Overview
Enable external users to communicate and collaborate seamlessly with your Google Group by granting them the ability to send emails, fostering efficient and inclusive discussions among both internal and external participants. Learn how to configure the necessary settings to facilitate external email communication within your Google Group, expanding its reach and engagement.
Step by step interactive demo
Steps to allow external users to email Google Group
1. Navigate to admin.google.com
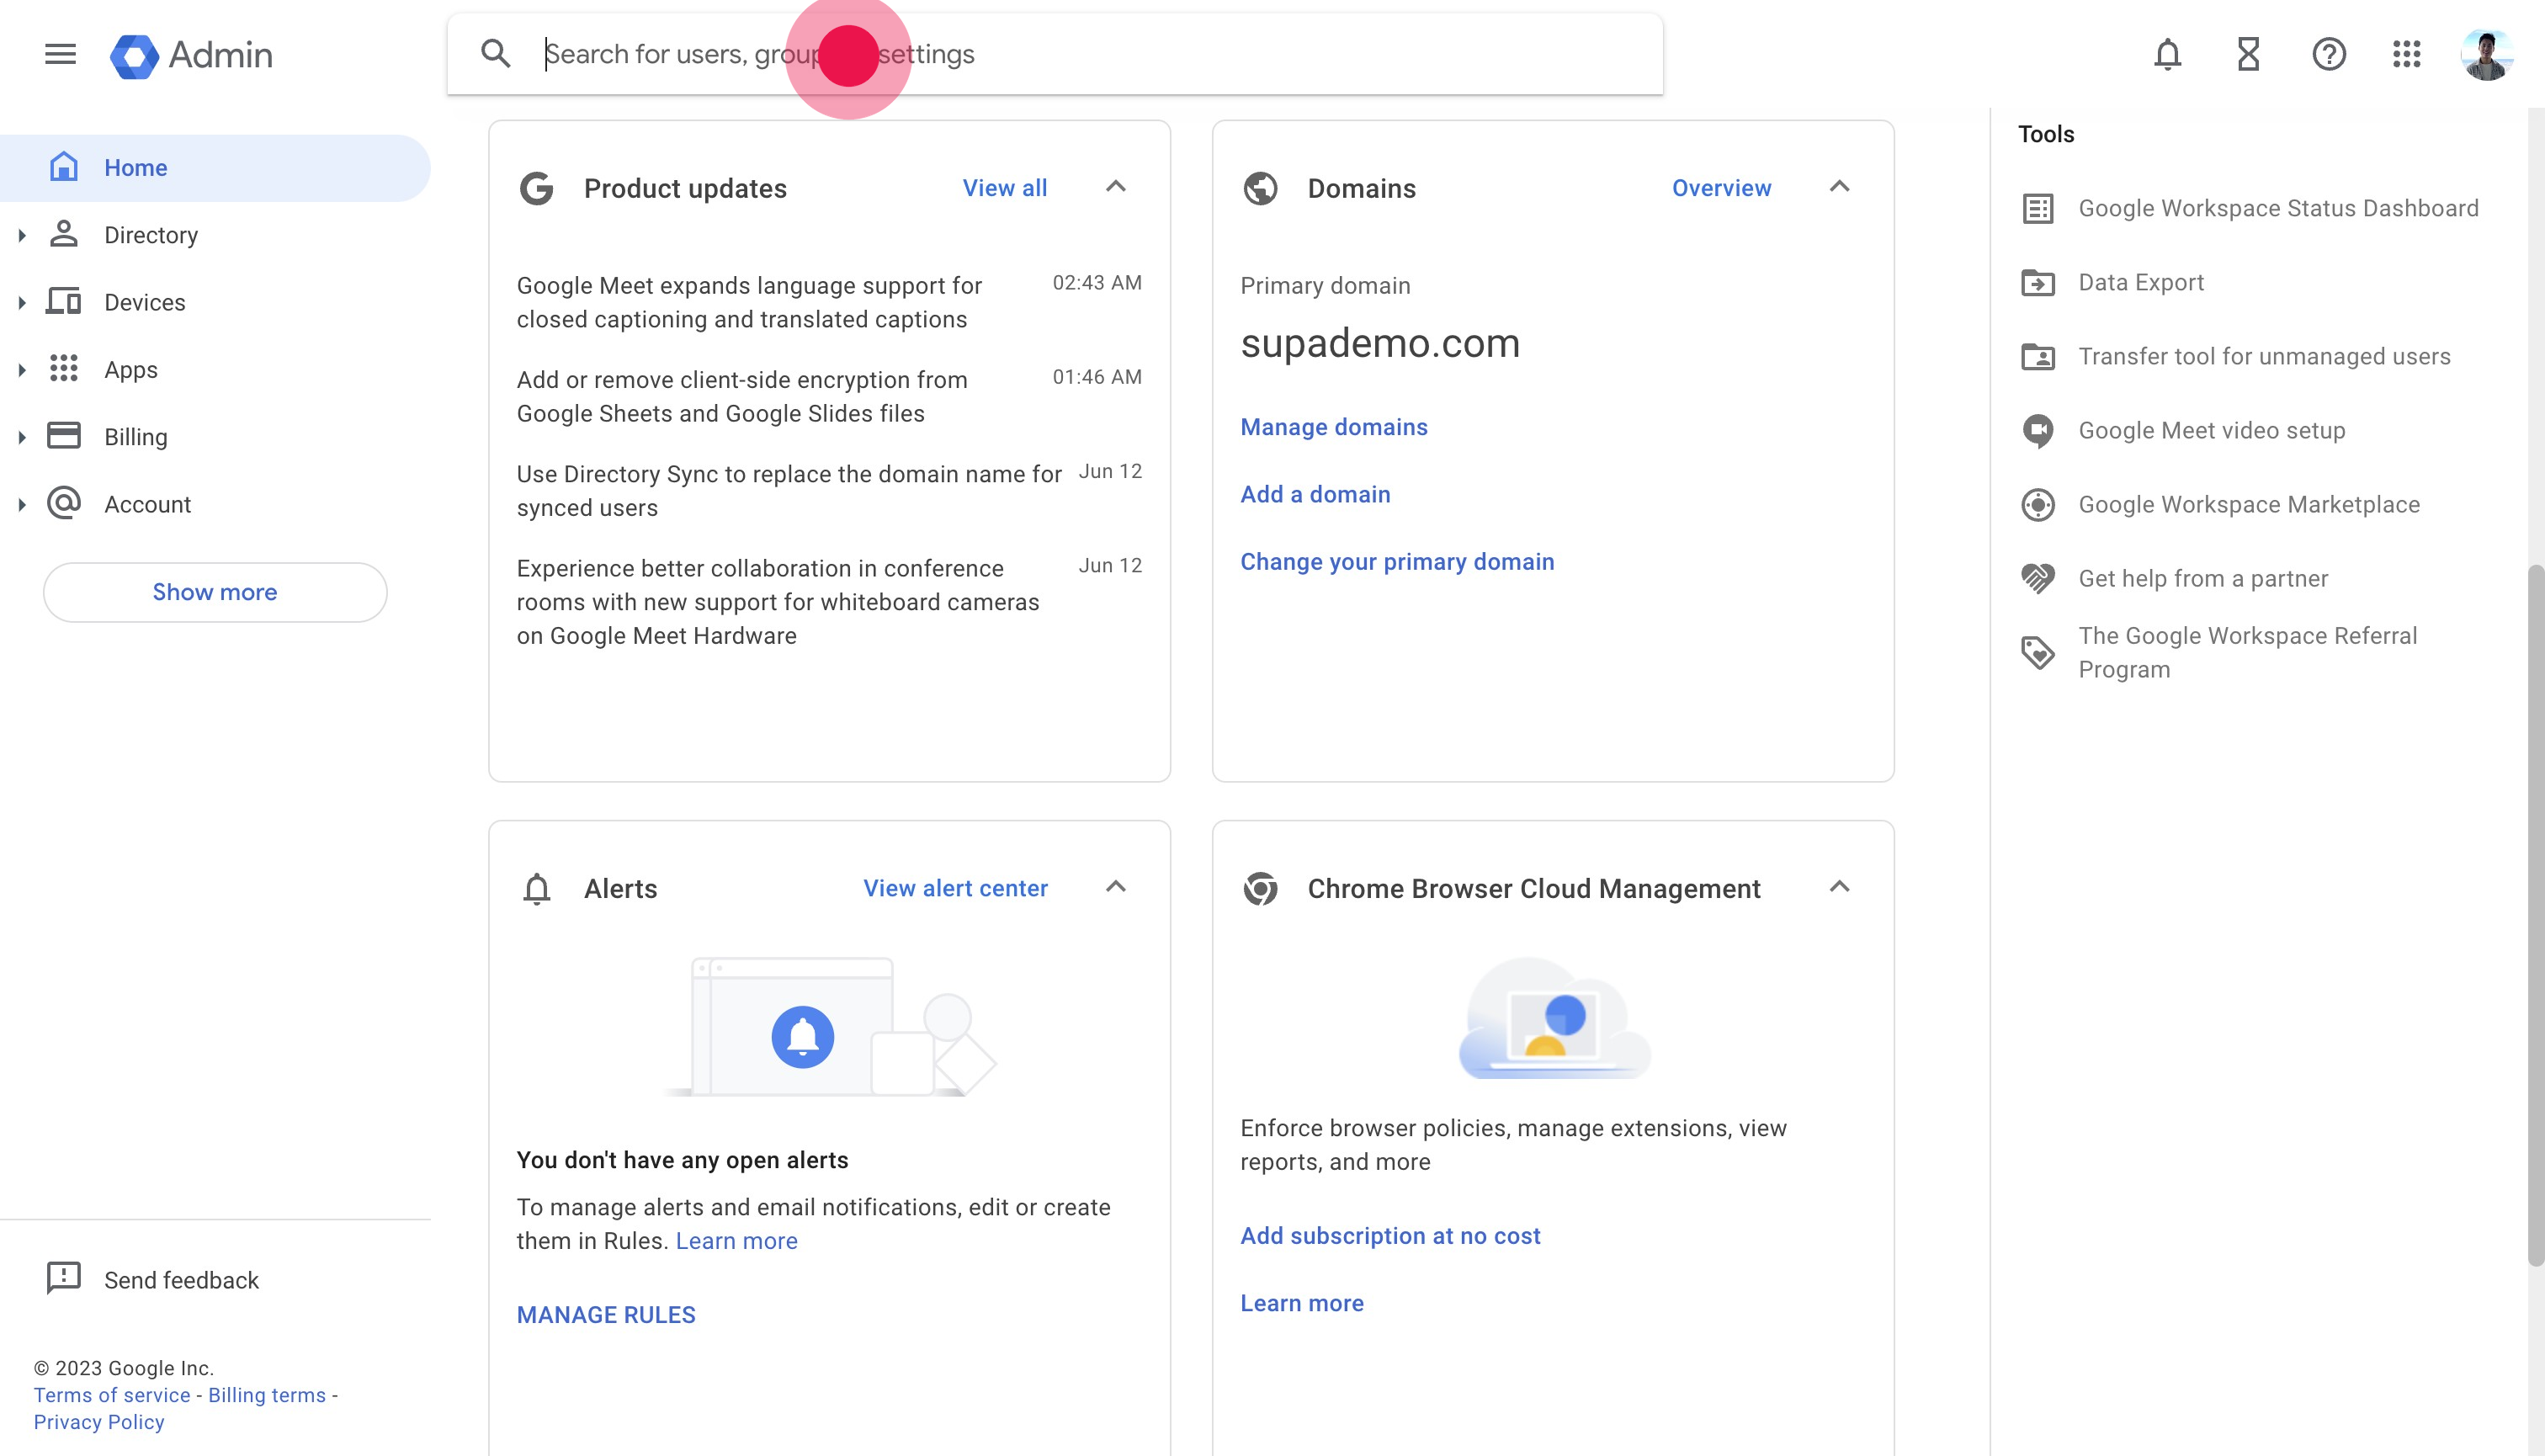
2. Search for and click on "Groups"
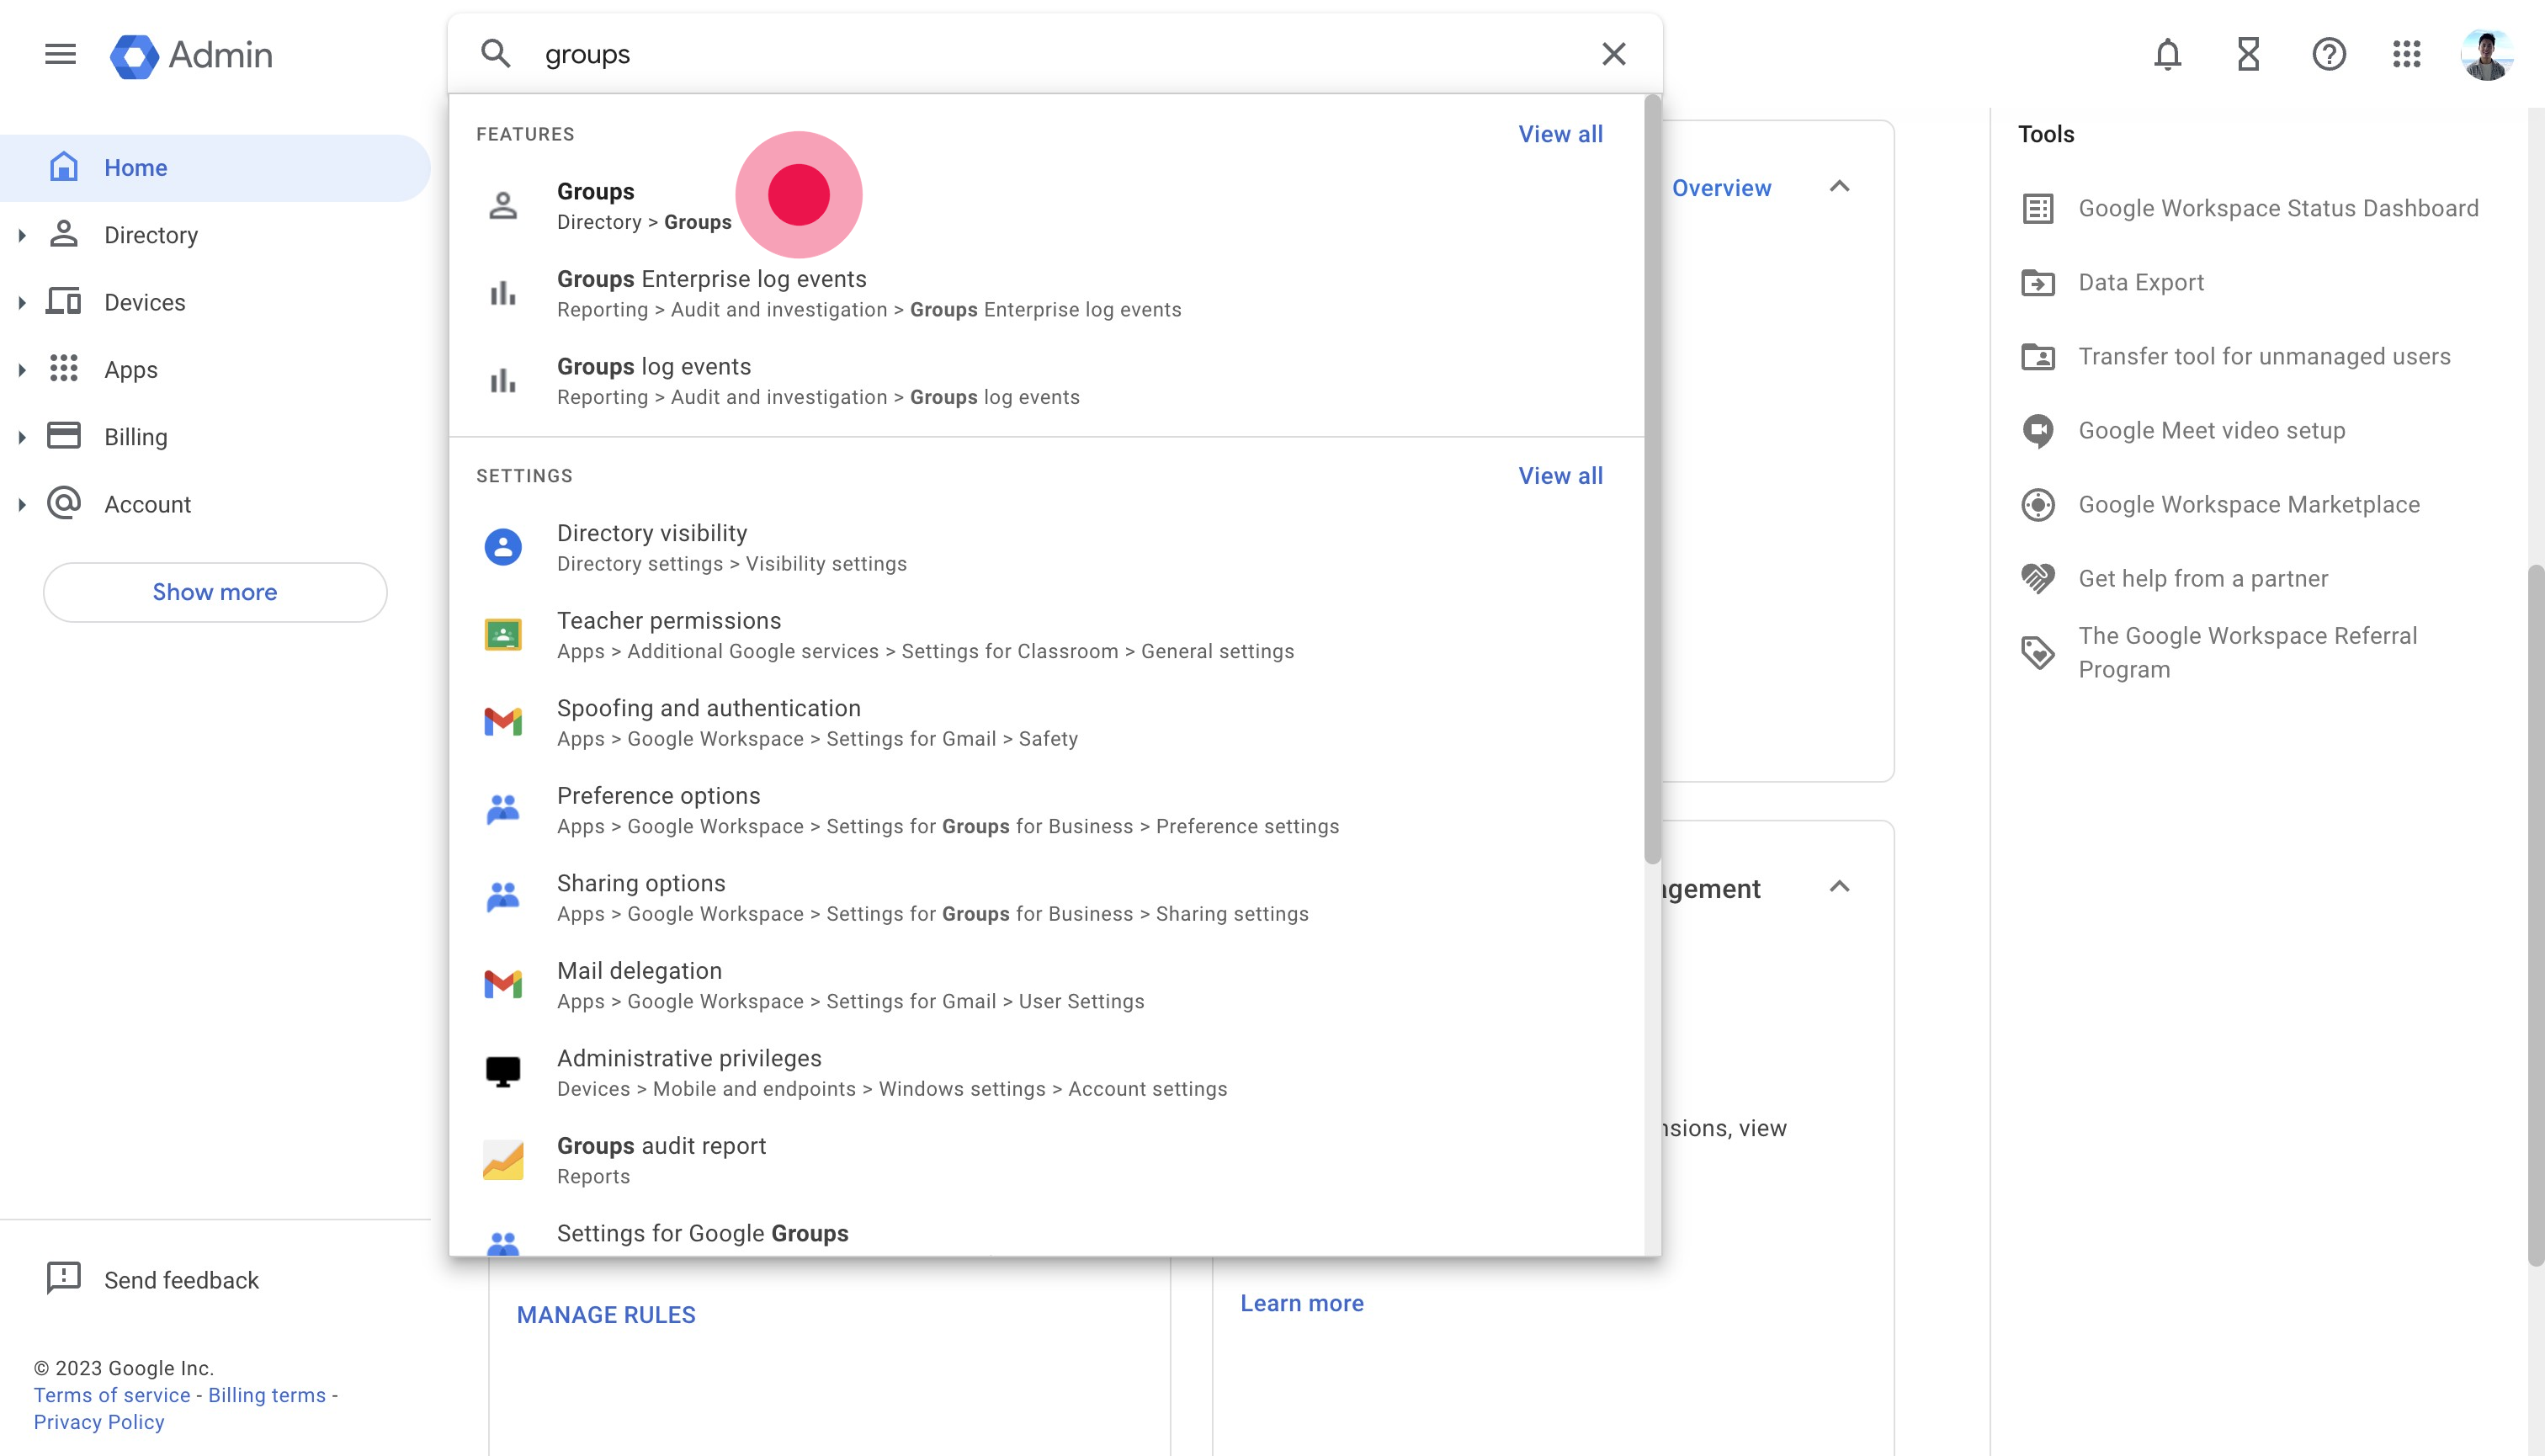
3. Click on the group you want to edit. We'll this one.
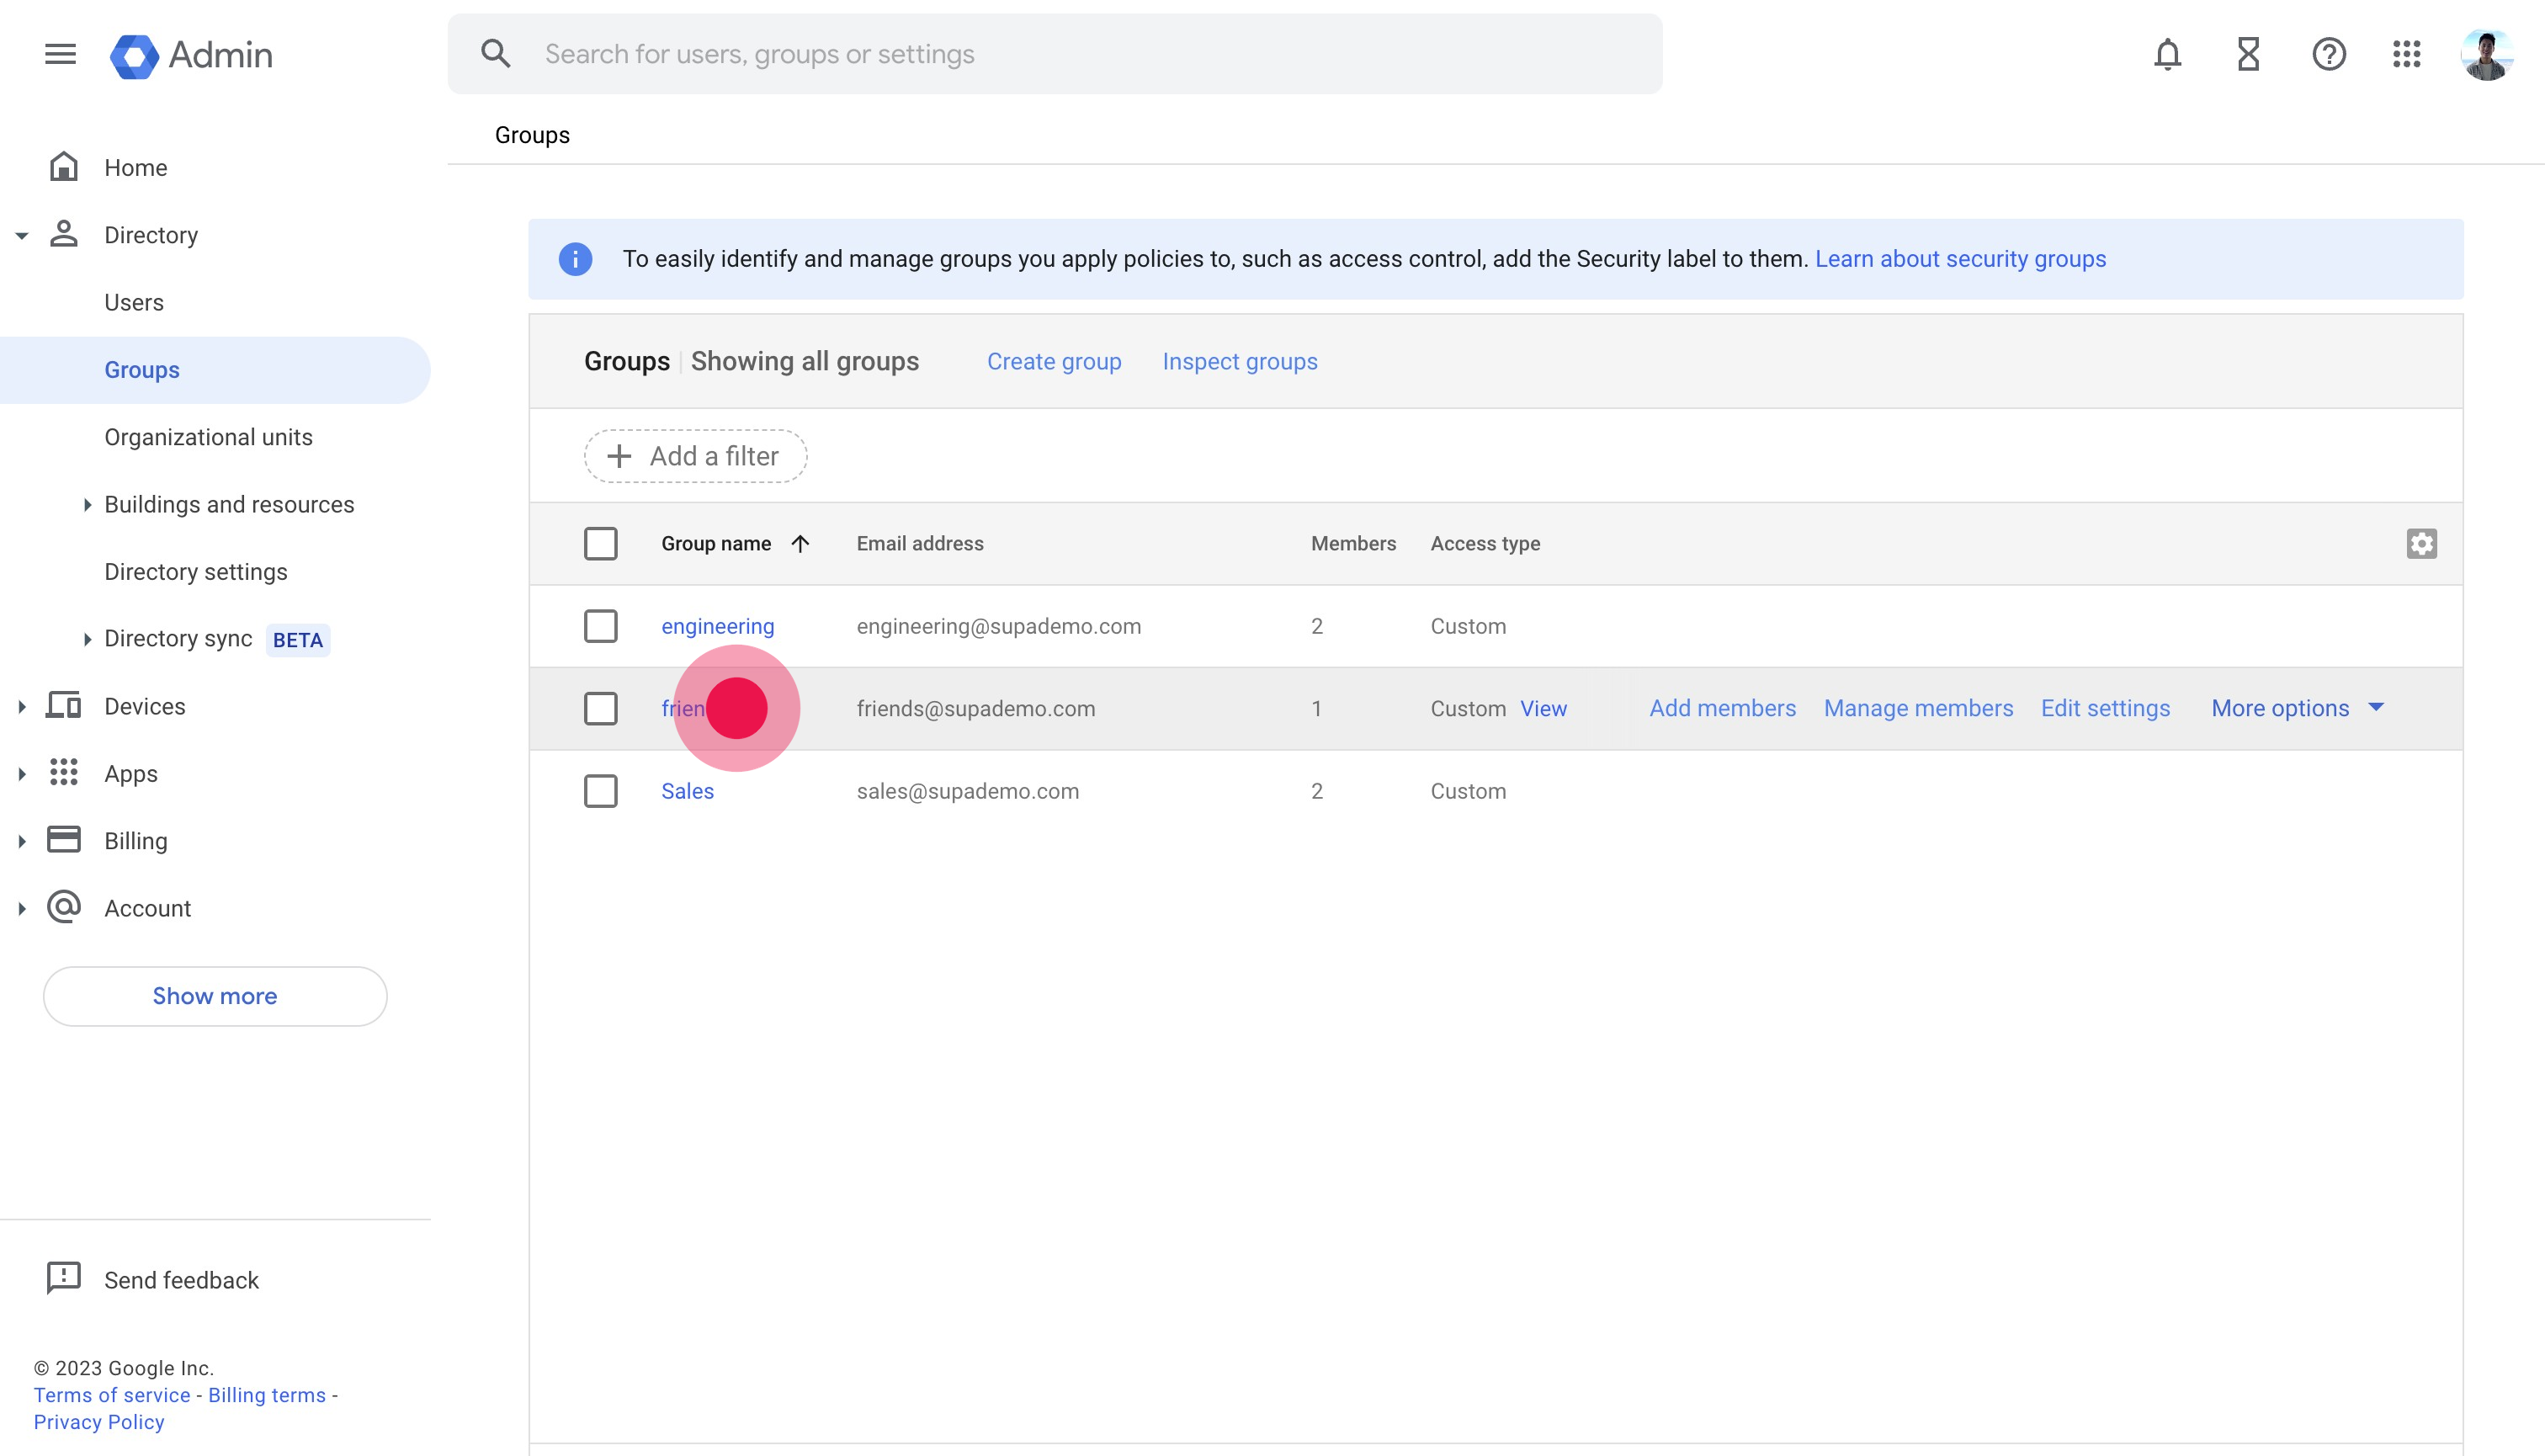
4. Click on "ACCESS SETTINGS"
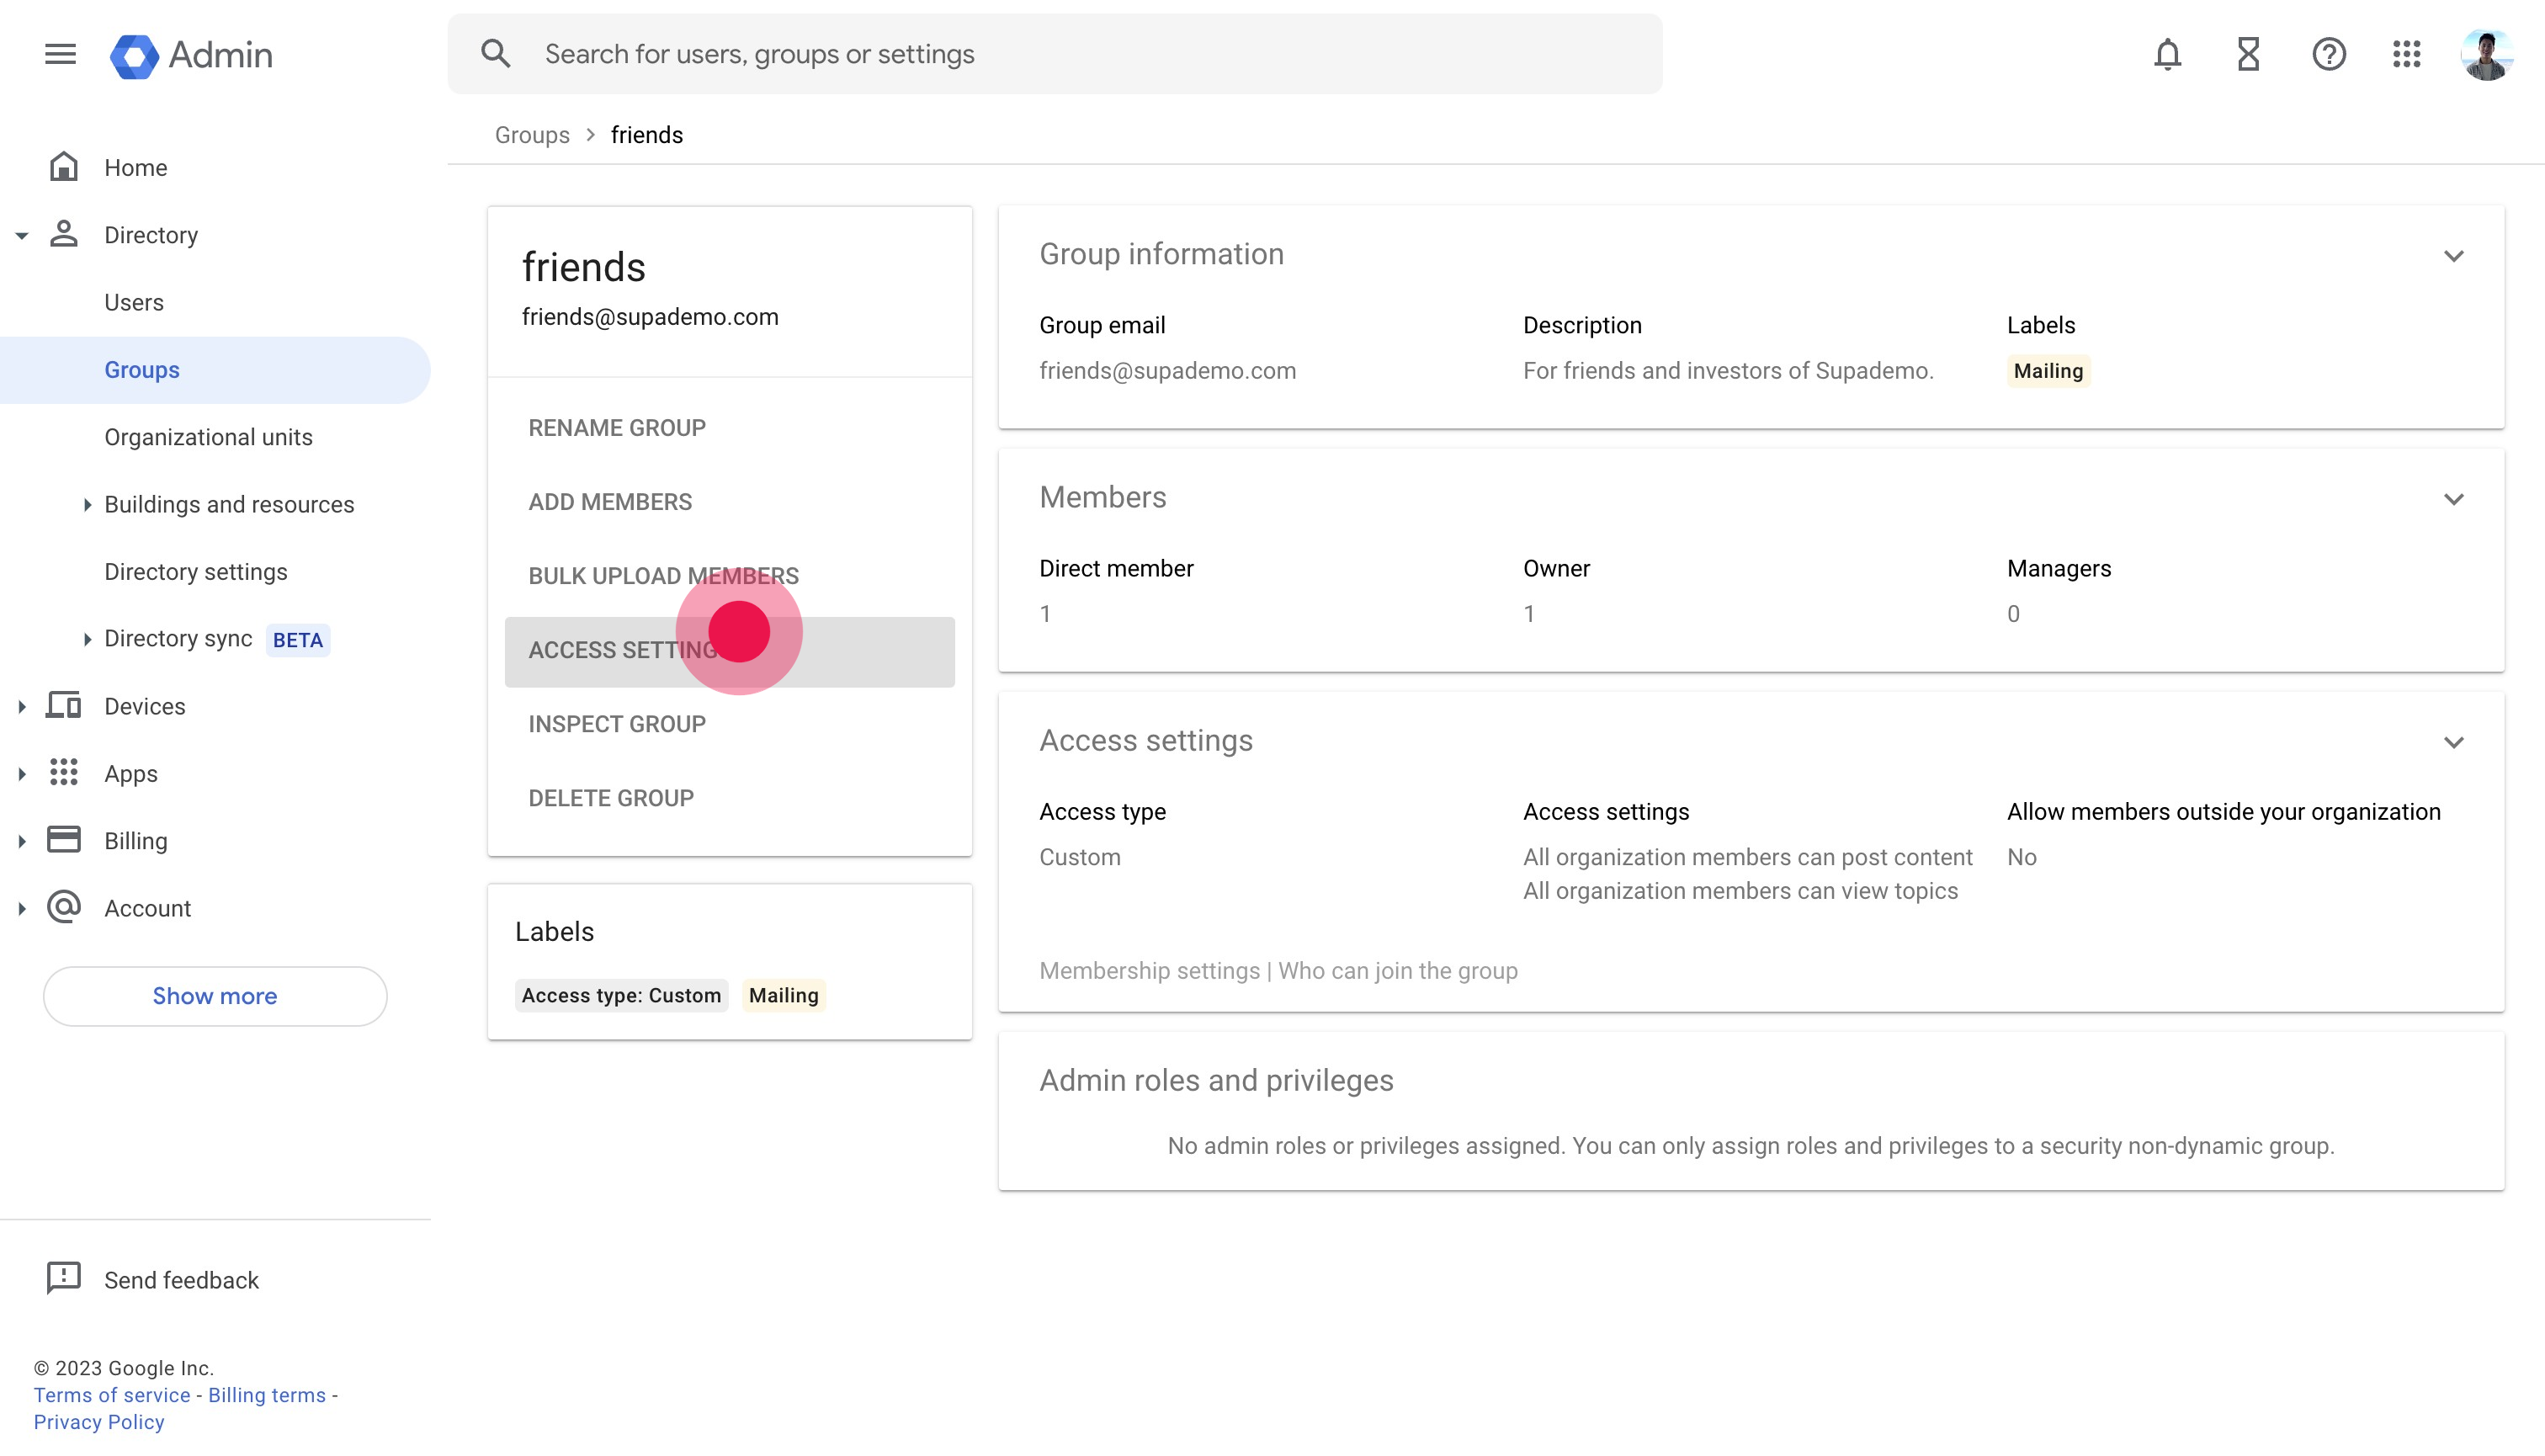
5. Click on the edit icon
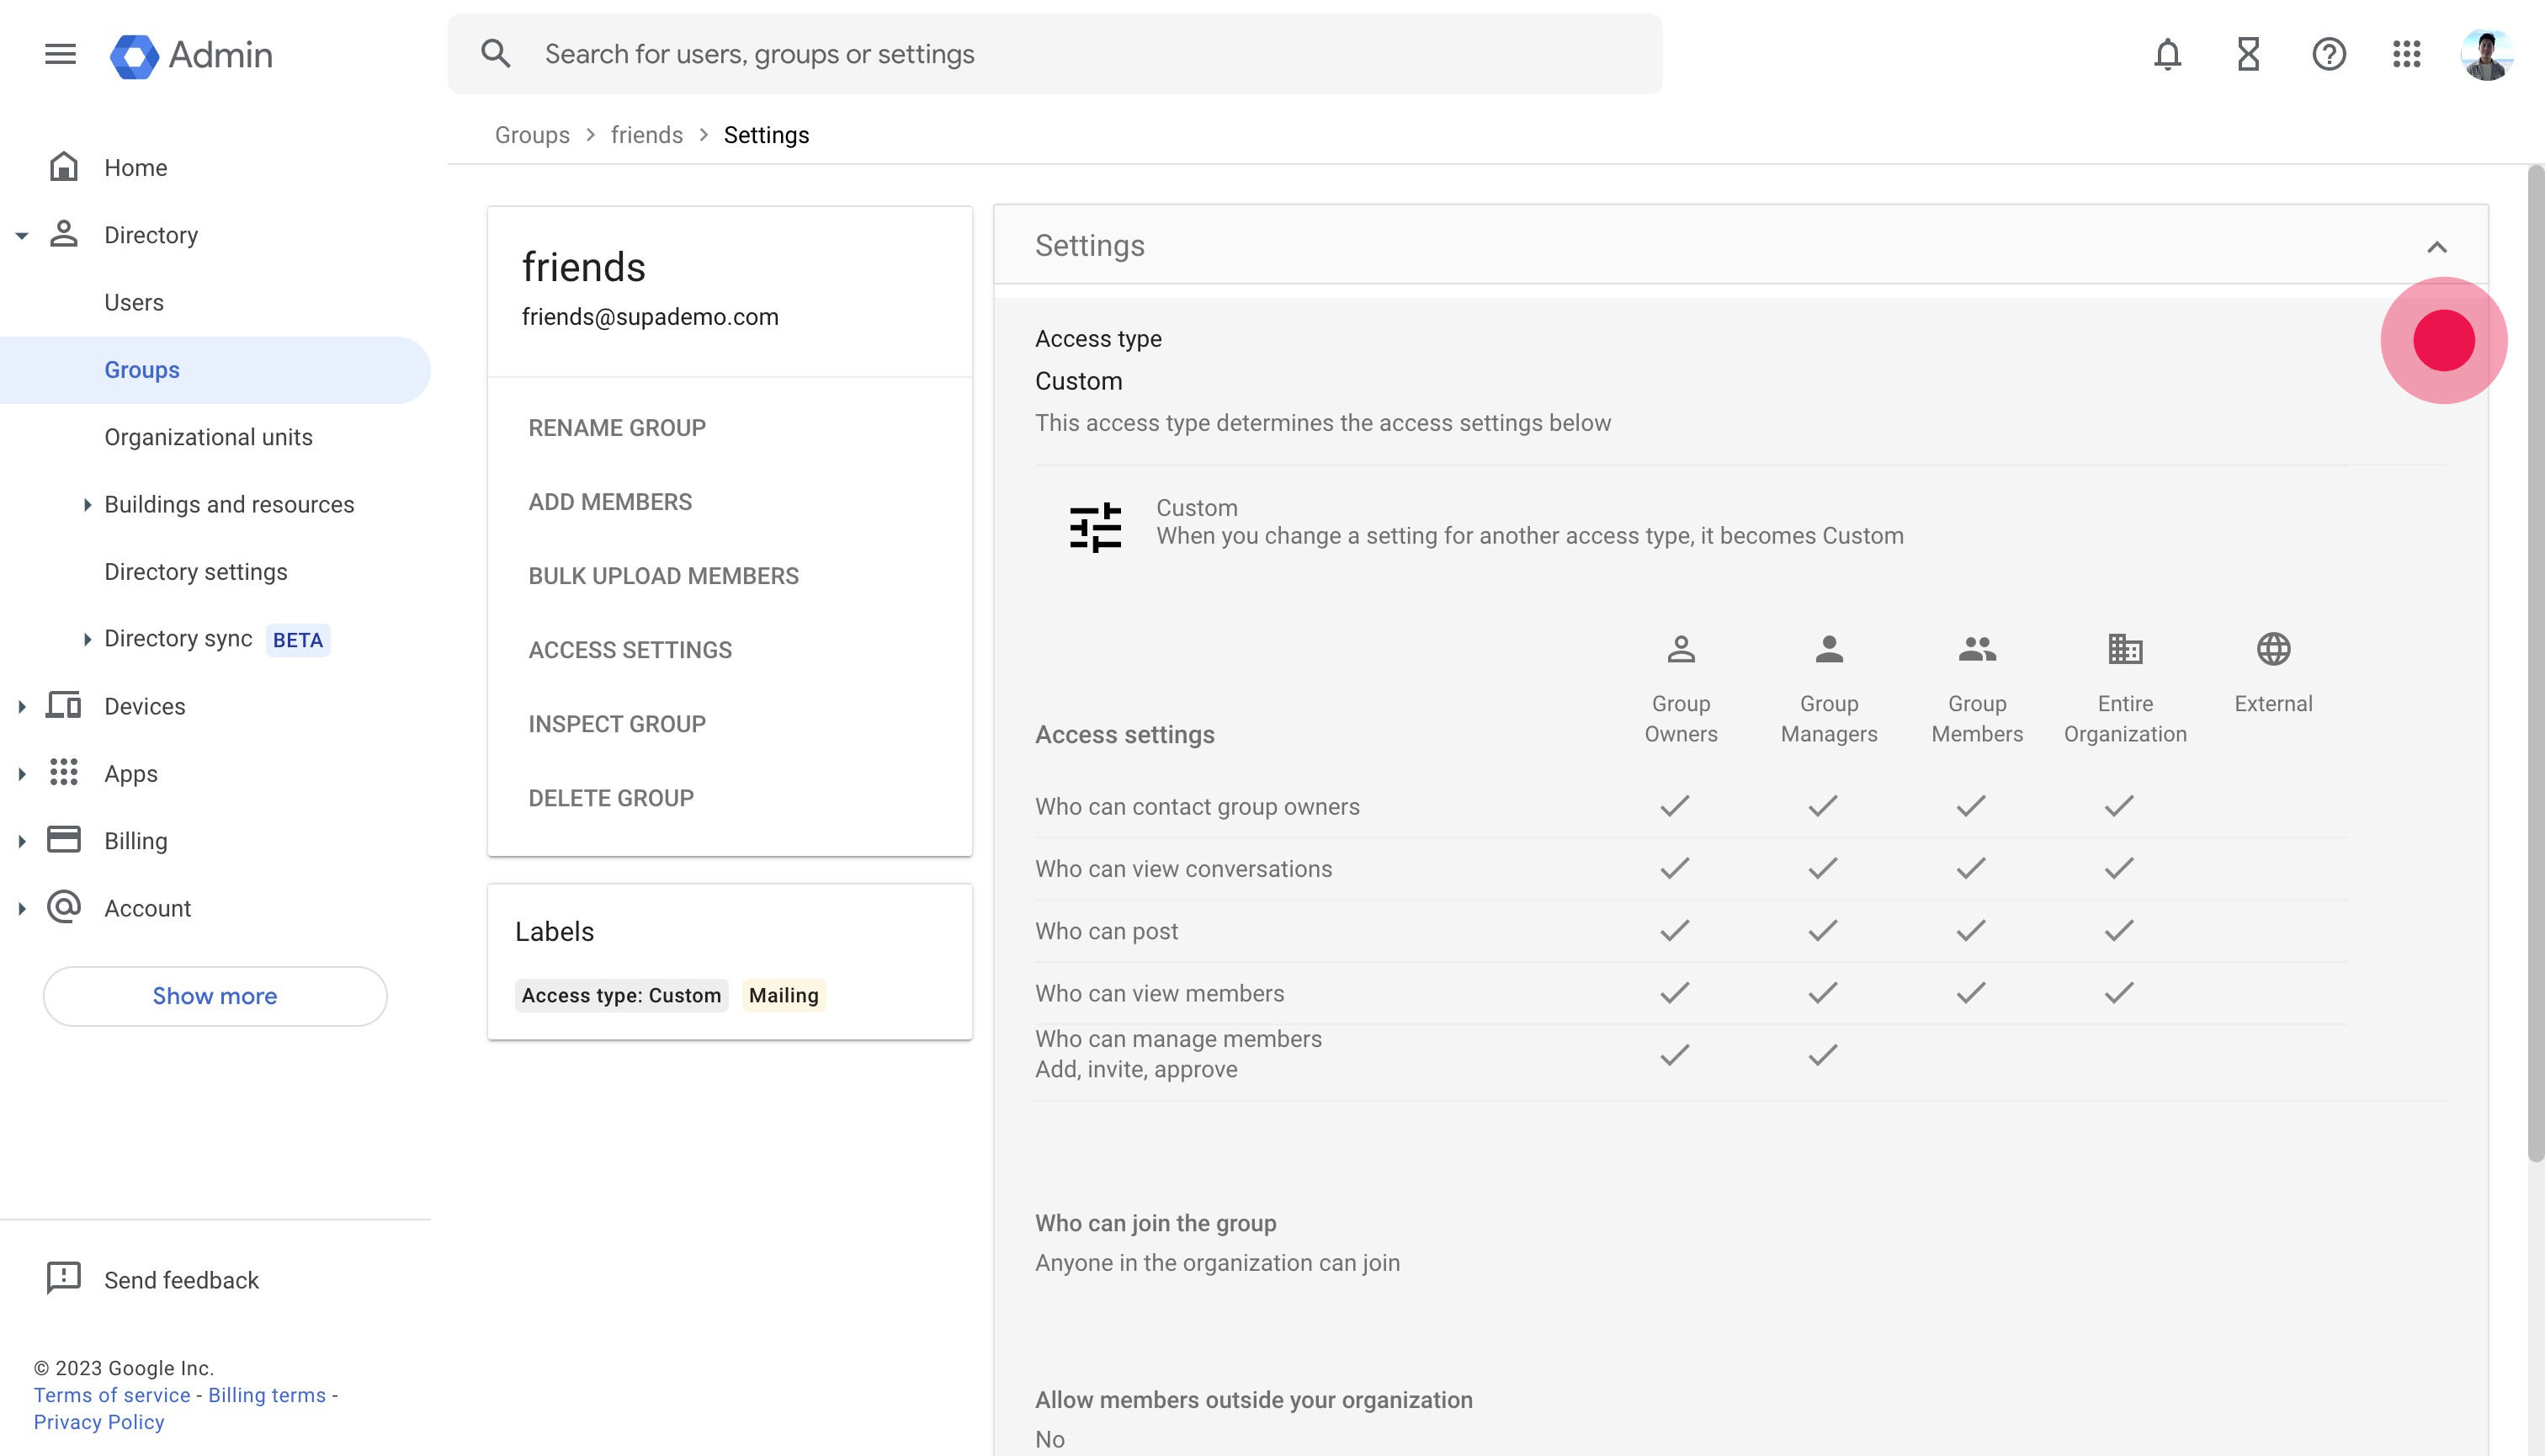
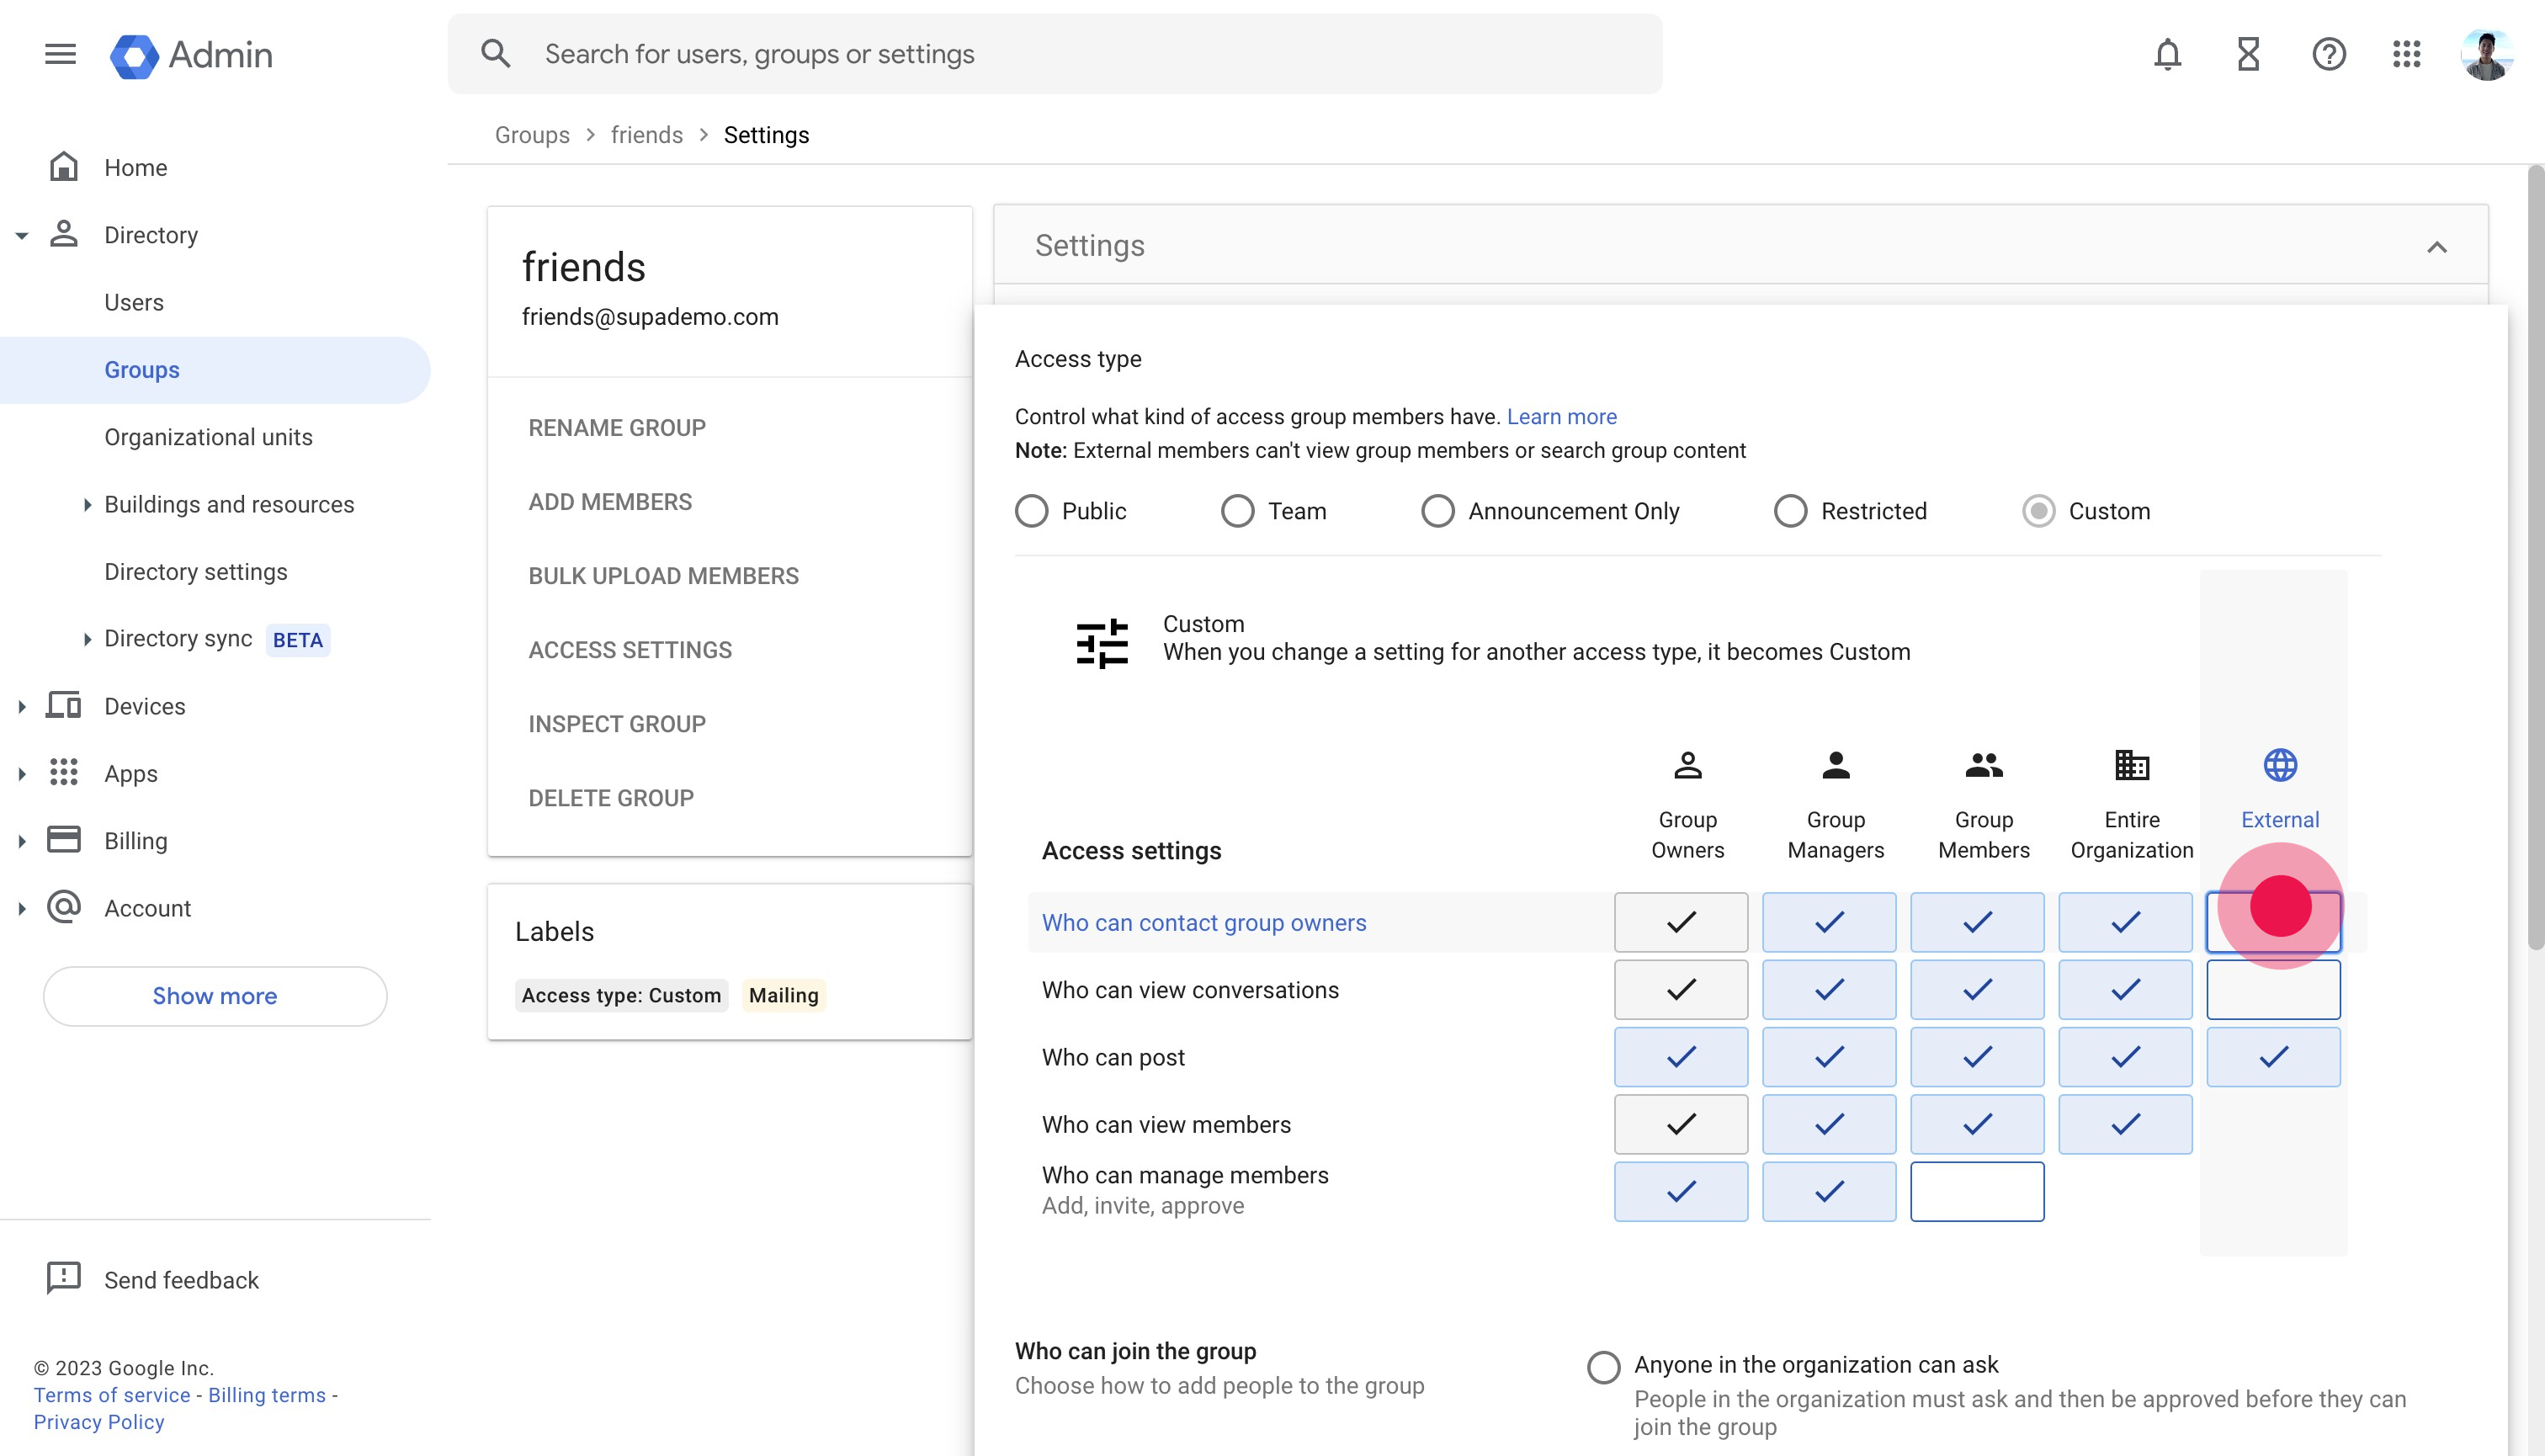
6. Click on "External" for "Who can post"
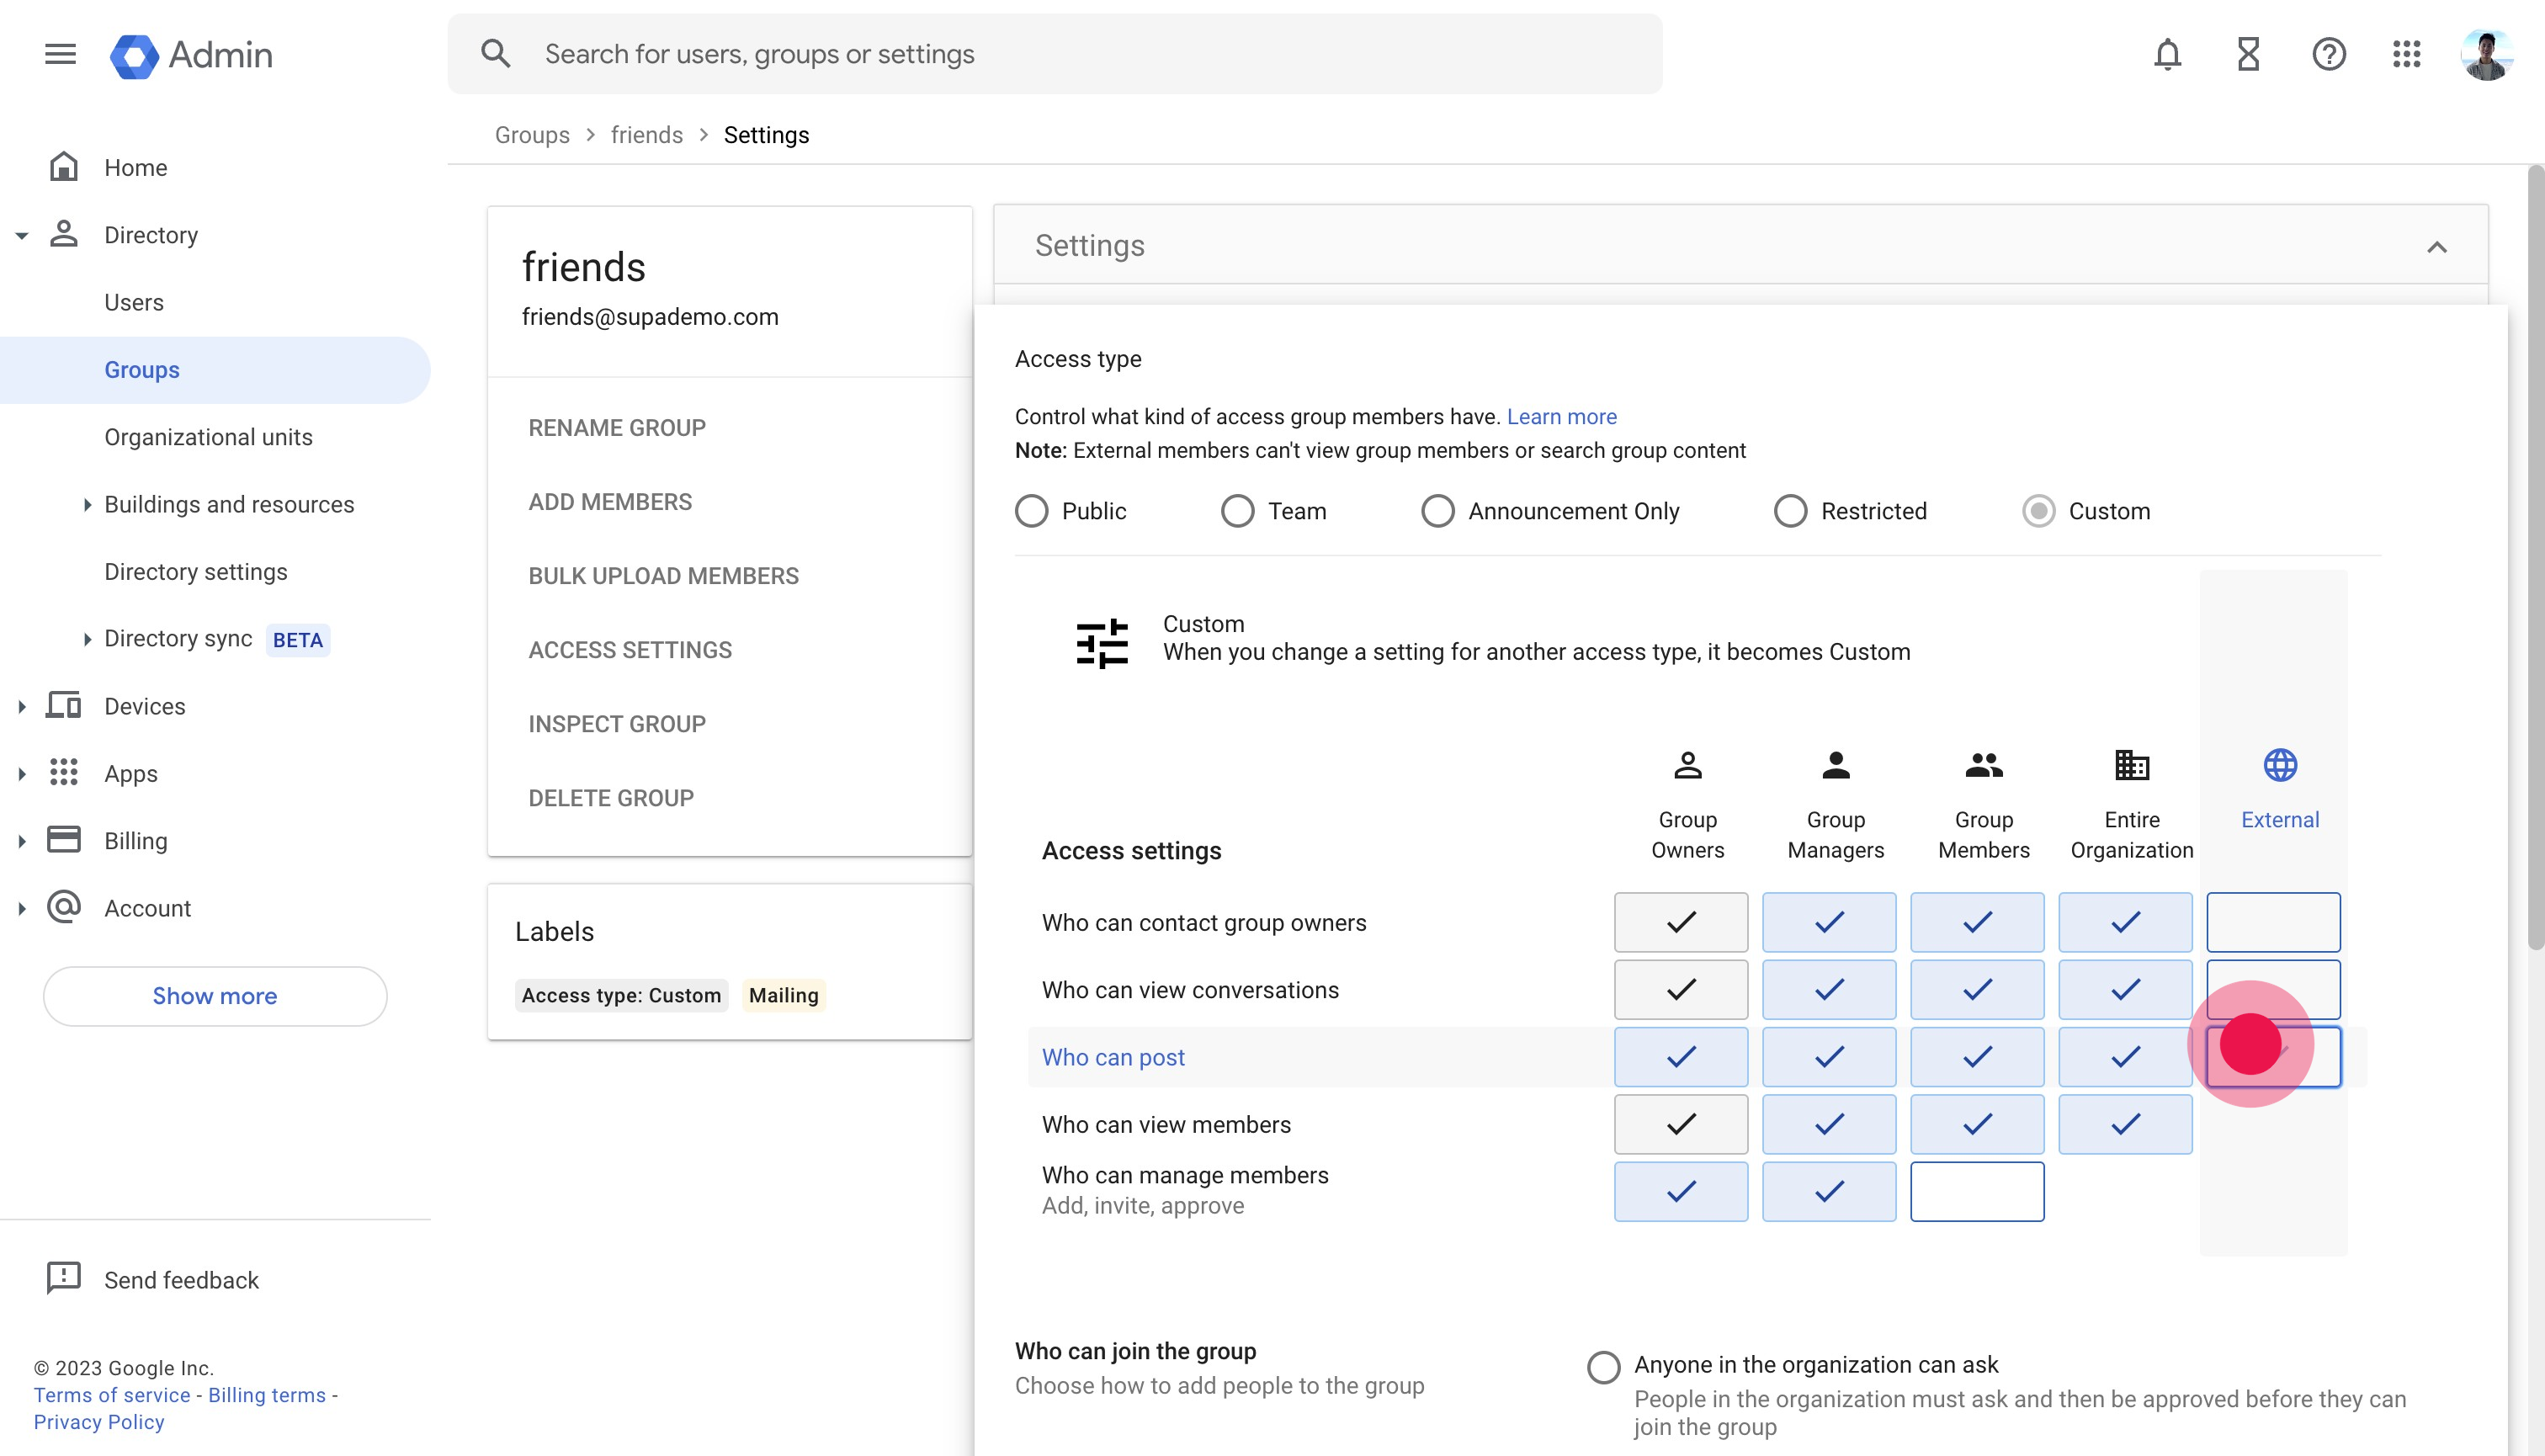
7. Click "External" for "Who can contact group owners"
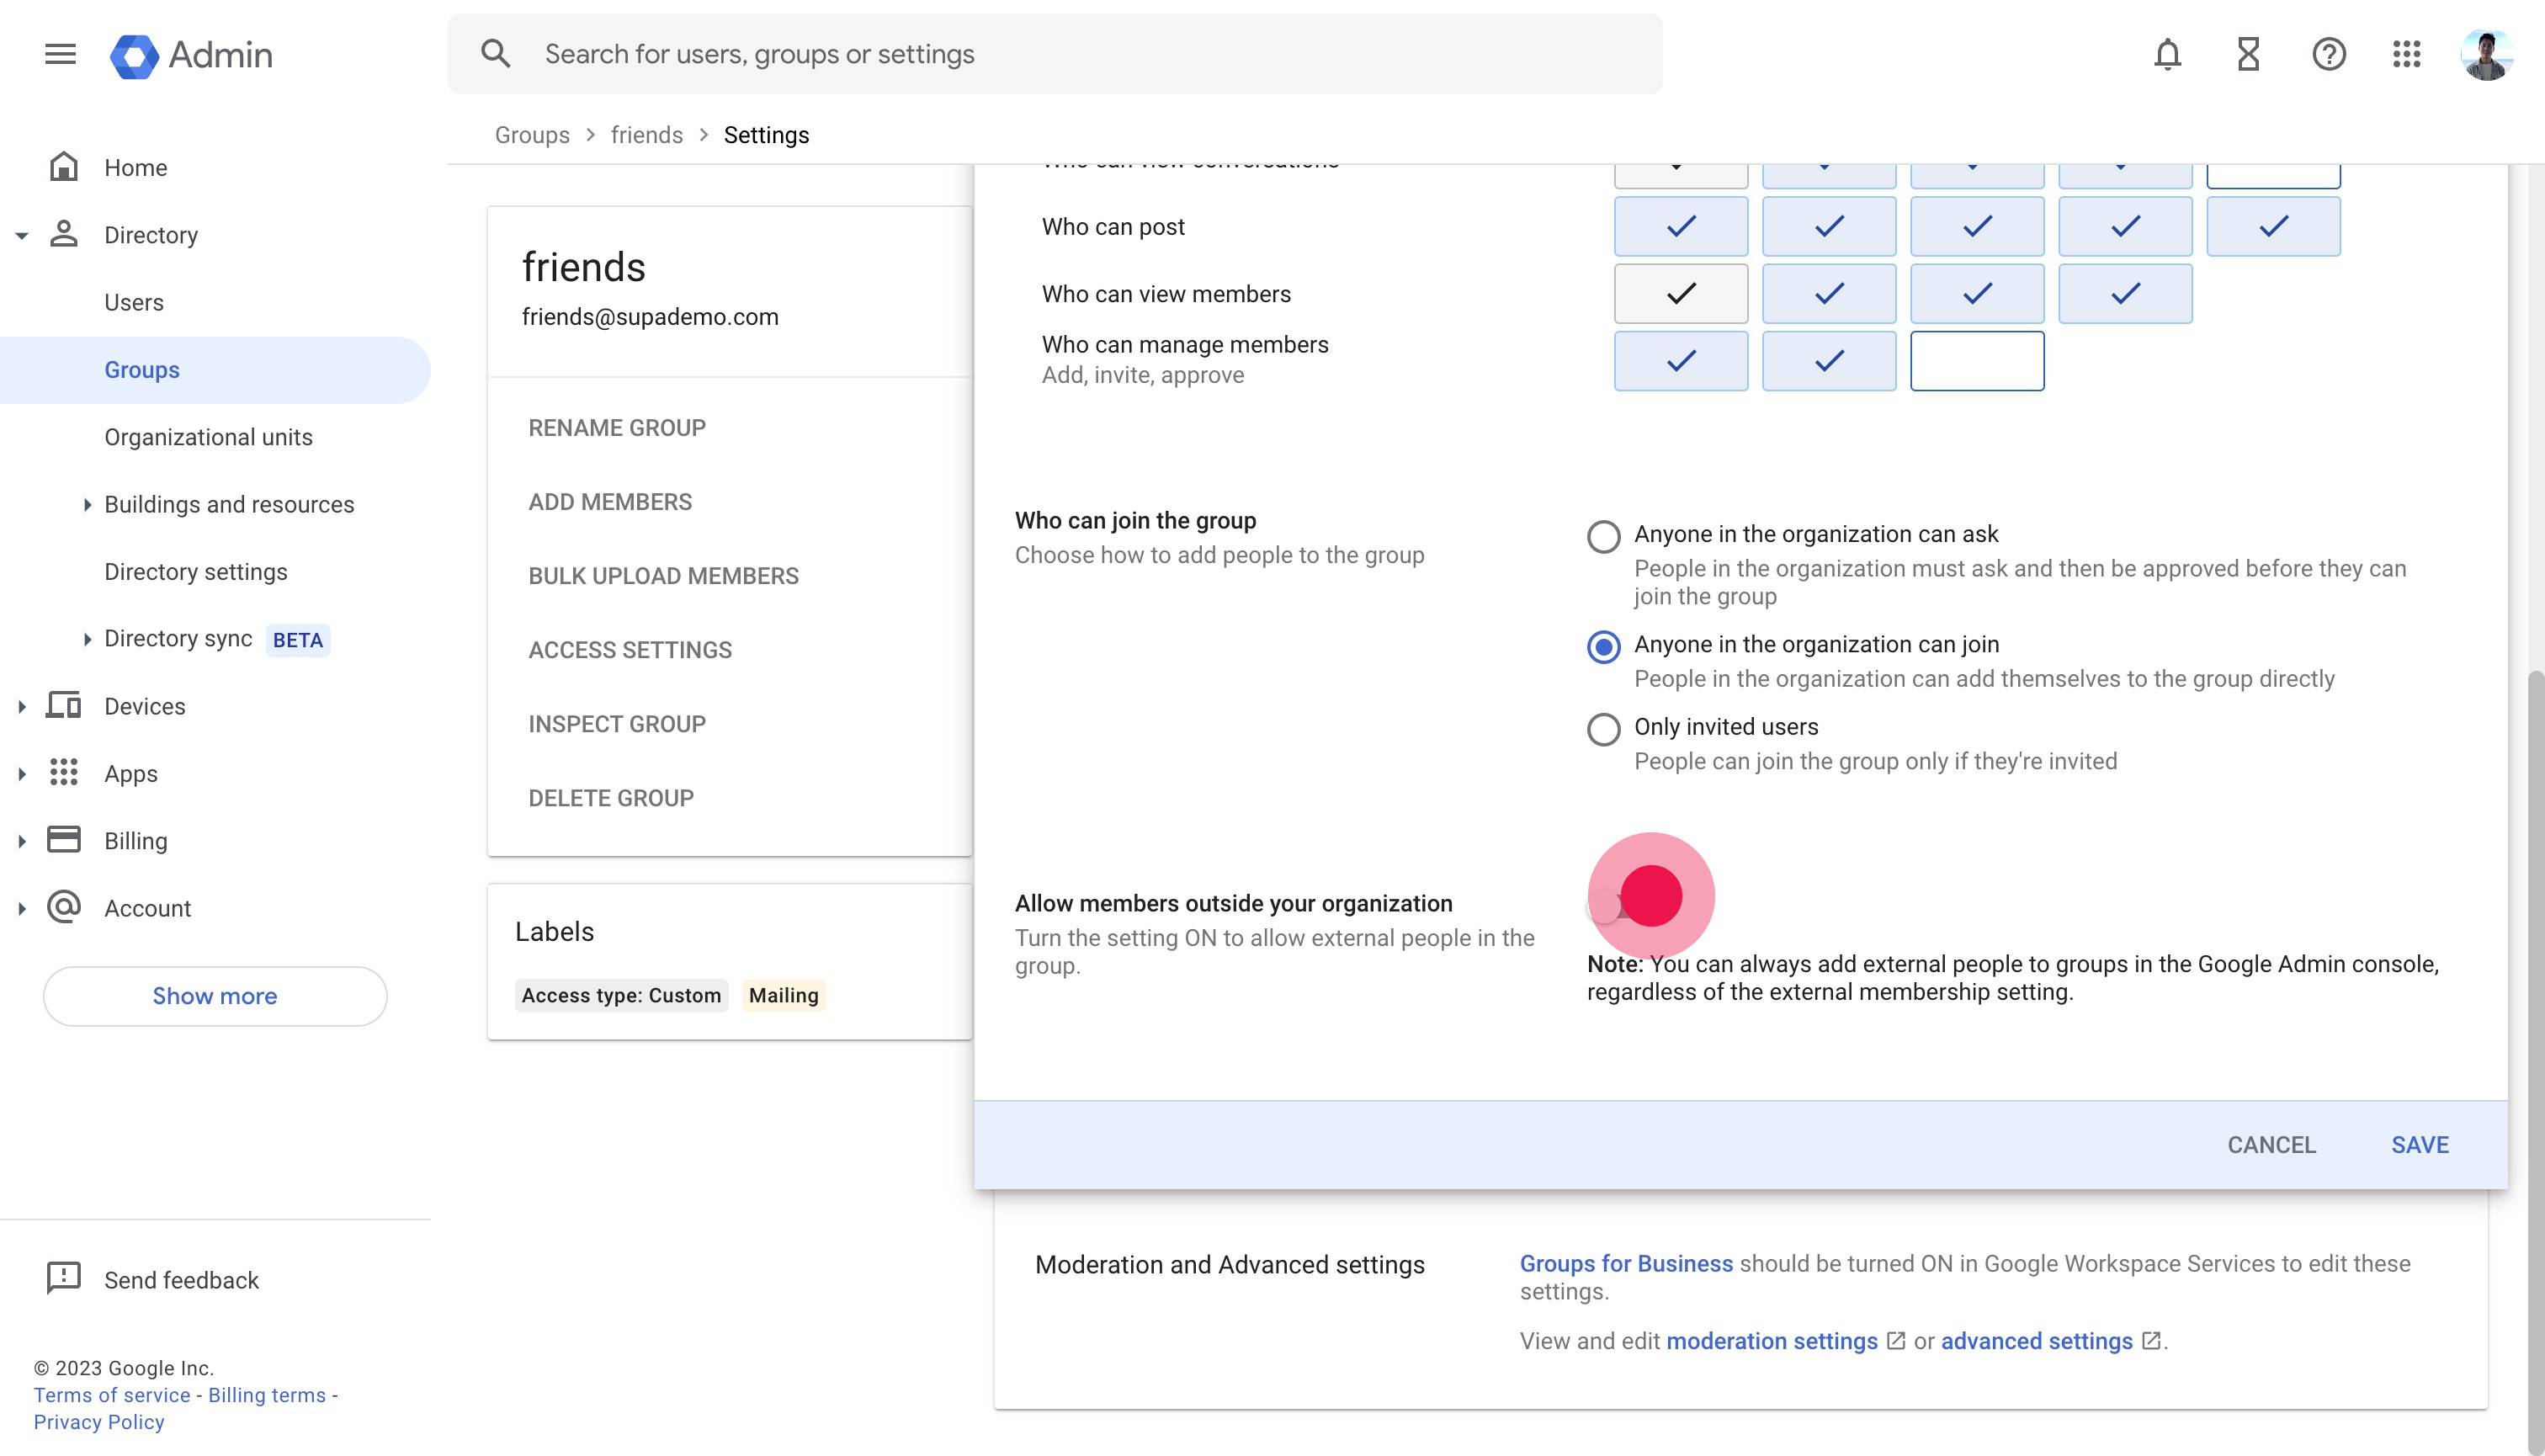
8. Scroll down and click "Allow members outside the organization"
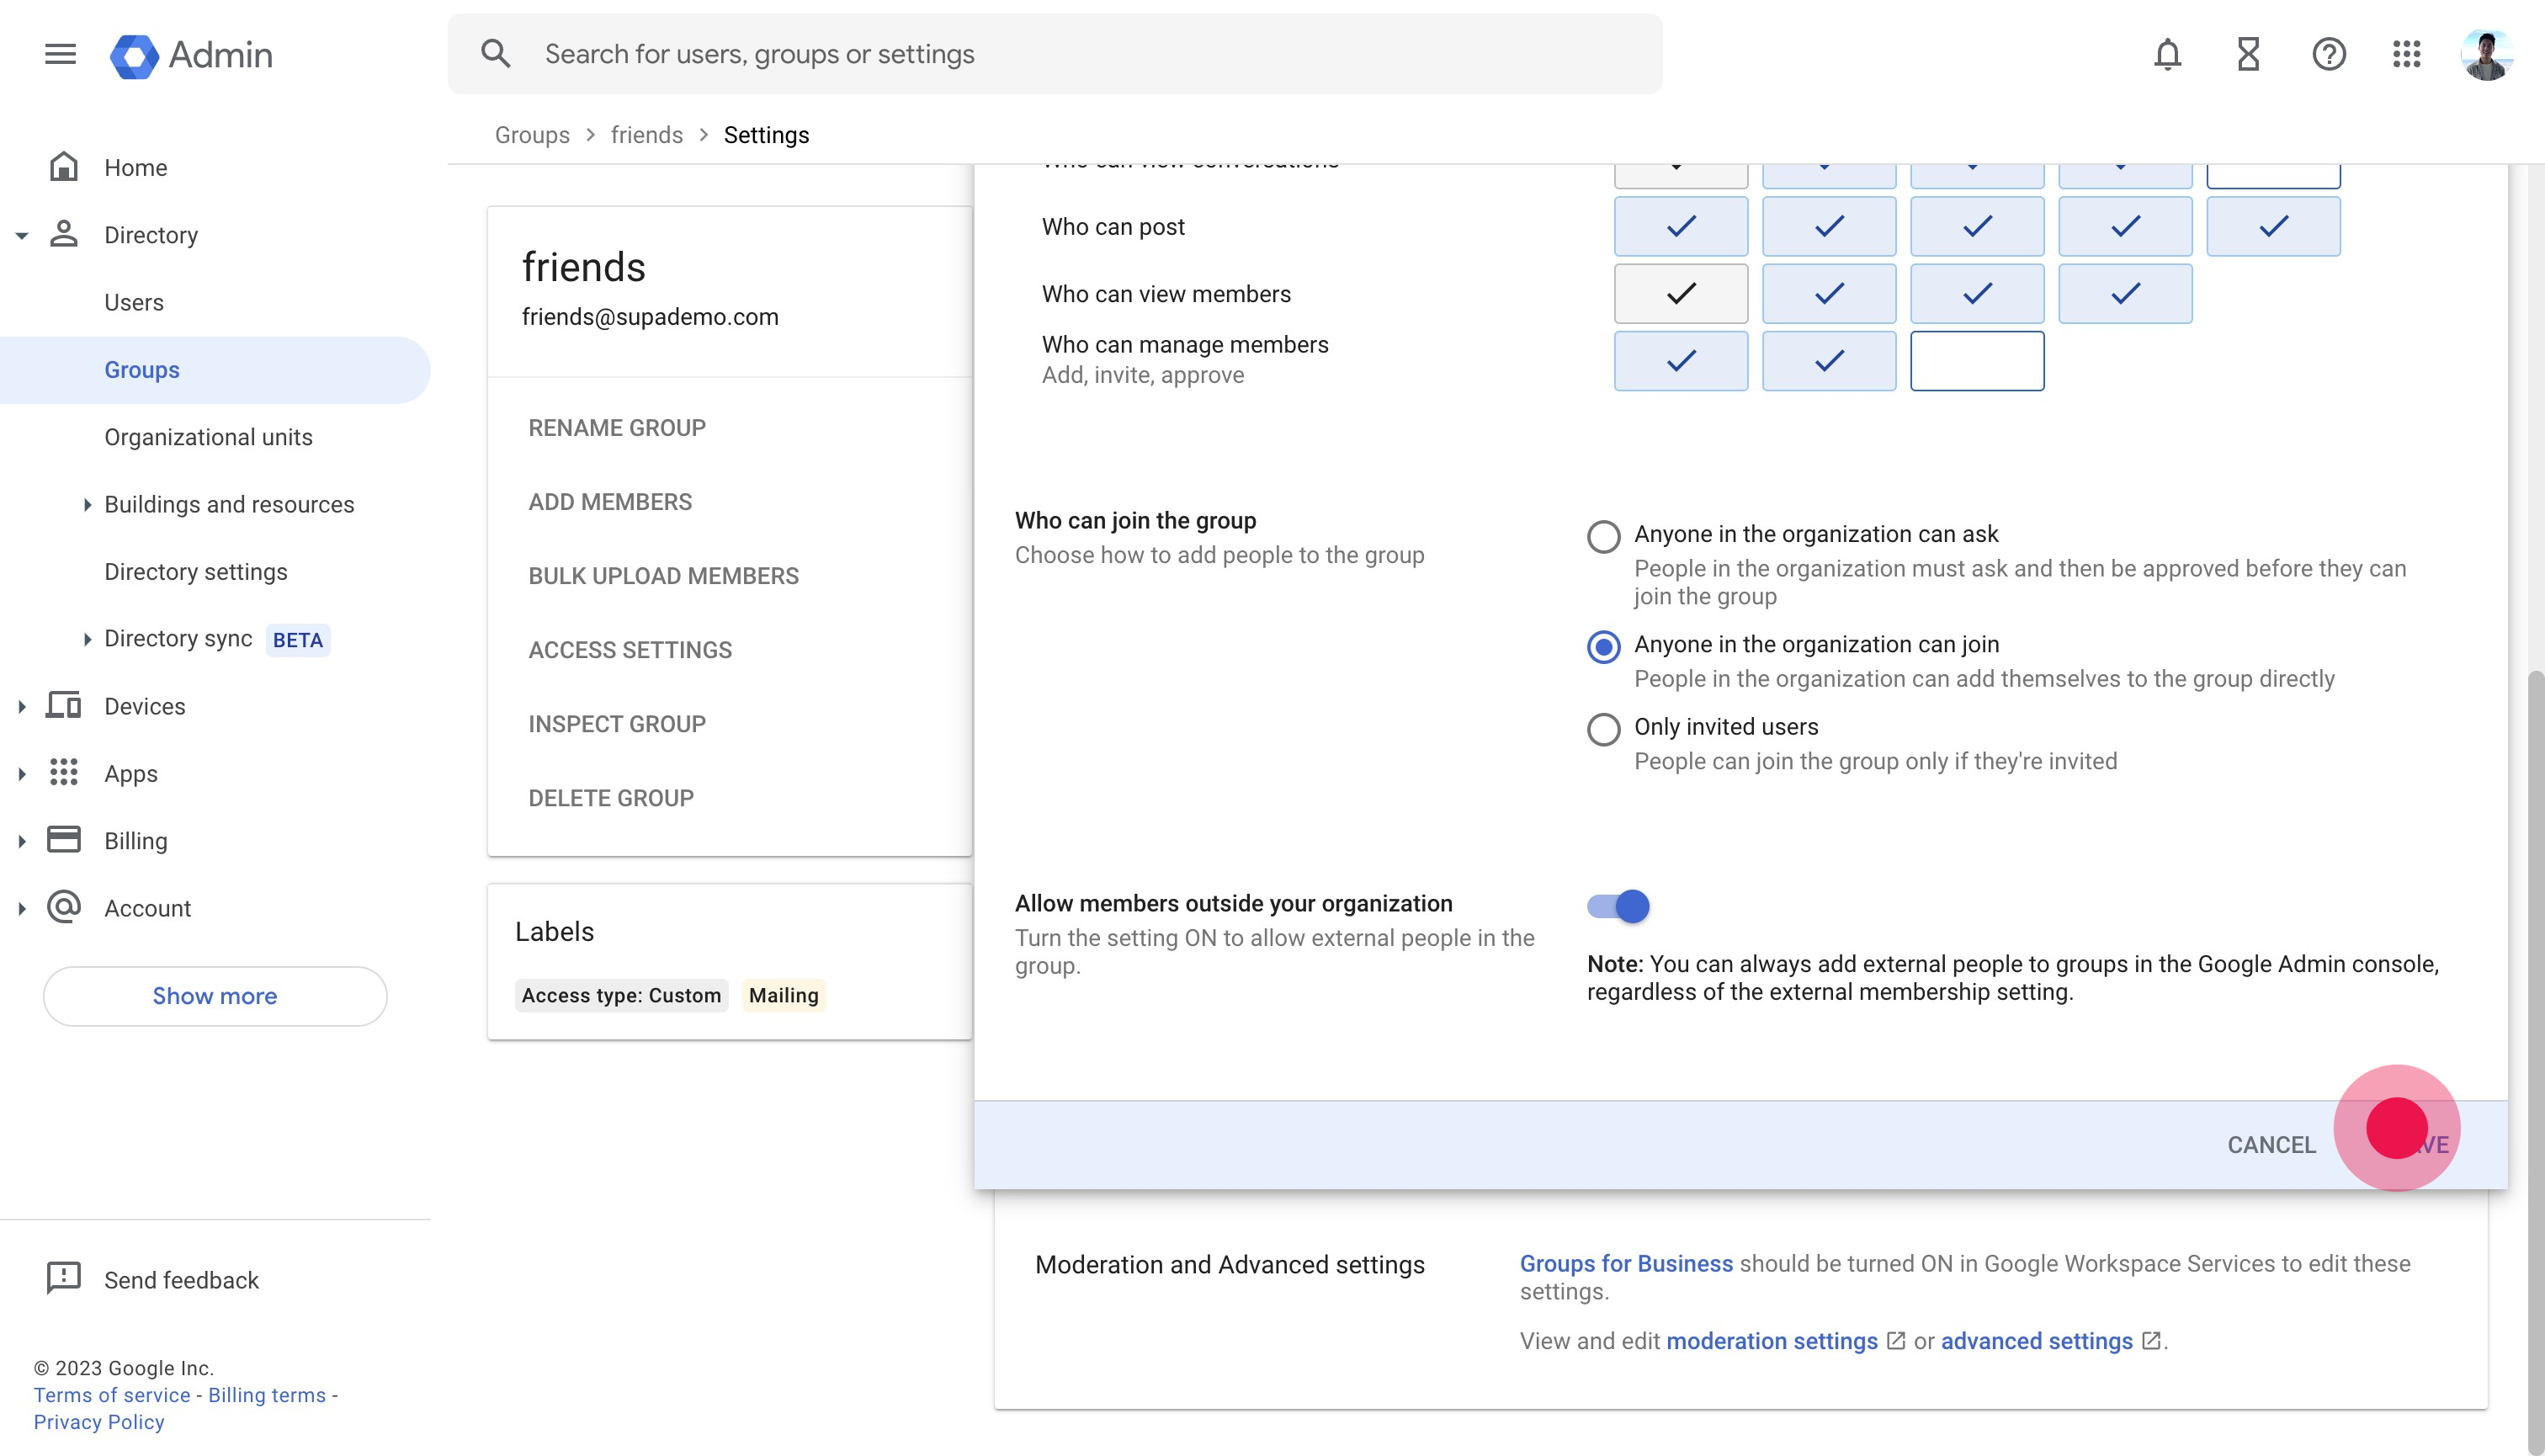
9. Click on "SAVE"
Common FAQs on Google Group
How do I create a Google Group?
To create a Google Group, go to the Google Groups website and sign in with your Google account. Click on “Create Group.” Fill in the group details, including the group name, email address, and description. Set the group’s privacy settings, such as who can view conversations, post messages, and join the group. Configure additional settings like permissions and group roles. Click “Create Group” to finalize the setup. You can then invite members and start using the group.
How can I manage group settings and permissions in Google Groups?
To manage group settings and permissions, go to the Google Groups website, select your group, and click on “Manage.” In the management interface, you can access various settings such as permissions, roles, and membership settings. You can adjust who can view or post messages, manage membership requests, and configure group roles like managers and members. Make changes as needed and click “Save” to apply the updates.
How do I archive or delete a Google Group?
To archive or delete a Google Group, go to the Google Groups website and select the group you want to manage. Click on “Manage” and navigate to the “Information” section. To archive the group, select “Archive Group” to prevent new posts while keeping existing messages accessible. To delete the group, click “Delete Group” under the “Group Settings” section. Confirm the deletion when prompted. Deleting a group is permanent and removes all messages and group data.
This interactive tutorial of Linkedin was created with Supademo

With Supademo, you can easily create step-by-step interactive product demos and tutorials in minutes. Whether you're driving growth, scaling marketing content, or supercharging product-led onboarding – Supademo is here to help.
Curious to take Supademo for a spin? Sign up for free here with no credit card required.


