

Overview:
Elevate your scheduling efficiency with Calendly by mastering the creation of customized workflows. This guide empowers you to optimize your time management by providing a step-by-step process for designing and implementing workflows in Calendly. Streamline your scheduling experience, enhance productivity, and achieve clarity in managing appointments within the Calendly platform.
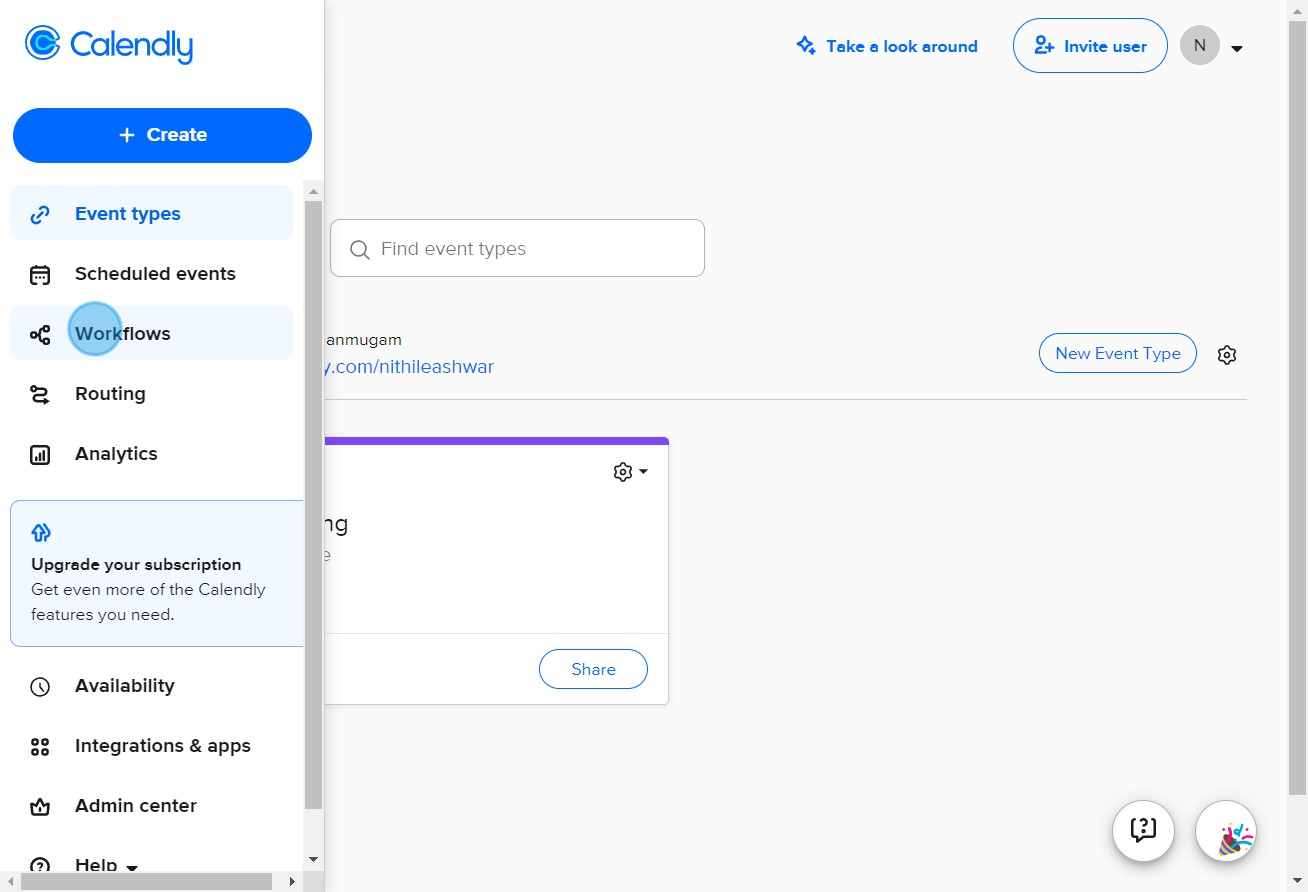
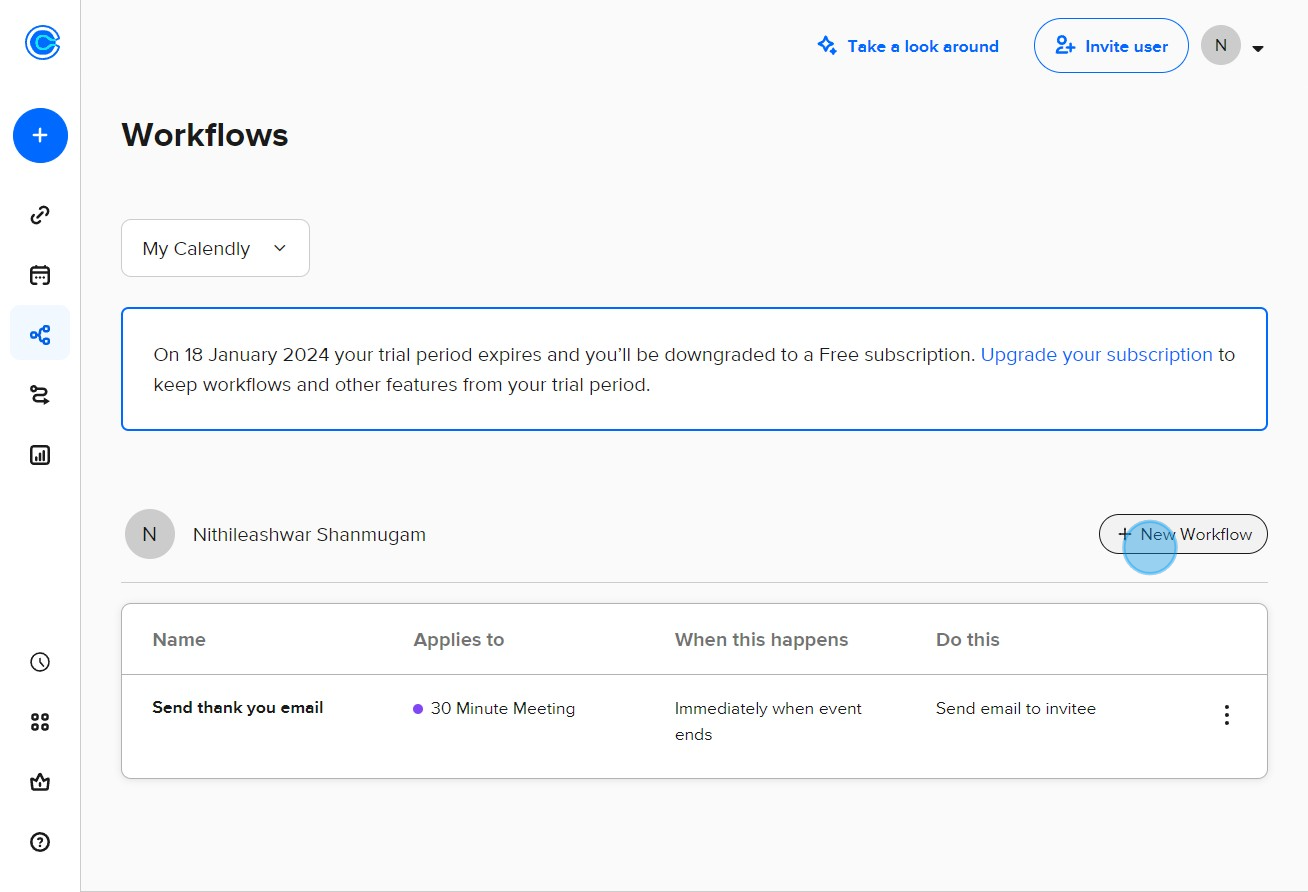
1. Begin by selecting the 'Workflows' tab.
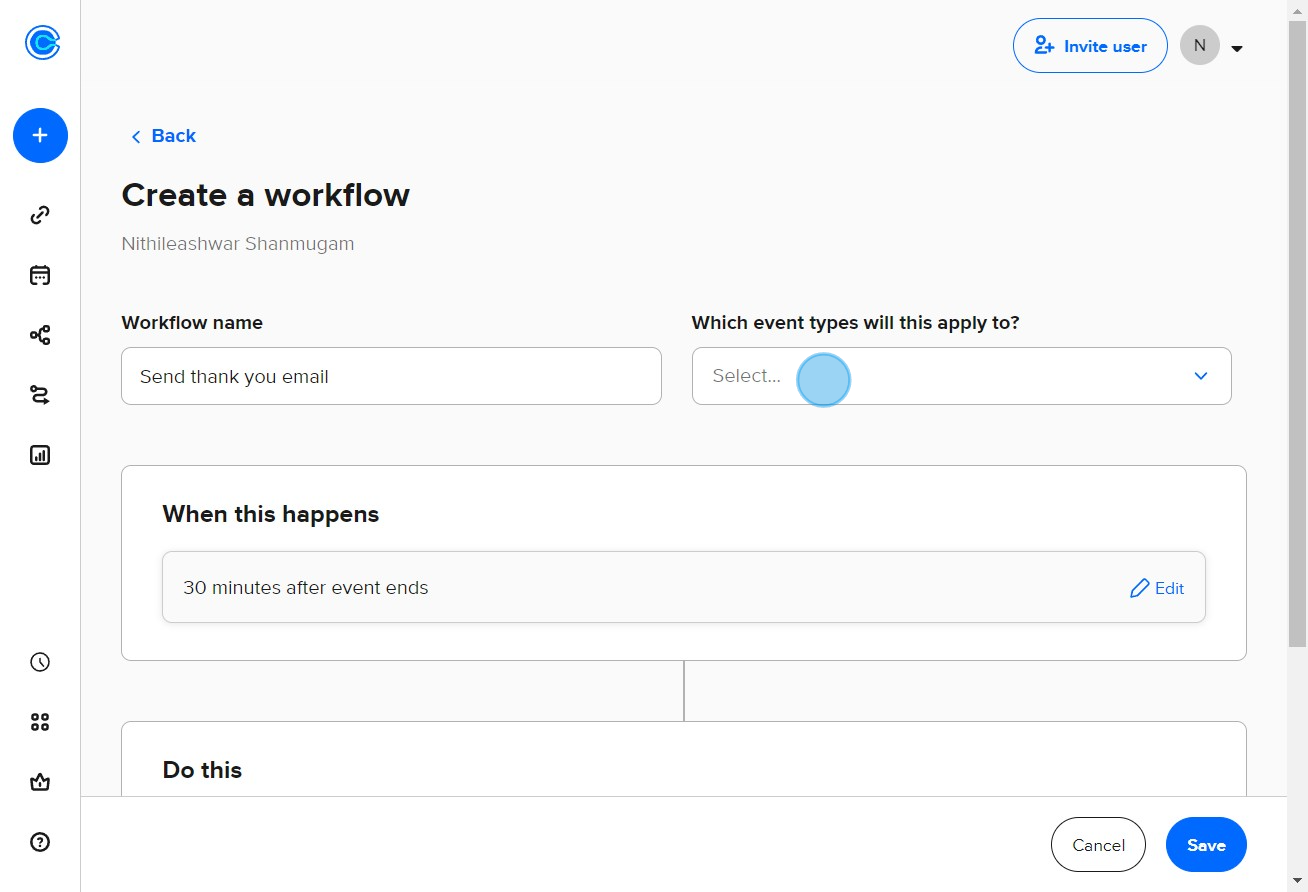
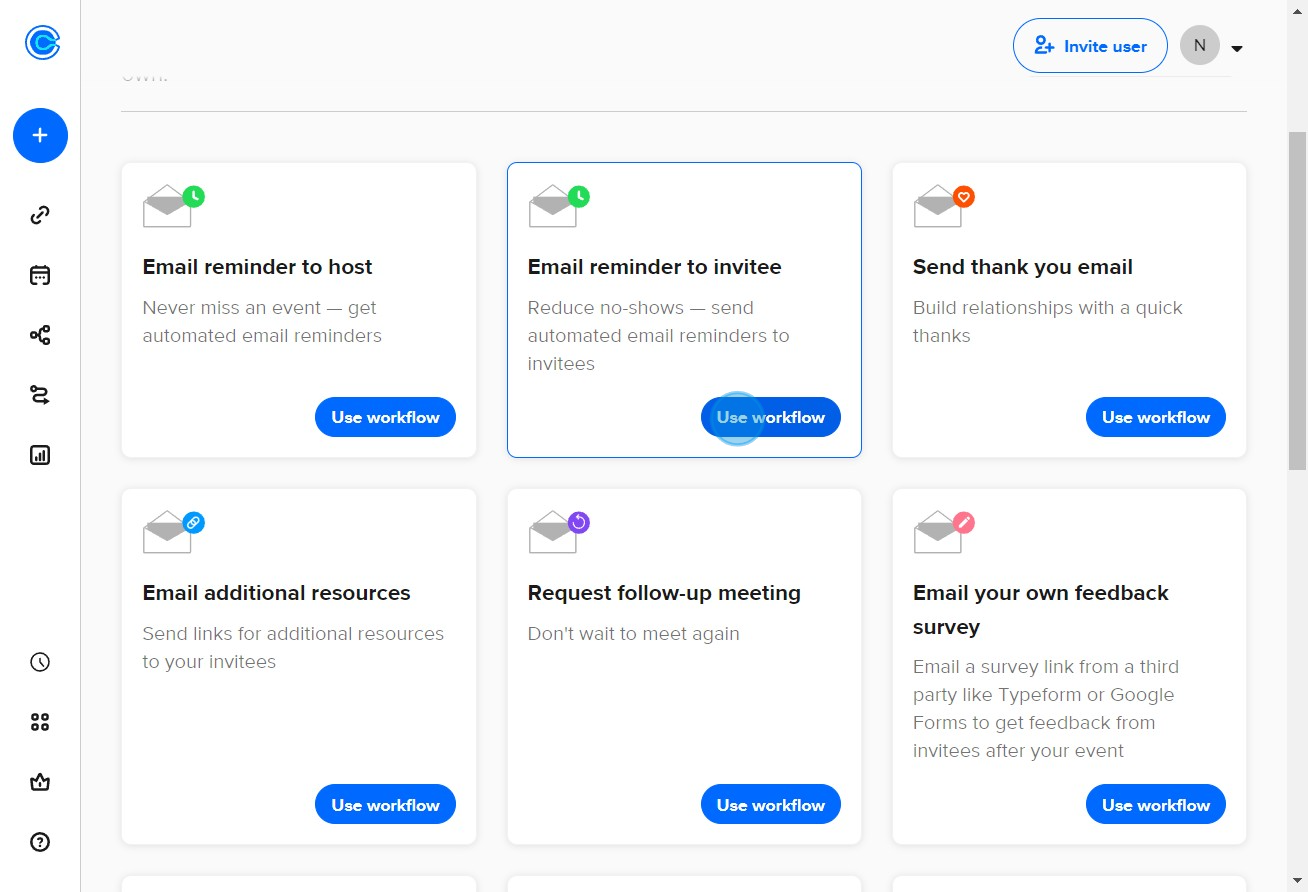
2. Choose your desired workflow.

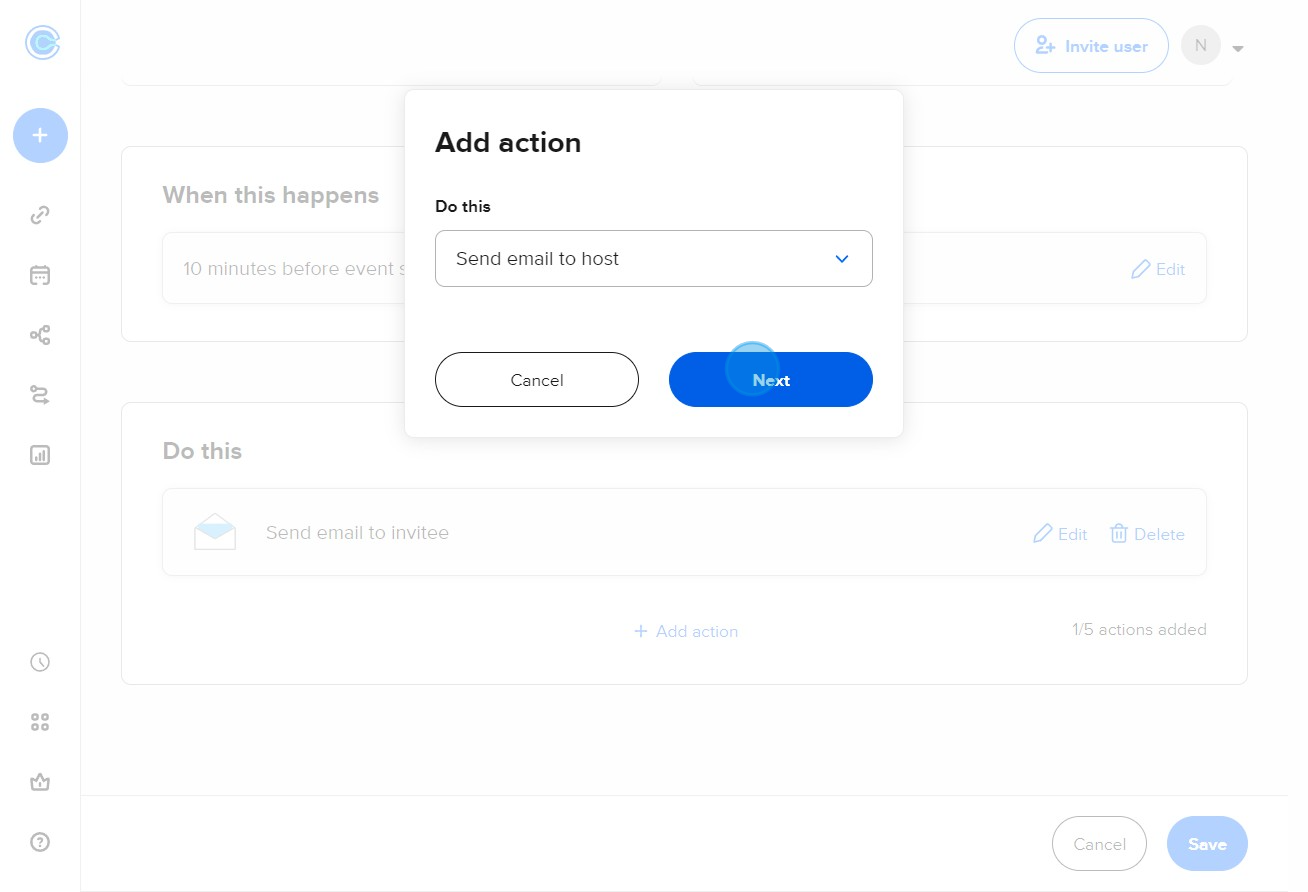
3. Select the events for this workflow.
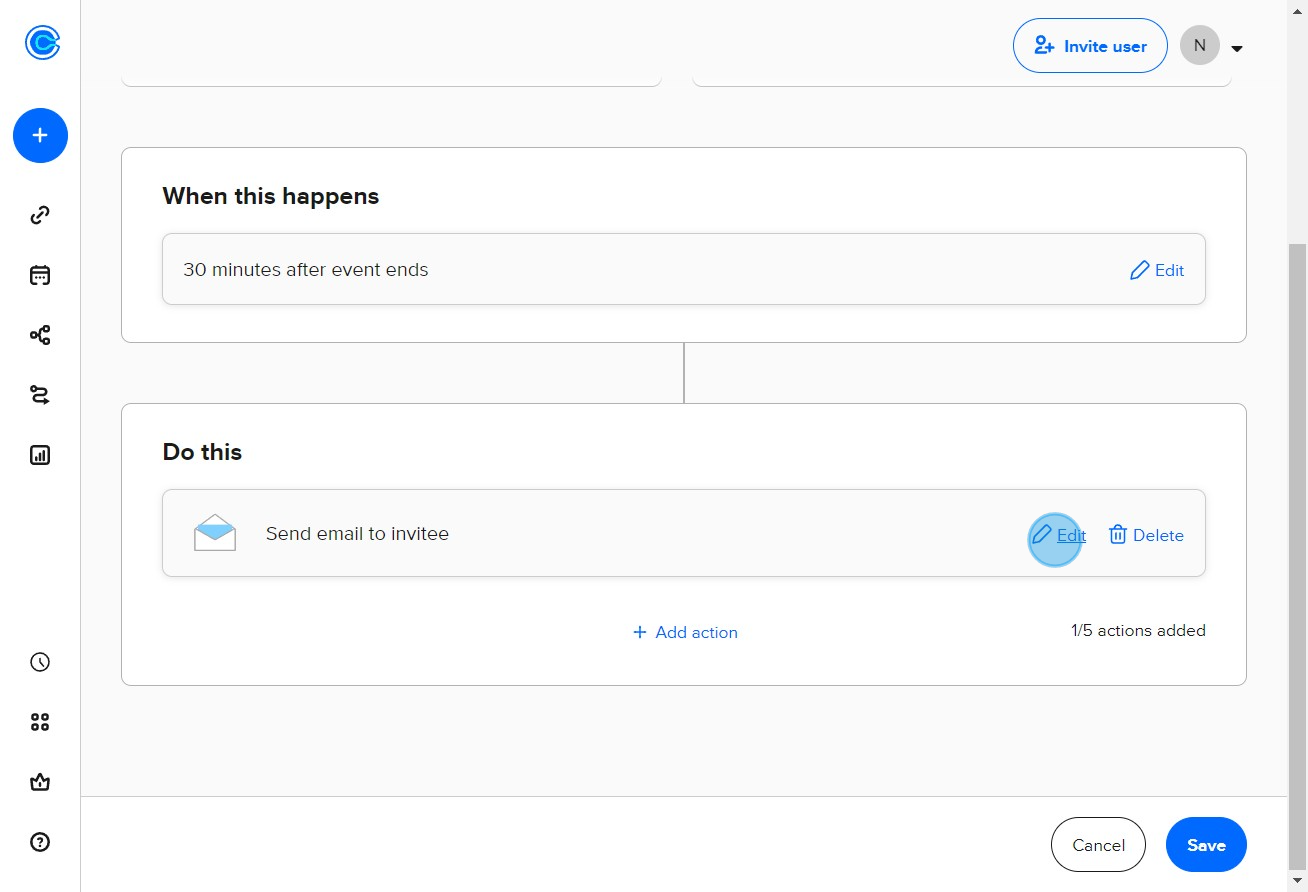
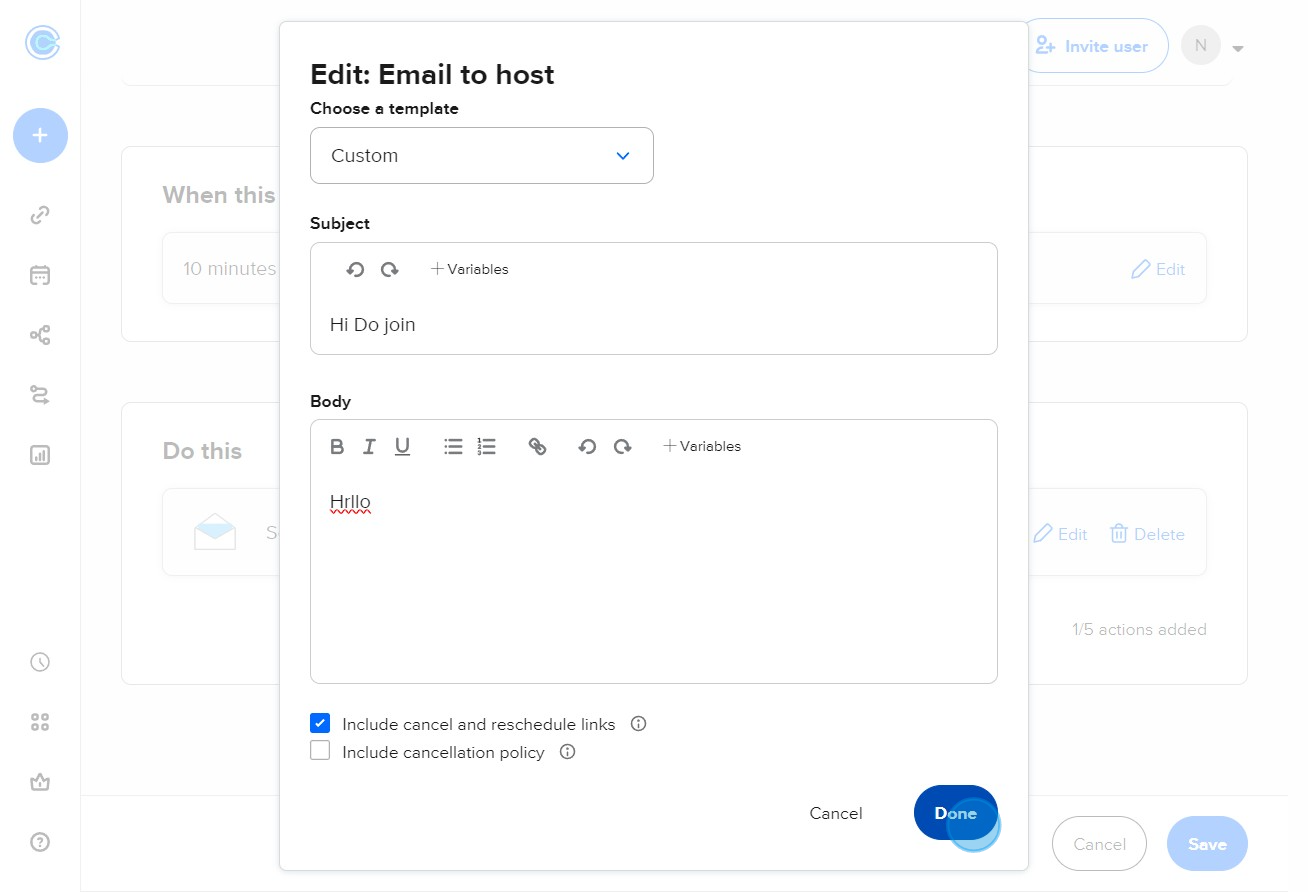
4. Now move on to customize the workflow by pressing 'Edit'.
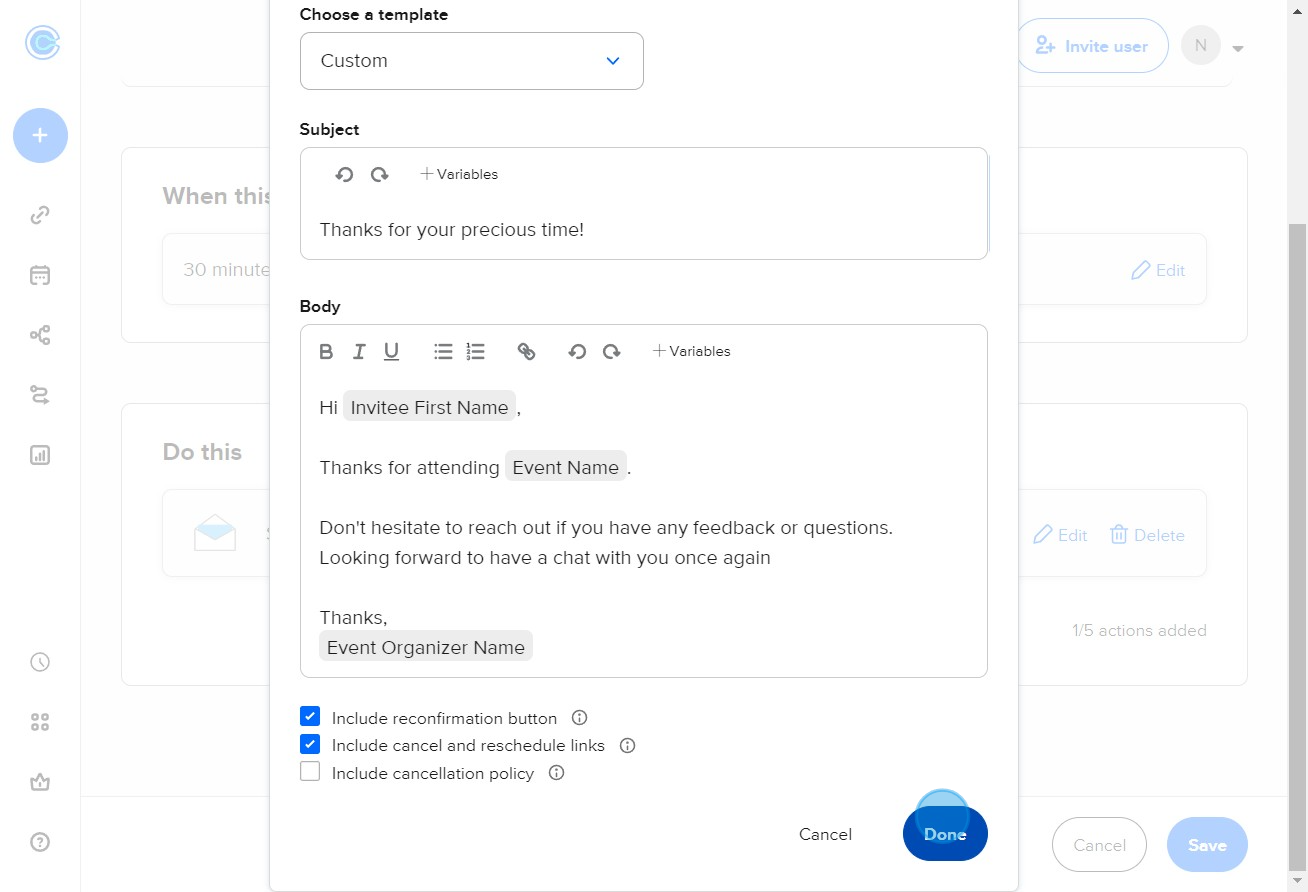
5. Review your settings, then confirm by clicking on 'Done'.
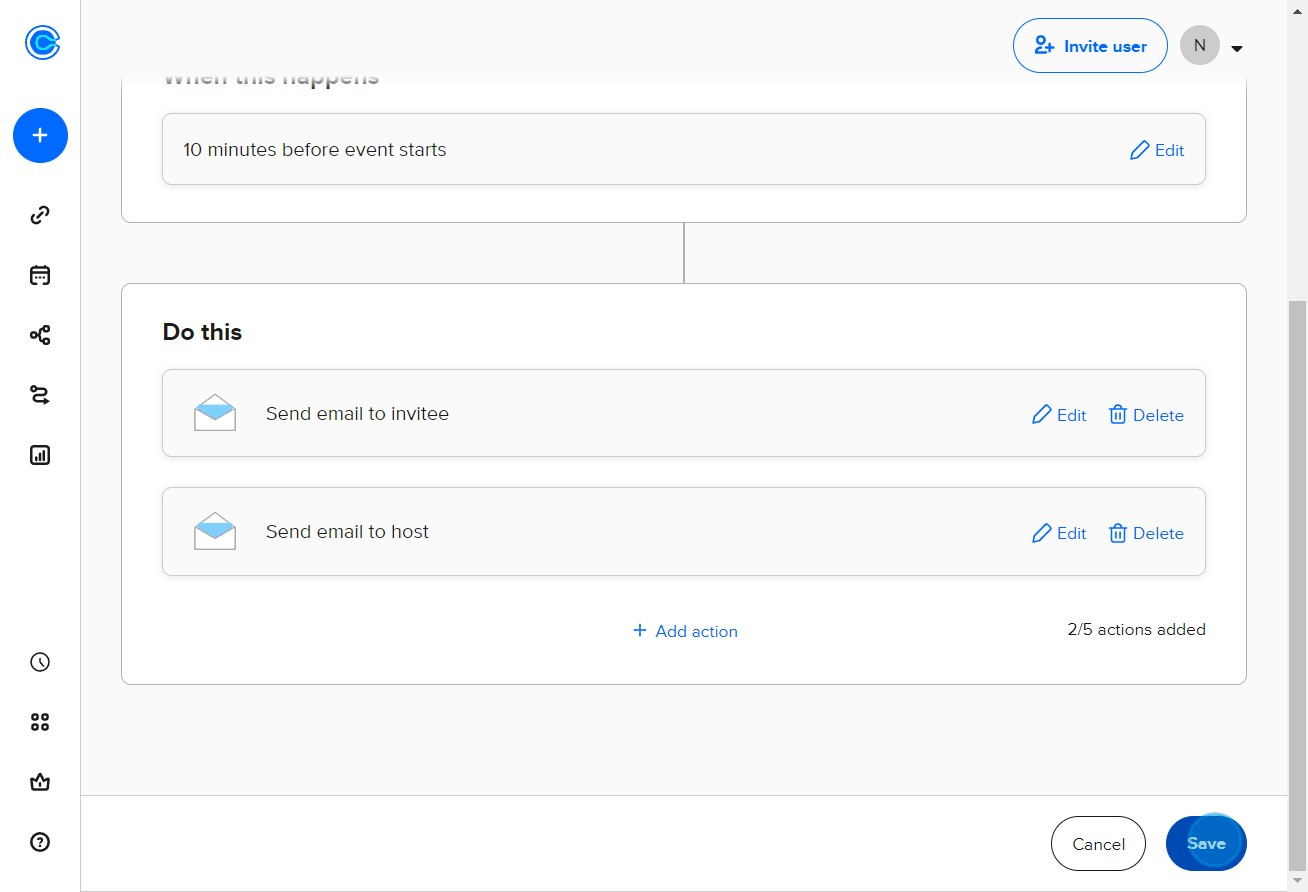
6. Ensure your changes are saved by hitting 'Save'.

7. If you want to add another workflow, click on 'New Workflow'.
8. Select the workflow you want to add.
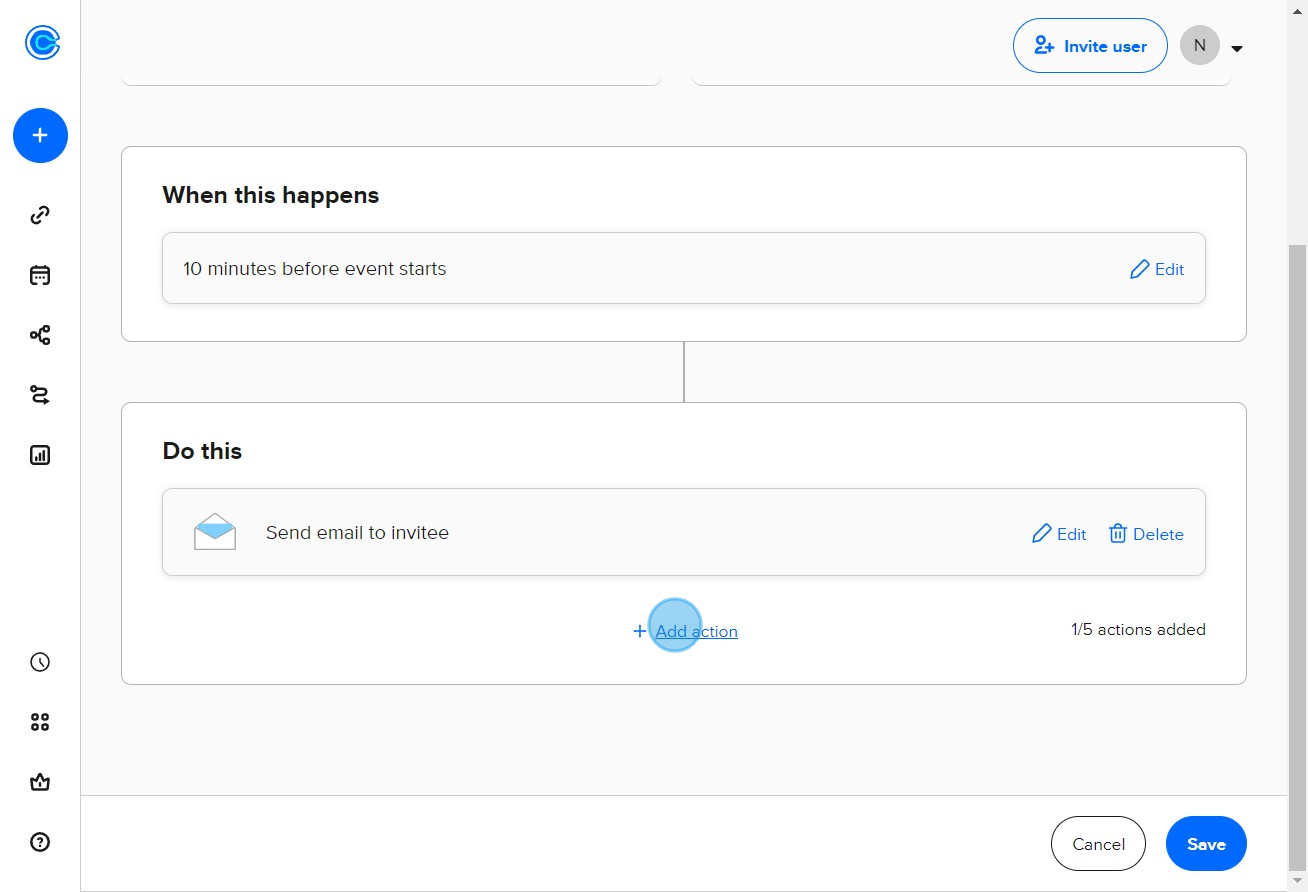
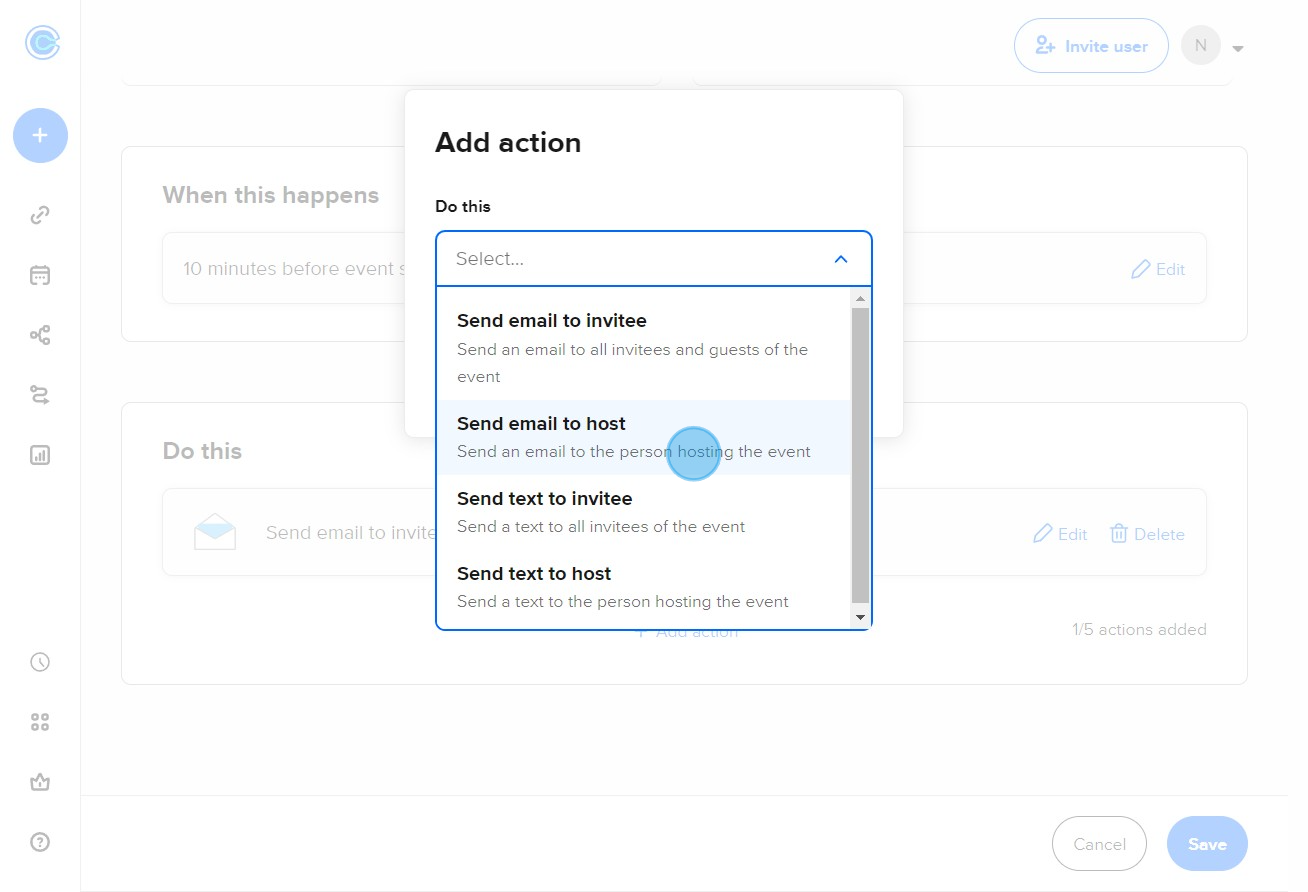
9. Add additional actions to your workflow if needed.
10. Choose the preferred option from the drop-down menu.
11. Proceed to the next step.
12. Review and finalize your workflow by clicking 'Done'.
13. Lastly, don't forget to save your customized workflow.
Create your own step-by-step demo
Scale up your training and product adoption with beautiful AI-powered interactive demos and guides. Create your first Supademo in seconds for free.