How to integrate Zoom into your Calendly link

Nithil Shanmugam
Nithil Shanmugam·
How to integrate Zoom into your Calendly link

Overview:

Elevate your scheduling process with the integration of Zoom into your Calendly link. Enhance user convenience by seamlessly connecting the two platforms, providing a streamlined experience for both you and your clients. This guide offers a straightforward, step-by-step process to effortlessly integrate Zoom with your Calendly link, ensuring efficient and clear communication for all your scheduled meetings. Boost productivity and simplify your virtual appointments with this comprehensive integration guide.

Who is Calendly best suited for?

Calendly is best suited for a wide range of professionals, including Sales Representatives, Recruiters, and Consultants. For example, Sales Representatives can use Calendly for scheduling meetings and demos with prospects, Recruiters can leverage it for coordinating interviews with candidates, and Consultants can use it for managing client appointments and consultations, all benefiting from Calendly’s automated scheduling and integration with calendar systems.

Interactive demo powered by Supademo

1. Begin by navigating to Integrations & apps.

1 Click on "Integrations & apps"

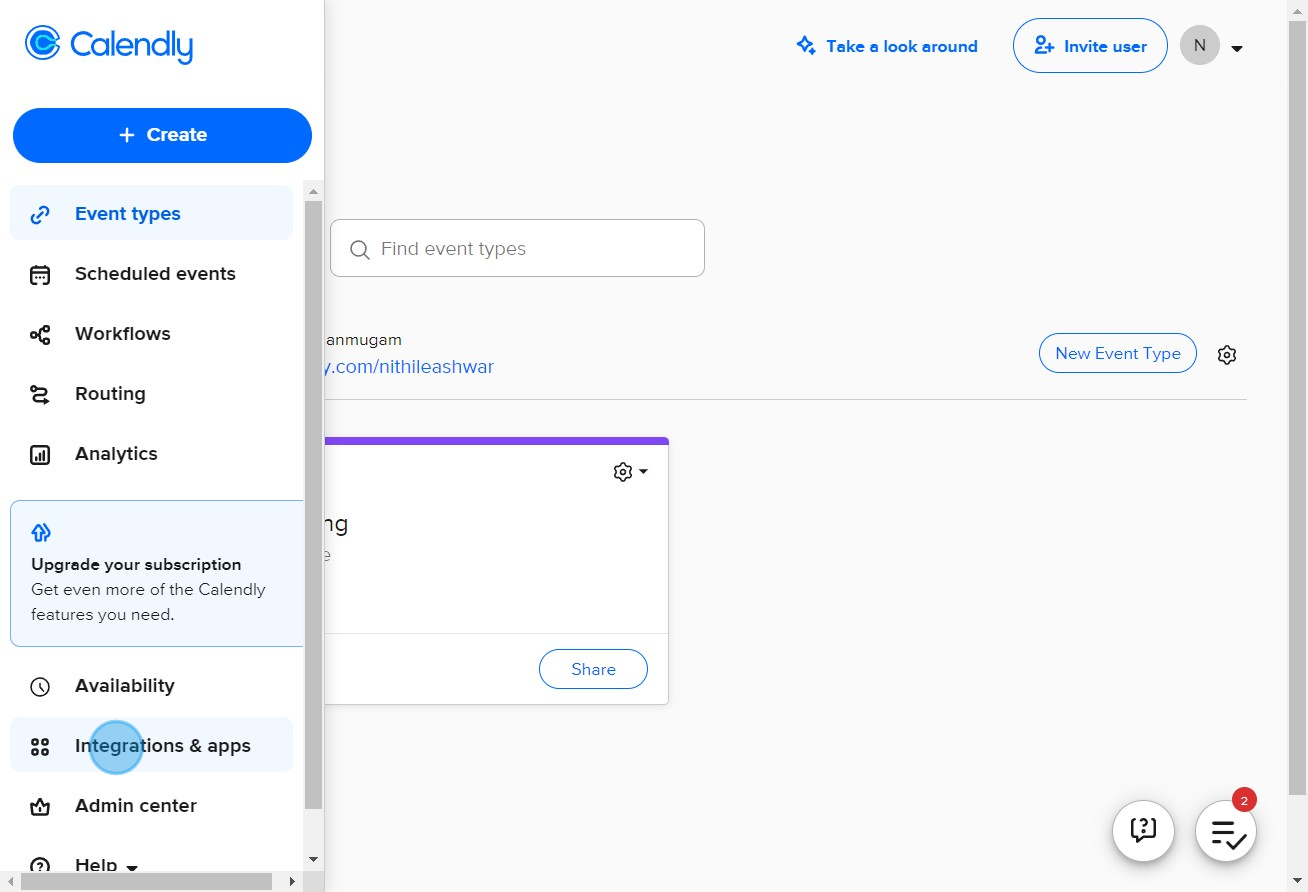
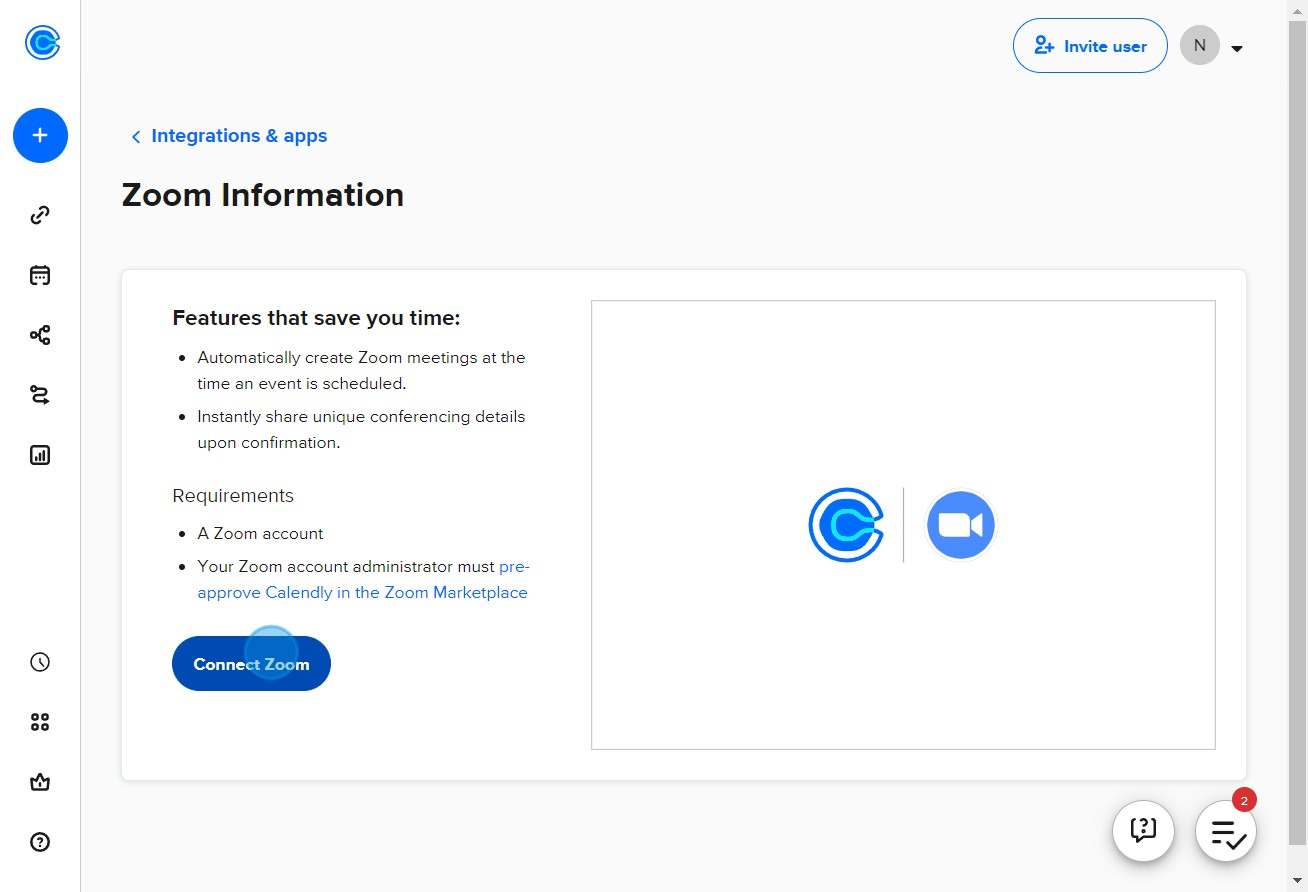
2. Now, spot and select the Zoom option.

2 Click here

3. Proceed by clicking on the Connect Zoom button.

3 Click on "Connect Zoom"

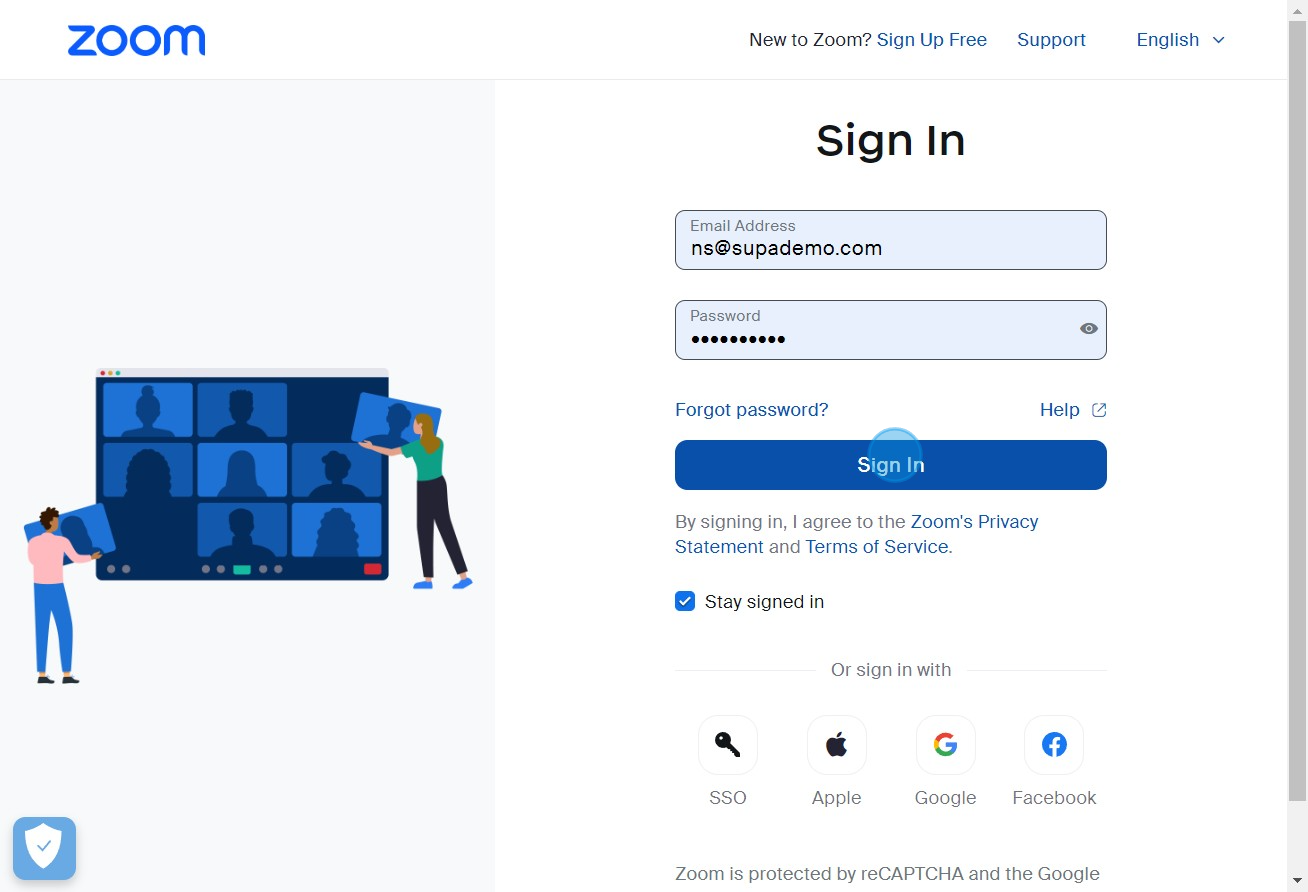
4. You'll have to sign in to your Zoom account next.

4 Click on "Sign In"

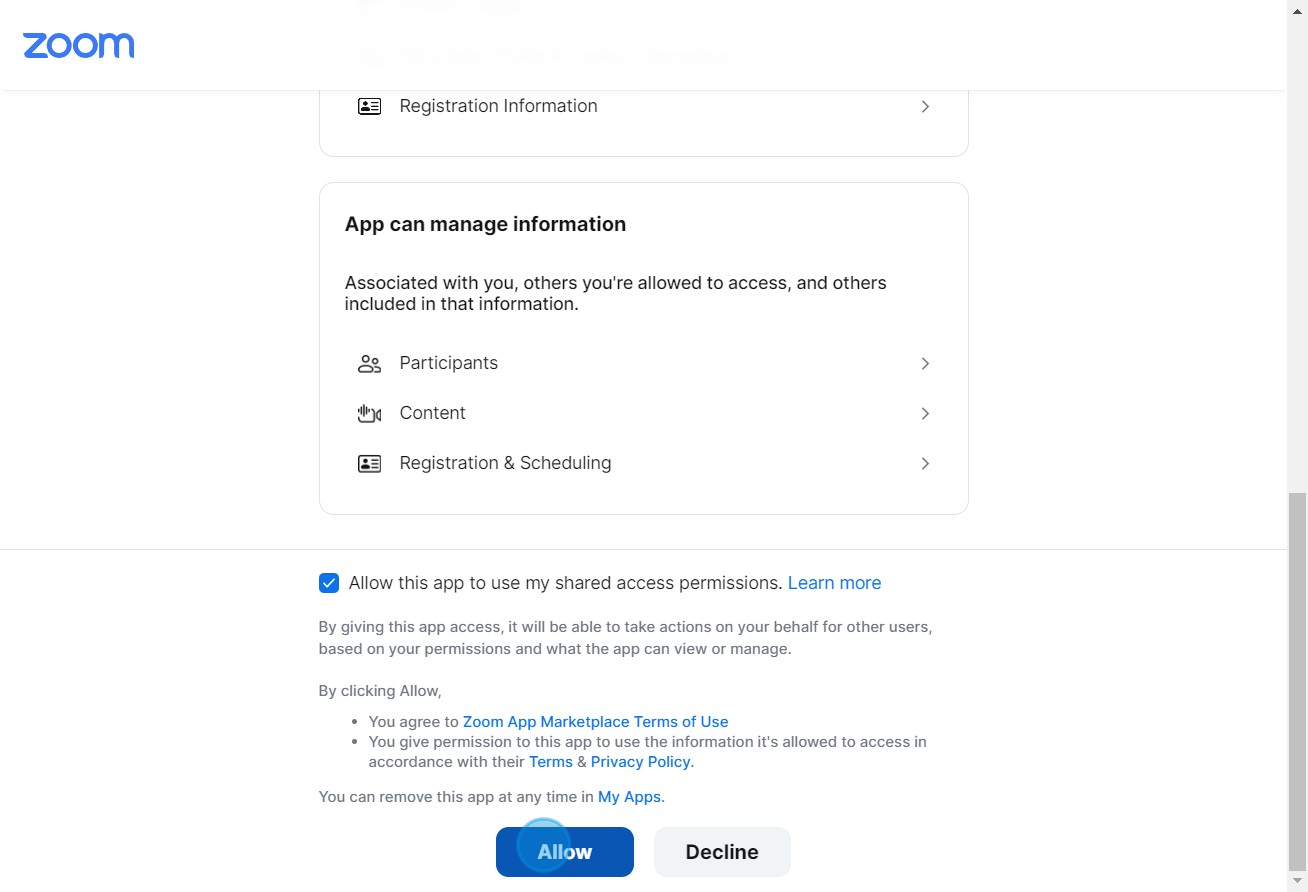
5. Check the box to share your access permissions.

5 Click here

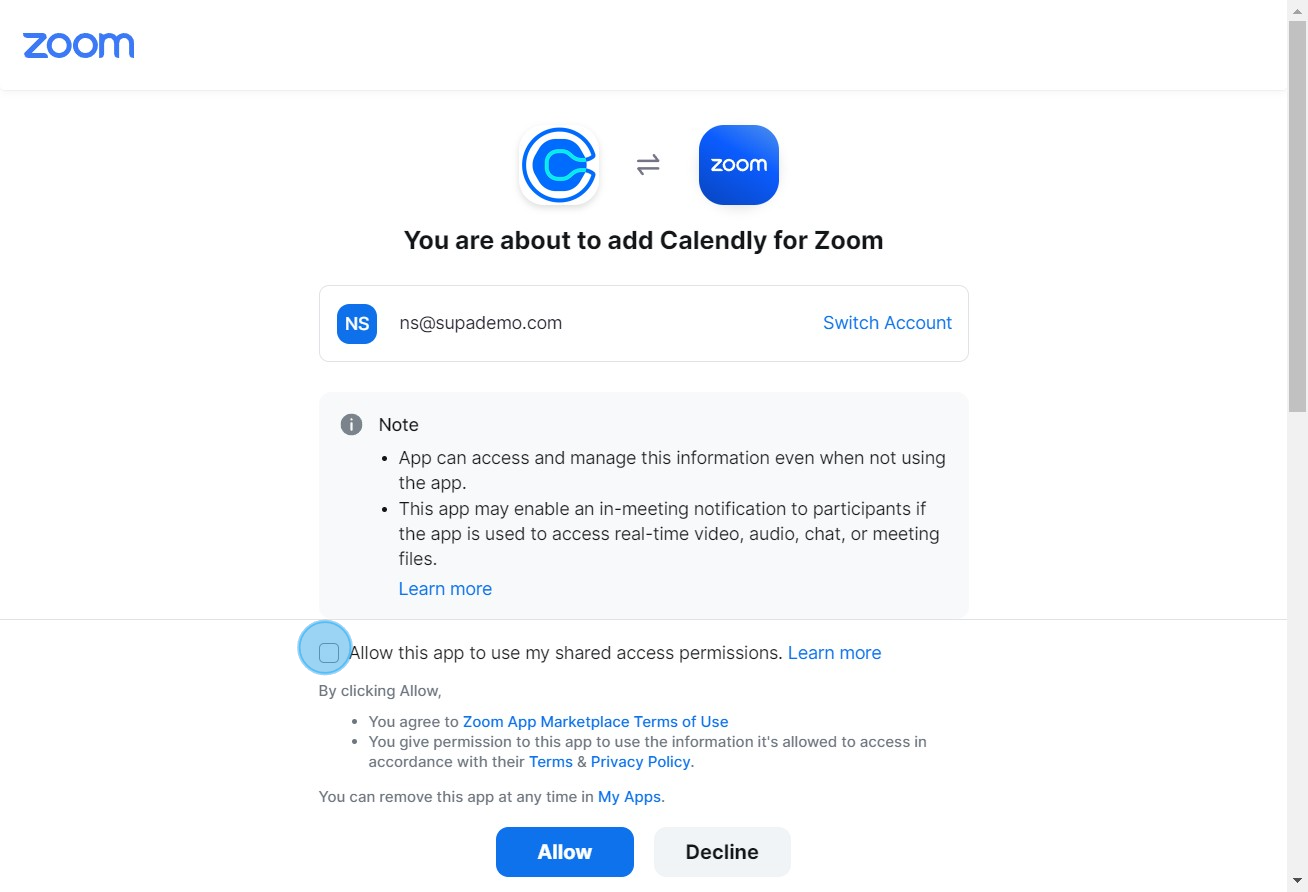
6. Once done, click the Allow button to grant access.

6 Click on "Allow"

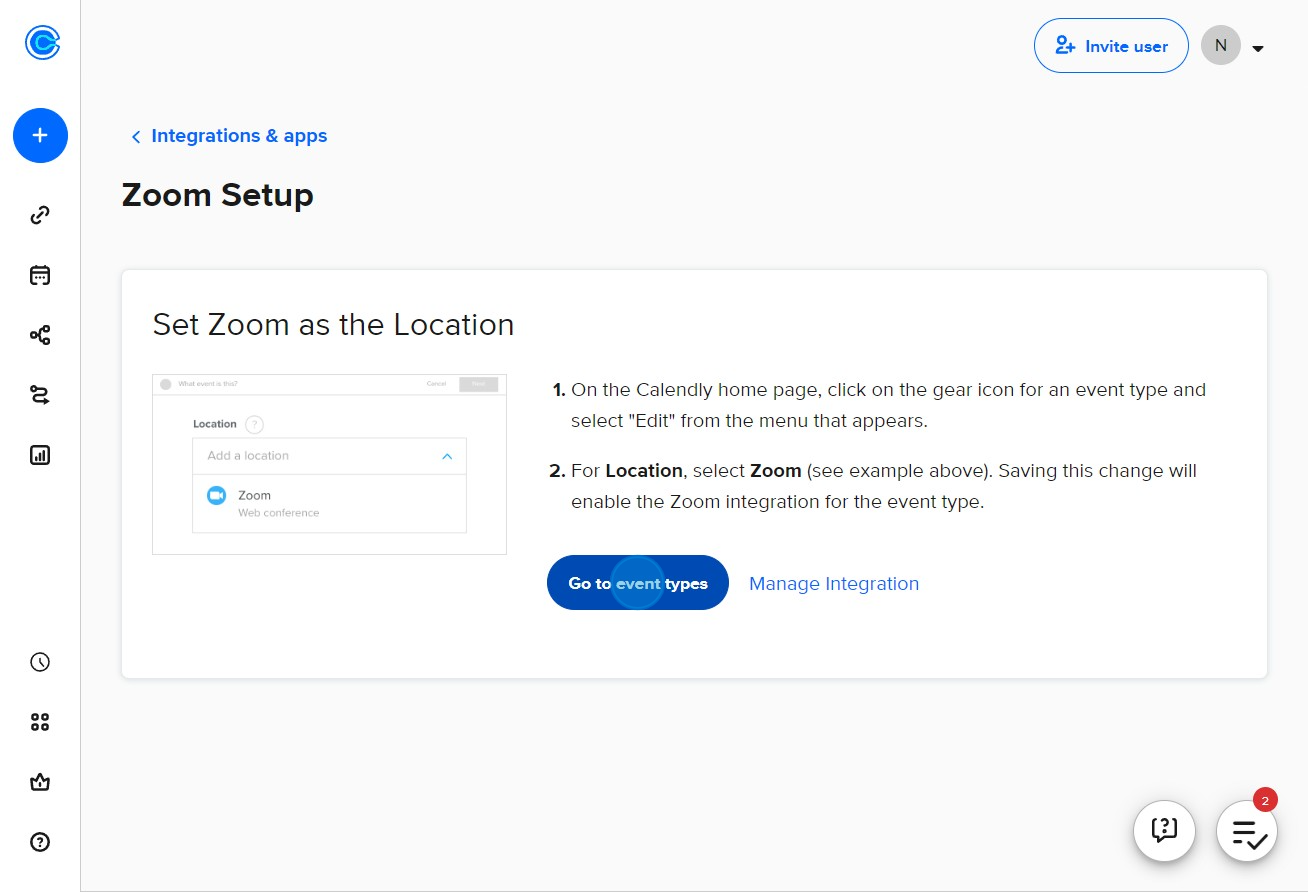
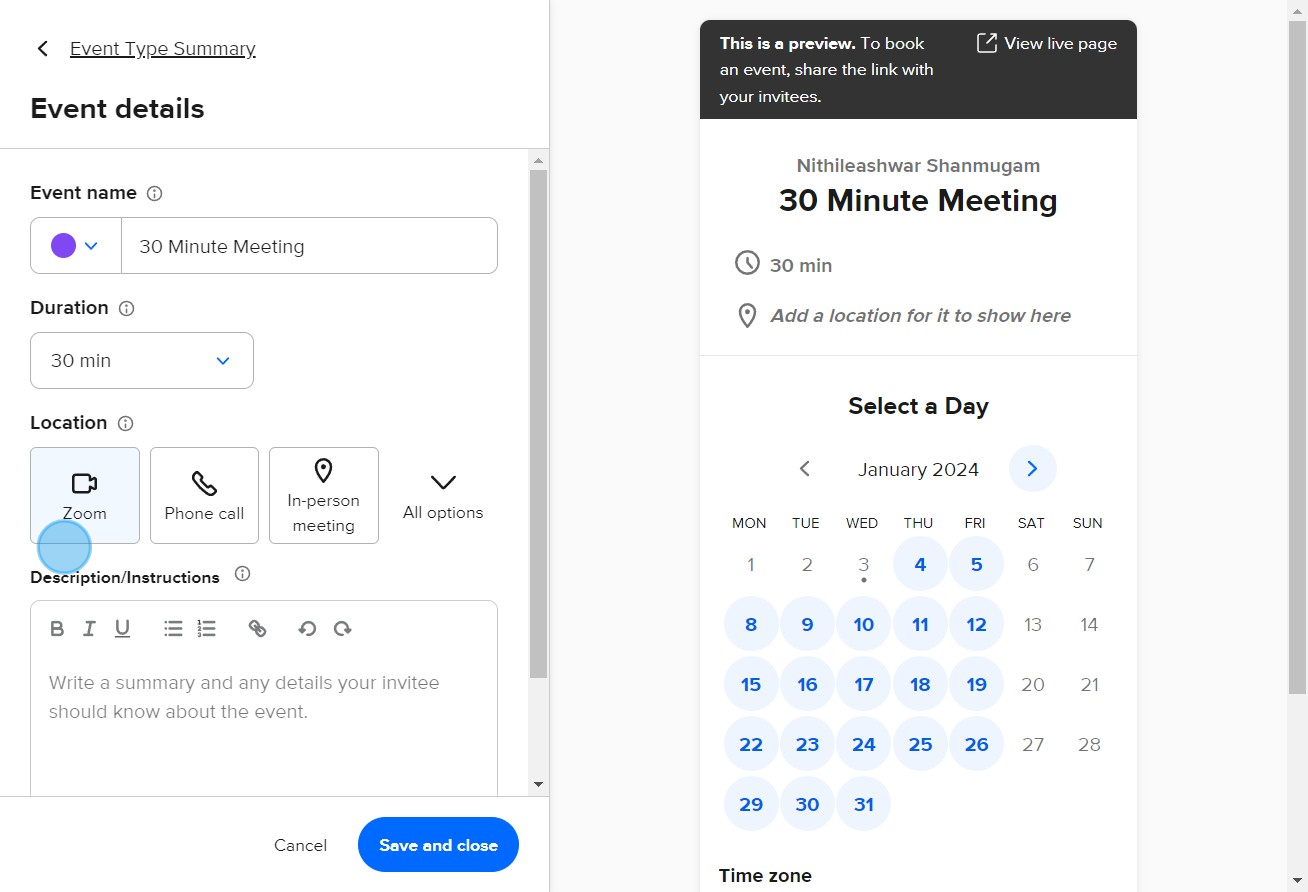
7. Now, navigate to Event types.

7 Click on "Go to event types"

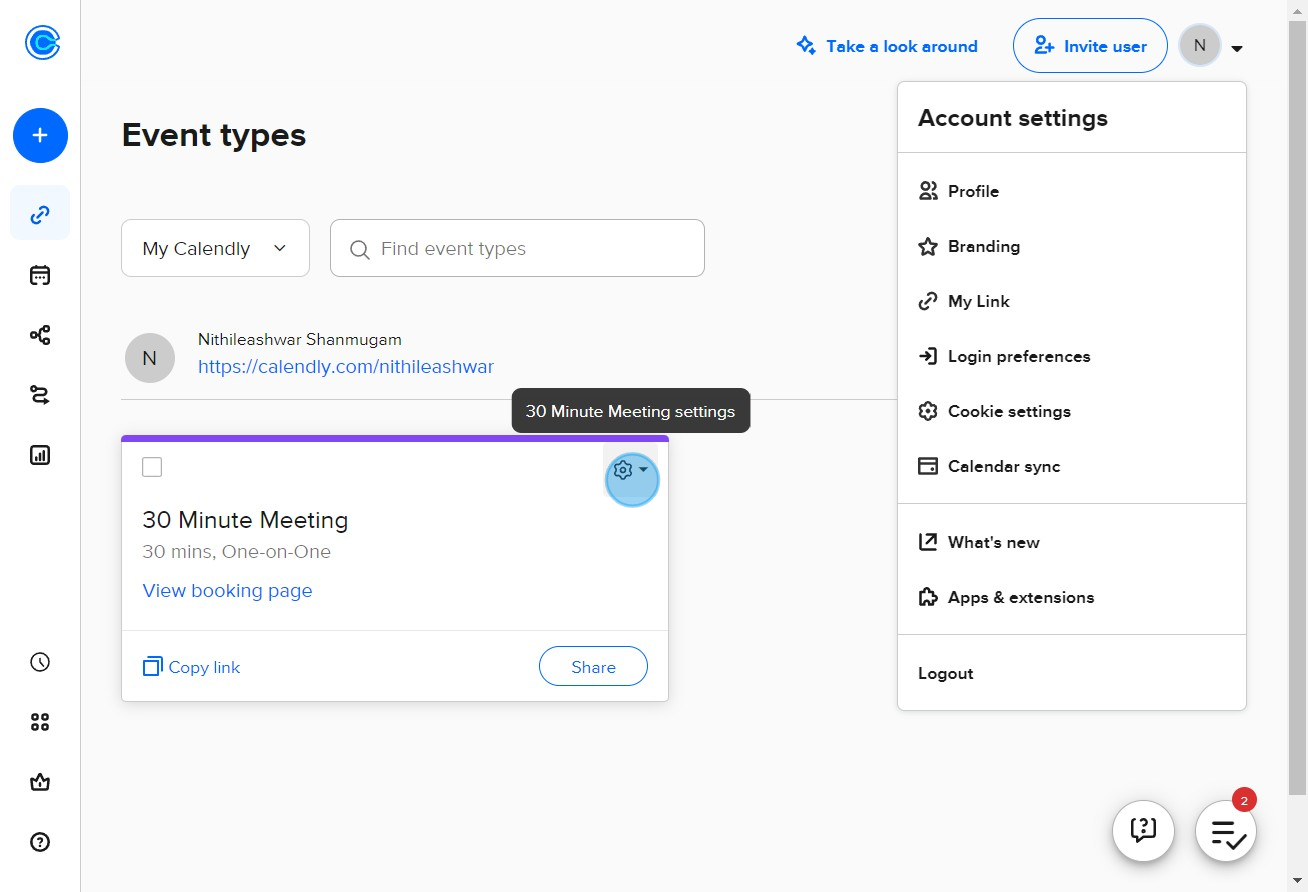
8. Find and click the icon for 30 Minute Meeting settings.

8 Click on "30 Minute Meeting settings"

9. Find the Edit option and click on it.

9 Click on "Edit"

10. Proceed to Event Details.

10 Upload

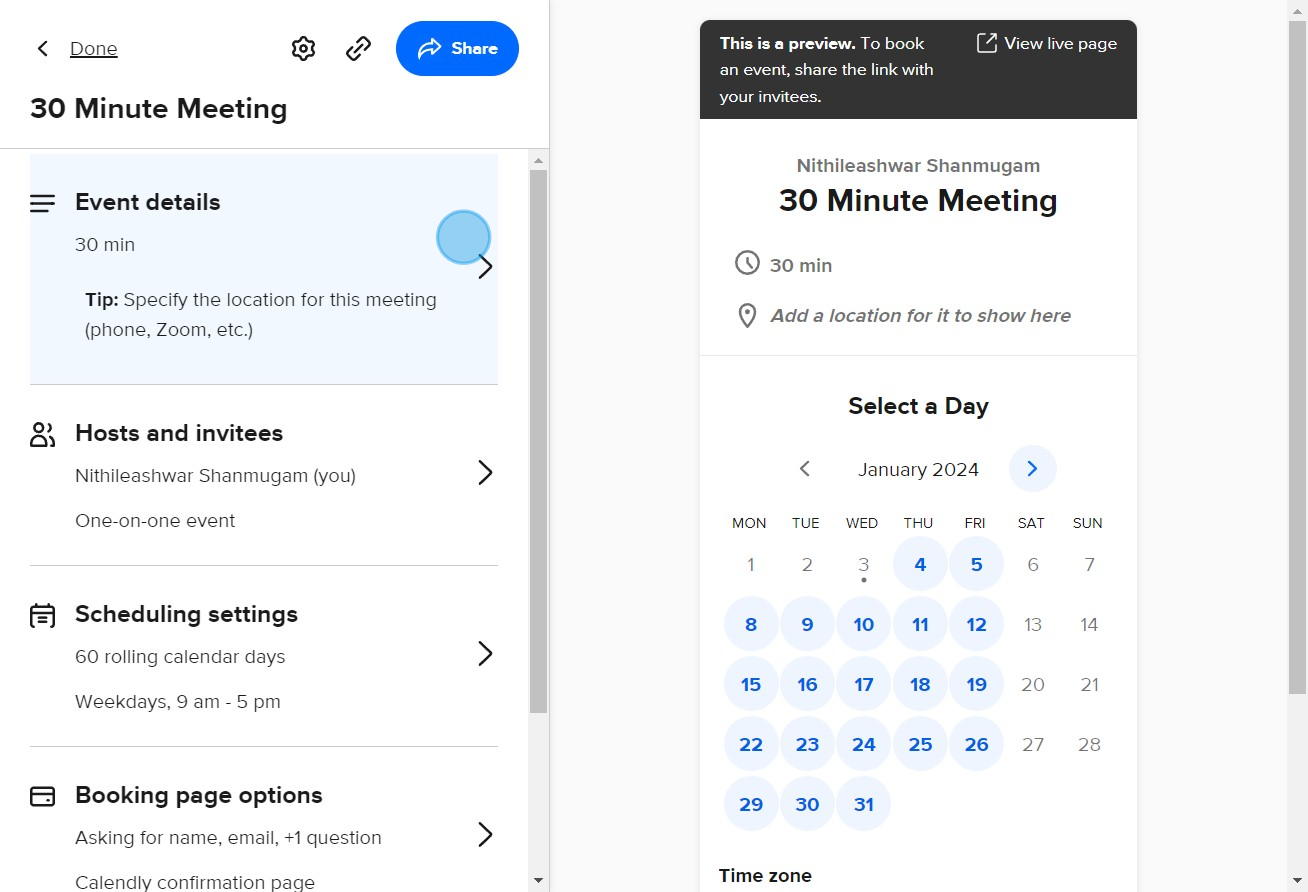
11. Finally, locate the Zoom option and click to add it to your Calendly link.

11 Upload

Common FAQs on Calendly

Commonly asked questions about this topic.

How do I set up and customize my Calendly scheduling page?

To set up your Calendly scheduling page, start by logging into your Calendly account and navigating to the “Event Types” section. Click on “+ New Event Type” to create a new scheduling event. You can choose between different types of events, such as one-on-one meetings, group meetings, or round-robin meetings. Customize your event by setting details like duration, availability, location, and any required questions for attendees. You can also adjust your availability by defining the days and times you are open for meetings. Once configured, share your scheduling link with others so they can book time with you according to your set parameters.

How can I integrate Calendly with my calendar and other tools?

Calendly integrates with popular calendar applications such as Google Calendar, Microsoft Outlook, and iCloud. To integrate your calendar, go to the “Calendar Connections” section in your Calendly settings and follow the instructions to connect your calendar account. This integration ensures that your availability is accurately reflected and prevents double-booking. Calendly also supports integrations with other tools like Zoom, Microsoft Teams, and Salesforce. For example, you can connect Zoom to automatically generate meeting links for scheduled events, or integrate with Salesforce to sync meeting data with your CRM. Explore the “Integrations” section in Calendly to set up these connections and enhance your scheduling workflow.

How do I use Calendly’s automation and reminder features?

Calendly offers automation and reminder features to streamline scheduling and reduce no-shows. In your event type settings, you can set up automated email reminders and follow-ups to be sent to attendees before the meeting. These reminders can be customized to include details such as the meeting agenda or any necessary preparation. You can also configure automatic confirmations and thank-you emails to be sent after the meeting is scheduled or completed. Additionally, Calendly allows you to set up buffer times between meetings to avoid back-to-back scheduling and to include time zone adjustments to accommodate international attendees. Use these features to ensure that your scheduling process is smooth and effective.

Create your own step-by-step demo

Scale up your training and product adoption with beautiful AI-powered interactive demos and guides. Create your first Supademo in seconds for free.

Nithil Shanmugam

Nithil Shanmugam

Nithil is a startup-obsessed operator focused on growth, sales and marketing. He's passionate about wearing different hats across startups to deliver real value.

More from the blog

How to Add Products to Shopify

How to Add Products to Shopify

Learn step-by-step how to add products to your Shopify store effortlessly, including tips on product details, images, pricing, and inventory management to boost your online sales.

Vimal Kumar
Vimal KumarDec 17, 2025
How to Deactivate Your Shopify Store

How to Deactivate Your Shopify Store

Learn step-by-step how to deactivate your Shopify store easily, including important considerations and tips to pause or close your shop without losing data.

Vimal Kumar
Vimal KumarDec 17, 2025
How to Remove 'Powered by Shopify'

How to Remove 'Powered by Shopify'

Learn how to easily remove the 'Powered by Shopify' text from your online store with step-by-step instructions and tips to customize your Shopify storefront.

Vimal Kumar
Vimal KumarDec 17, 2025
How to Create a Shopify Account

How to Create a Shopify Account

Learn step-by-step how to create a Shopify account quickly and easily, set up your online store, and start selling your products in no time.

Vimal Kumar
Vimal KumarDec 17, 2025
How to Create a Stripe Account

How to Create a Stripe Account

Learn how to create a Stripe account quickly and easily with our step-by-step guide, perfect for beginners looking to start accepting online payments.

Vimal Kumar
Vimal KumarDec 17, 2025
How to Contact Stripe Support

How to Contact Stripe Support

Learn the easiest ways to contact Stripe support for quick assistance with your payment processing, account issues, and technical questions.

Vimal Kumar
Vimal KumarDec 16, 2025