Overview
Elevate your Google Slide presentations by learning how to seamlessly add headers through this comprehensive guide. Streamline your content and enhance visual appeal by incorporating headers that provide structure and clarity to your slides. This step-by-step tutorial ensures a smooth process, empowering you to optimize your presentation layout and improve overall communication within the Google Slide platform. Master the art of adding headers to elevate the impact of your presentations with efficiency and clarity.
Who is Google Slides best suited for?
Google Slides is best suited for a wide range of professionals, including Presenters, Educators, and Business Teams. For example, Presenters can use Google Slides for creating and delivering engaging presentations, Educators can leverage it for designing interactive lessons and teaching materials, and Business Teams can use it for sharing reports and collaborating on pitch decks, all benefiting from Google Slides' cloud-based accessibility and collaborative features.
How to add header in Google Slides
1. Begin by opening Google Slides.
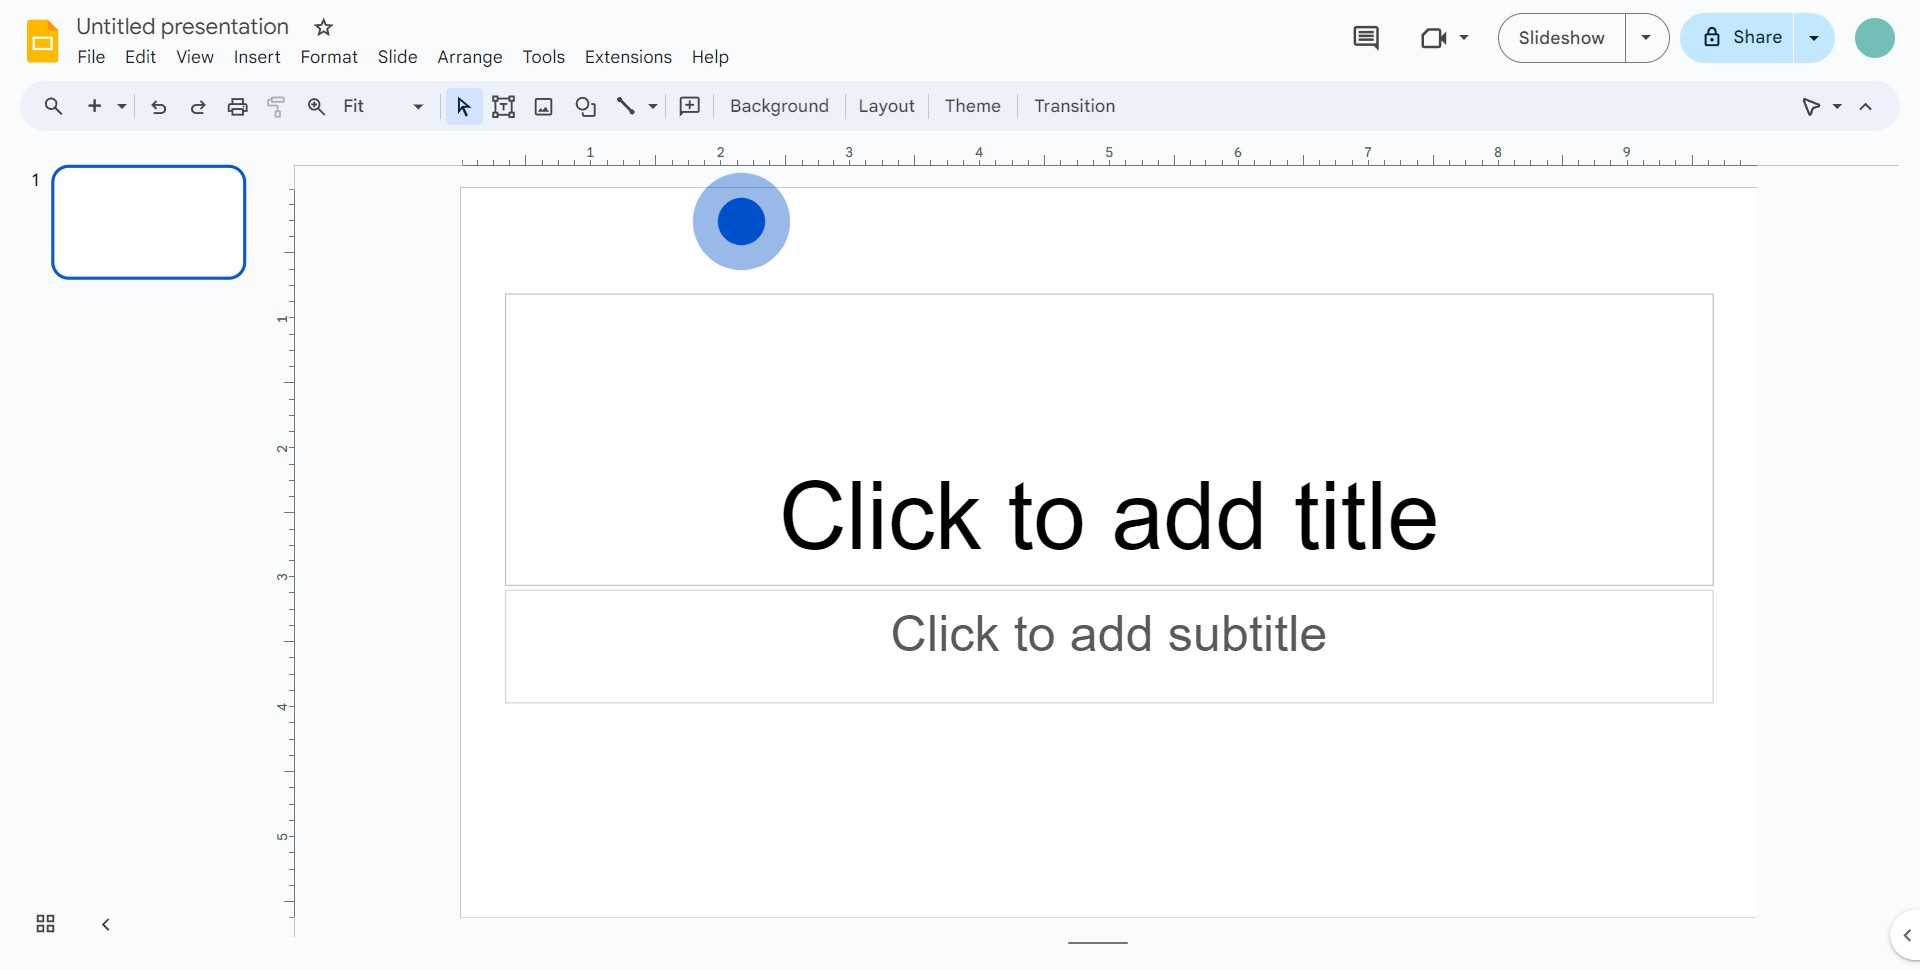
2. Next, select 'Theme' from the options.
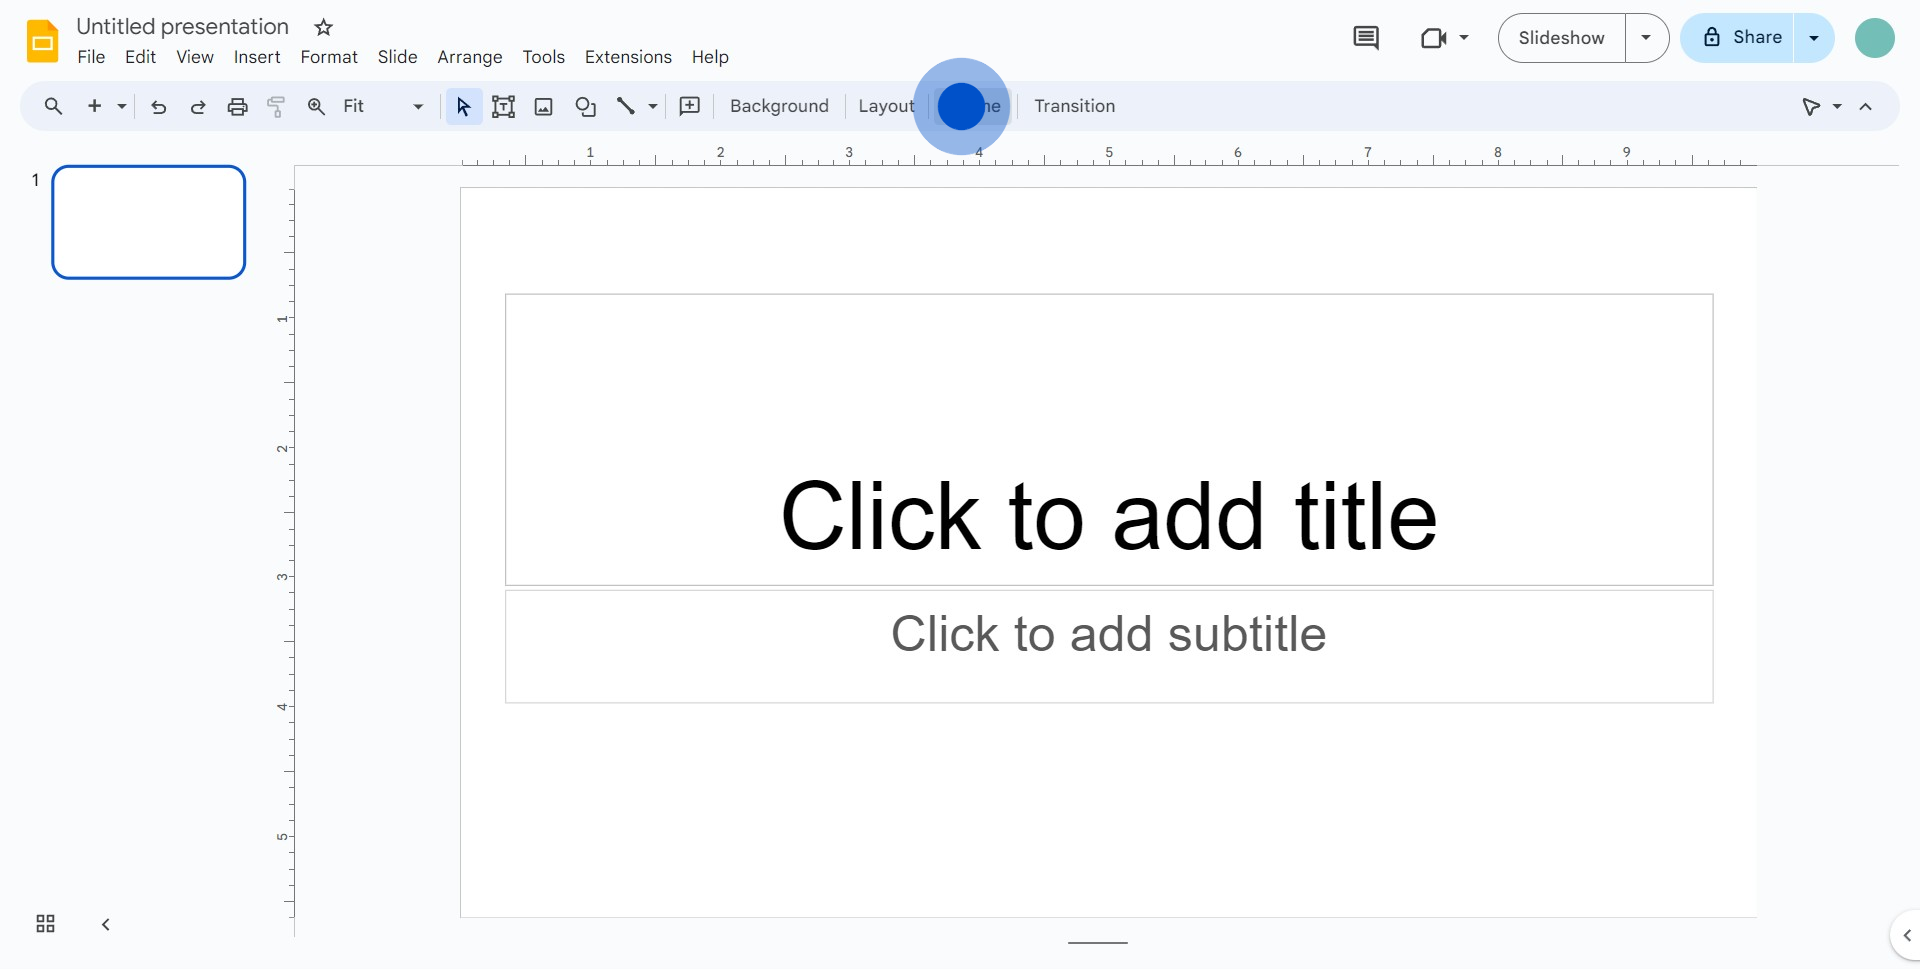
3. Proceed to 'Slide' from the dropdown menu.
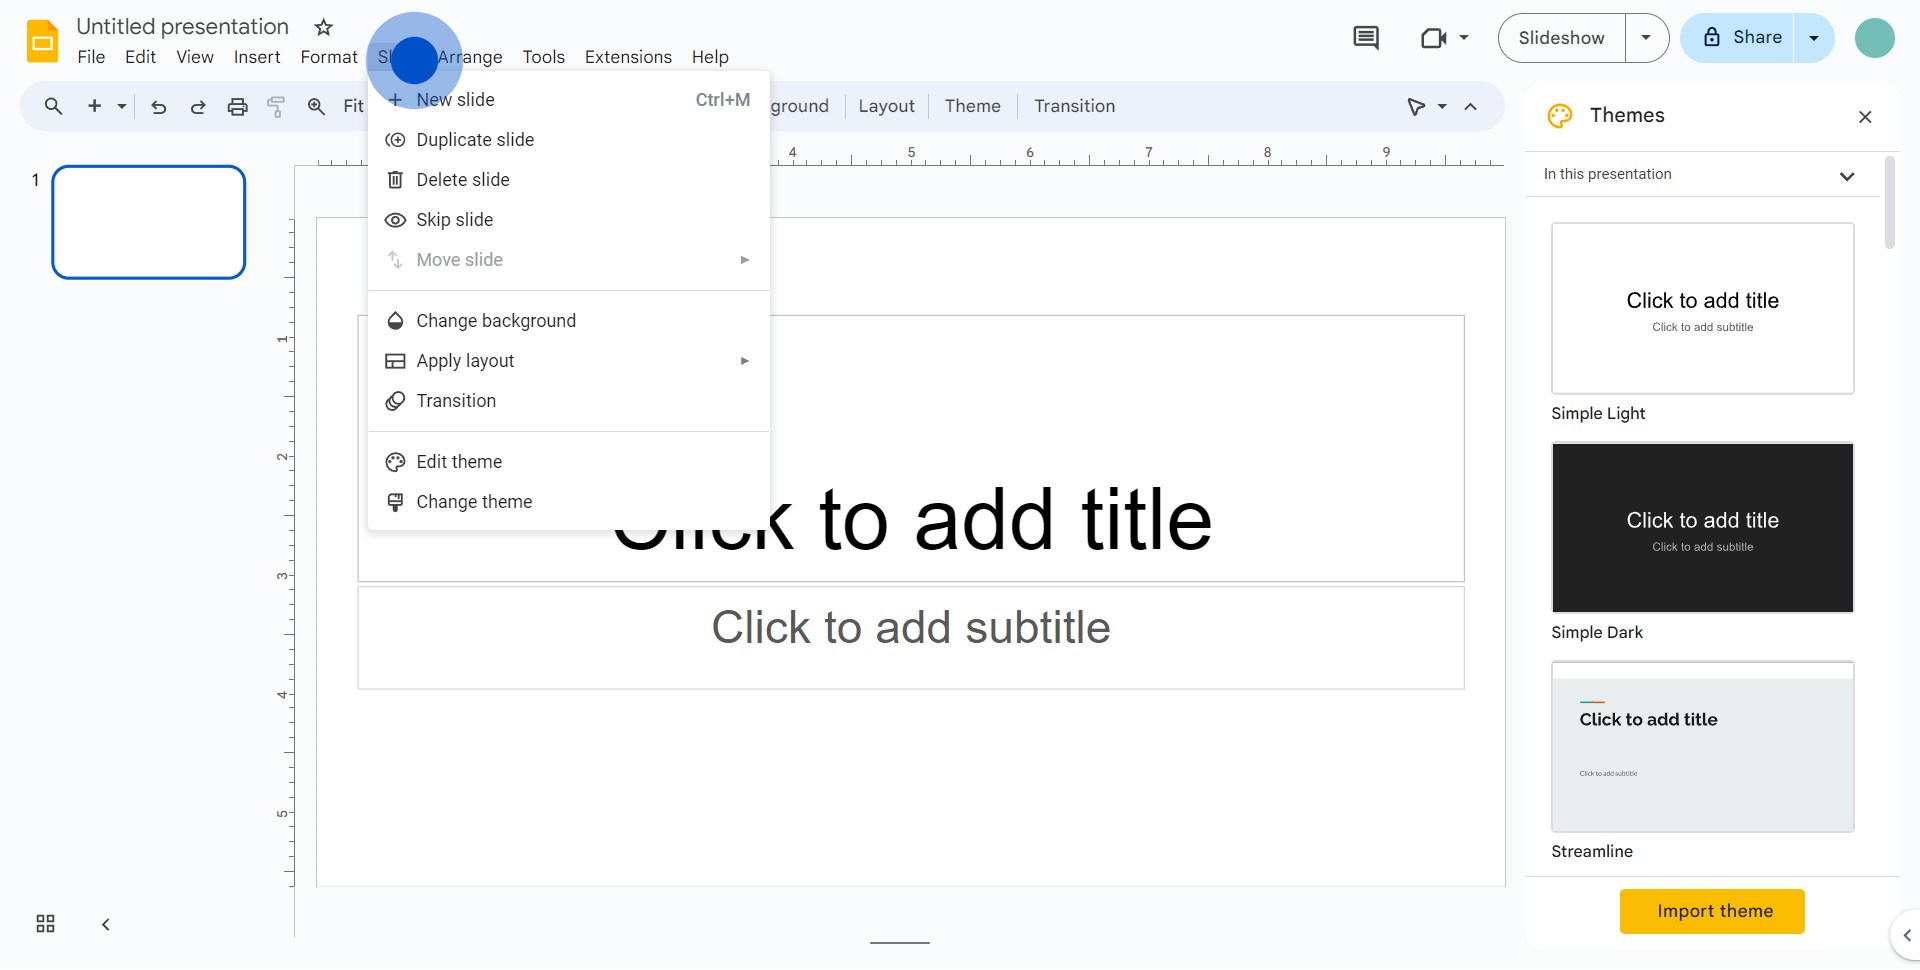
4. Then, navigate to and select 'Edit theme'.
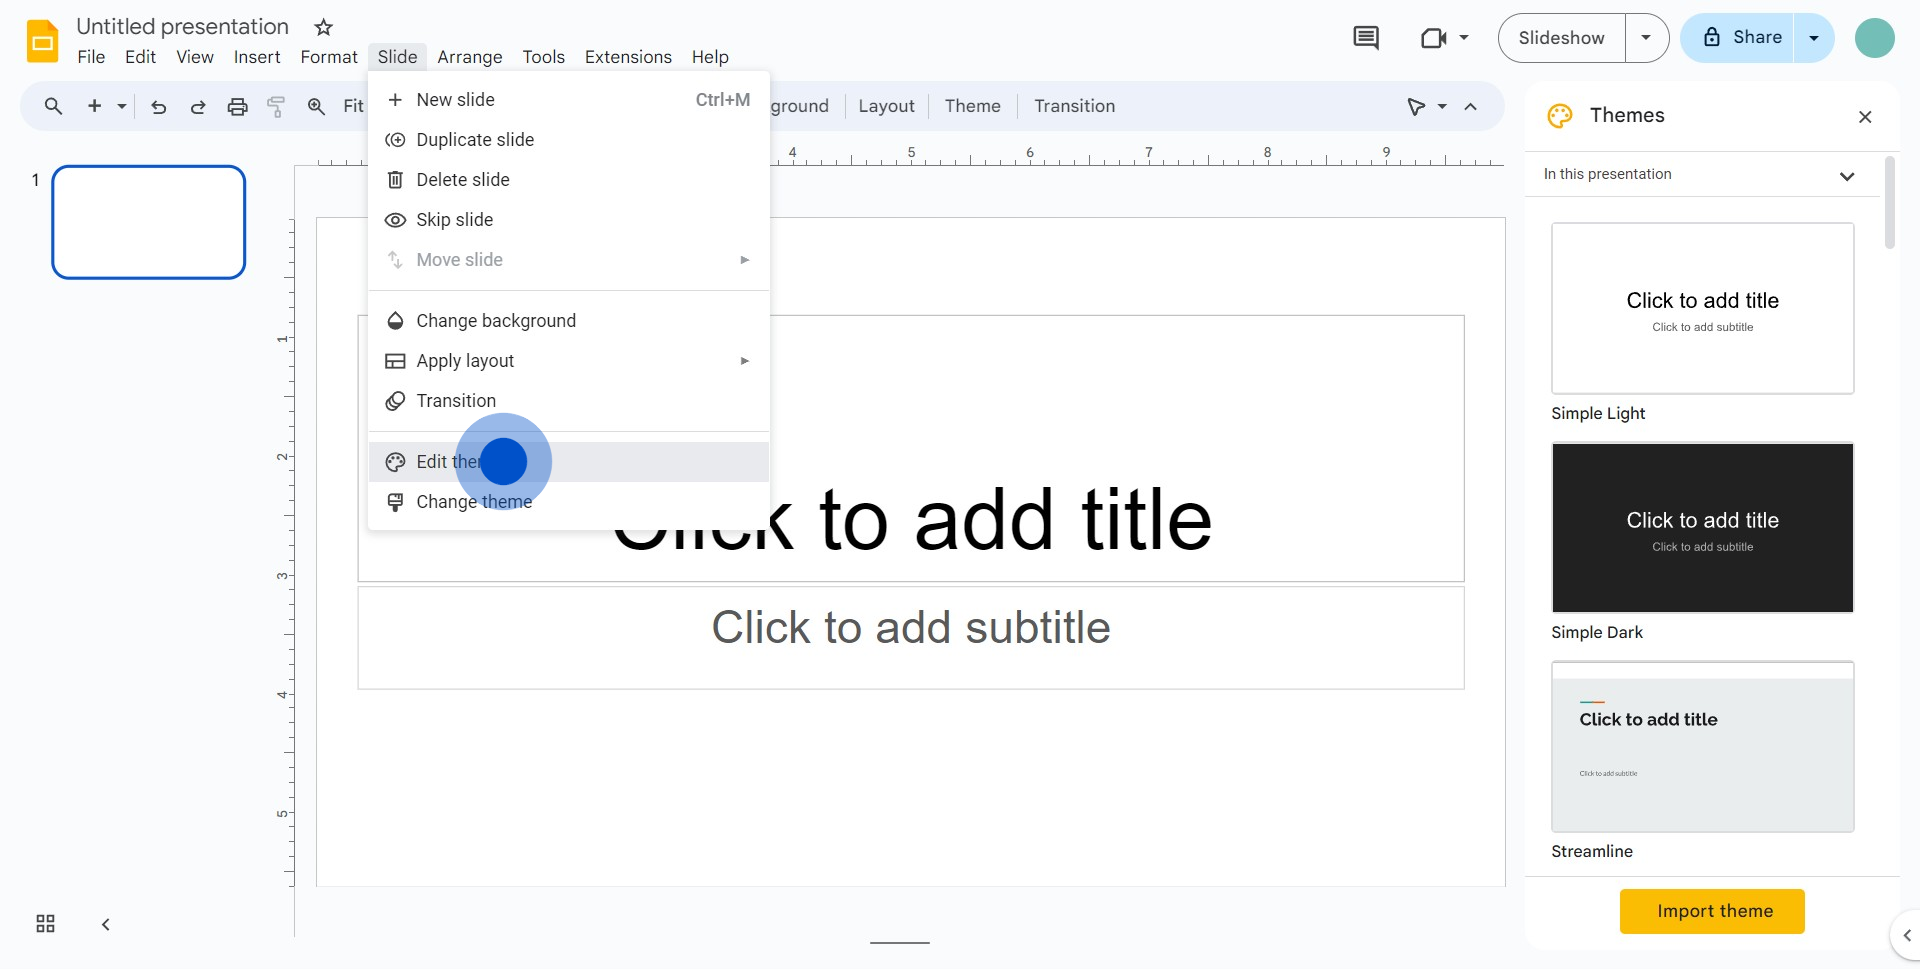
5. Locate and click the icon shown.
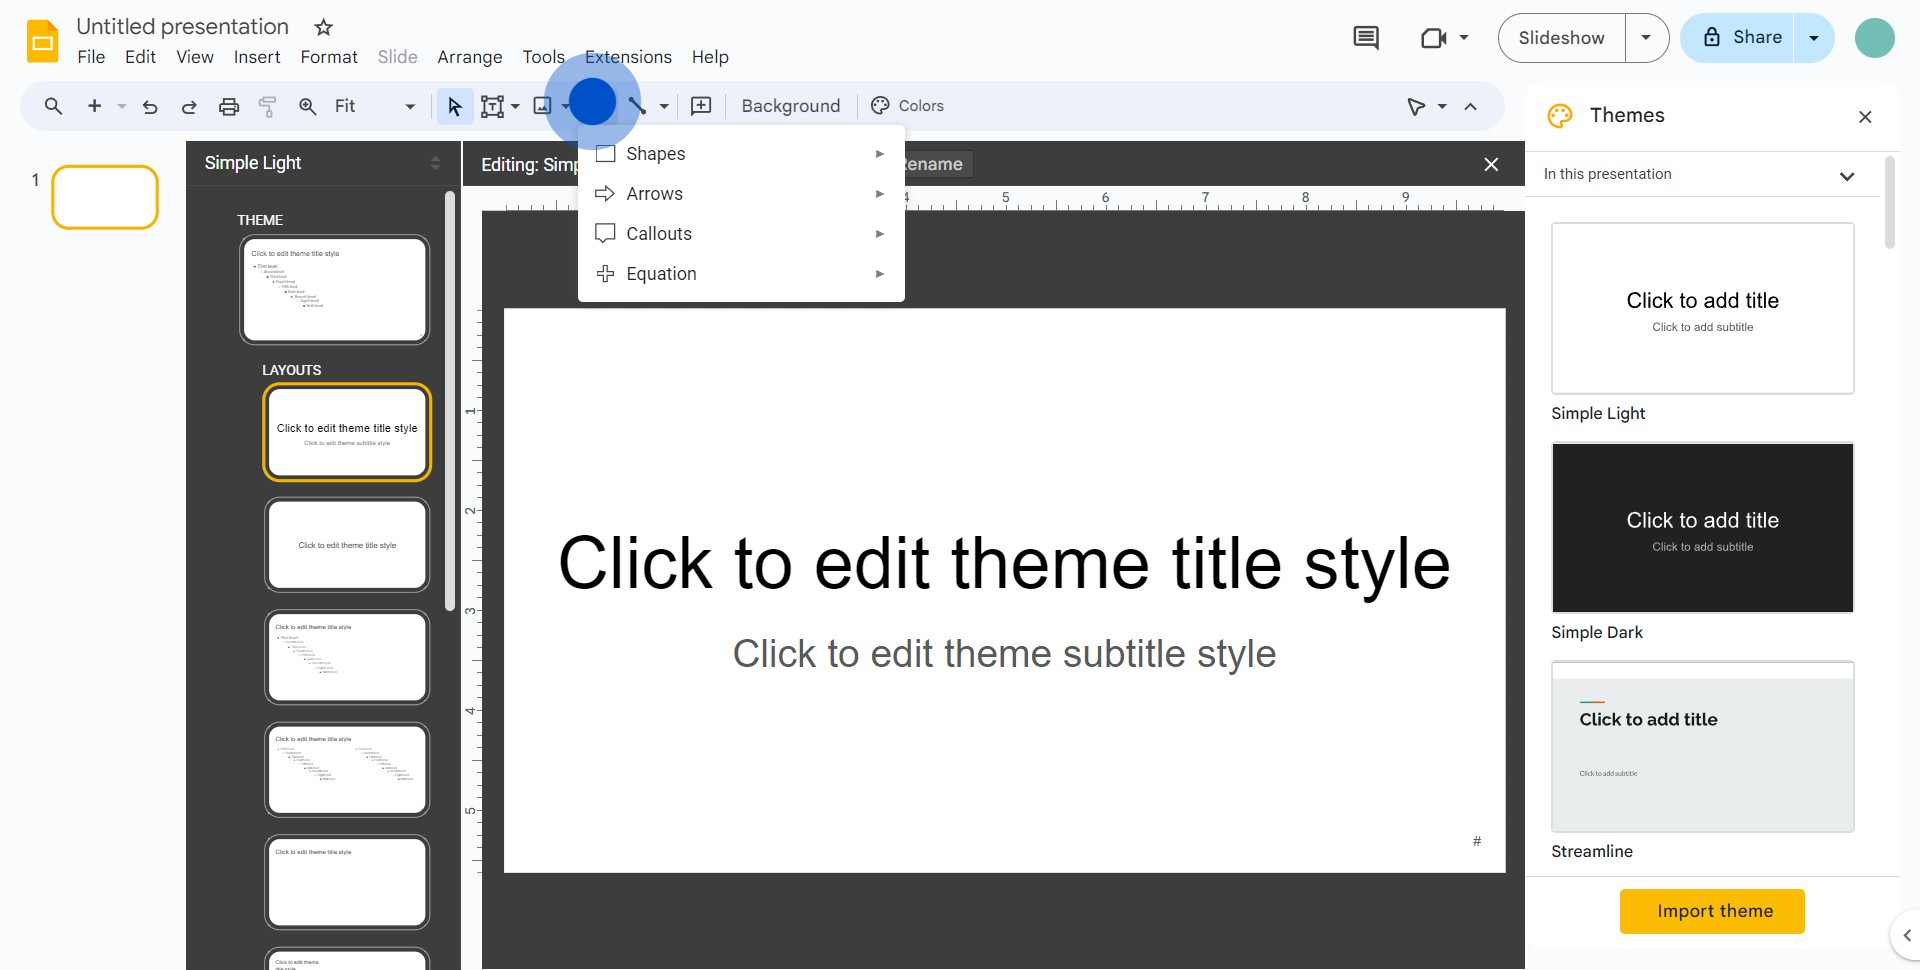
6. Consequently, find 'Shapes' and click on it.
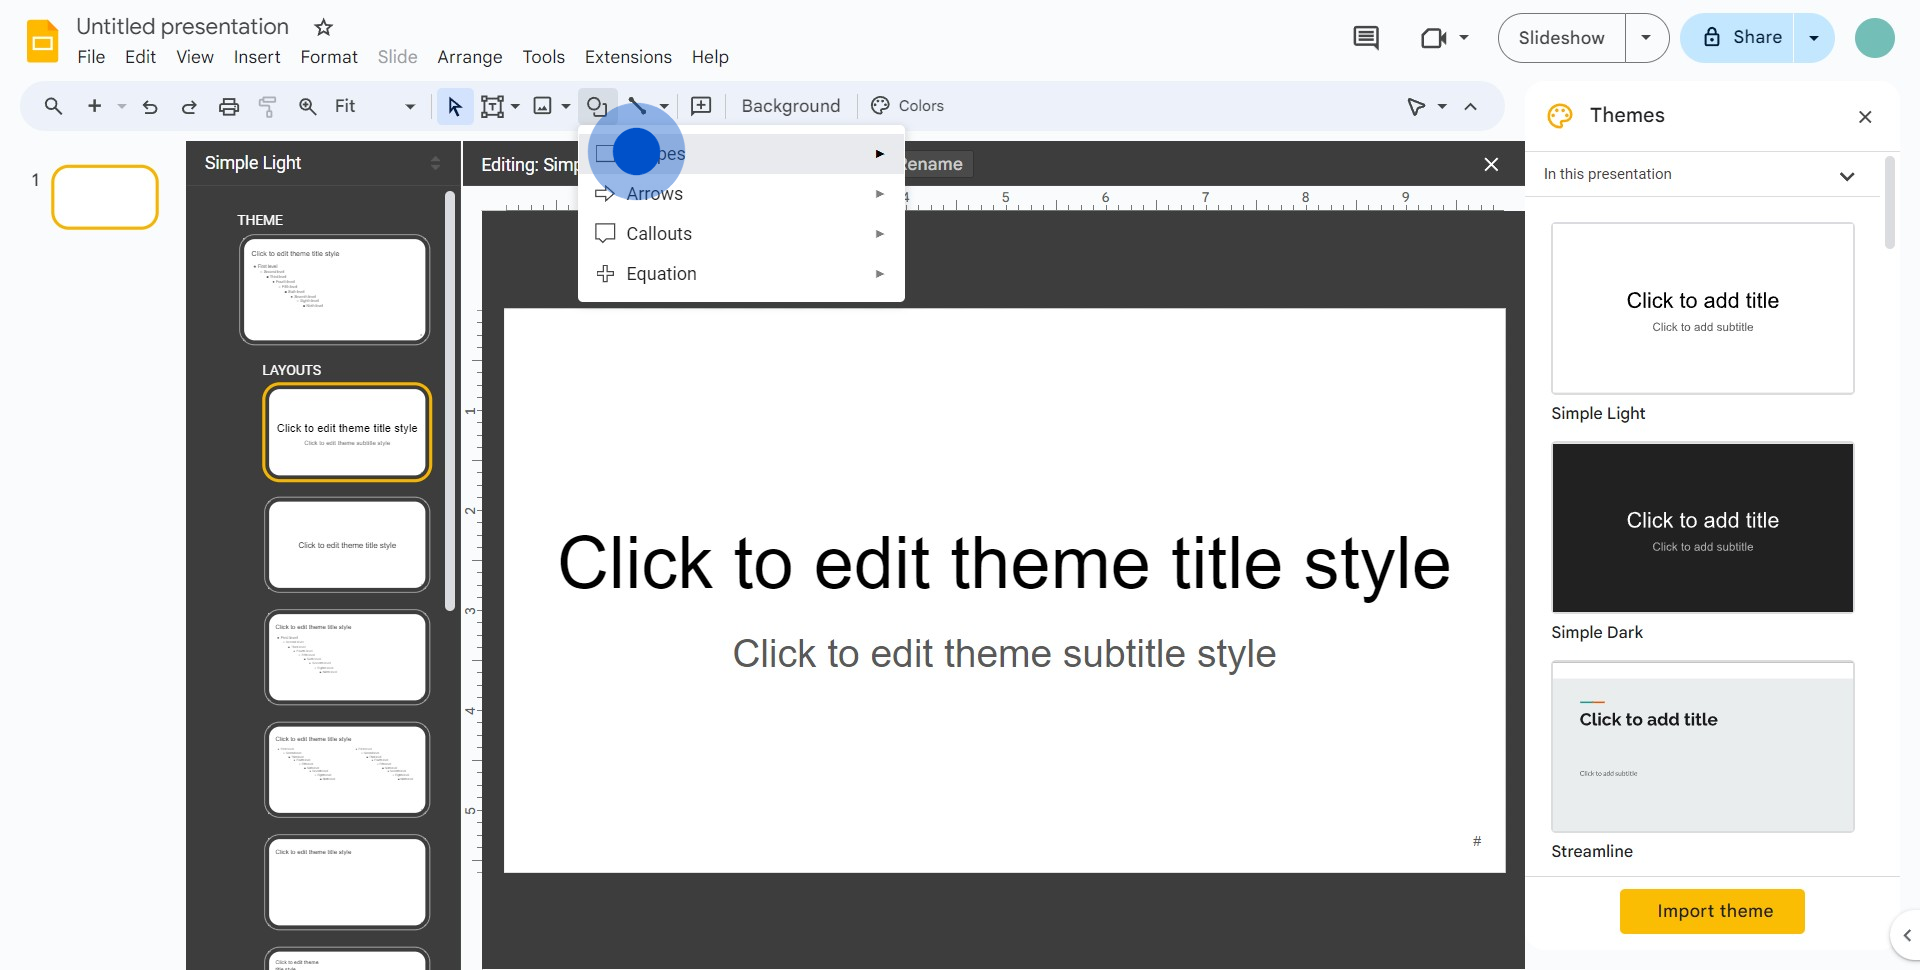
7. Select the shape you want for your Header.
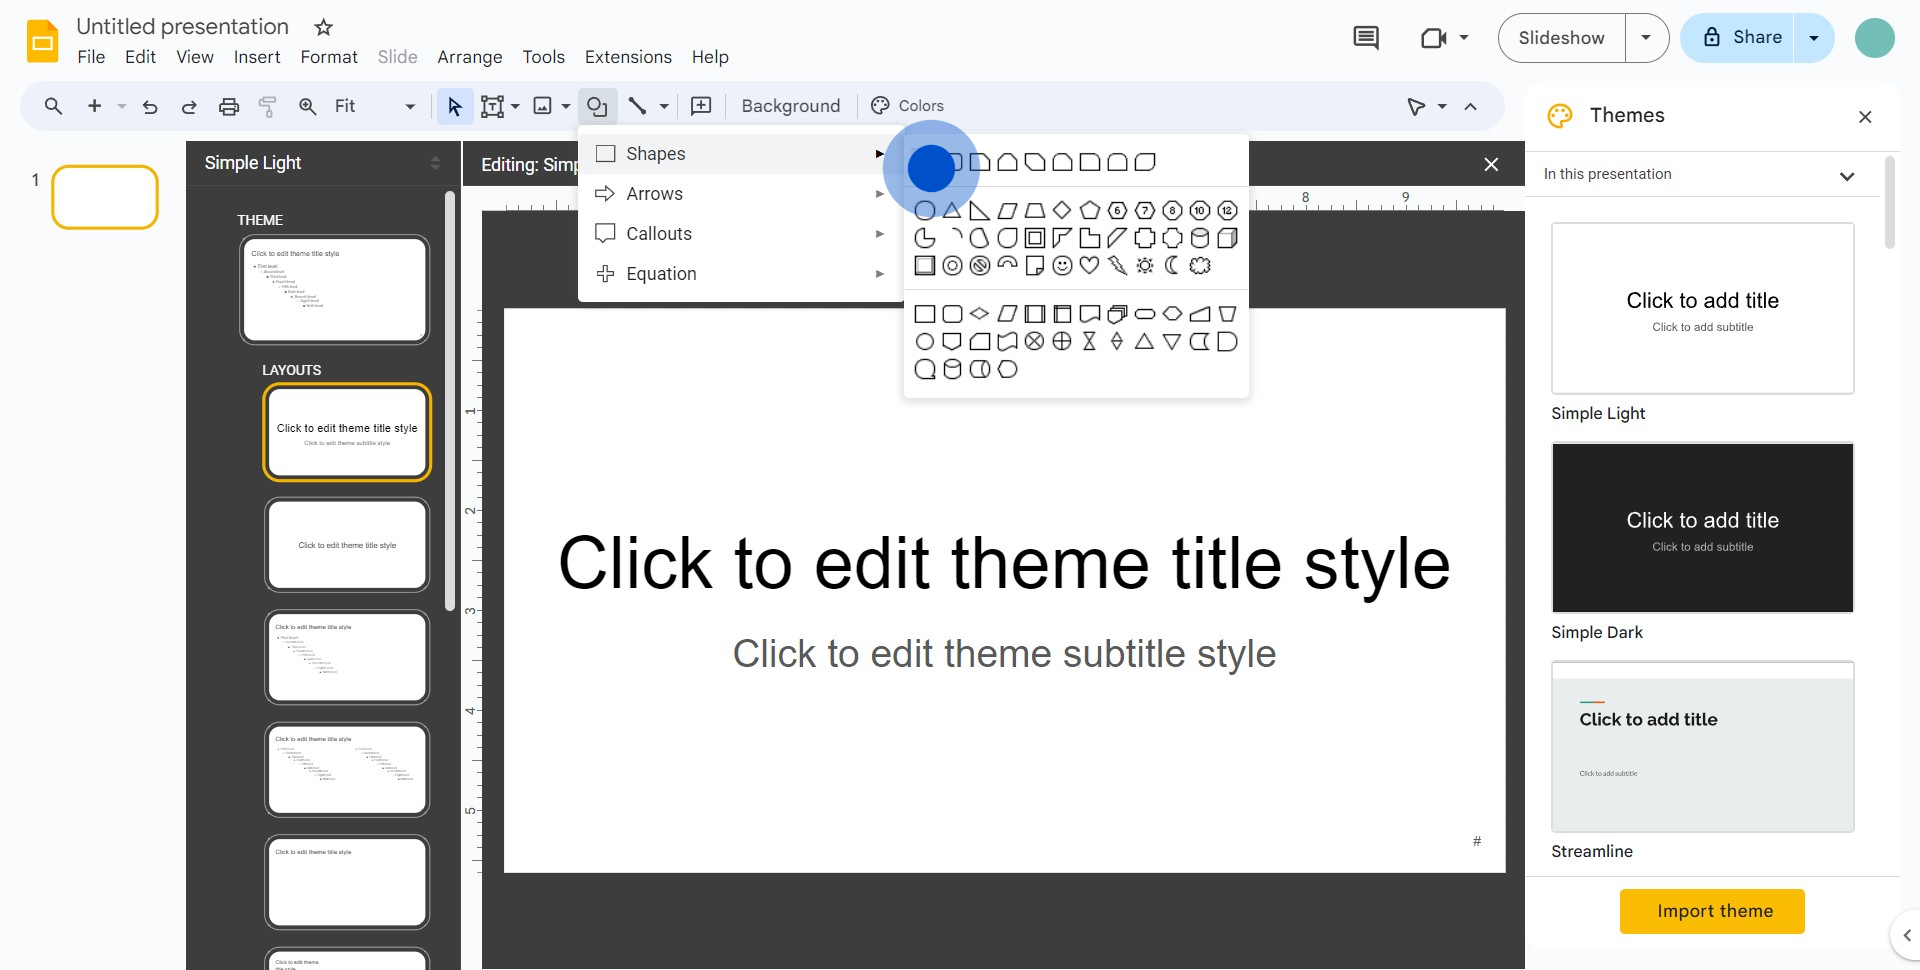
8. In the following step, adjust the shape to fit as your header.
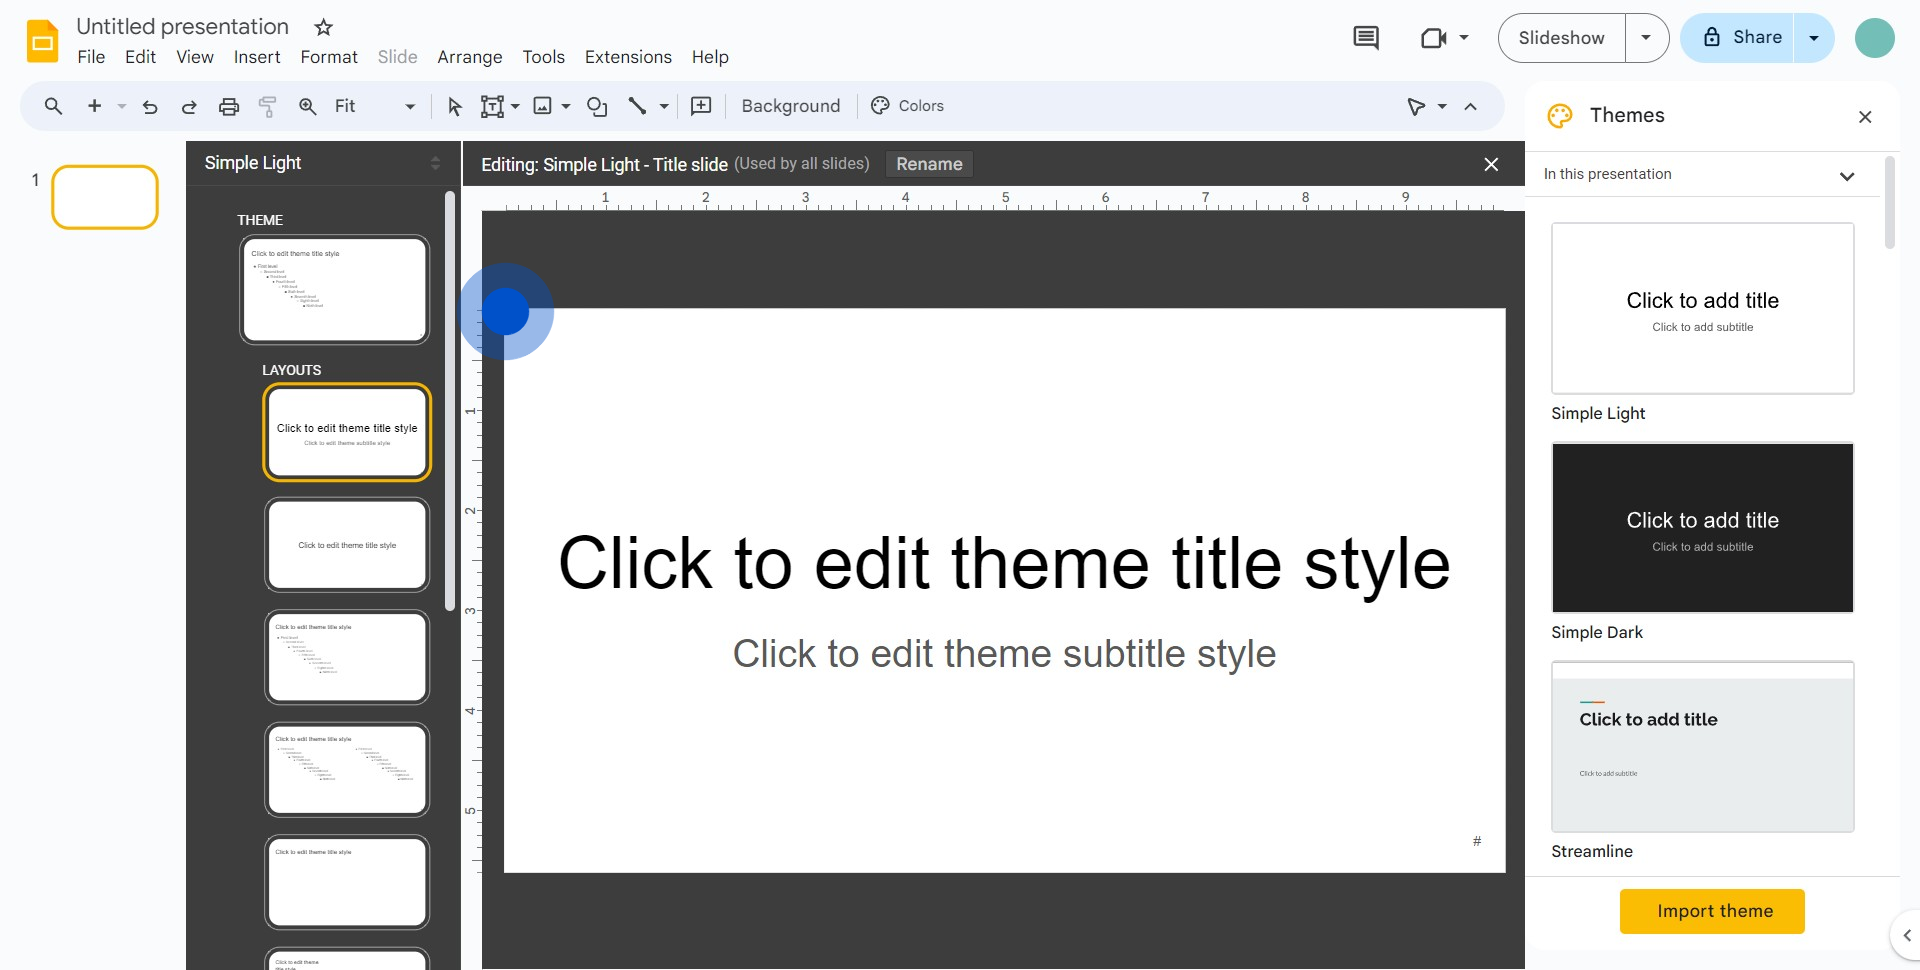
9. Now, open the color gradient box.
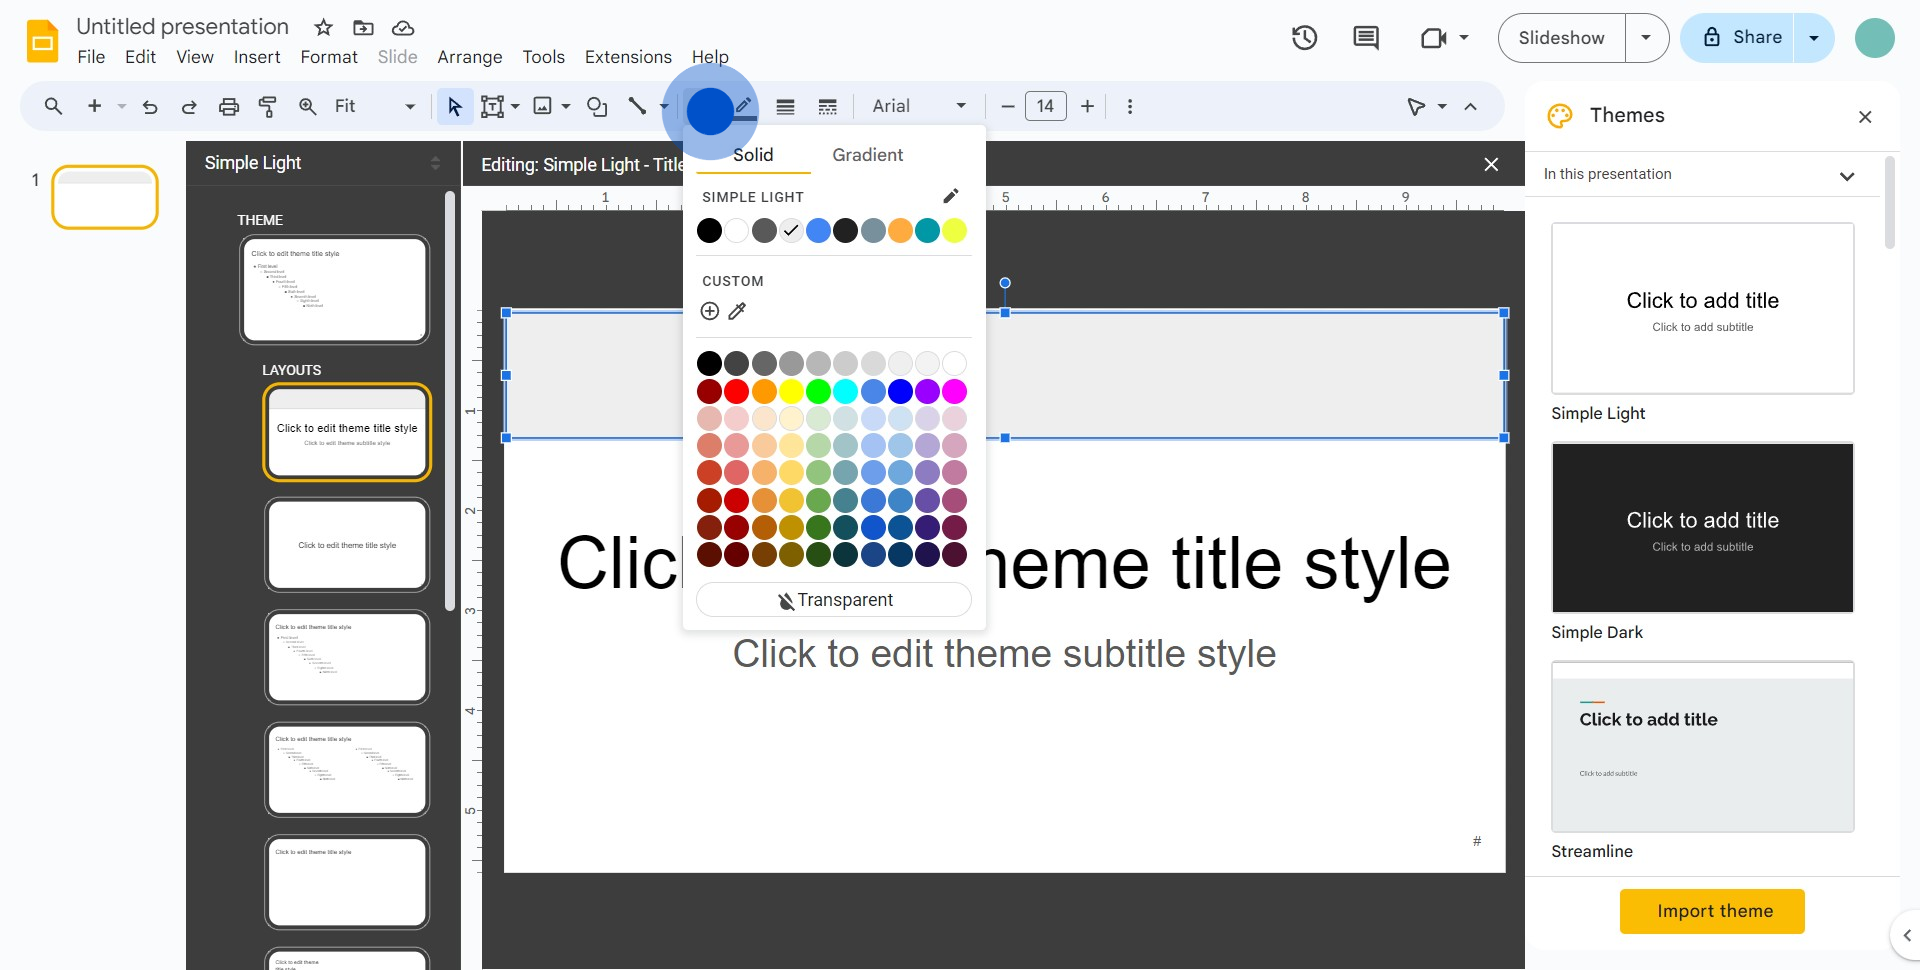
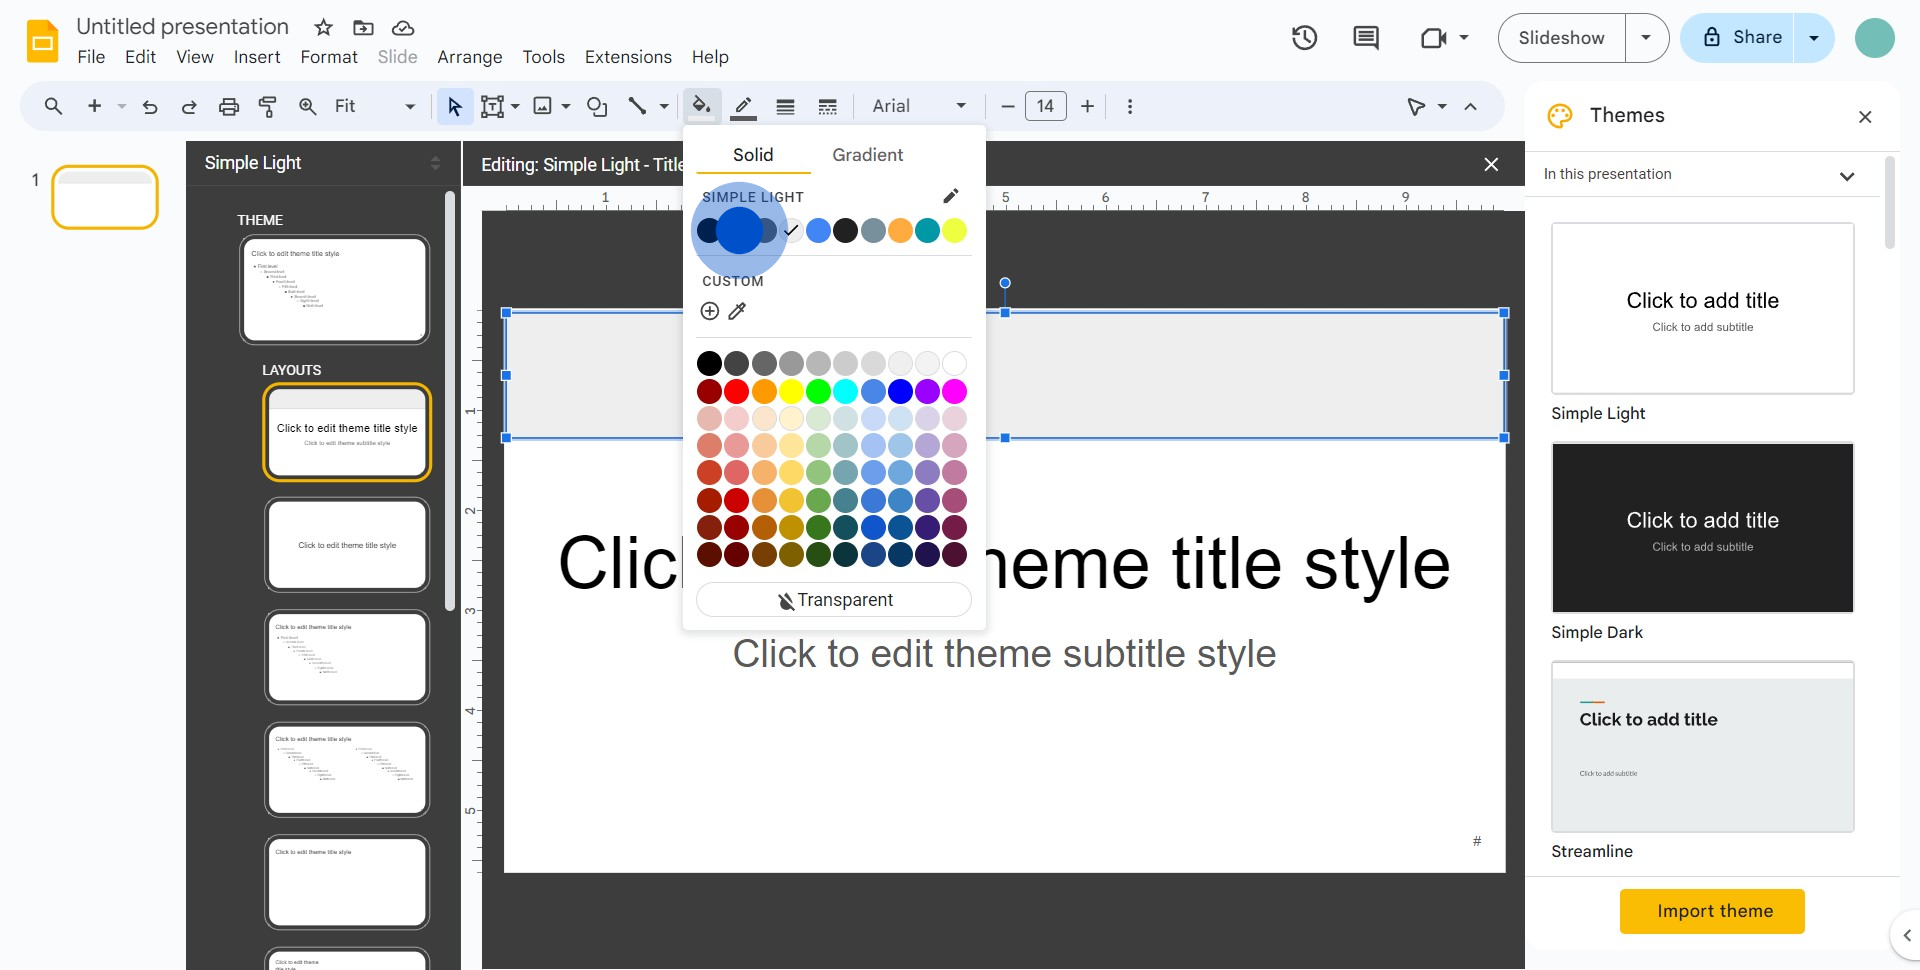
10. Then, pick the 'Transparent' color for the shape.
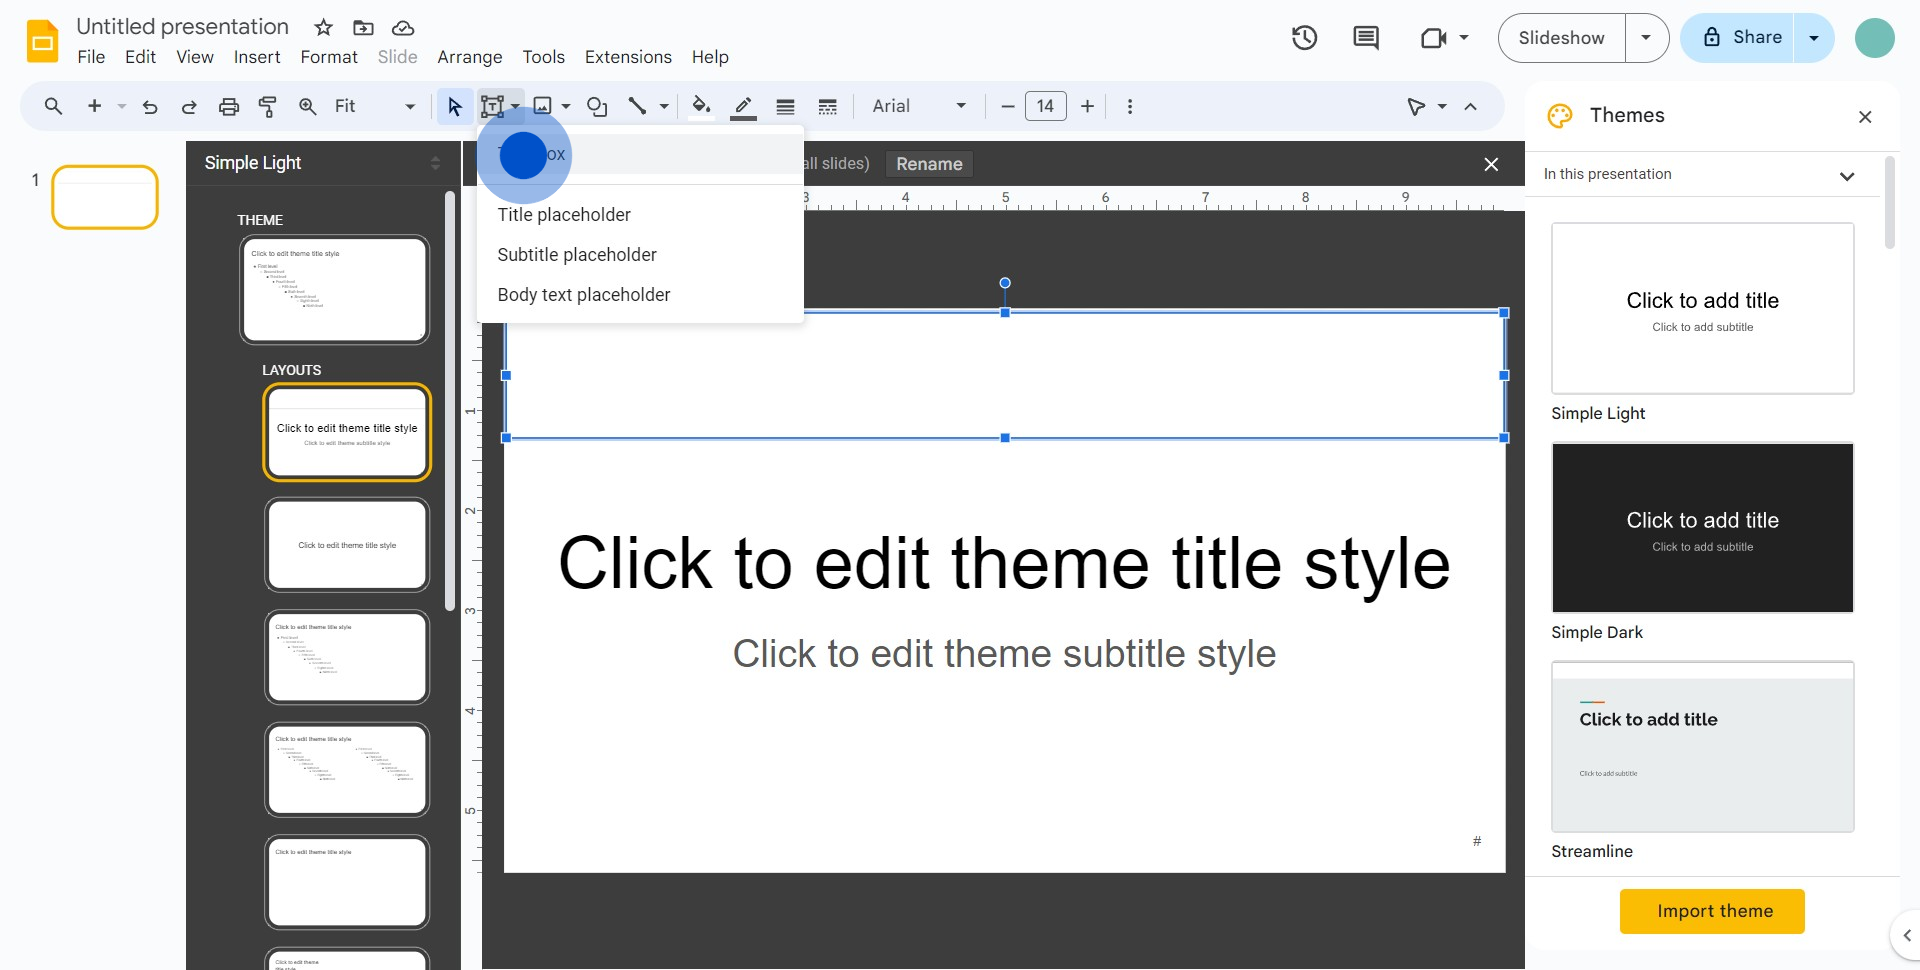
11. Click on the text icon next
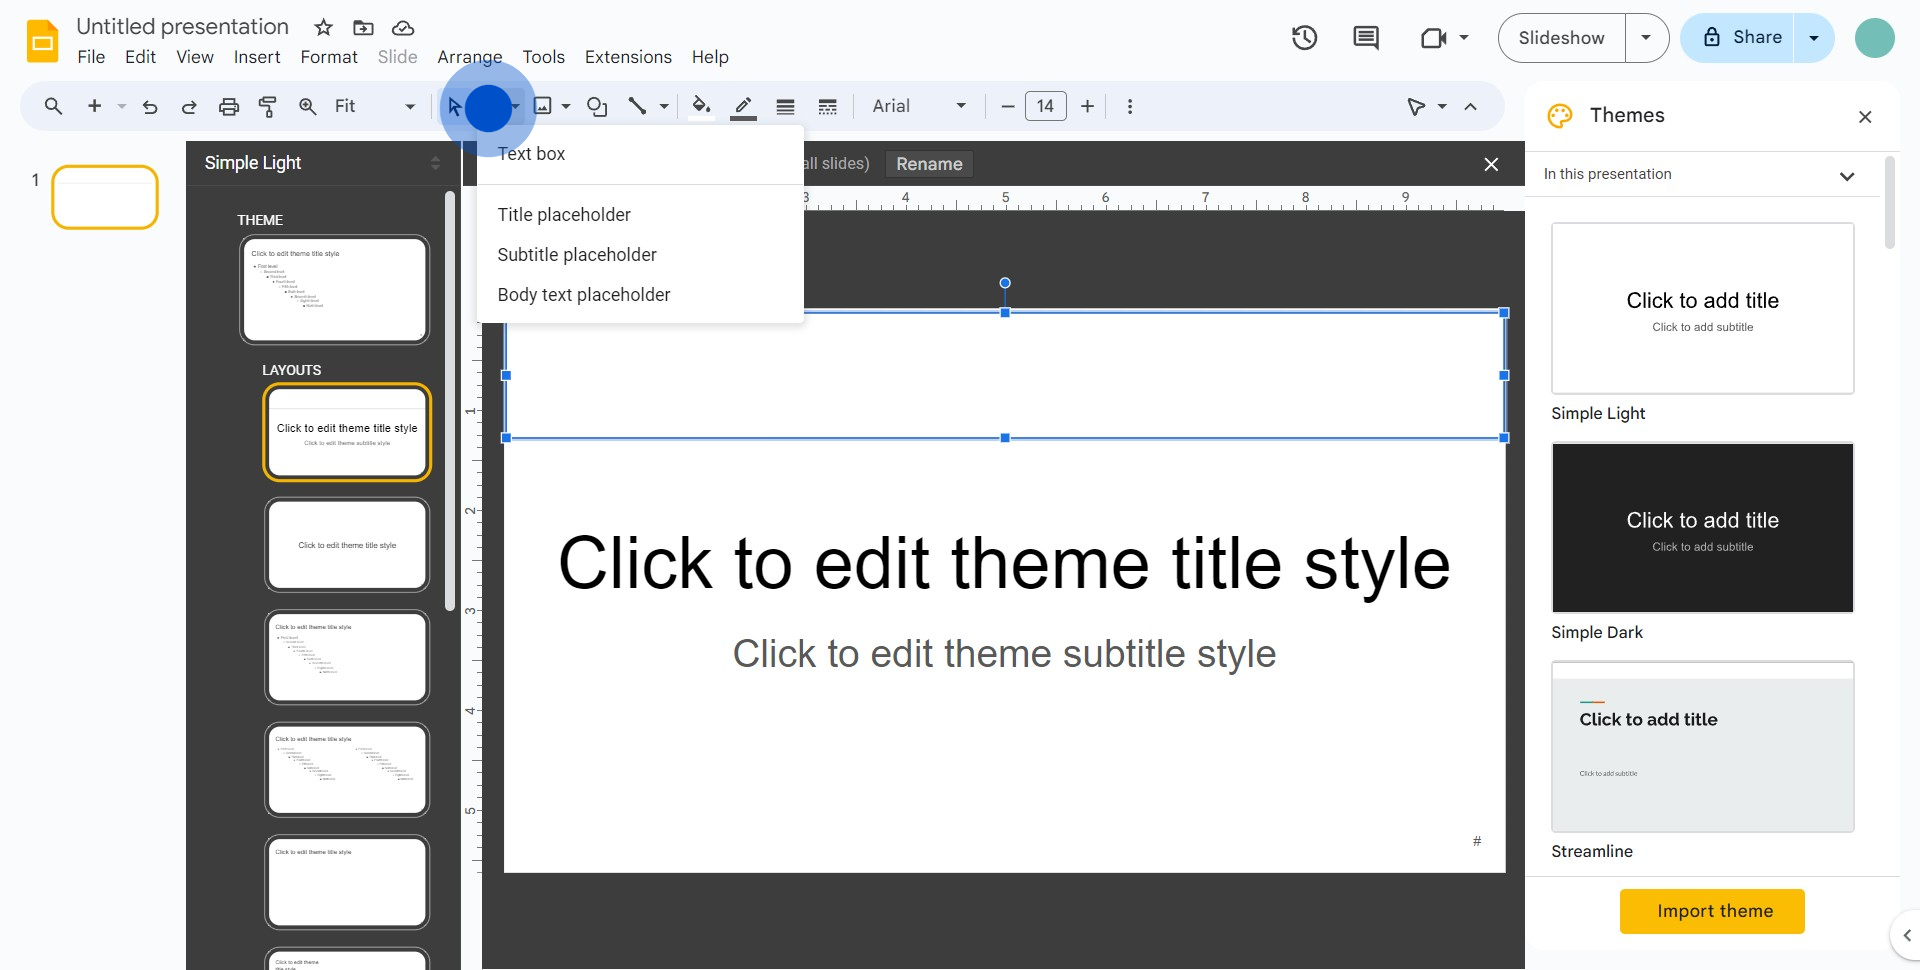
12. Lastly, select 'Text box' and start creating your Header.
Common FAQs on Google Slides
How do I create a new presentation in Google Slides?
To create a new presentation, go to Google Slides and click on the “Blank” option or choose a template from the template gallery. You can also start a new presentation from Google Drive by clicking the “+ New” button and selecting “Google Slides” from the dropdown menu.
Can I collaborate with others on a Google Slides presentation?
Yes, Google Slides allows real-time collaboration. To invite others, open your presentation and click the “Share” button in the upper-right corner. Enter the email addresses of the people you want to collaborate with or generate a shareable link. You can set permissions to let them view, comment, or edit the presentation.
How do I add animations and transitions in Google Slides?
To add animations and transitions, select the slide or object you want to animate. Click on “Insert” in the menu and choose “Animation” for objects or “Slide transition” for slide transitions. Customize the animation or transition effects according to your preferences, such as duration and start options.
Create your own step-by-step demo
Scale up your training and product adoption with beautiful AI-powered interactive demos and guides. Create your first Supademo in seconds for free.


