Overview:
Simplify your Miro collaboration with the Guide on How to Hide Frames. Streamline your workspace by organizing and concealing frames for a cleaner interface. Enhance user experience and facilitate focused collaboration by following this straightforward guide, providing you with a seamless process to hide frames in Miro. Optimize your workflow and improve clarity within the Miro platform for more efficient project management.
Who is Miro best suited for?
Miro is best suited for a wide range of professionals, including UX/UI Designers, Product Managers, and Remote Teams. For example, UX/UI Designers can use Miro for wireframing and prototyping, Product Managers can leverage it for brainstorming sessions and planning product roadmaps, and Remote Teams can use it for virtual whiteboarding and collaborative meetings, all benefiting from Miro’s interactive and visual collaboration platform.
How to hide frames in Miro
1. Start by selecting your preferred working frame.
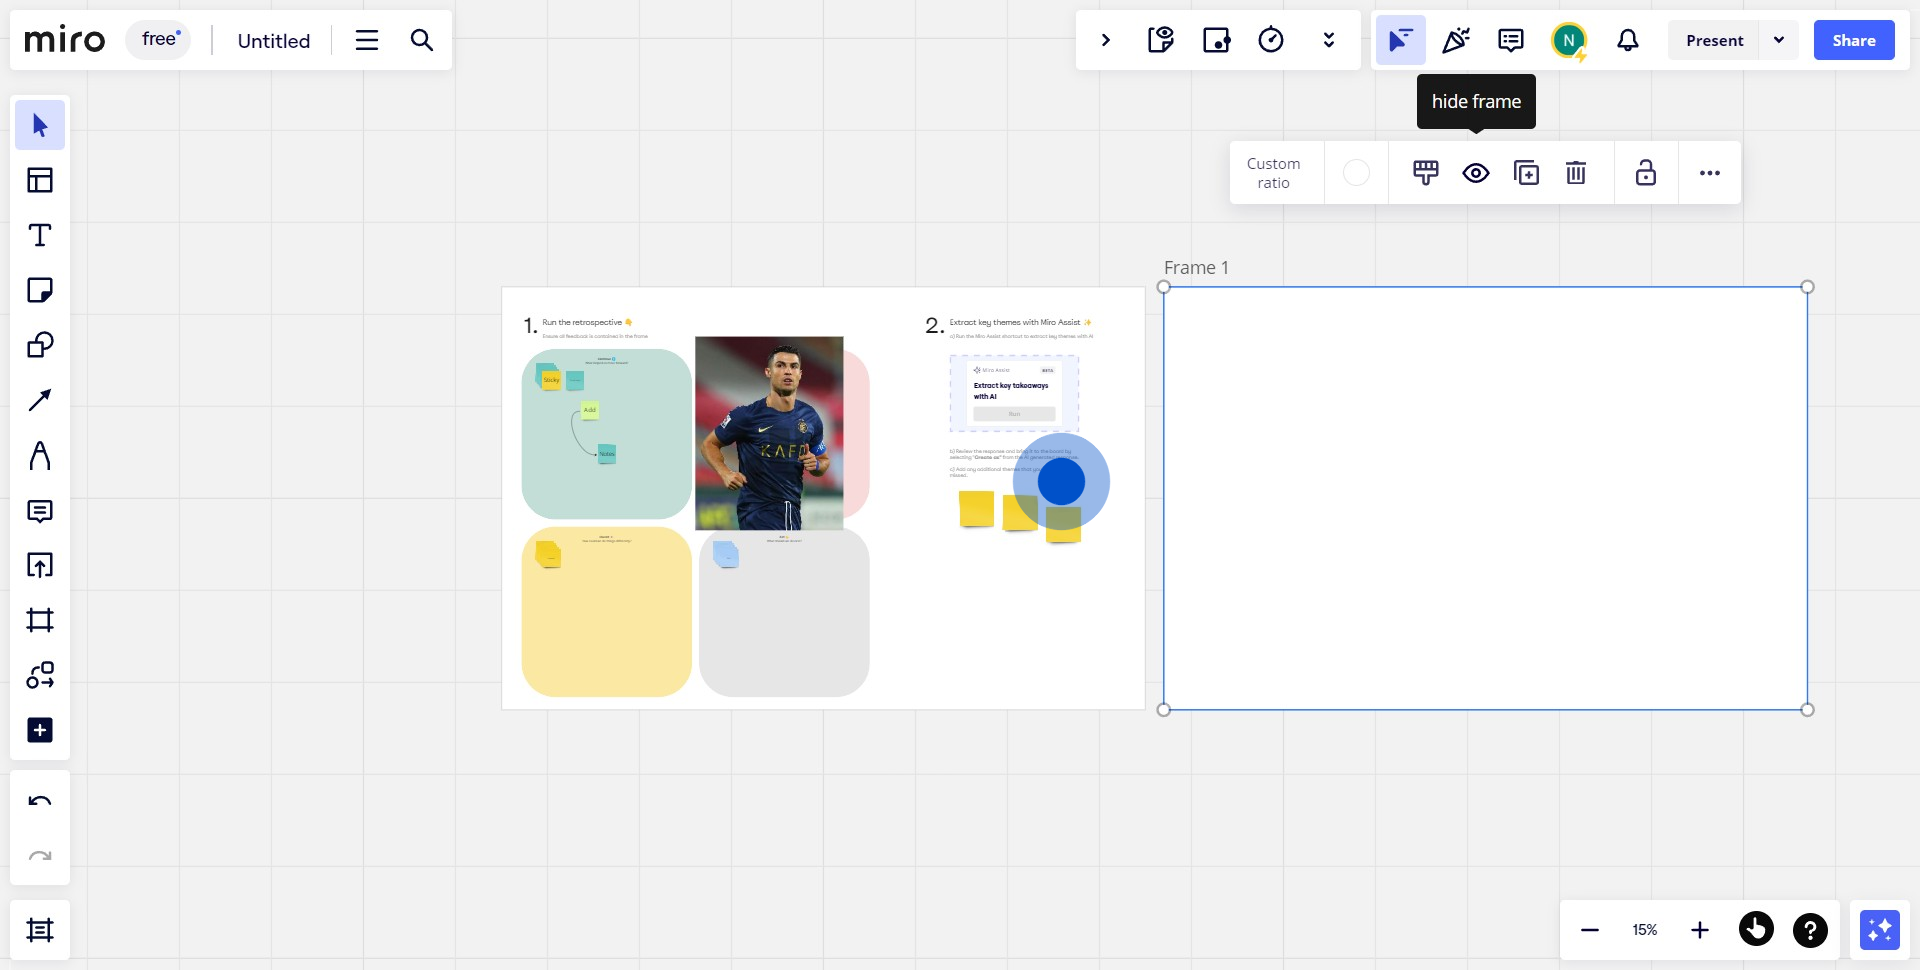
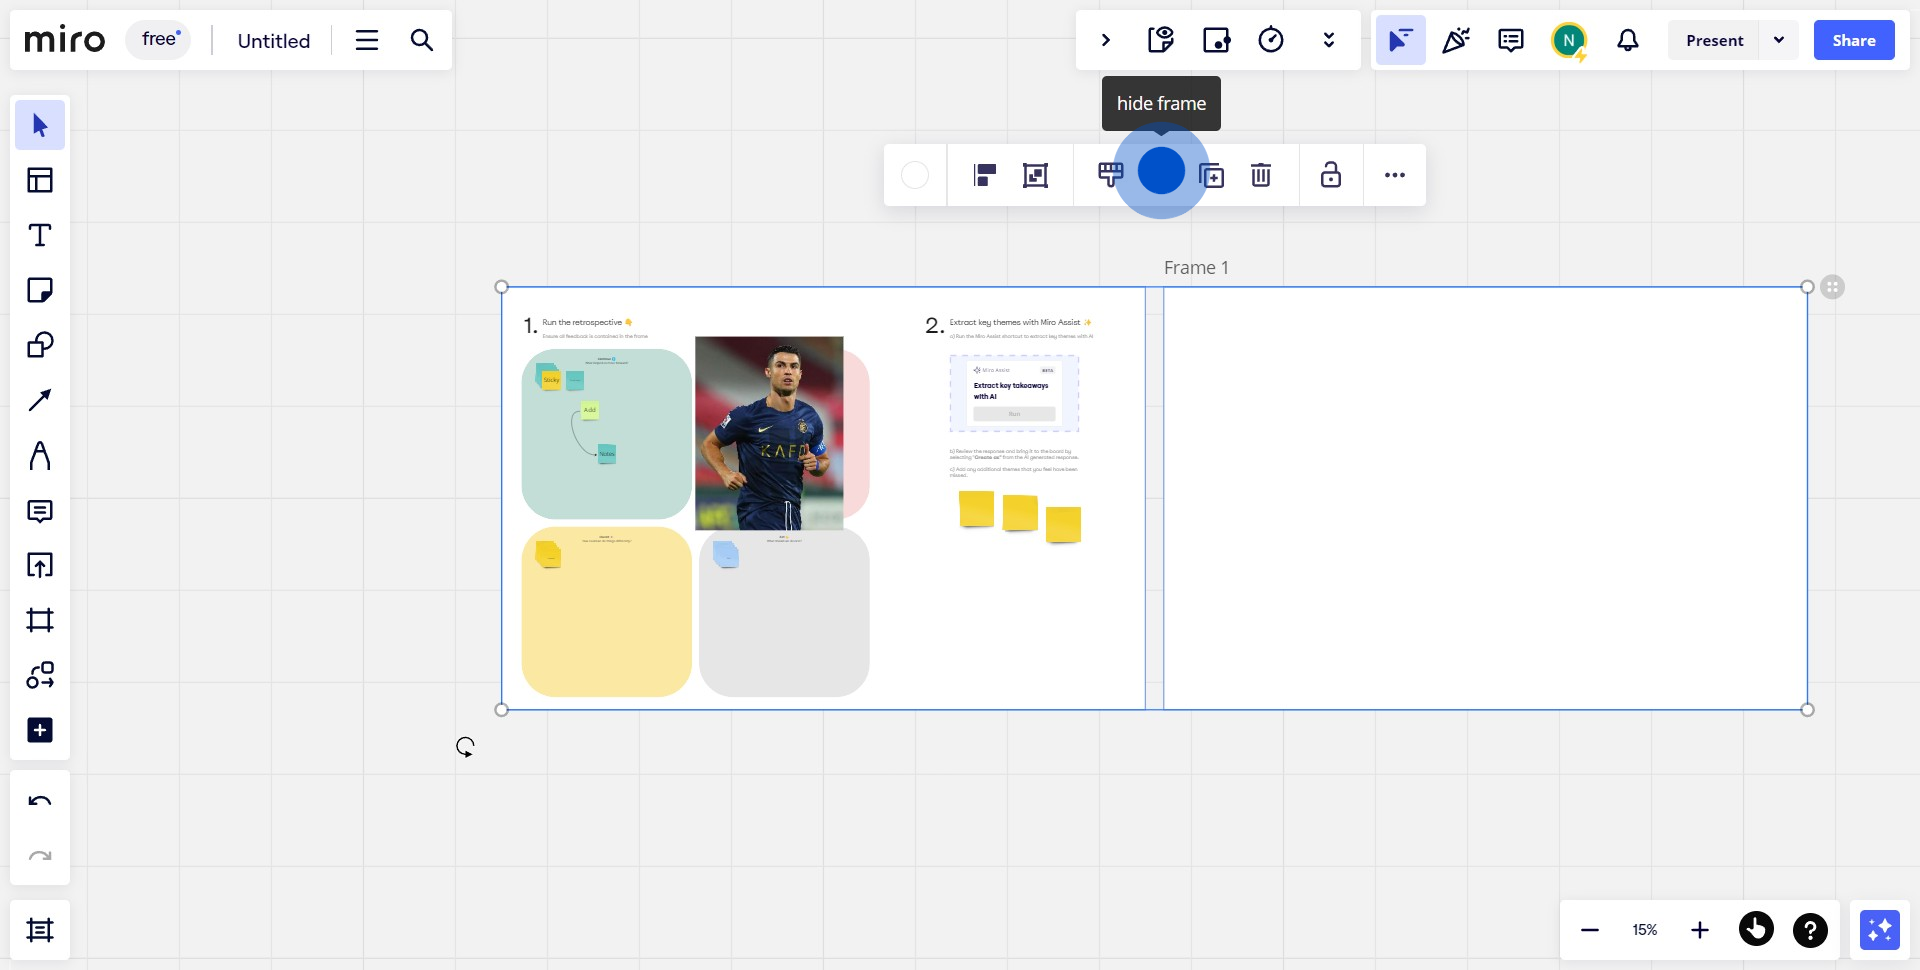
2. Next, click the designated icon to hide the frame.
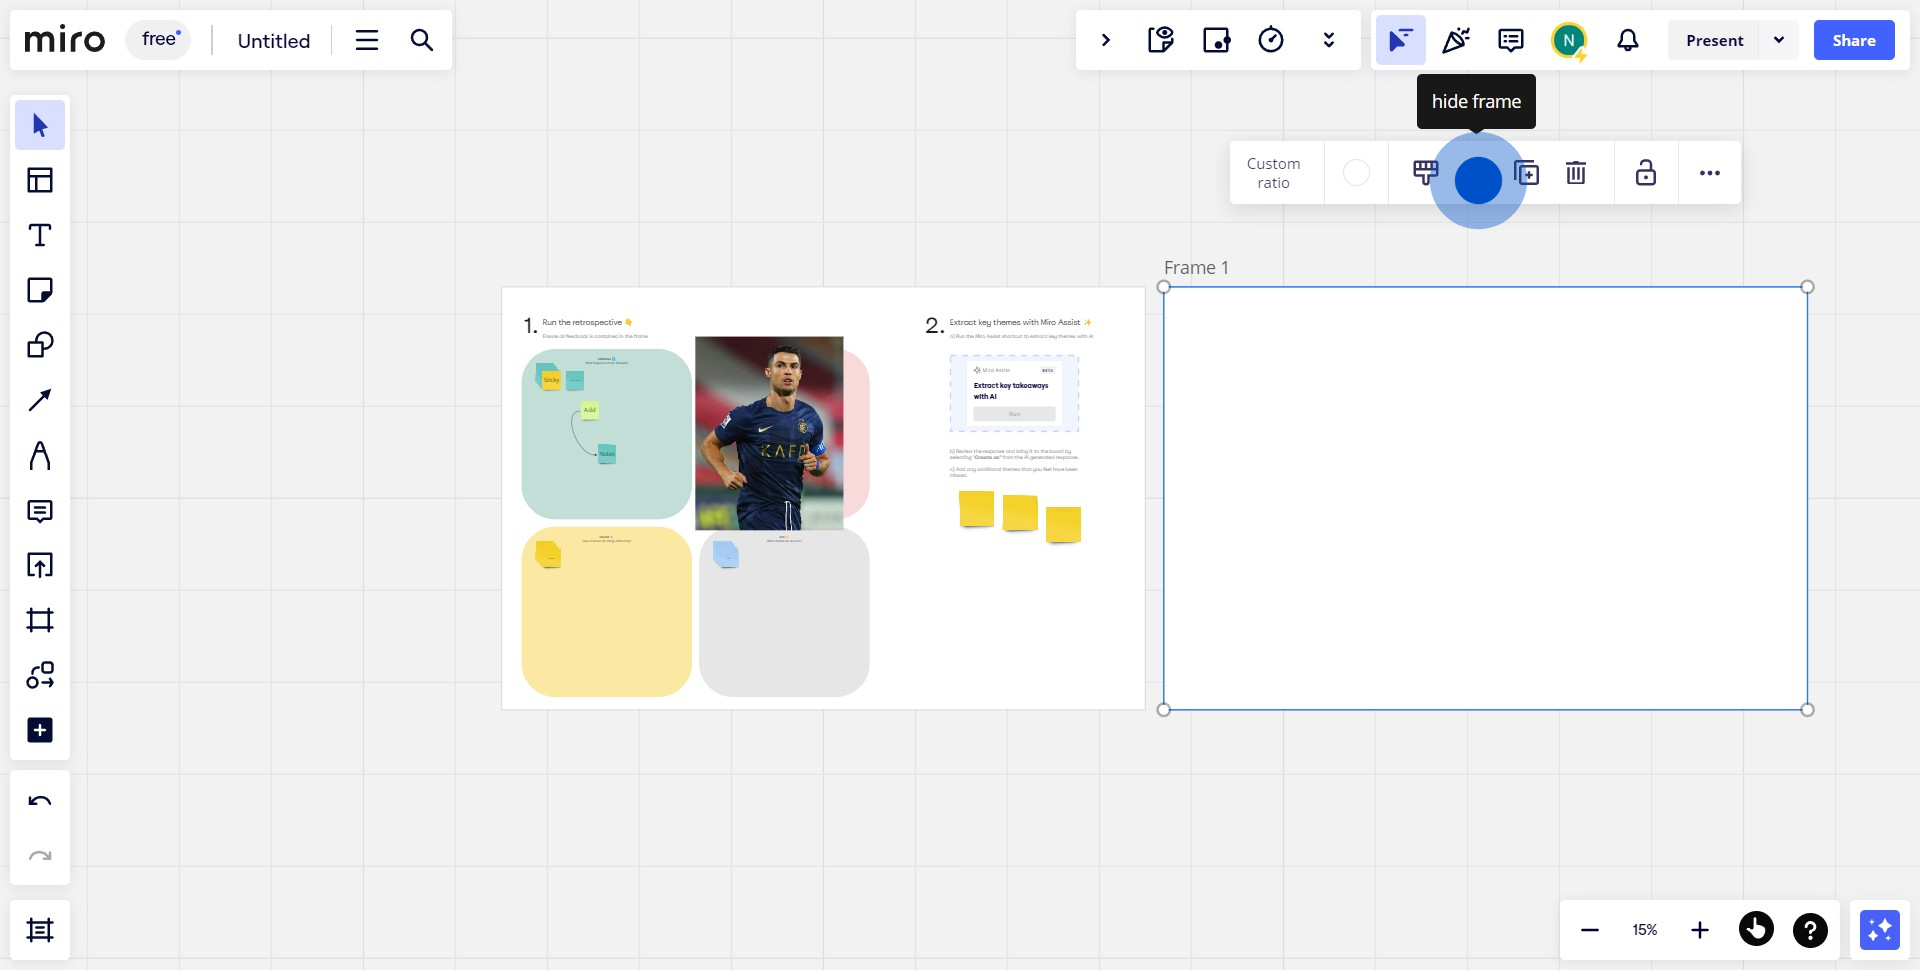
3. For hiding multiple frames, make sure to select all the desired frames.
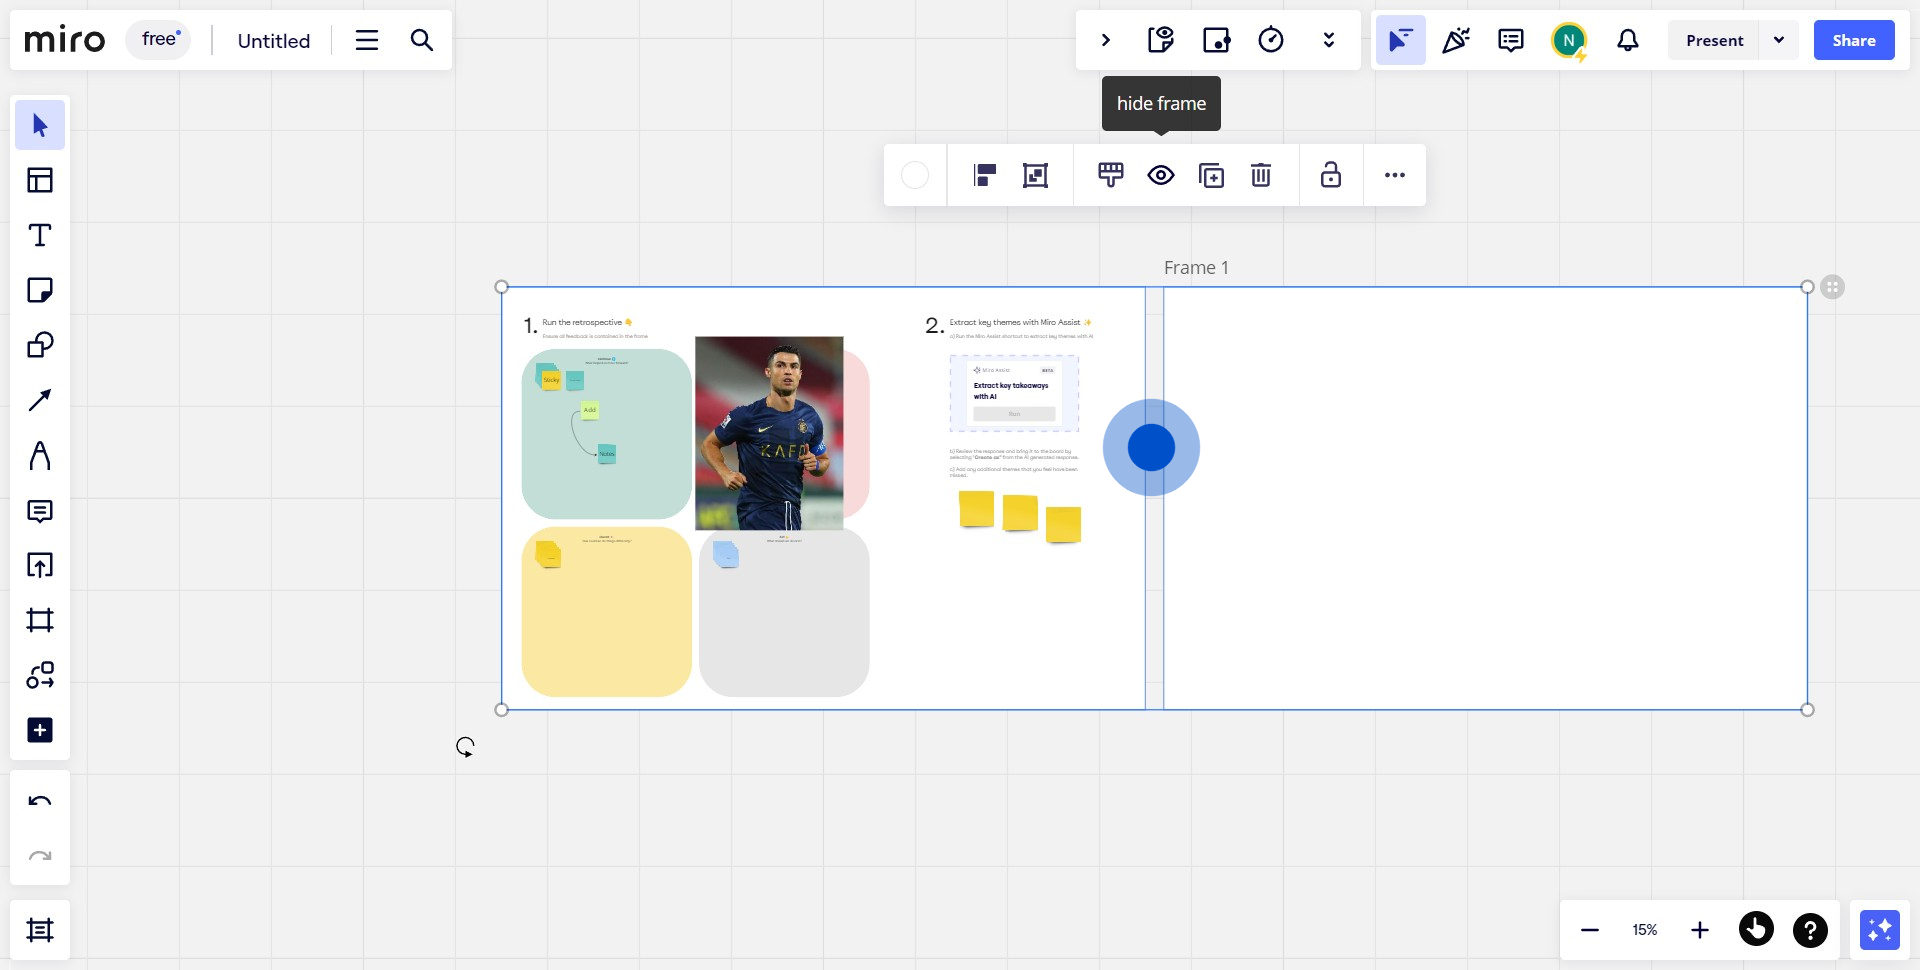
4. Finally, click on the indicated icon to finalize hiding.
Common FAQs on Miro
Commonly asked questions about this topic.
How do I create and share a Miro board for collaboration?
To create a new Miro board, log in to your account and click the “+ New Board” button from your dashboard. You can start with a blank canvas or select a pre-made template that suits your project, such as brainstorming, agile workflows, or mind mapping. Once your board is set up, you can invite collaborators by clicking the “Share” button in the top-right corner. Enter their email addresses or generate a shareable link. You can adjust their access level by setting permissions such as “Viewer,” “Commenter,” or “Editor.” Miro supports real-time collaboration, so multiple users can edit, comment, and contribute simultaneously. This makes it an ideal tool for remote team collaboration on visual projects.
How do I use Miro’s templates to enhance my workflow?
Miro provides a variety of pre-built templates that can enhance your workflow by offering ready-made frameworks for specific tasks, such as brainstorming sessions, retrospective meetings, wireframes, and project planning. To access templates, click on the “Templates” button when you create a new board or open an existing one. Browse through the available categories or search for a specific template. Once you select a template, it will be added to your board, and you can begin customizing it to fit your team’s needs. Templates help streamline processes by providing structure, saving time, and ensuring that your team follows a standardized approach to different tasks.
How can I integrate Miro with other tools like Jira, Slack, or Google Drive?
Miro offers a wide range of integrations with popular tools like Jira, Slack, Google Drive, and others, which allow you to seamlessly connect Miro to your existing workflow. To integrate Miro with another tool, go to the “Apps & Integrations” section in the Miro dashboard. From there, select the tool you want to integrate and follow the setup instructions. For example, with the Jira integration, you can create Jira issues directly from Miro sticky notes, while the Slack integration allows you to receive notifications in Slack when someone comments or updates a Miro board. Integrations help streamline communication, task management, and file sharing across different platforms, making it easier to manage your projects and collaborate with your team.
Create your own step-by-step demo
Scale up your training and product adoption with beautiful AI-powered interactive demos and guides. Create your first Supademo in seconds for free.
Nithil Shanmugam
Nithil is a startup-obsessed operator focused on growth, sales and marketing. He's passionate about wearing different hats across startups to deliver real value.
