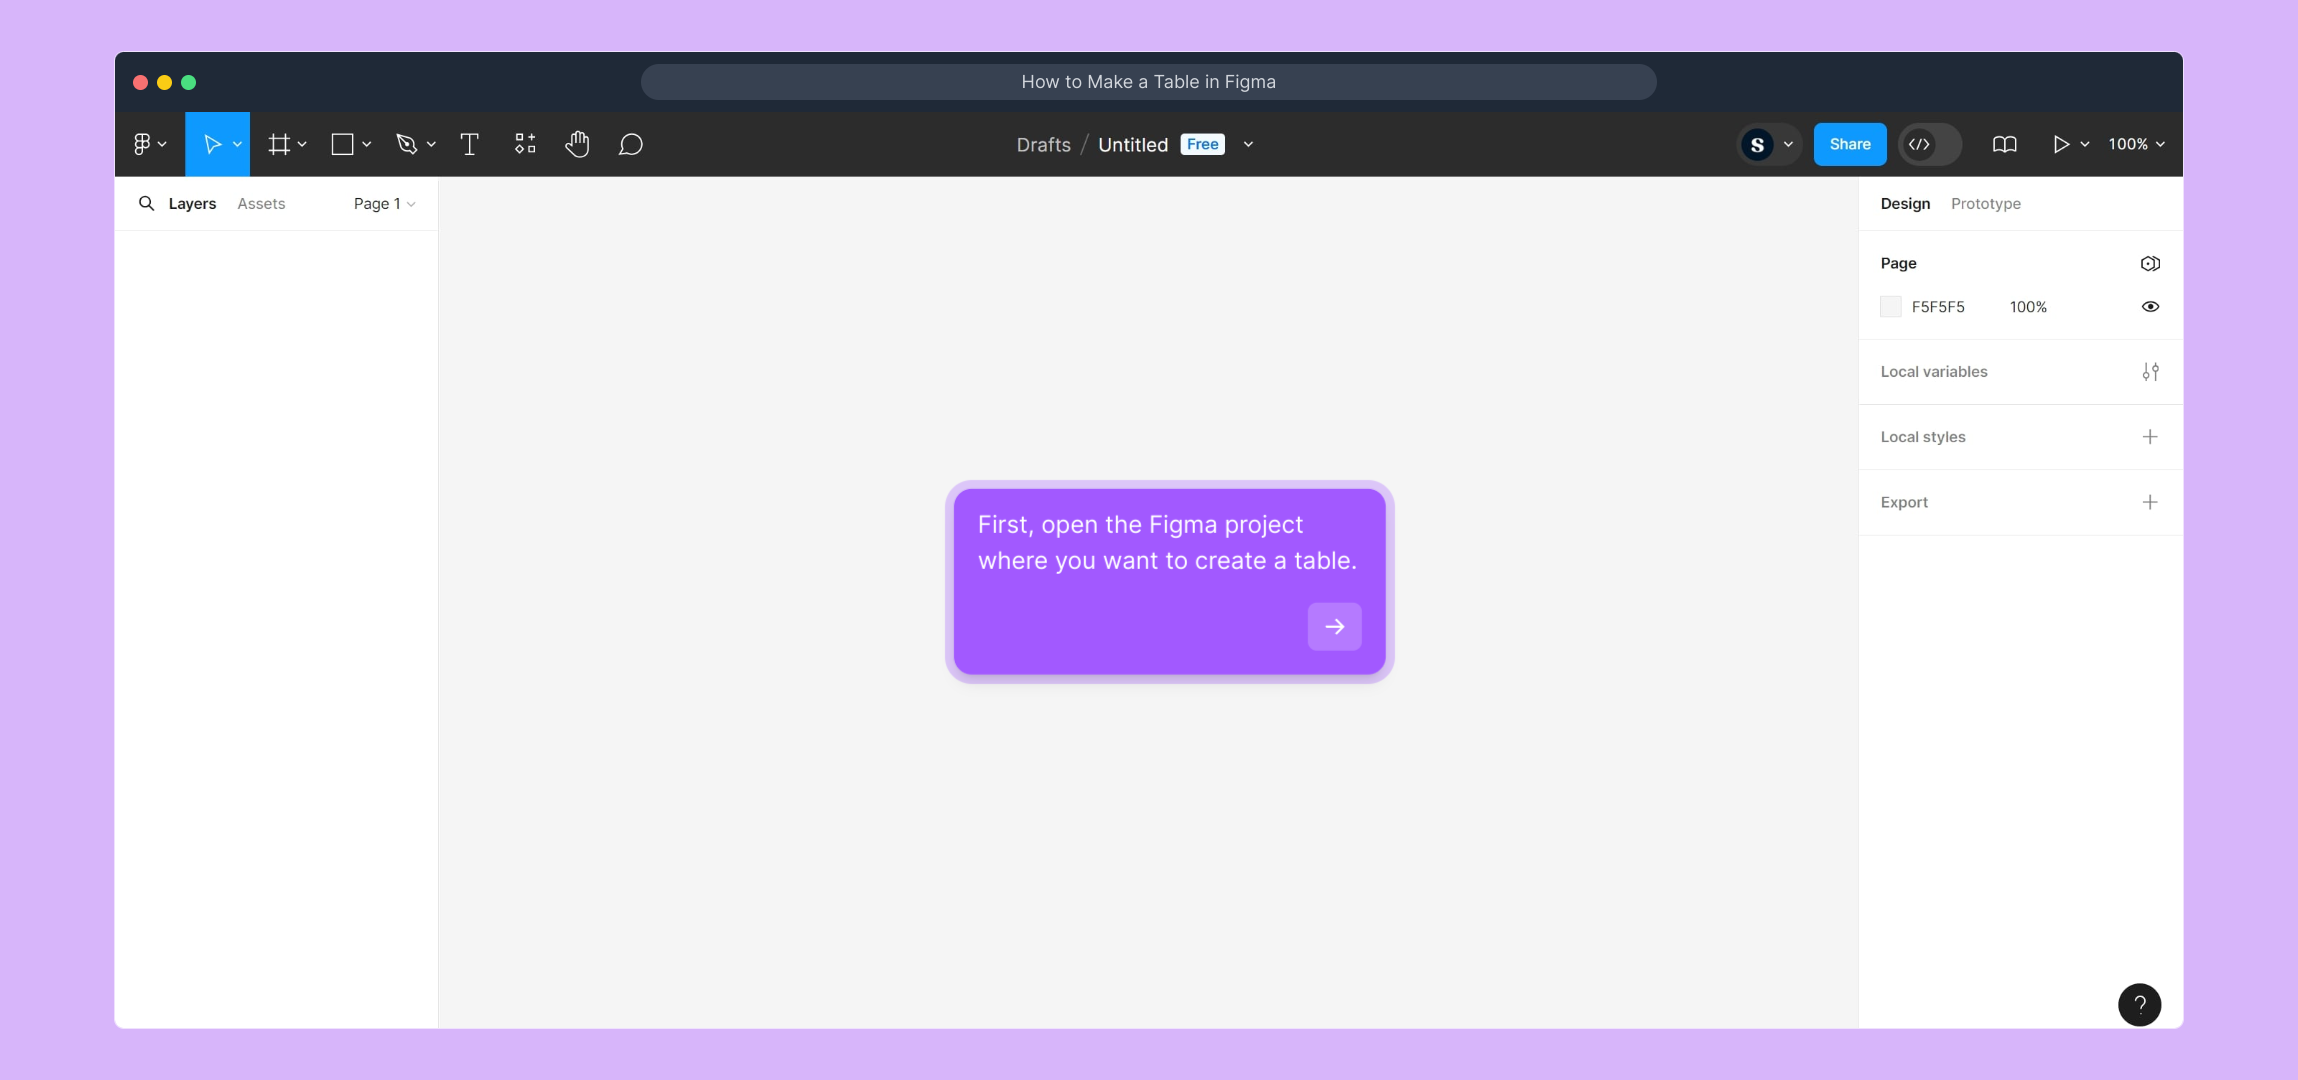
1. First, open the Figma project where you want to create a table.
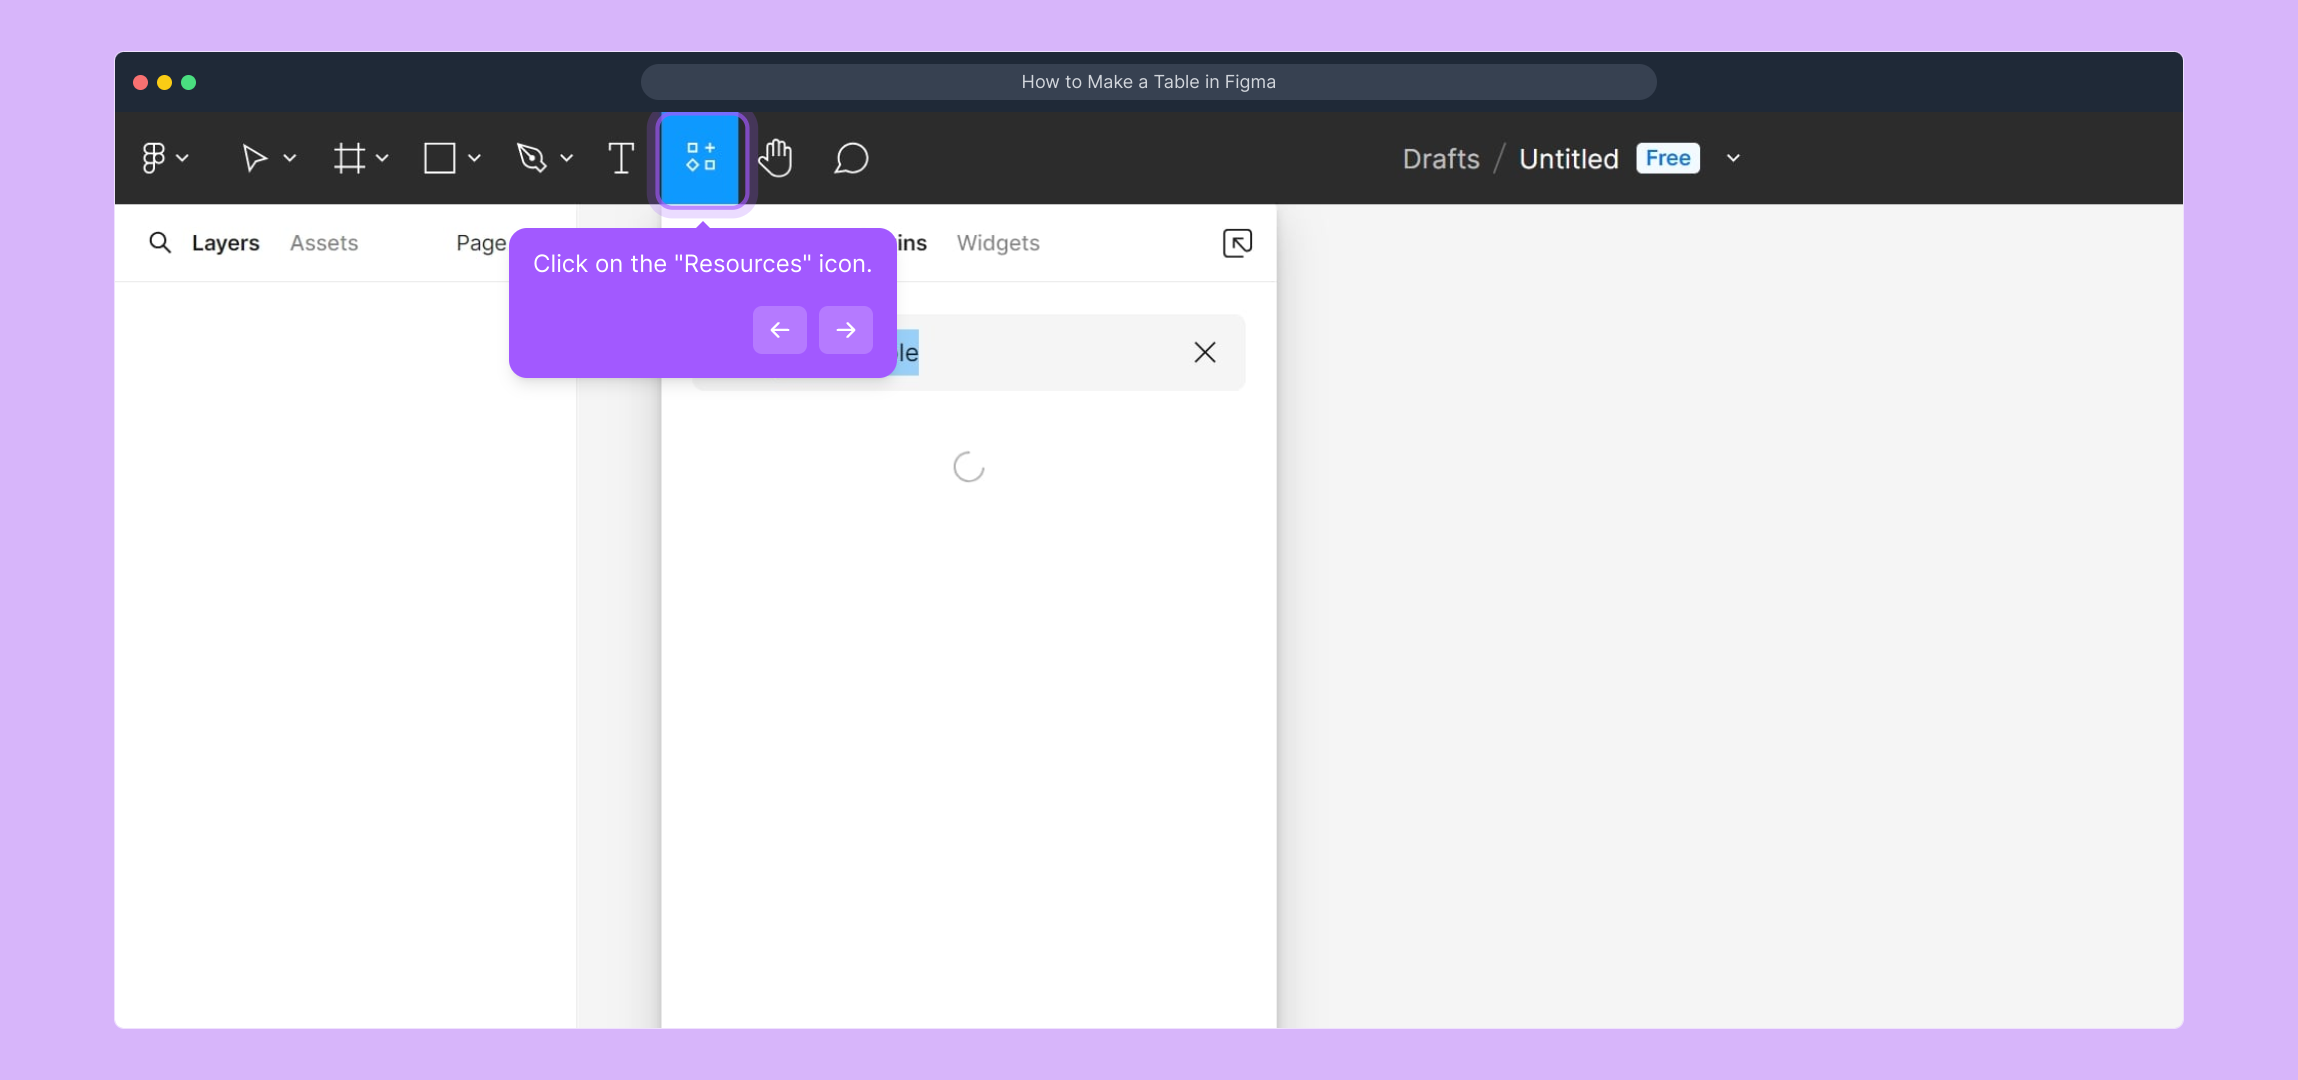
2. Click on the "Resources" icon.
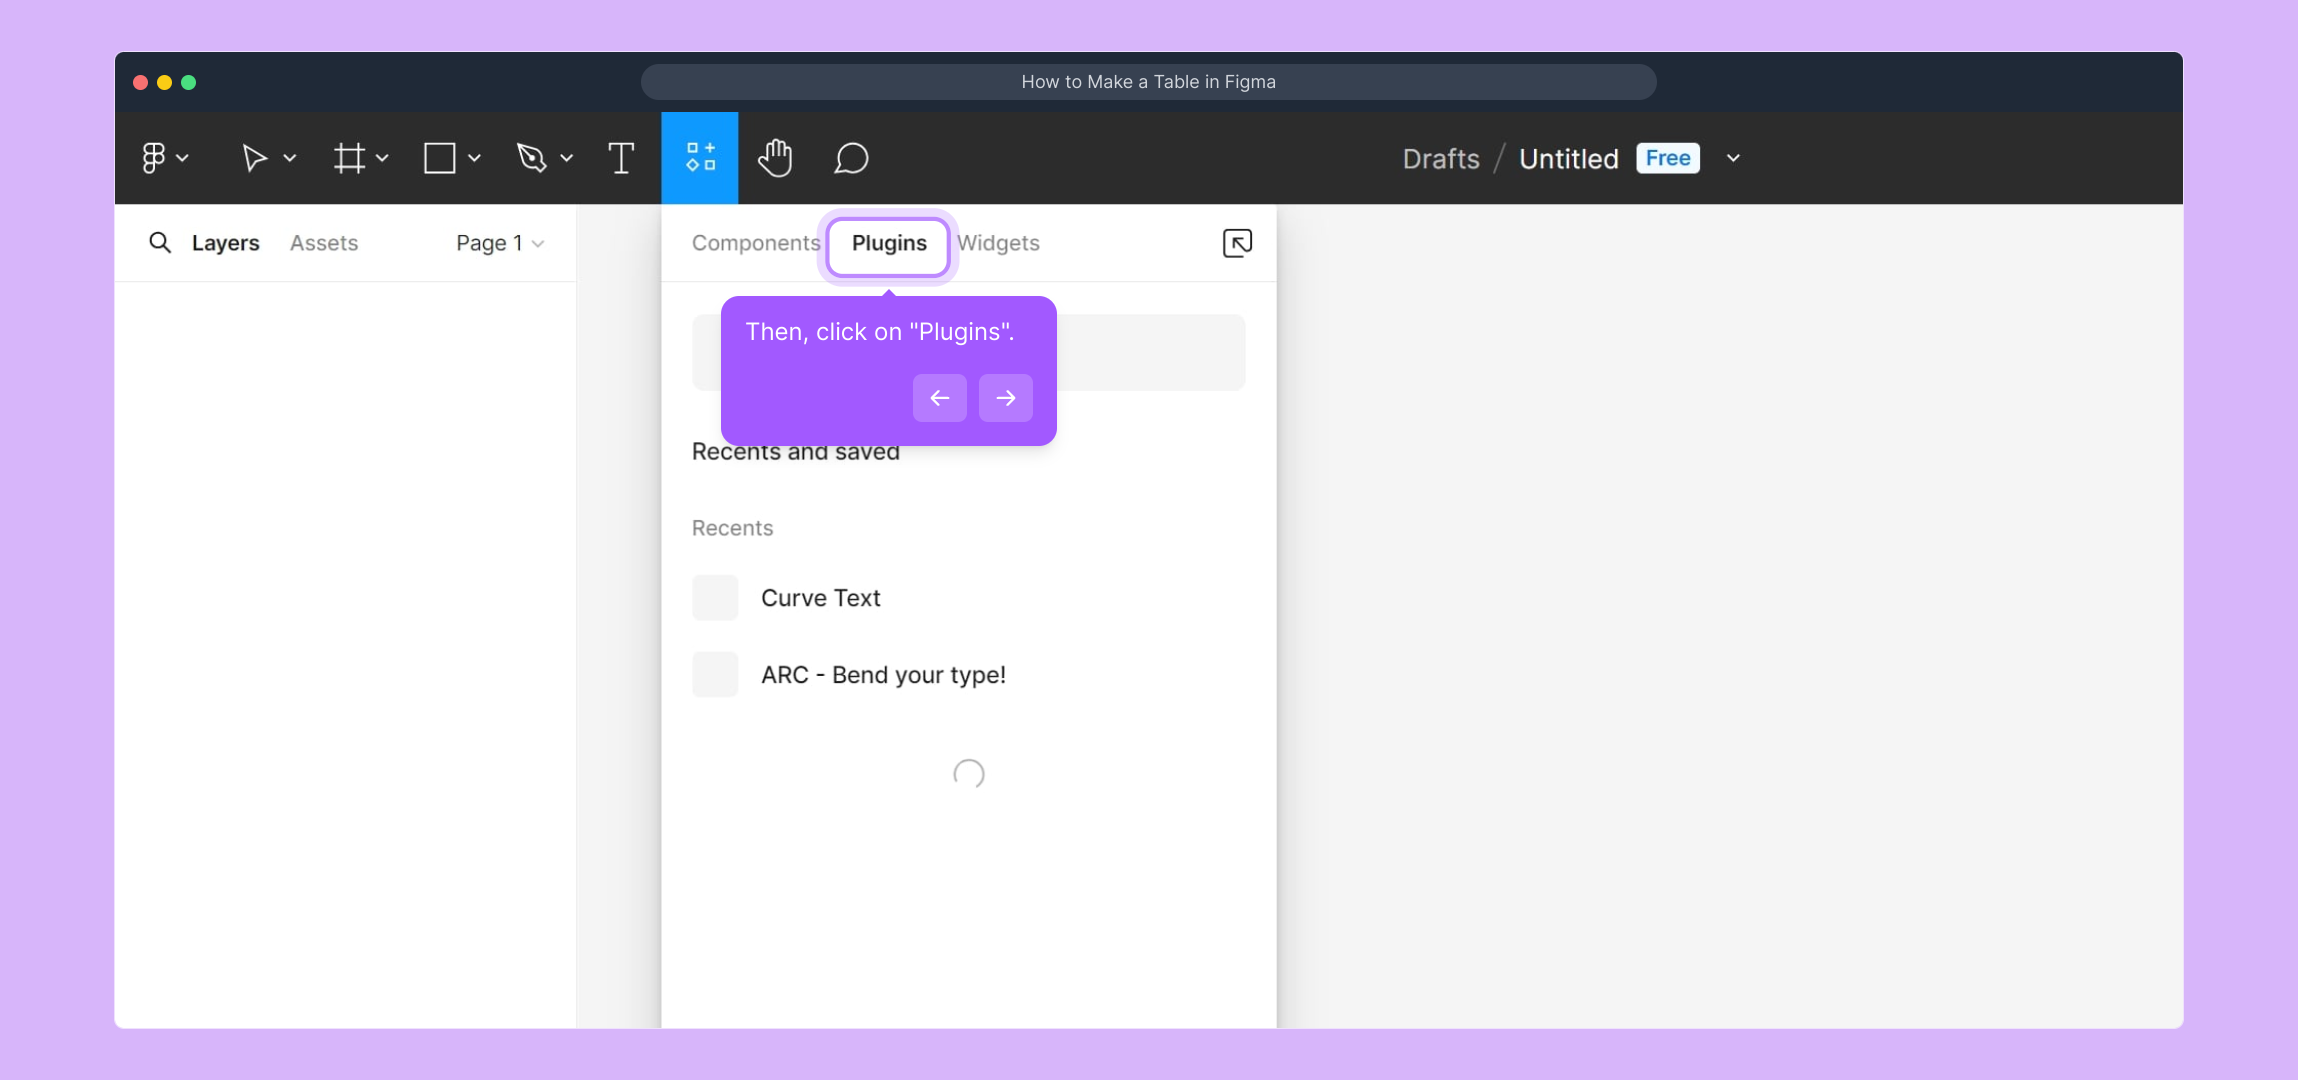
3. Then, click on "Plugins".
4. Video Step (
5. Now, click on "Table Creator".
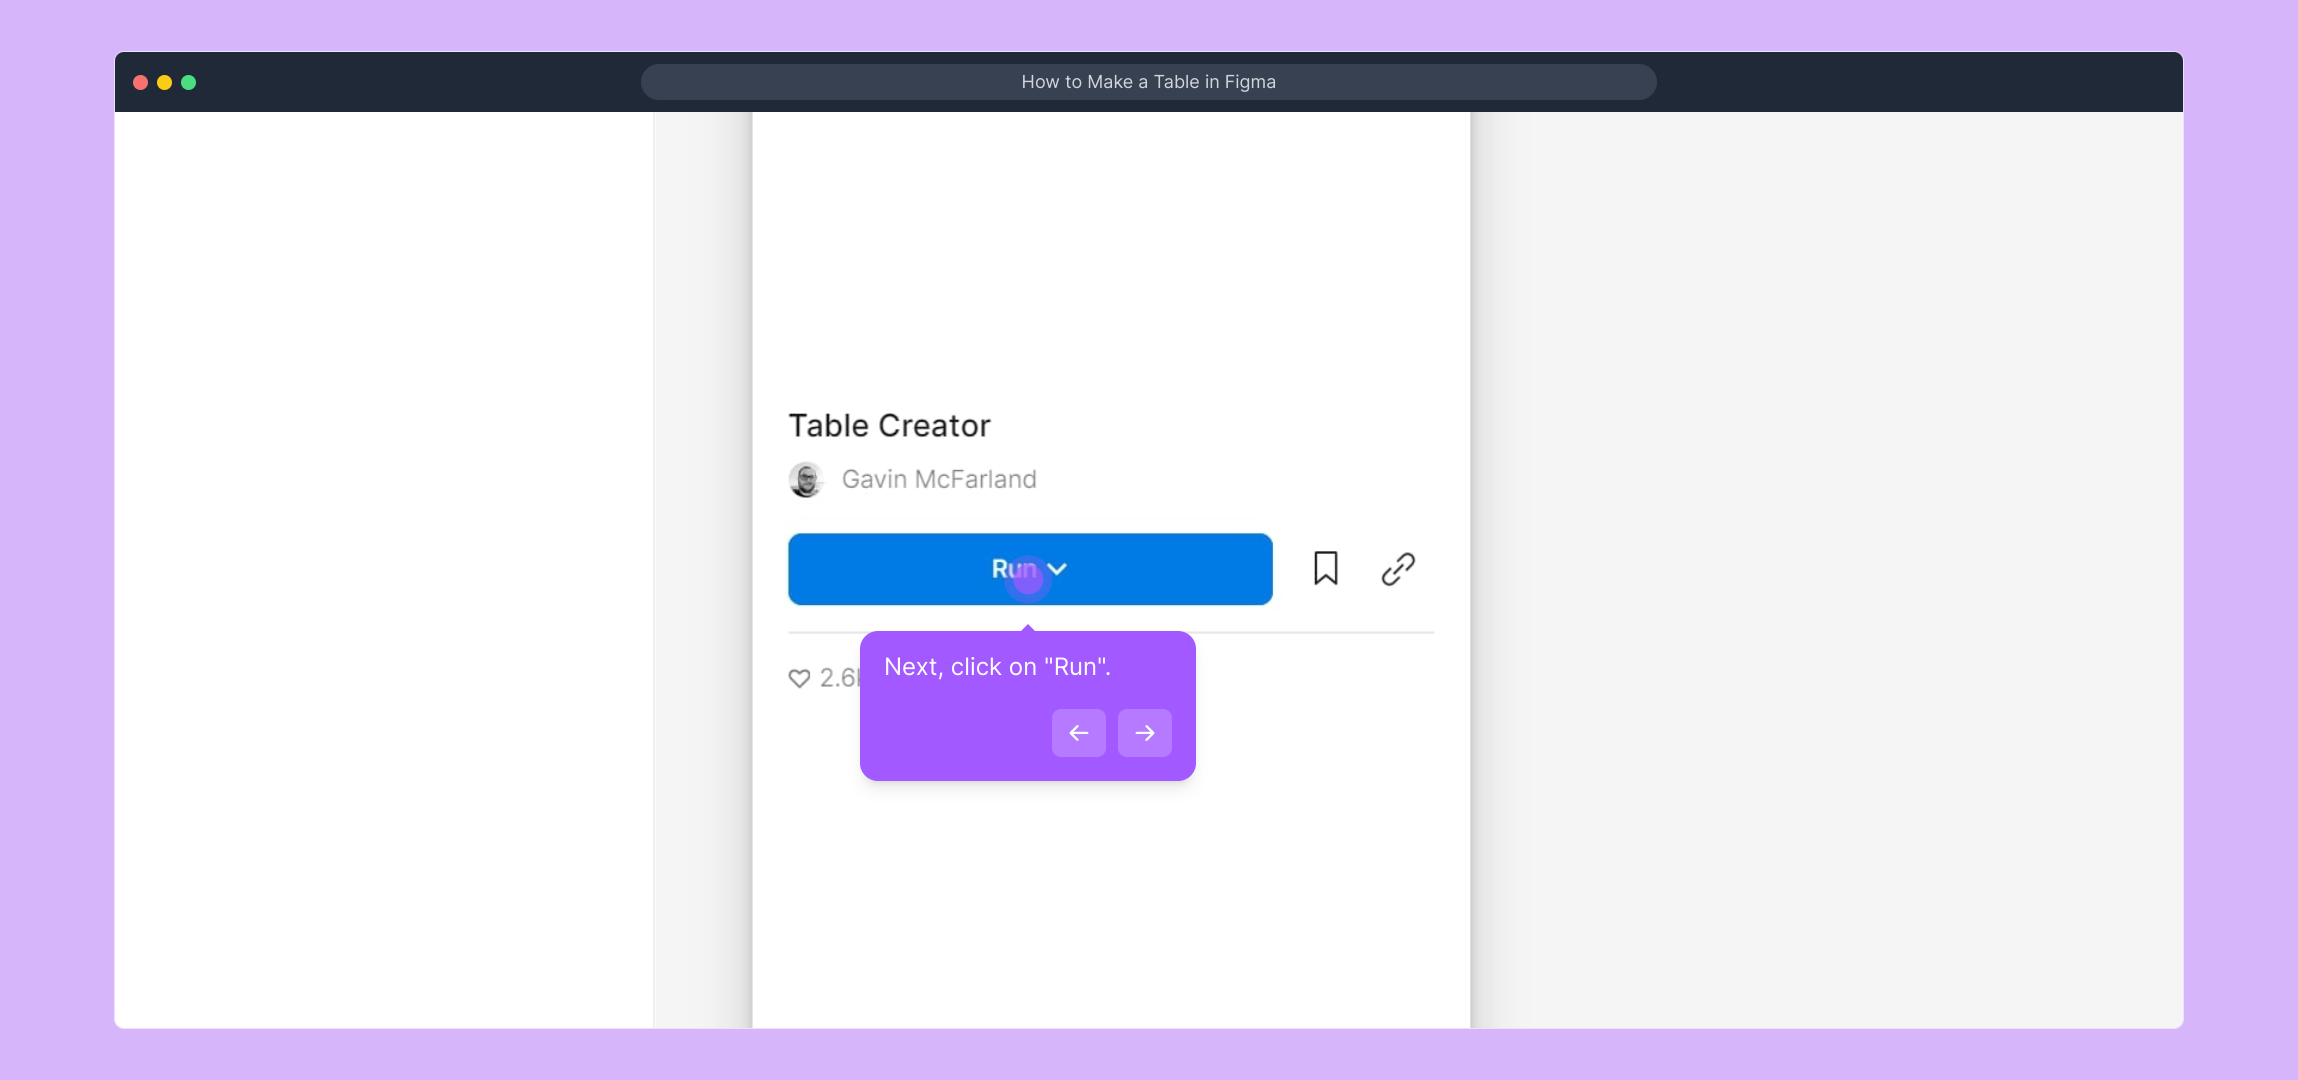
6. Next, click on "Run".
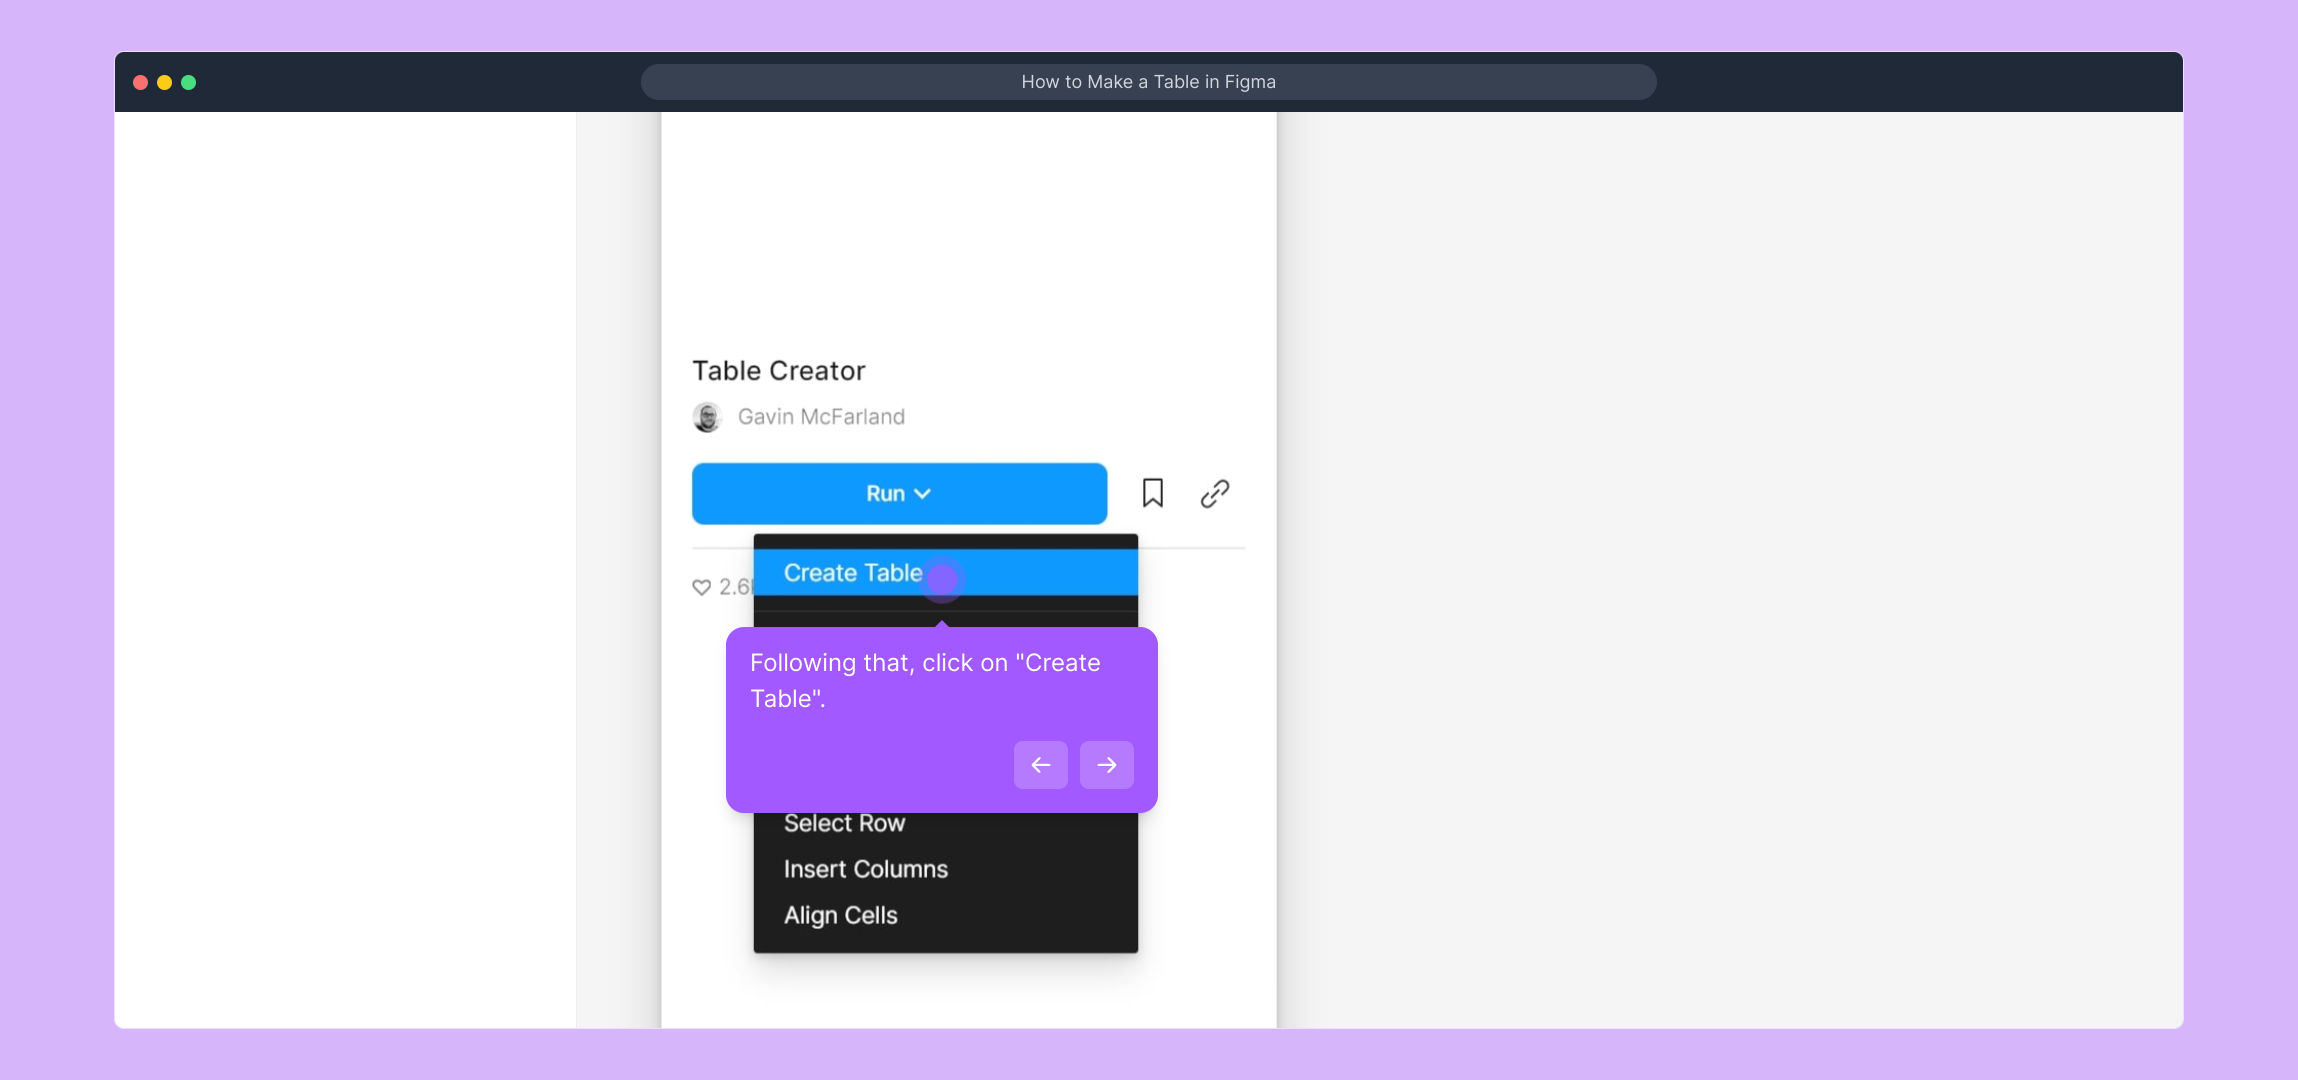
7. Following that, click on "Create Table".
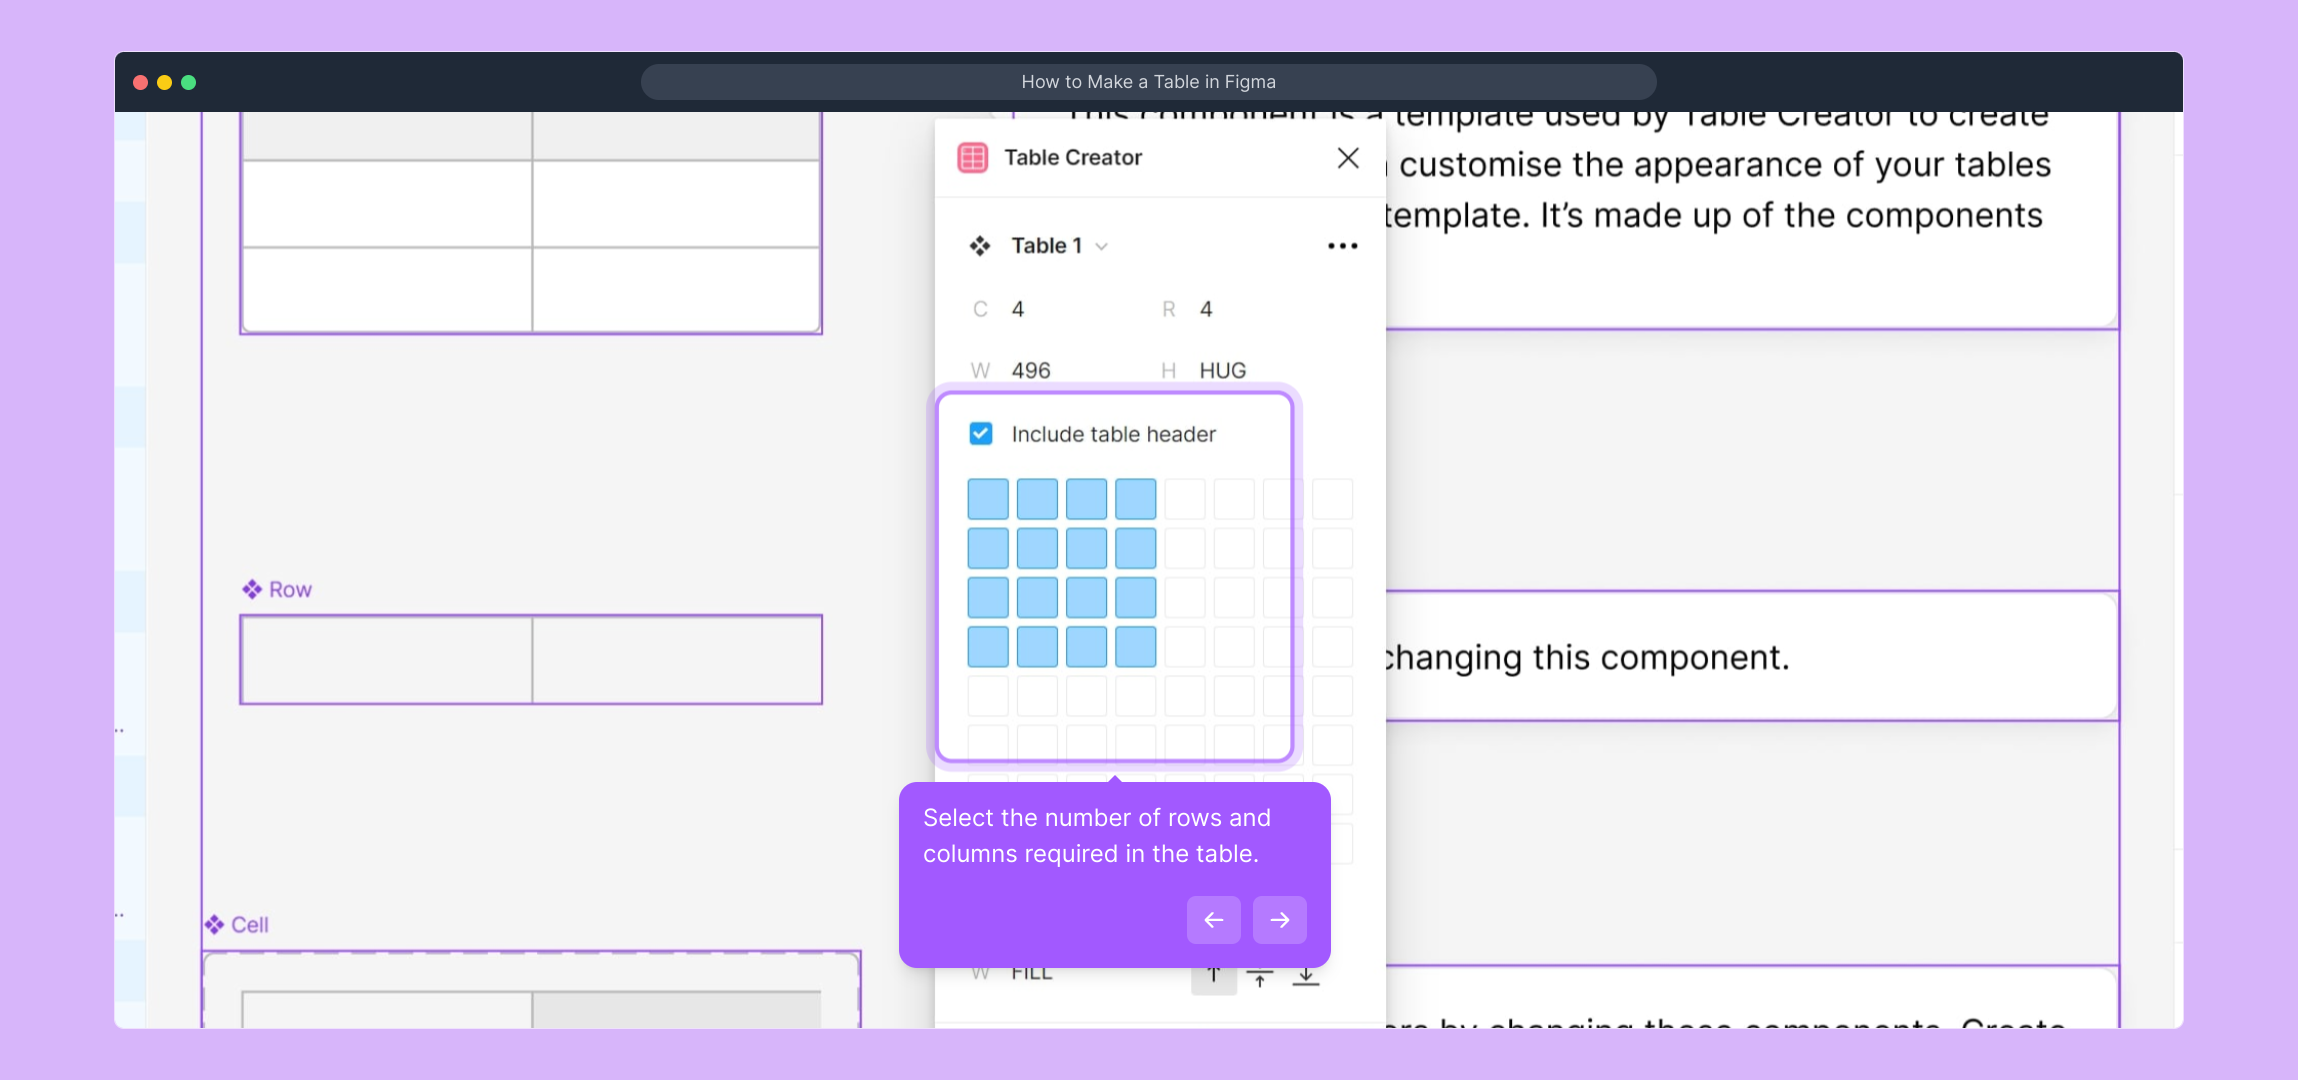
8. Select the number of rows and columns required in the table.
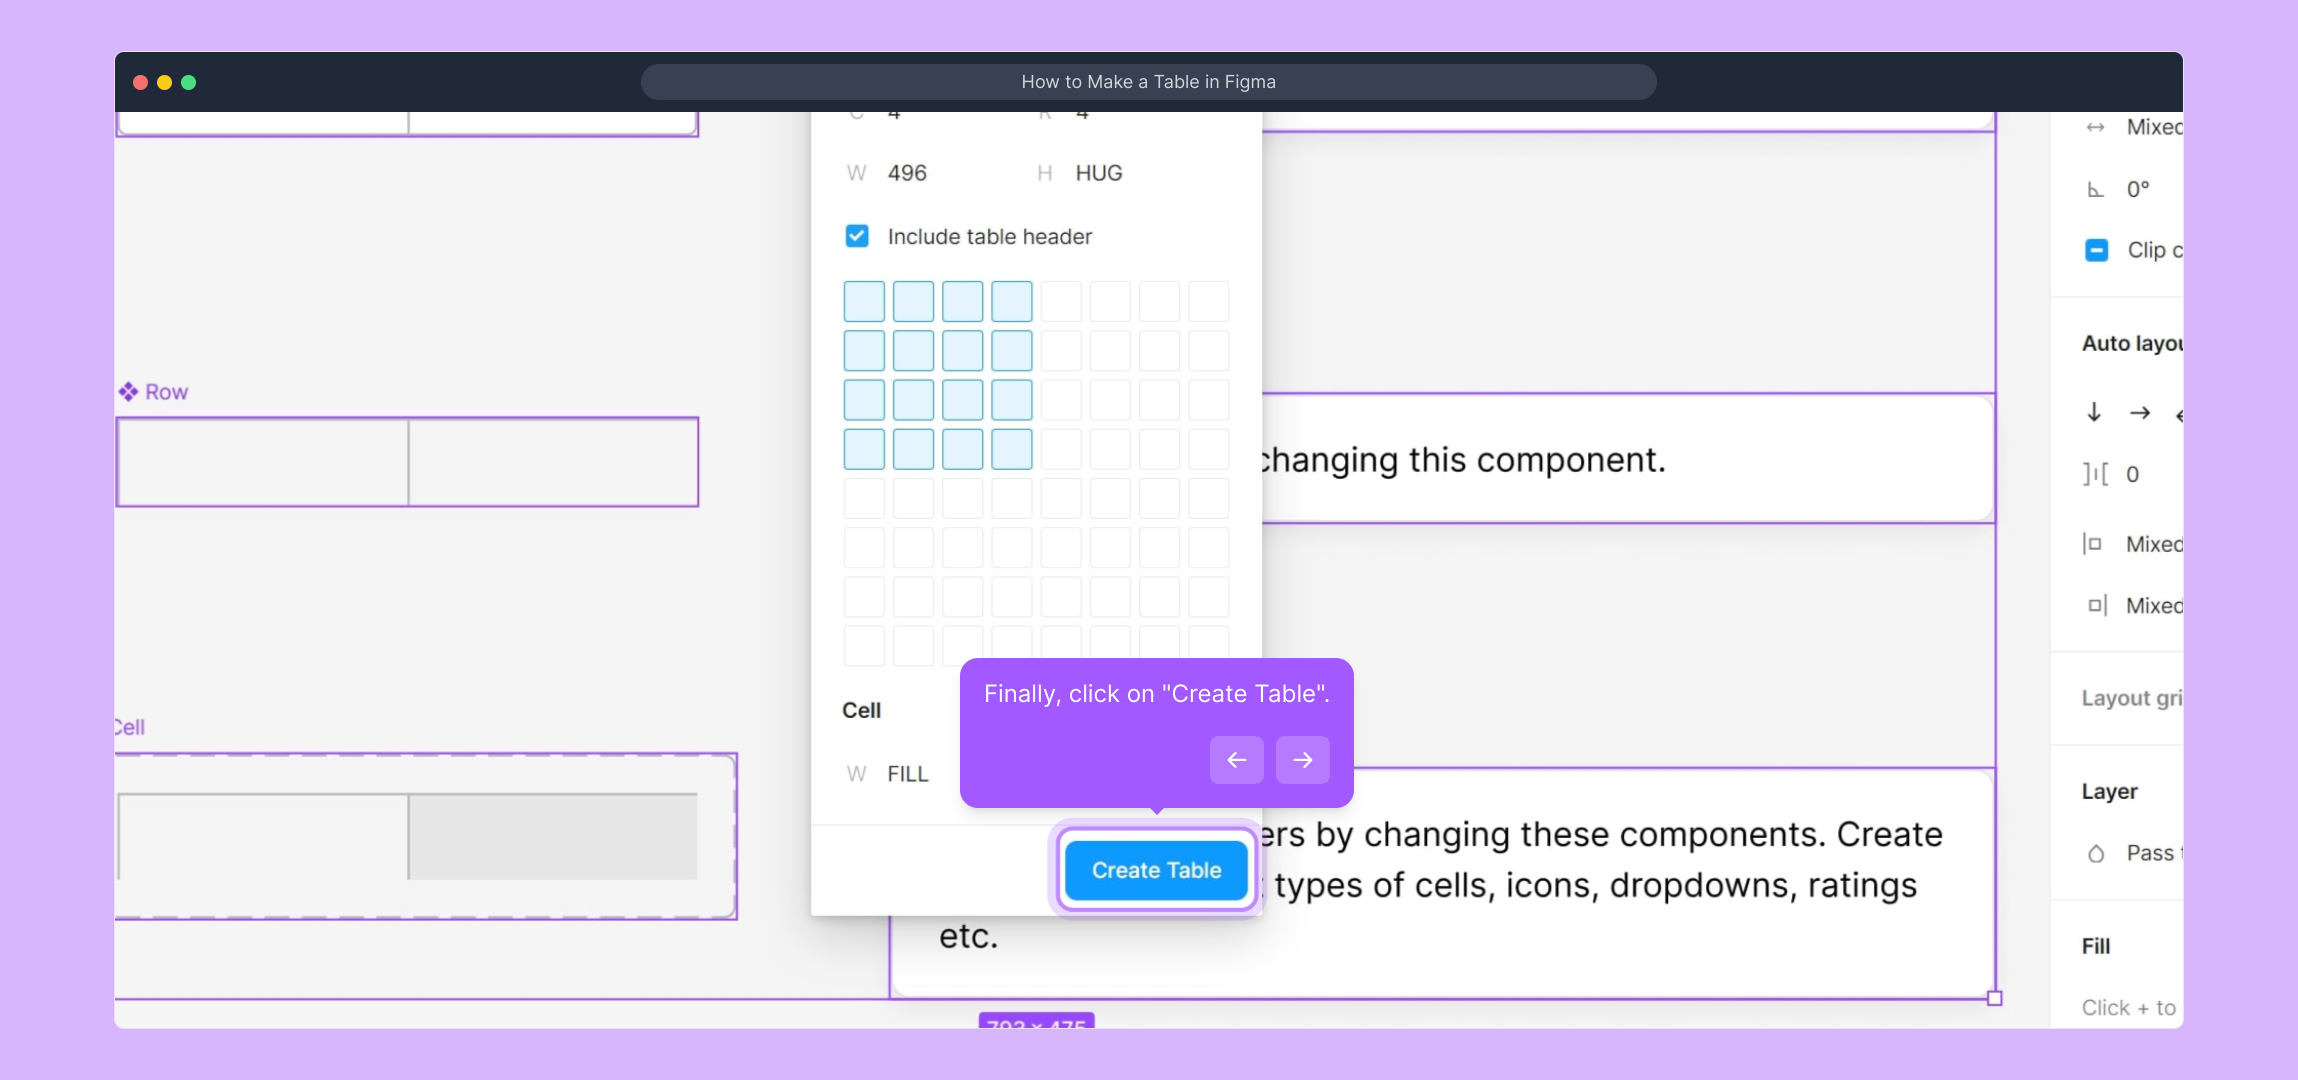
9. Finally, click on "Create Table".
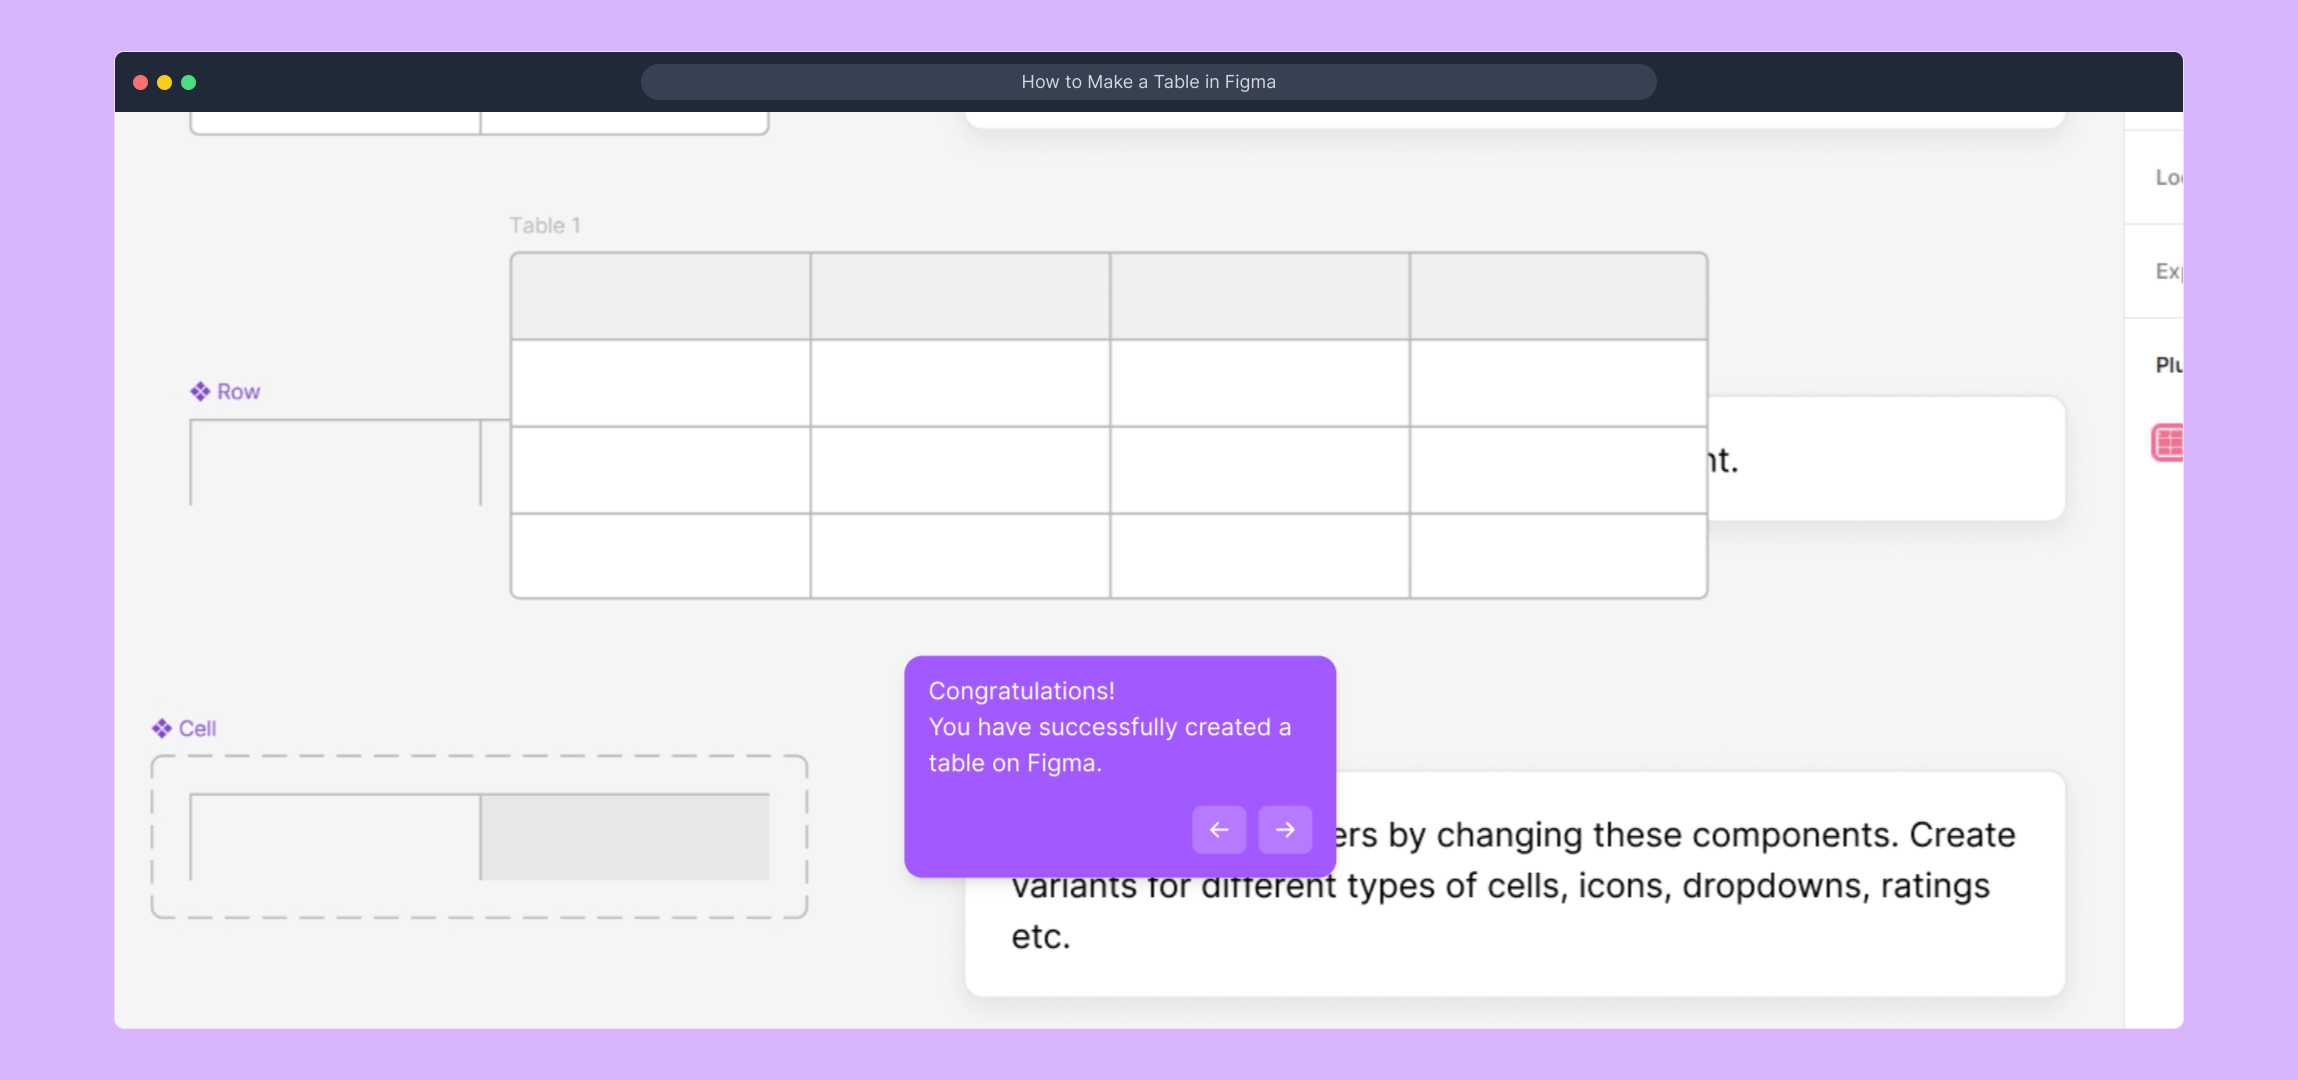
10. Congratulations!
You have successfully created a table on Figma.
11. Create a Supademo in seconds
This interactive demo/guided walkthrough on How to Make a Table in Figma was created using Supademo.
How to Make a Table in Figma : Step-by-Step Guide
Begin by opening the Figma project where you want to add a table. This is where all your design work happens, so make sure you're in the correct file to keep everything organized.
Next, look for the "Resources" icon in the toolbar. This icon lets you access additional assets, plugins, and tools that enhance your Figma workspace.
Once you open Resources, switch to the "Plugins" tab. This section is where you can find and manage plugins that extend Figma’s functionality to fit your project needs.
For a detailed walkthrough, check out this video that walks through the table creation process step-by-step.
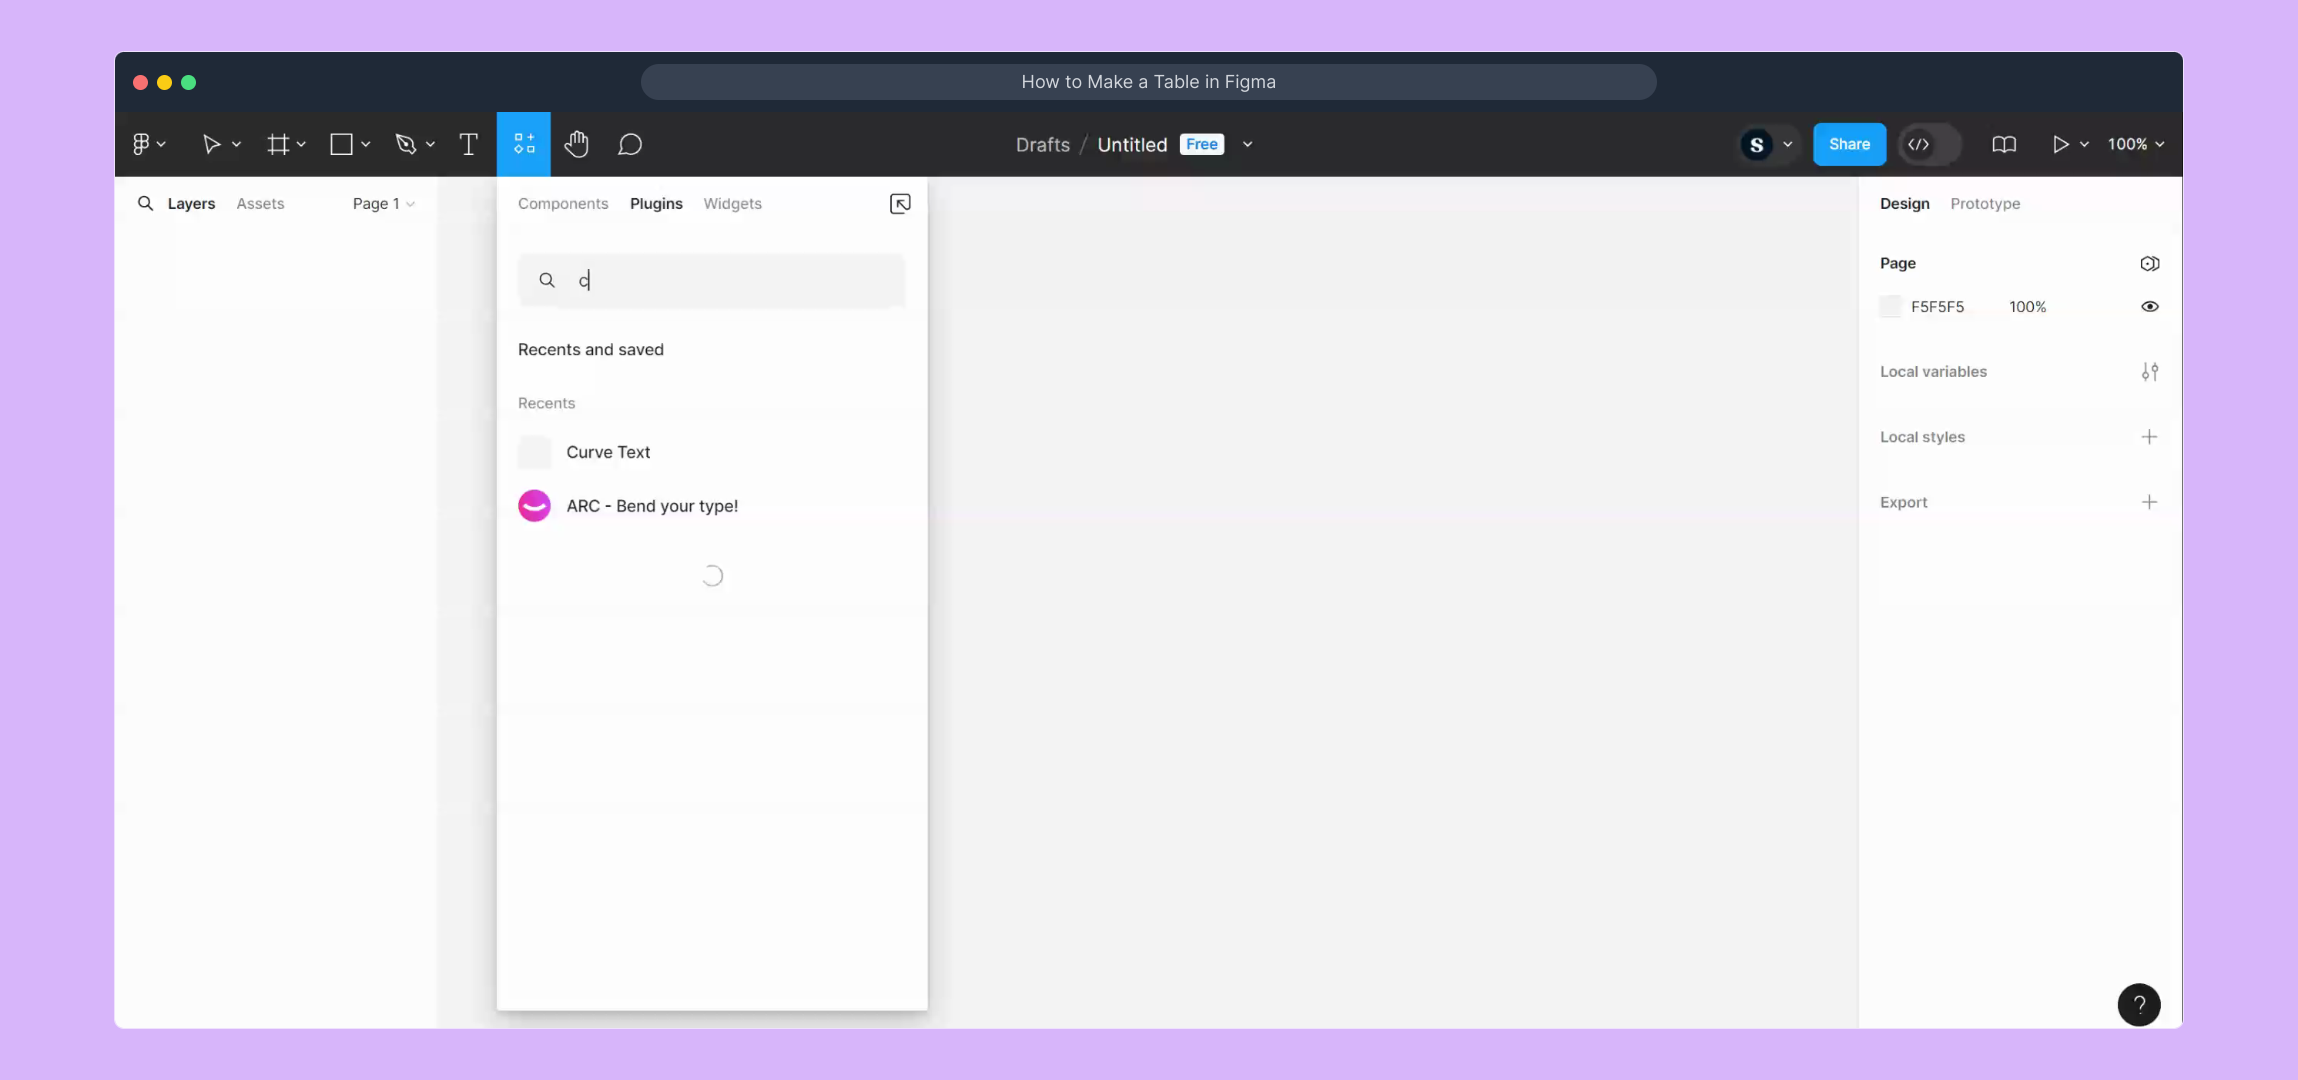
Now, locate the "Table Creator" plugin from the list. Selecting this plugin is the key step that will help you generate tables quickly within your design.

After opening Table Creator, click the "Run" button to launch the plugin. This initiates the table creation tool and prepares it for your inputs.
Next, choose the option to "Create Table." This command starts the process of building the table structure manually or based on your configuration.
Now, set the dimensions of your table by specifying how many rows and columns you need. This allows you to tailor the table exactly to your content requirements.
Once you have adjusted the size, finalize your table by clicking "Create Table." This generates the table directly onto your Figma canvas, ready for use.
Great job! You’ve now added a fully functional table to your Figma project. You can edit and style it further as needed to fit your design.
Try creating your own Supademo in just a few seconds—this tool makes showcasing your Figma designs even easier and more dynamic.

Create your own interactive demos in < 5 mins with Supademo
You can create your own interactive product demo in minutes using Supademo. Drive growth, scale enablement, and supercharge product-led onboarding with Supademo. Sign up for free here with no credit card required.
FAQs
Commonly asked questions about this topic.
What is the easiest way to create a table in Figma?
Can I customize the table styles after creating it in Figma?
Is the Table Creator plugin free to use?
How many rows and columns can I add in a Figma table?
Do I need any coding skills to create tables in Figma?
Can I import data into the table created in Figma?
Is it possible to resize rows and columns after creating the table?
How do I delete or remove a table in Figma?
Can I use tables created in Figma for prototyping or sharing?
What are some alternatives to create tables besides using plugins?

Product Operations Associate
Vimal Kumar helps build and grow Supademo’s team and GTM efforts, with a focus on figuring out growth levers and improving product traction.