How to Set Up Branching on Figma

Vimal Kumar
Vimal Kumar·
How to Set Up Branching on Figma
Interactive demo powered by Supademo

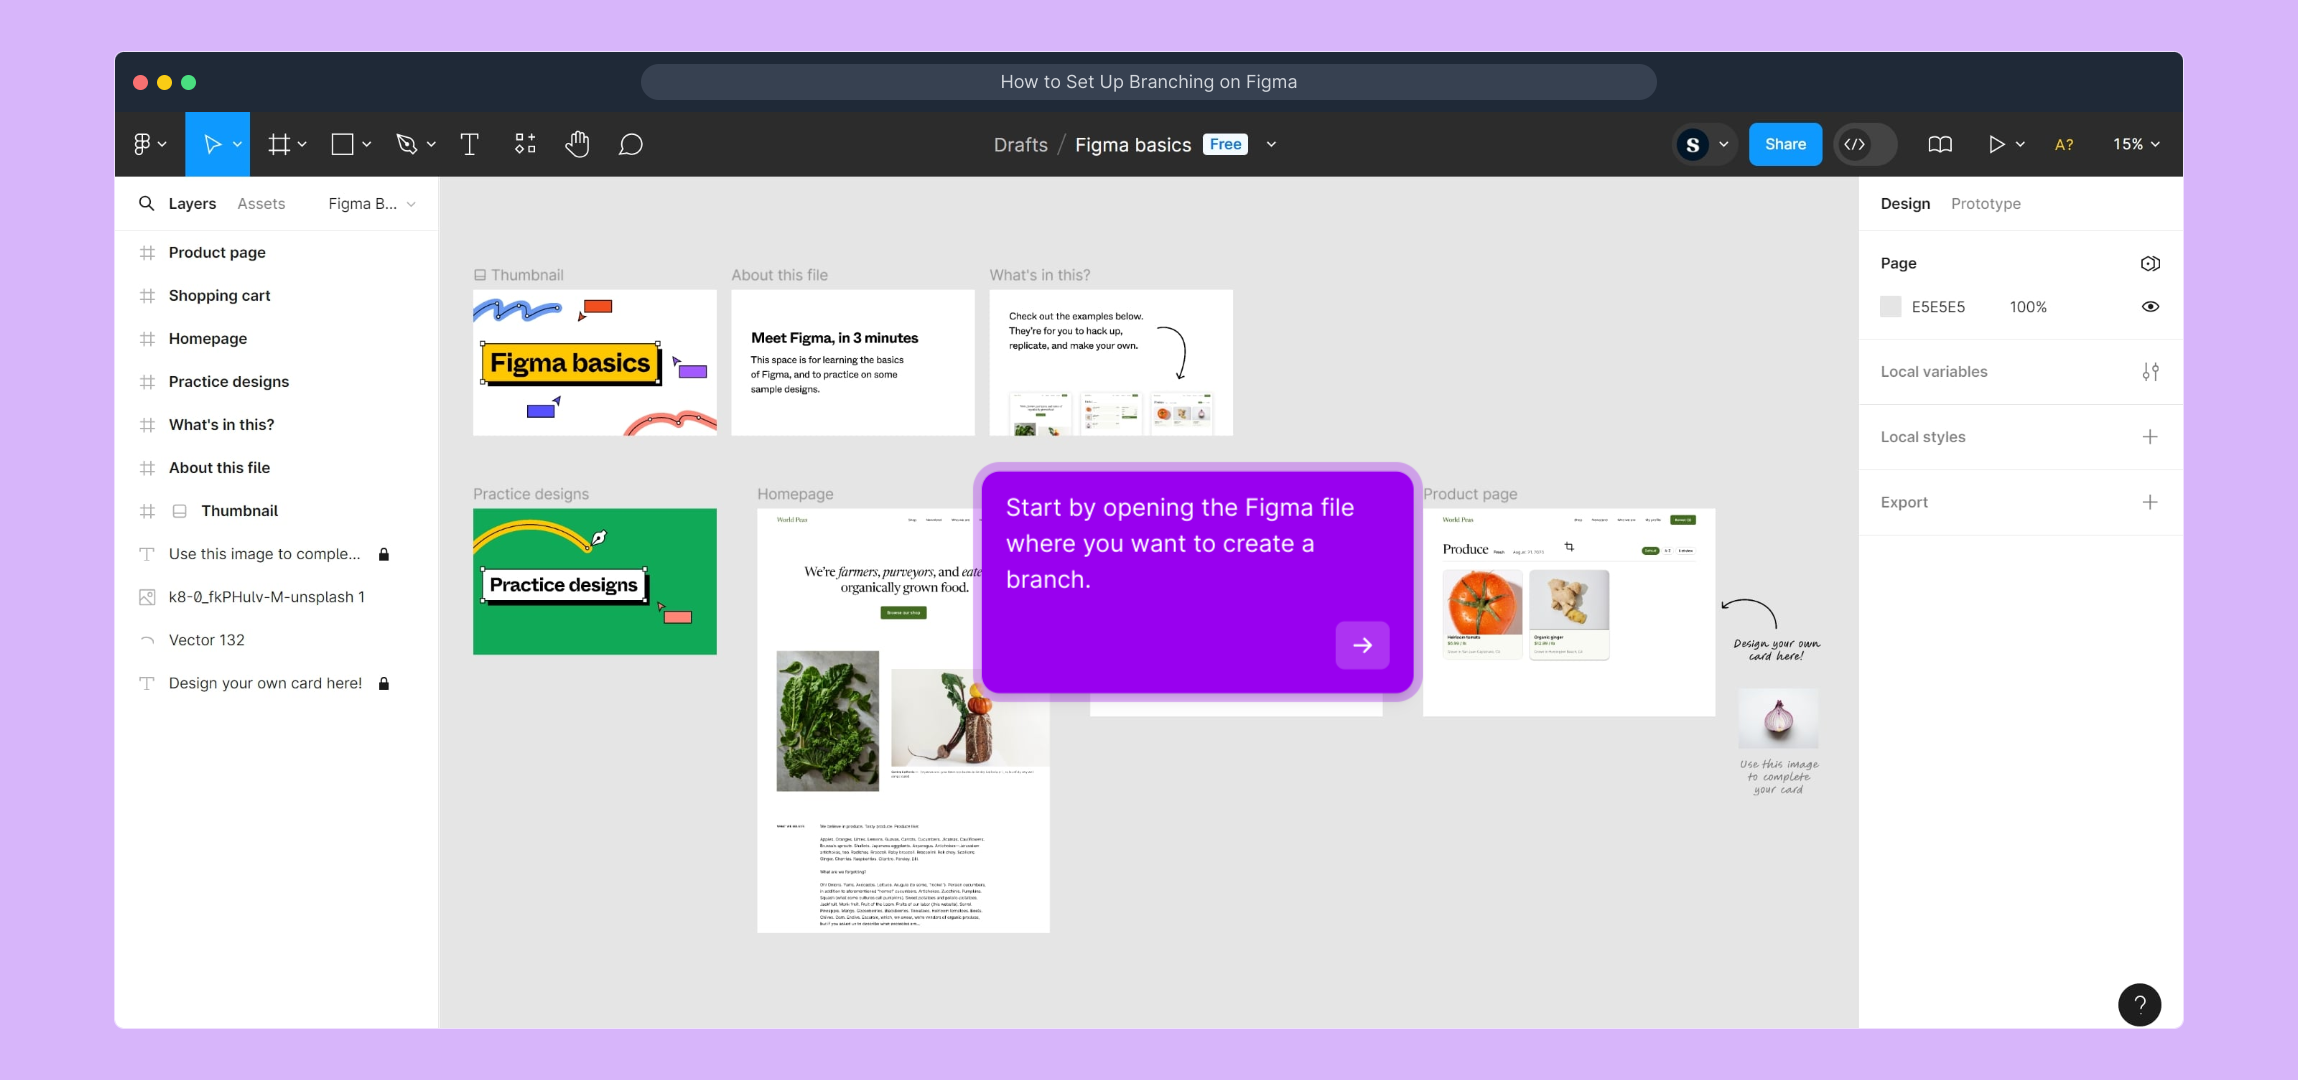
1. Start by opening the Figma file where you want to create a branch.

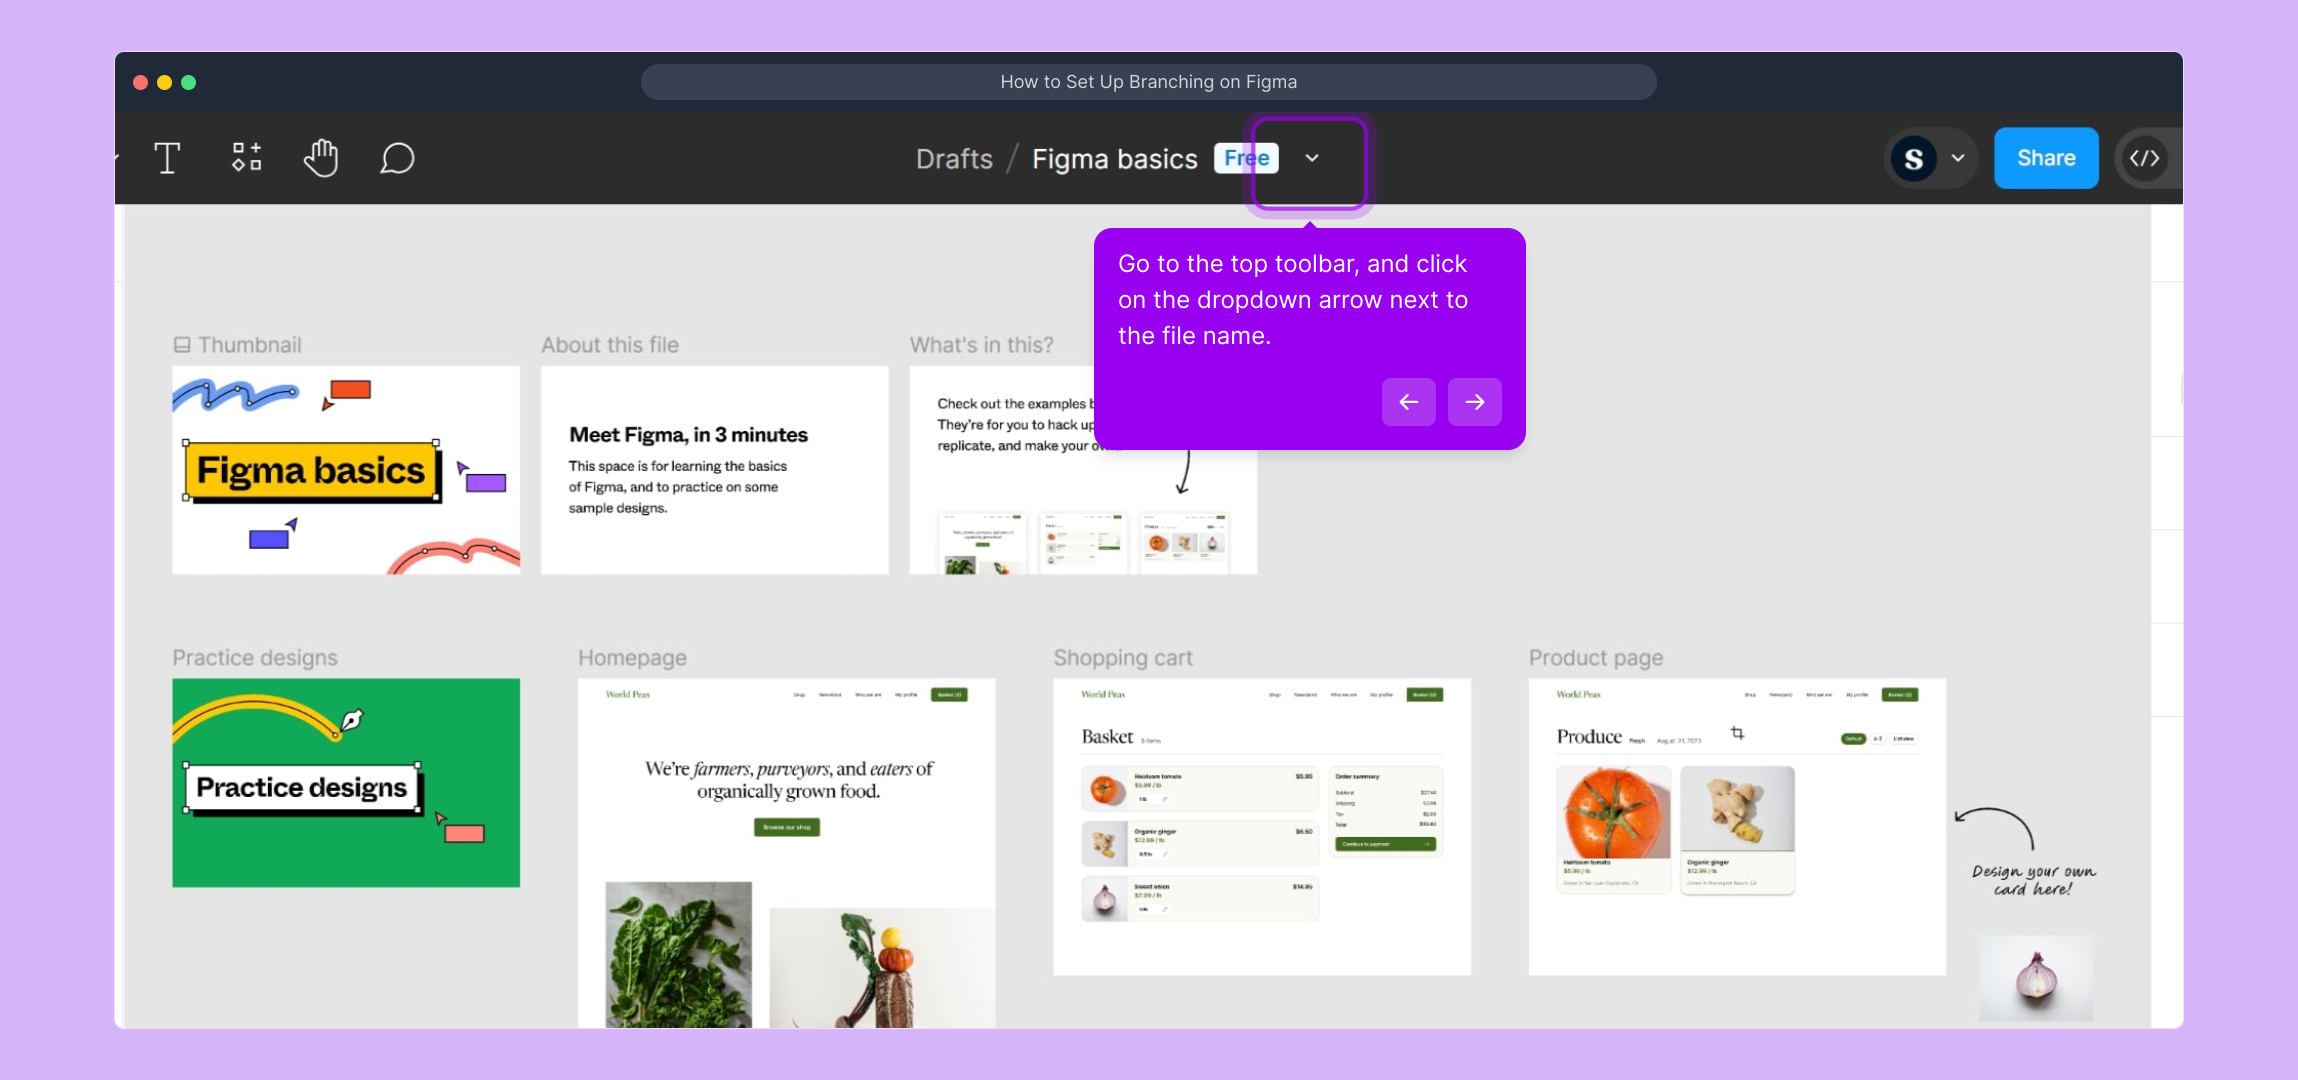
2. Go to the top toolbar, and click on the dropdown arrow next to the file name.

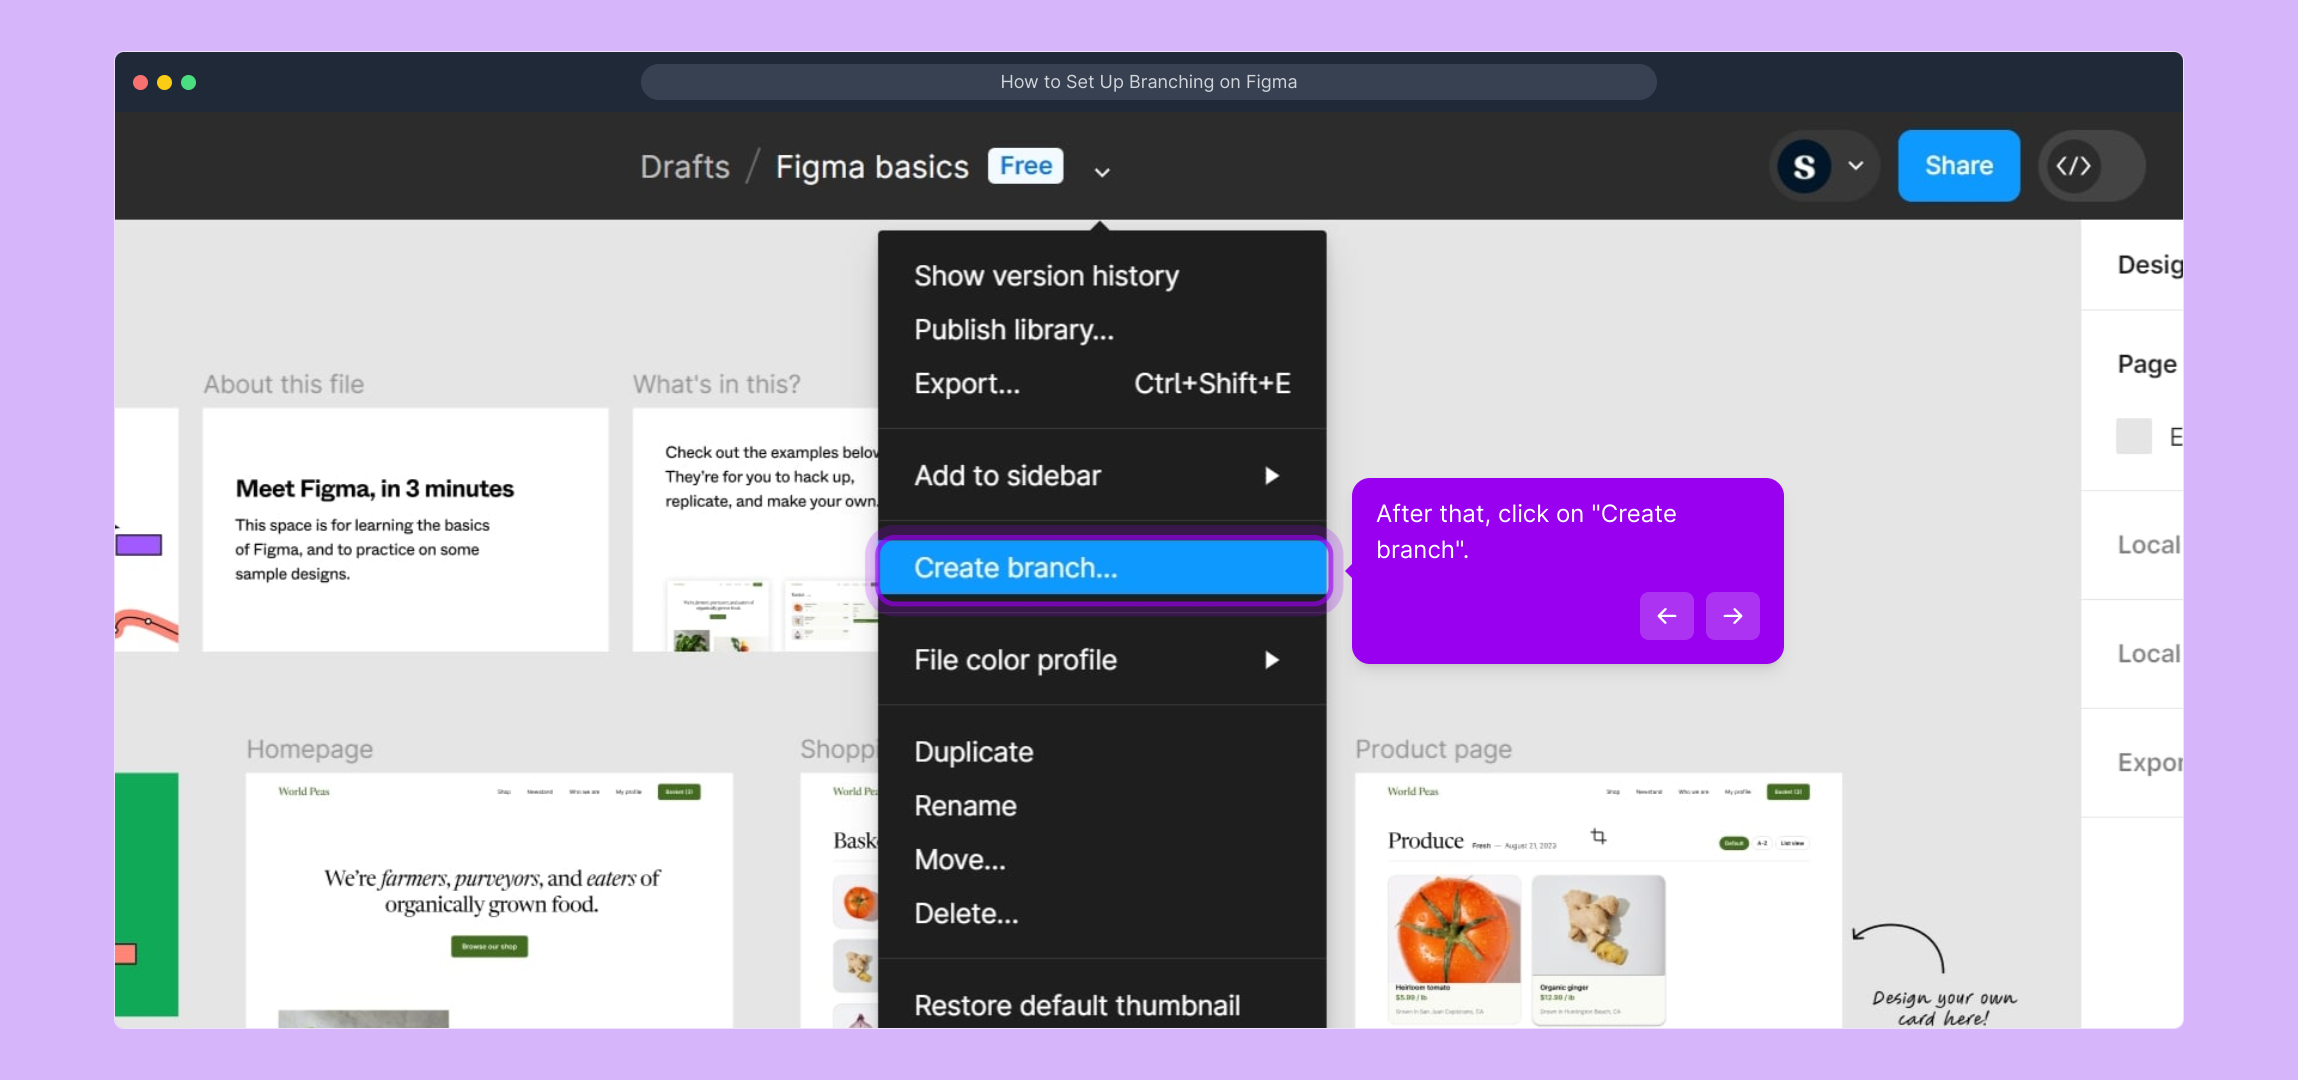
3. After that, click on "Create branch".

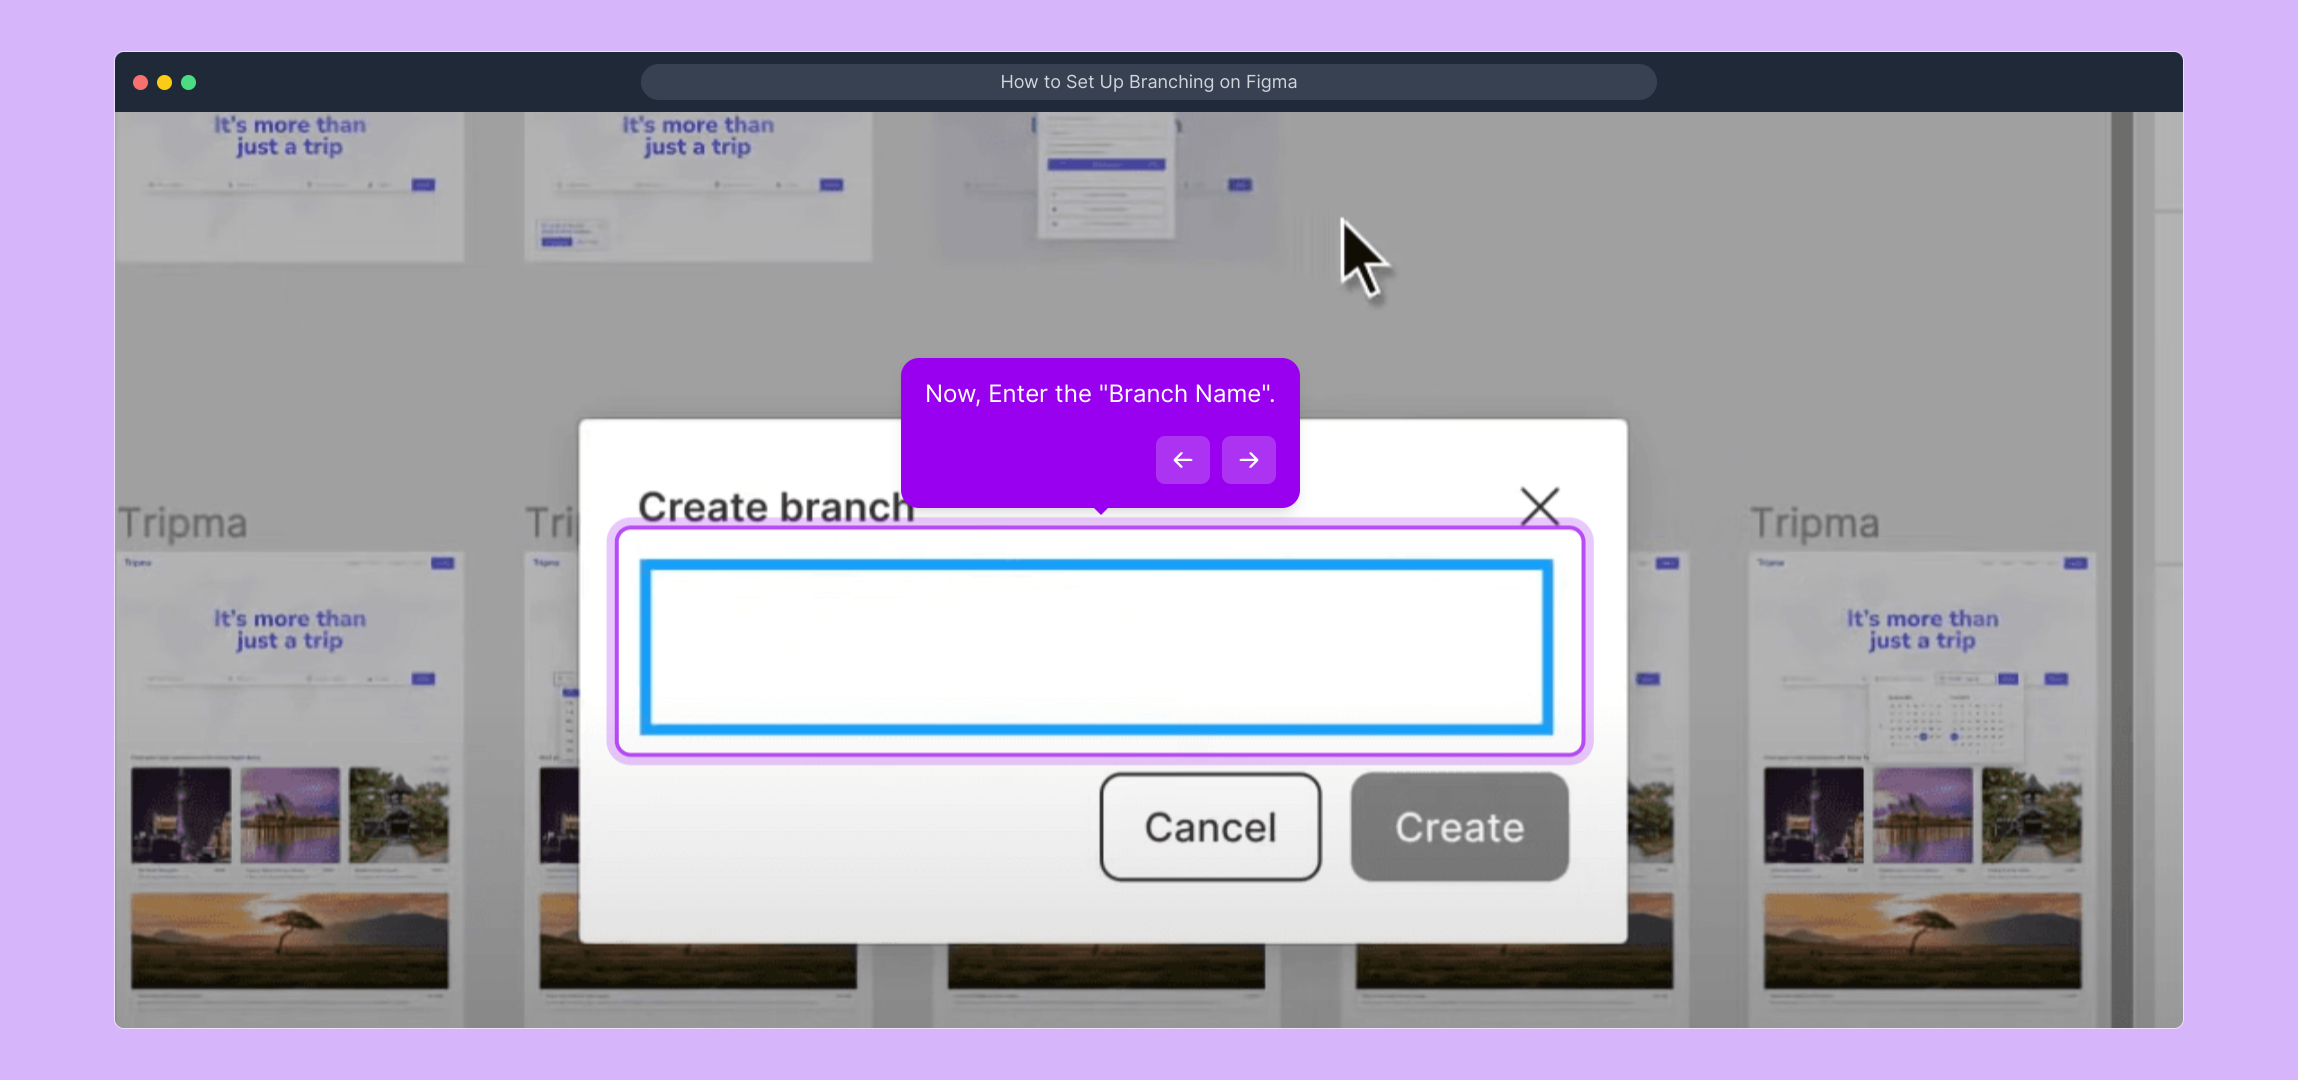
4. Now, Enter the "Branch Name".

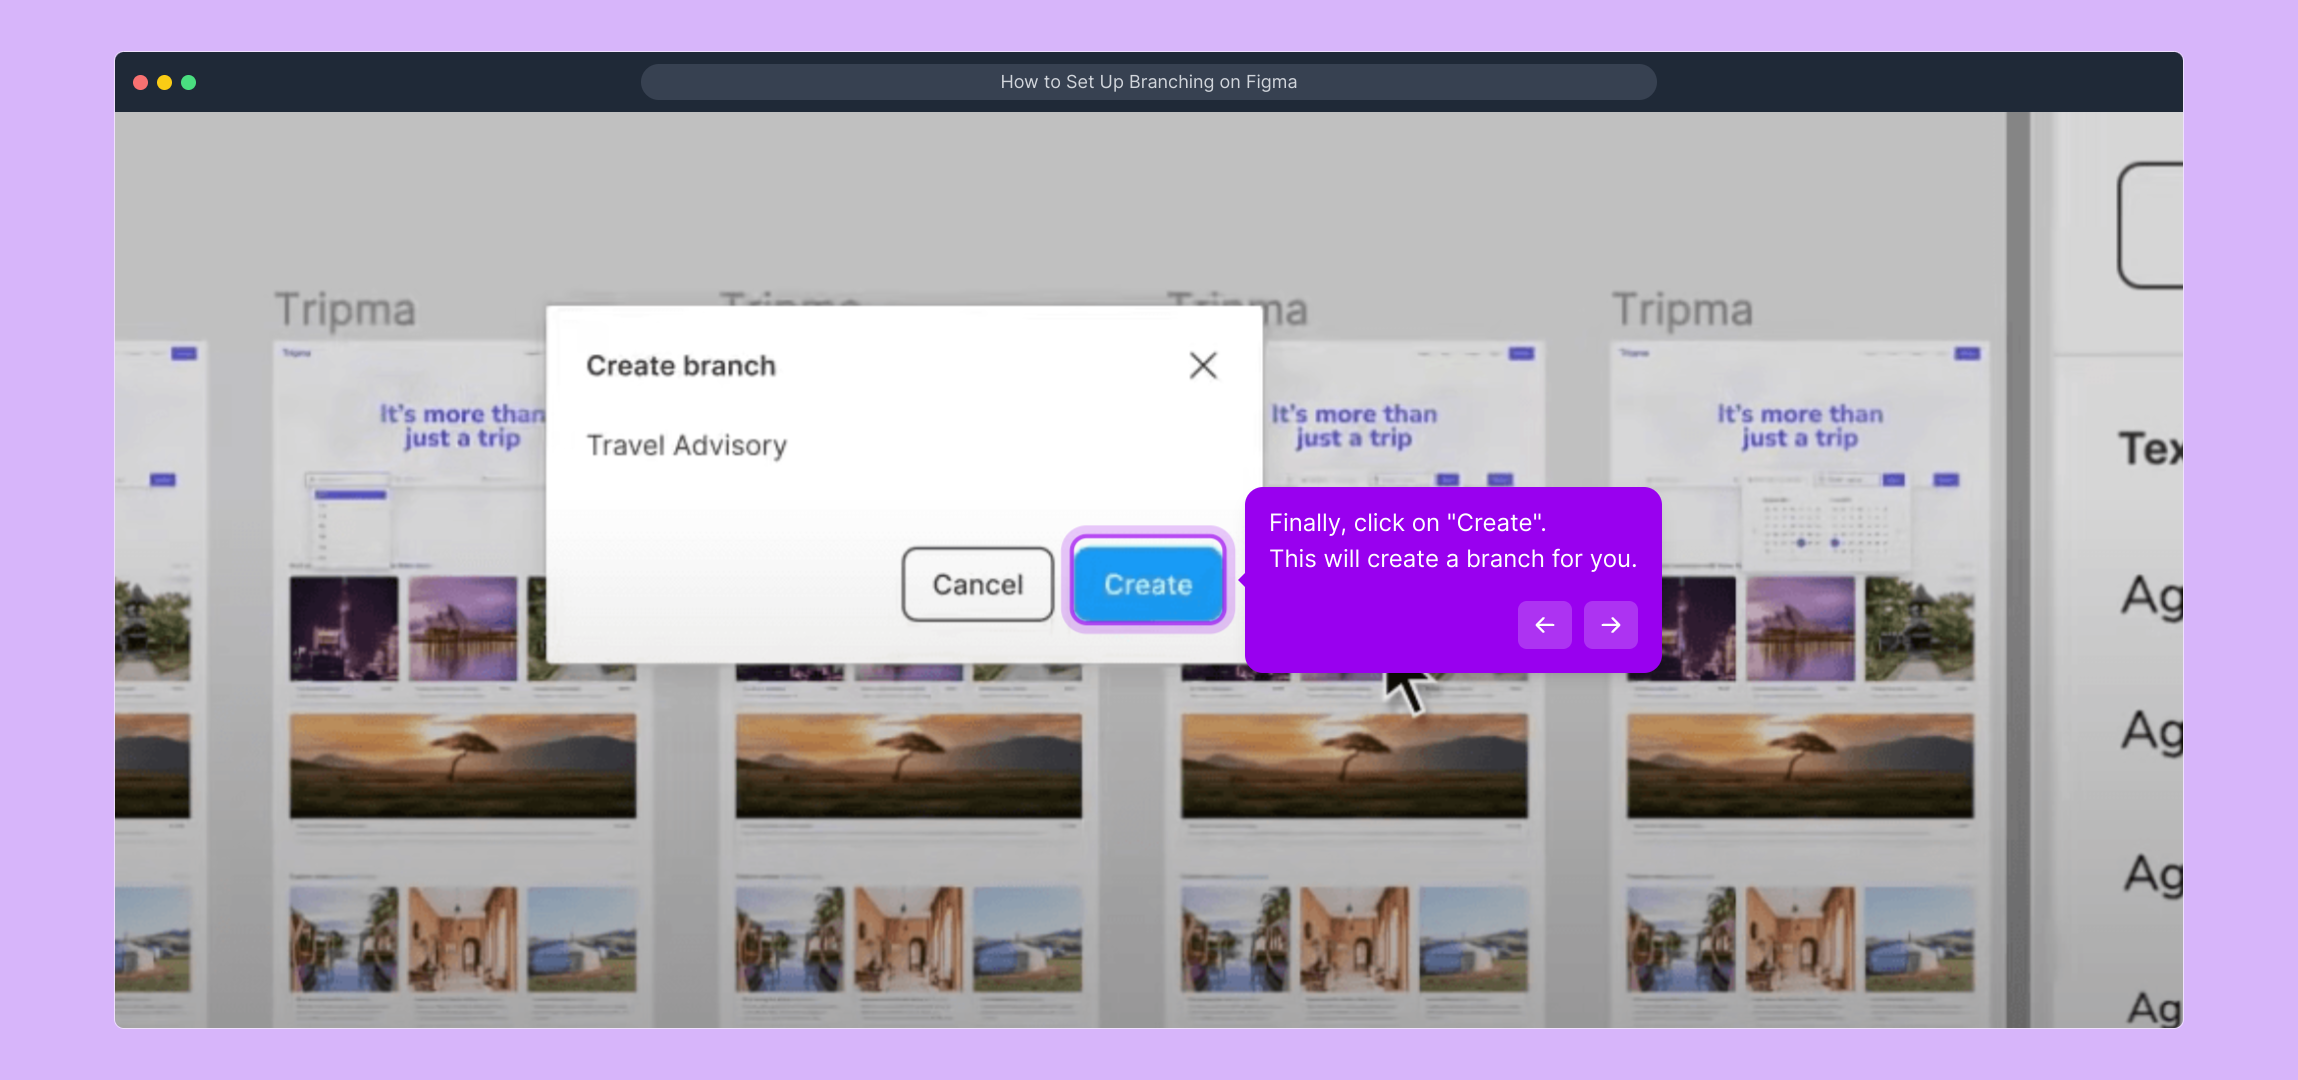
5. Finally, click on "Create". This will create a branch for you.

6. Create a Supademo in seconds

This interactive demo/guided walkthrough on How to Set Up Branching on Figma was created using Supademo.


How to Set Up Branching on Figma : Step-by-Step Guide

Begin by navigating to the Figma file in which you’d like to set up a new branch. This is the starting point where your branching process will take place.

1

Next, look towards the top toolbar of Figma’s interface. Locate the file name displayed there and click on the dropdown arrow beside it to reveal more options related to file management.

2

From the dropdown menu that appears, select the option labeled “Create branch.” This action initiates the process of branching your current file, allowing you to work on a separate version.

3

At this stage, you’ll be prompted to give your new branch a meaningful name. Enter a descriptive “Branch Name” that helps you and your team easily identify the purpose or contents of this branch.

4

Finally, confirm your action by clicking the “Create” button. This will establish your new branch, enabling you to work independently from the original file without affecting it.

5

With your branch successfully created, you’ve taken the first step towards efficient collaboration and version control. Now, you can quickly create a Supademo or continue building from this new working space.

6

Create your own interactive demos in < 5 mins with Supademo

You can create your own interactive product demo in minutes using Supademo. Drive growth, scale enablement, and supercharge product-led onboarding with Supademo. Sign up for free here with no credit card required.


FAQs

Commonly asked questions about this topic.

What is branching in Figma?

Branching in Figma allows you to create independent copies of a file where you can work on features or changes without affecting the main version. It facilitates collaboration and parallel development.

How do I create a branch in a Figma file?

Open the Figma file, click the dropdown arrow next to the file name in the top toolbar, select “Create branch,” name your branch, and then click “Create” to make a new branch.

Can I merge branches back to the main file in Figma?

Yes, after completing your changes, Figma allows you to merge branches back into the main file, combining updates while managing conflicts effectively.

Is branching available on all Figma plans?

Branching is typically available on Figma’s Professional and Organization plans. Free plan users might have limited access, so check your plan details for specific features.

Does branching affect team collaboration?

Branching enhances team collaboration by allowing multiple team members to work on different changes simultaneously without disrupting the main file, improving workflow and reducing errors.

How should I name branches in Figma?

Choose descriptive names that reflect the feature, bug fix, or purpose of the branch, e.g., “new-navbar-design” or “fix-login-error,” to help team members understand the changes easily.

Can I delete a branch once I’m done with it?

Yes, after merging or if the branch is no longer needed, you can delete it within Figma to keep your workspace organized and avoid confusion with outdated branches.

Are there any risks when using branching in Figma?

Branching reduces risks by isolating changes, but conflicts can occur when merging. Careful review and communication with your team help minimize merge issues.

Can I collaborate on a branch with others?

Yes, collaborators can be invited to work on a branch in Figma, enabling teamwork on isolated changes before merging back into the main file.

What happens if I make changes directly to the main file instead of a branch?

Changes to the main file affect everyone immediately, which can risk breaking ongoing work. Branching helps avoid this by letting you experiment or develop features without impacting the main file.

Vimal Kumar

Vimal Kumar

Product Operations Associate

Vimal Kumar helps build and grow Supademo’s team and GTM efforts, with a focus on figuring out growth levers and improving product traction.

More from the blog

How to Add Products to Shopify

How to Add Products to Shopify

Learn step-by-step how to add products to your Shopify store effortlessly, including tips on product details, images, pricing, and inventory management to boost your online sales.

Vimal Kumar
Vimal KumarDec 17, 2025
How to Deactivate Your Shopify Store

How to Deactivate Your Shopify Store

Learn step-by-step how to deactivate your Shopify store easily, including important considerations and tips to pause or close your shop without losing data.

Vimal Kumar
Vimal KumarDec 17, 2025
How to Remove 'Powered by Shopify'

How to Remove 'Powered by Shopify'

Learn how to easily remove the 'Powered by Shopify' text from your online store with step-by-step instructions and tips to customize your Shopify storefront.

Vimal Kumar
Vimal KumarDec 17, 2025
How to Create a Shopify Account

How to Create a Shopify Account

Learn step-by-step how to create a Shopify account quickly and easily, set up your online store, and start selling your products in no time.

Vimal Kumar
Vimal KumarDec 17, 2025
How to Create a Stripe Account

How to Create a Stripe Account

Learn how to create a Stripe account quickly and easily with our step-by-step guide, perfect for beginners looking to start accepting online payments.

Vimal Kumar
Vimal KumarDec 17, 2025
How to Contact Stripe Support

How to Contact Stripe Support

Learn the easiest ways to contact Stripe support for quick assistance with your payment processing, account issues, and technical questions.

Vimal Kumar
Vimal KumarDec 16, 2025