
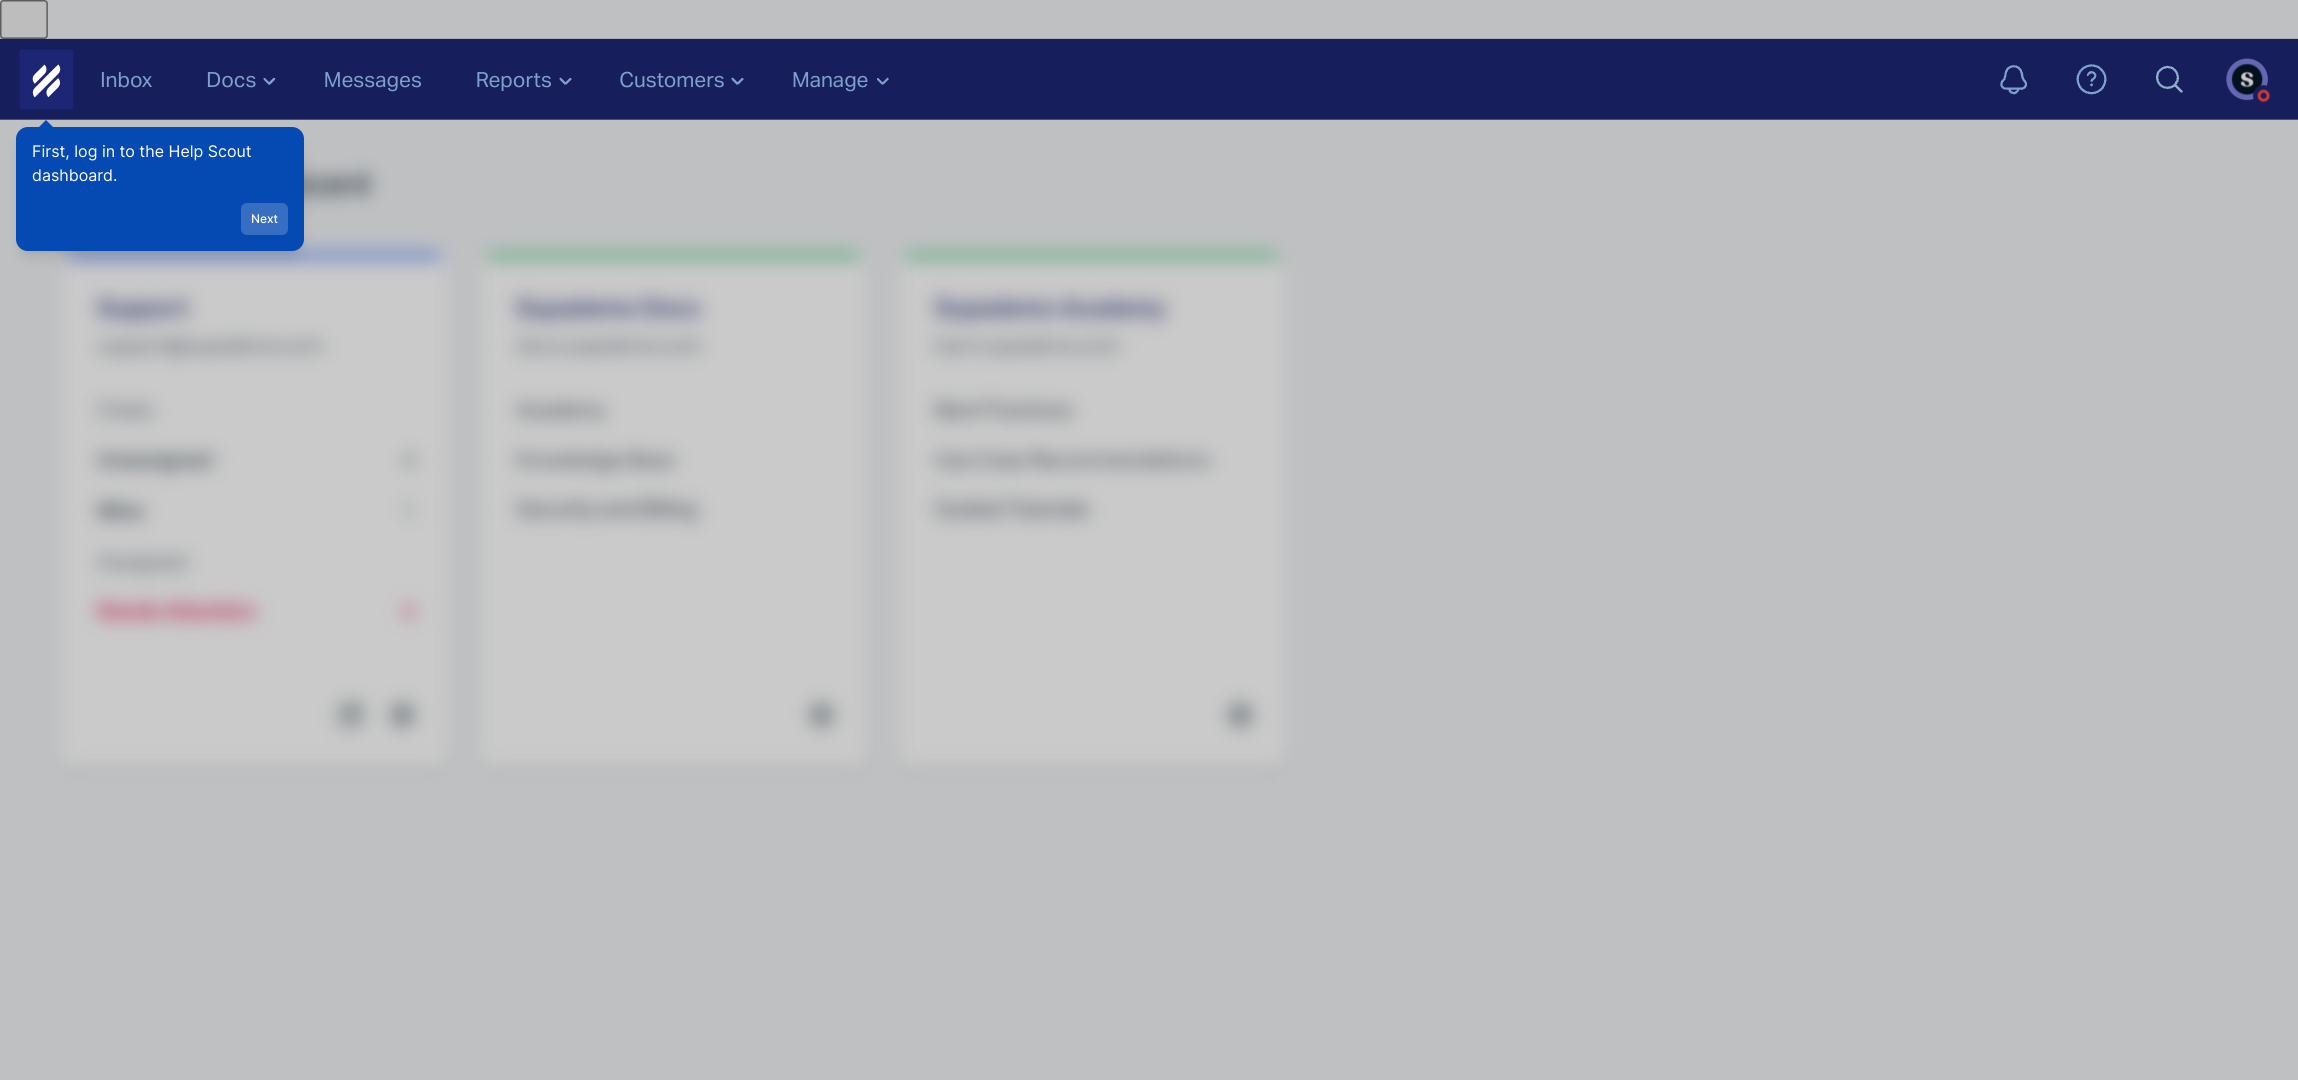
1. First, log in to the Help Scout dashboard.
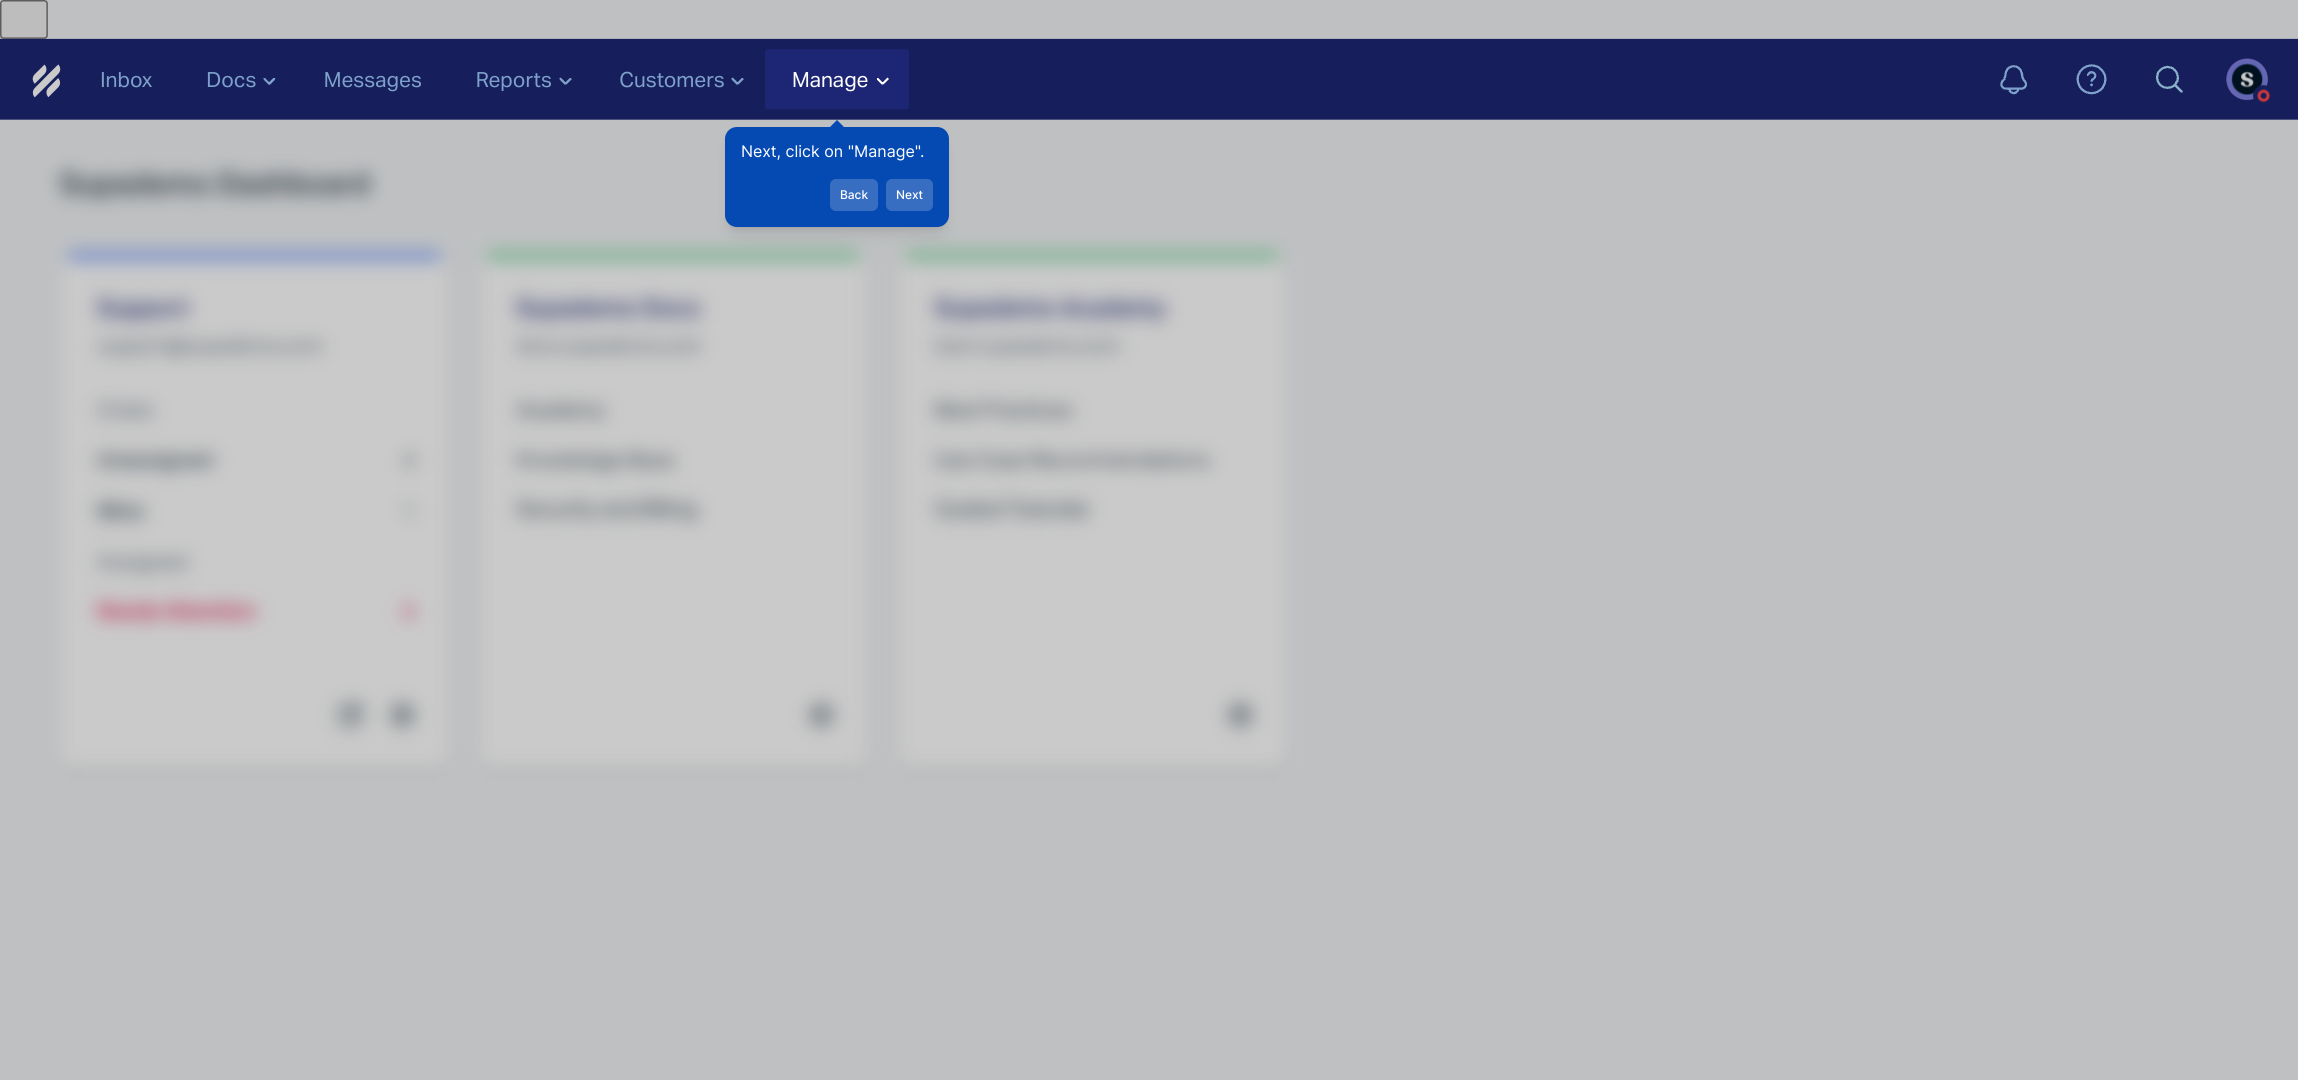
2. Next, click on "Manage".
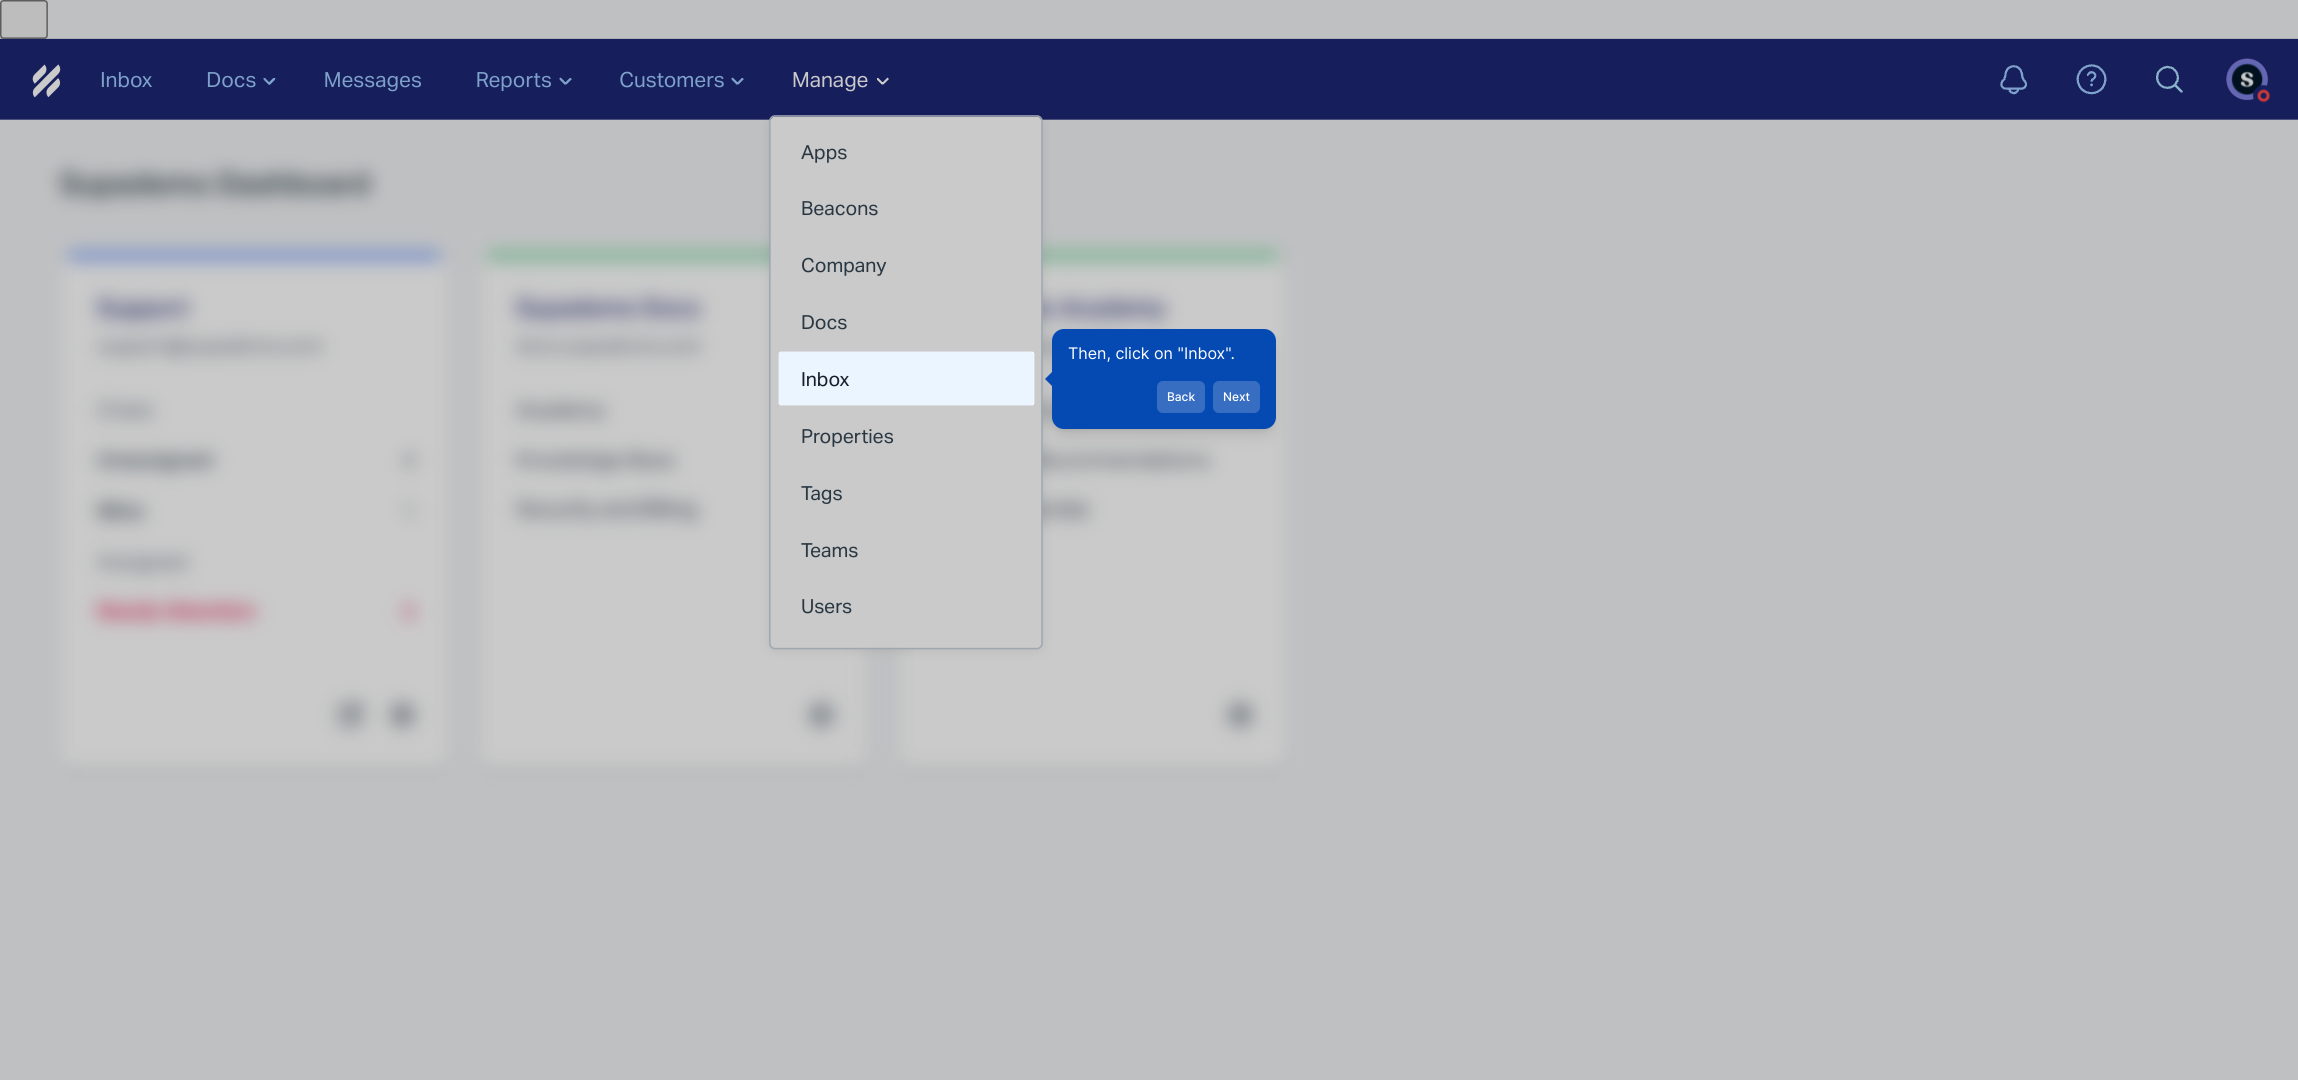
3. Then, click on "Inbox".
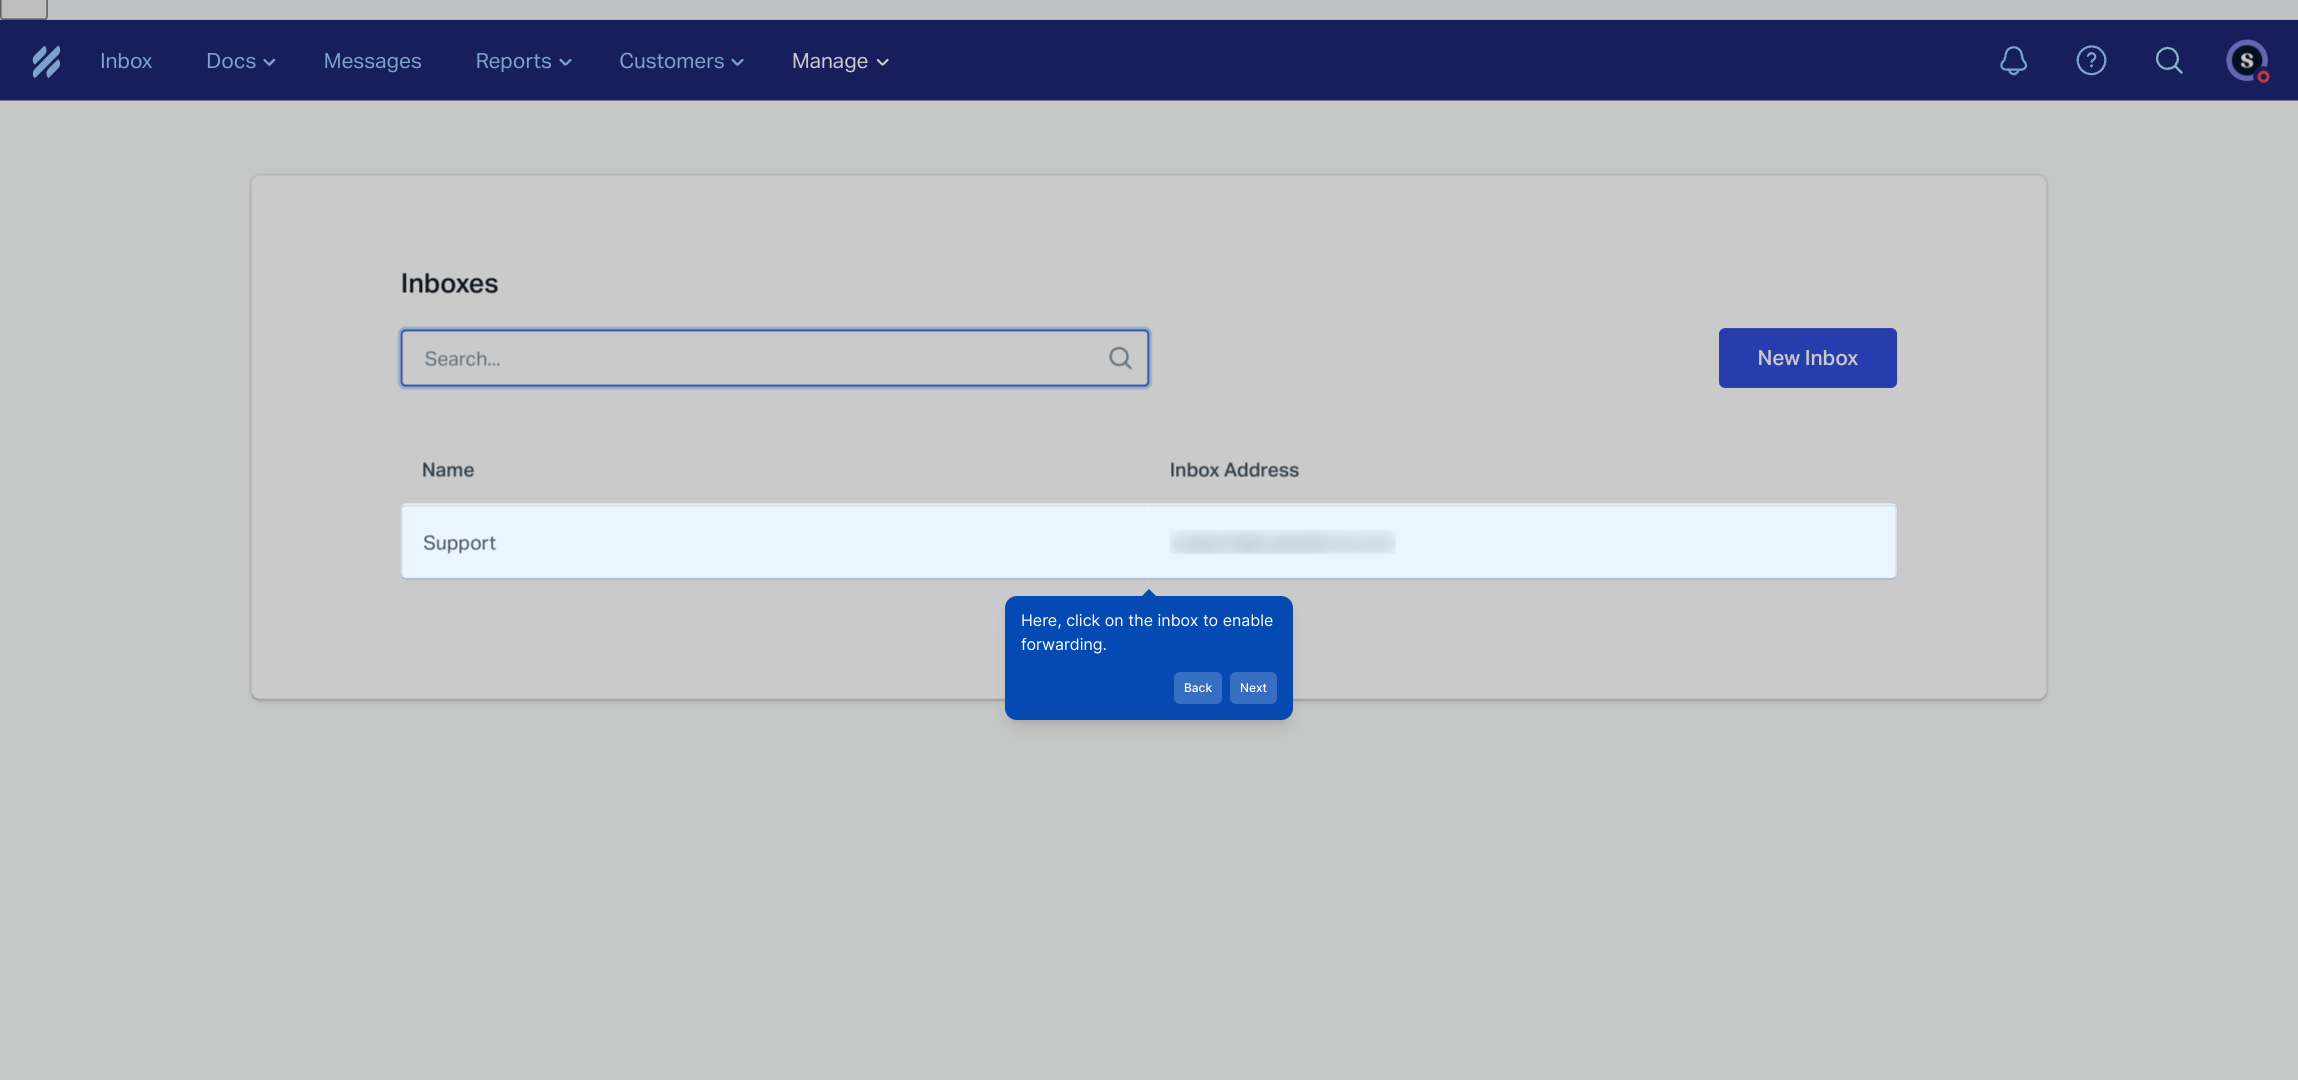
4. Here, click on the inbox to enable forwarding.
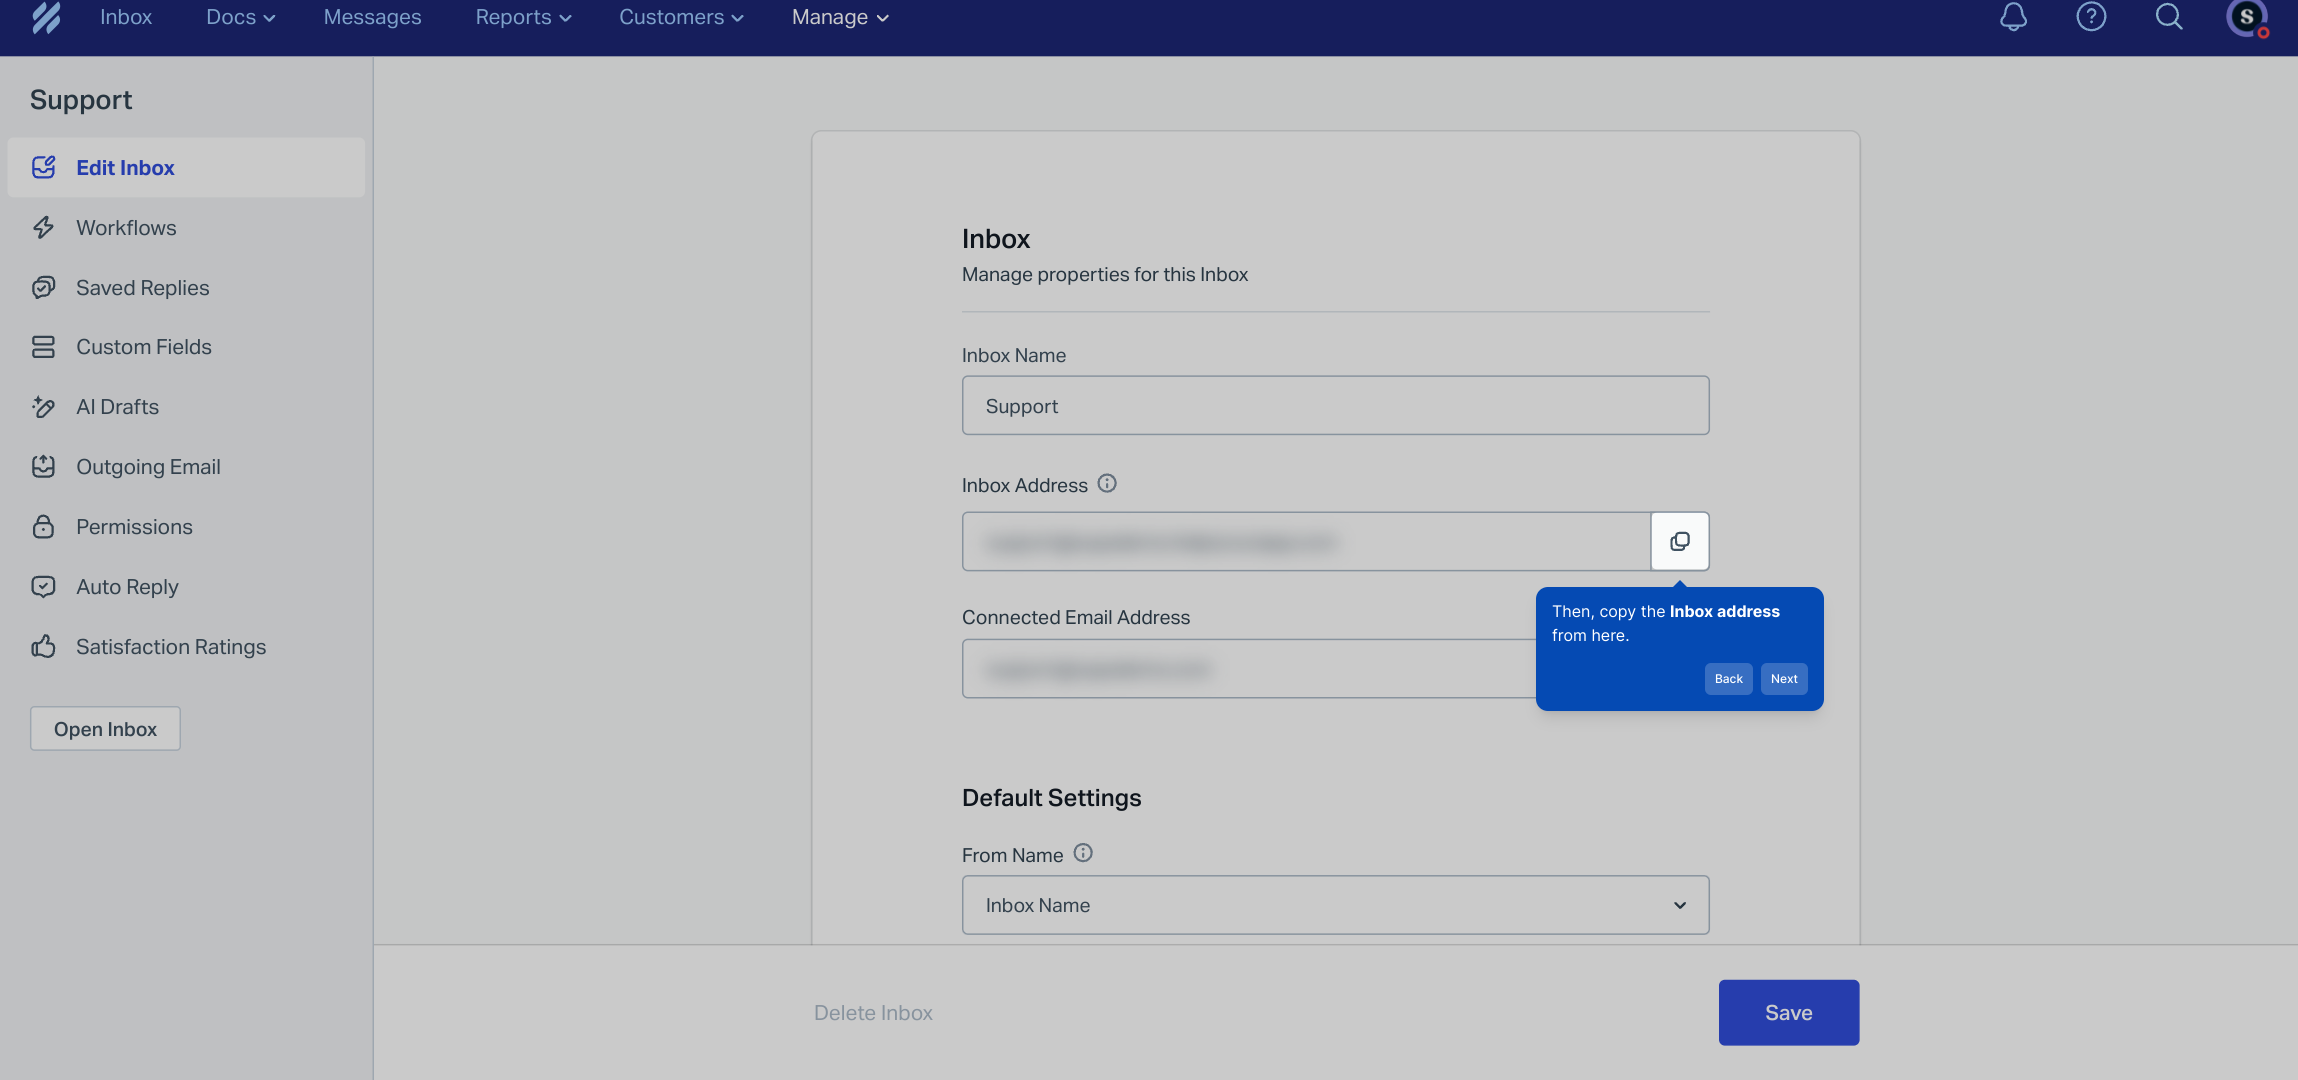
5. Then, copy the Inbox address from here.
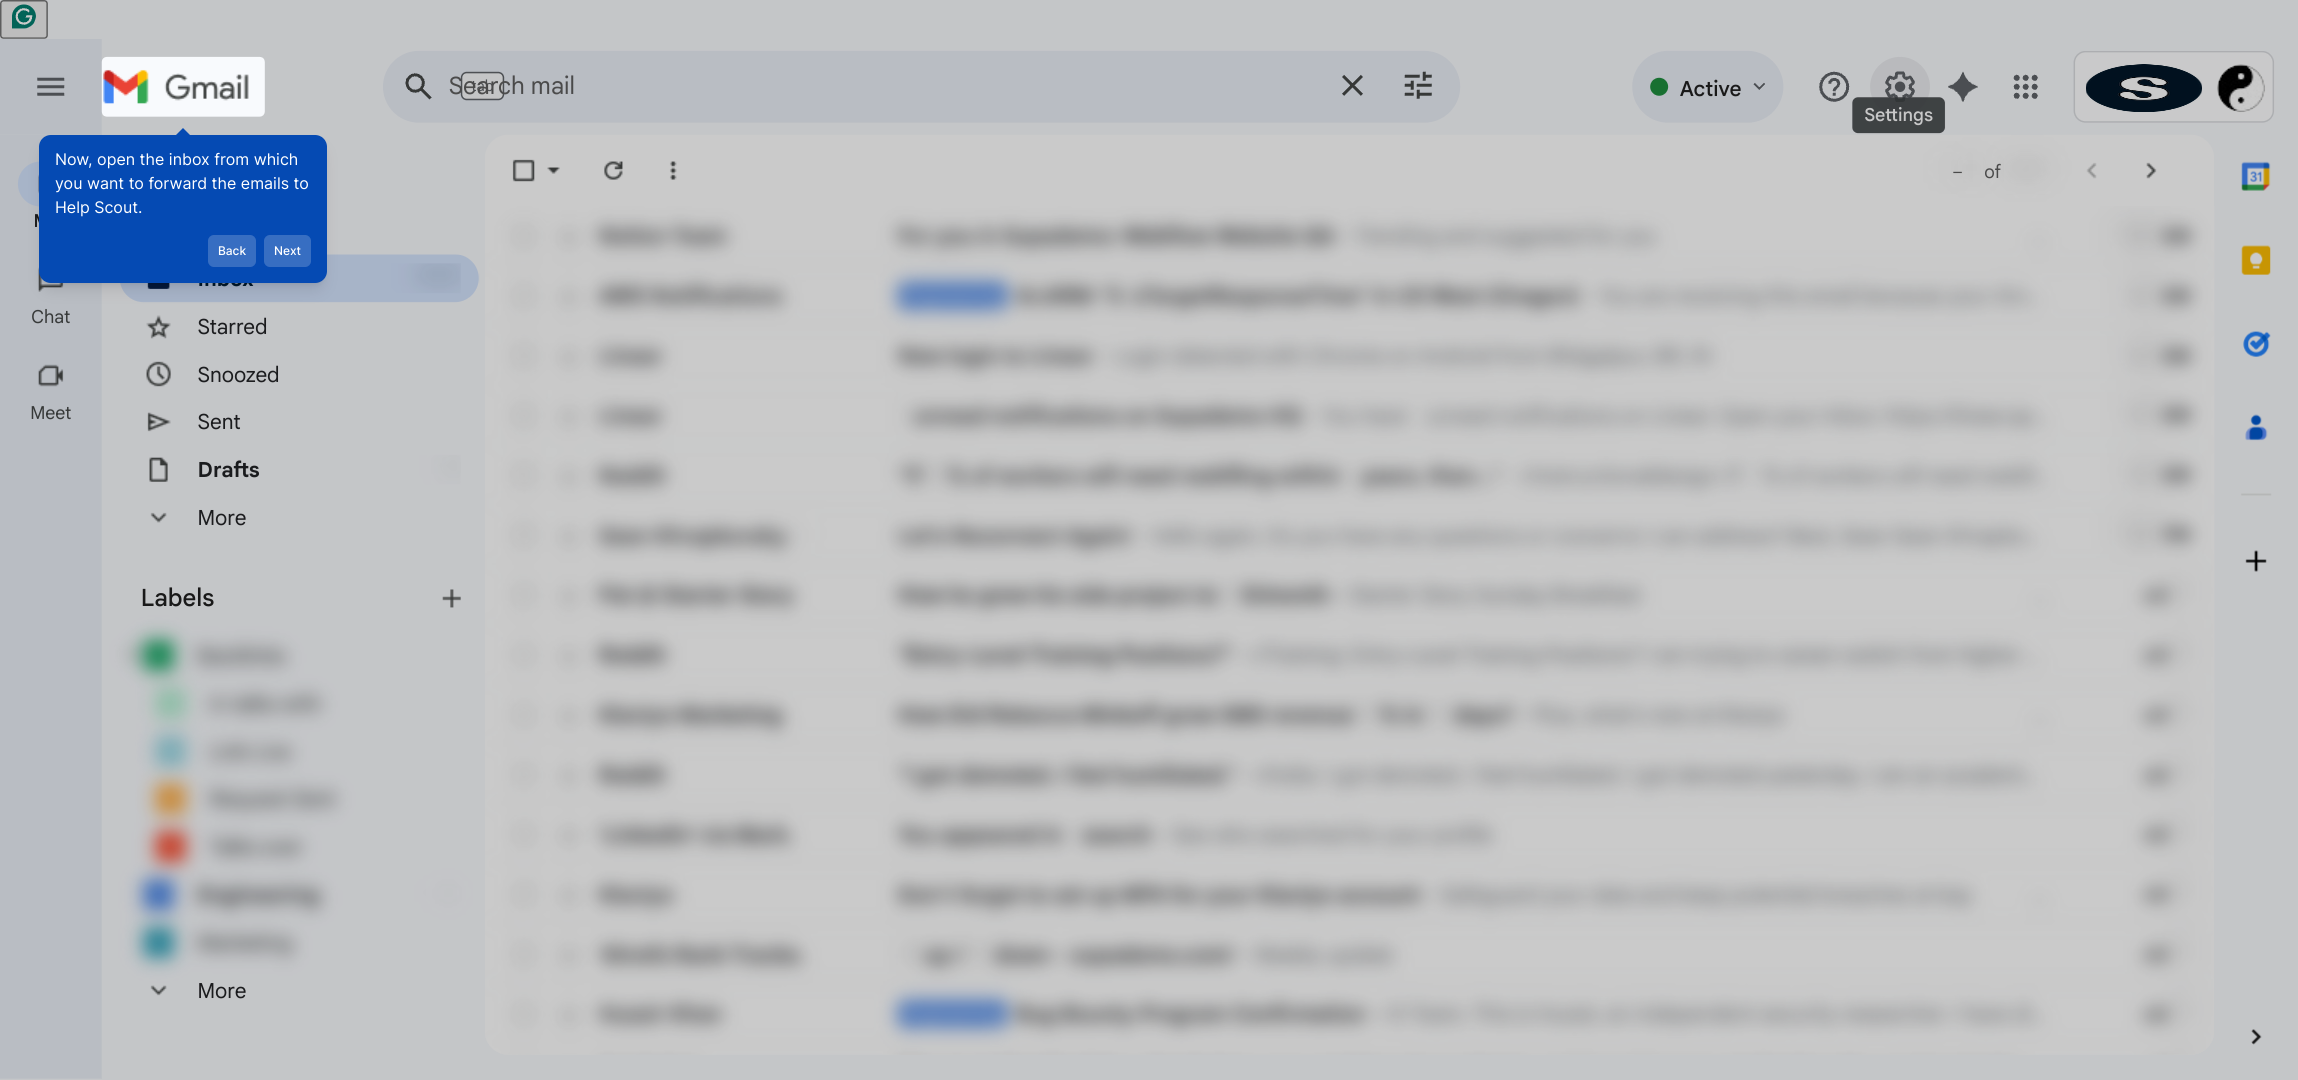
6. Now, open the inbox from which you want to forward the emails to Help Scout.
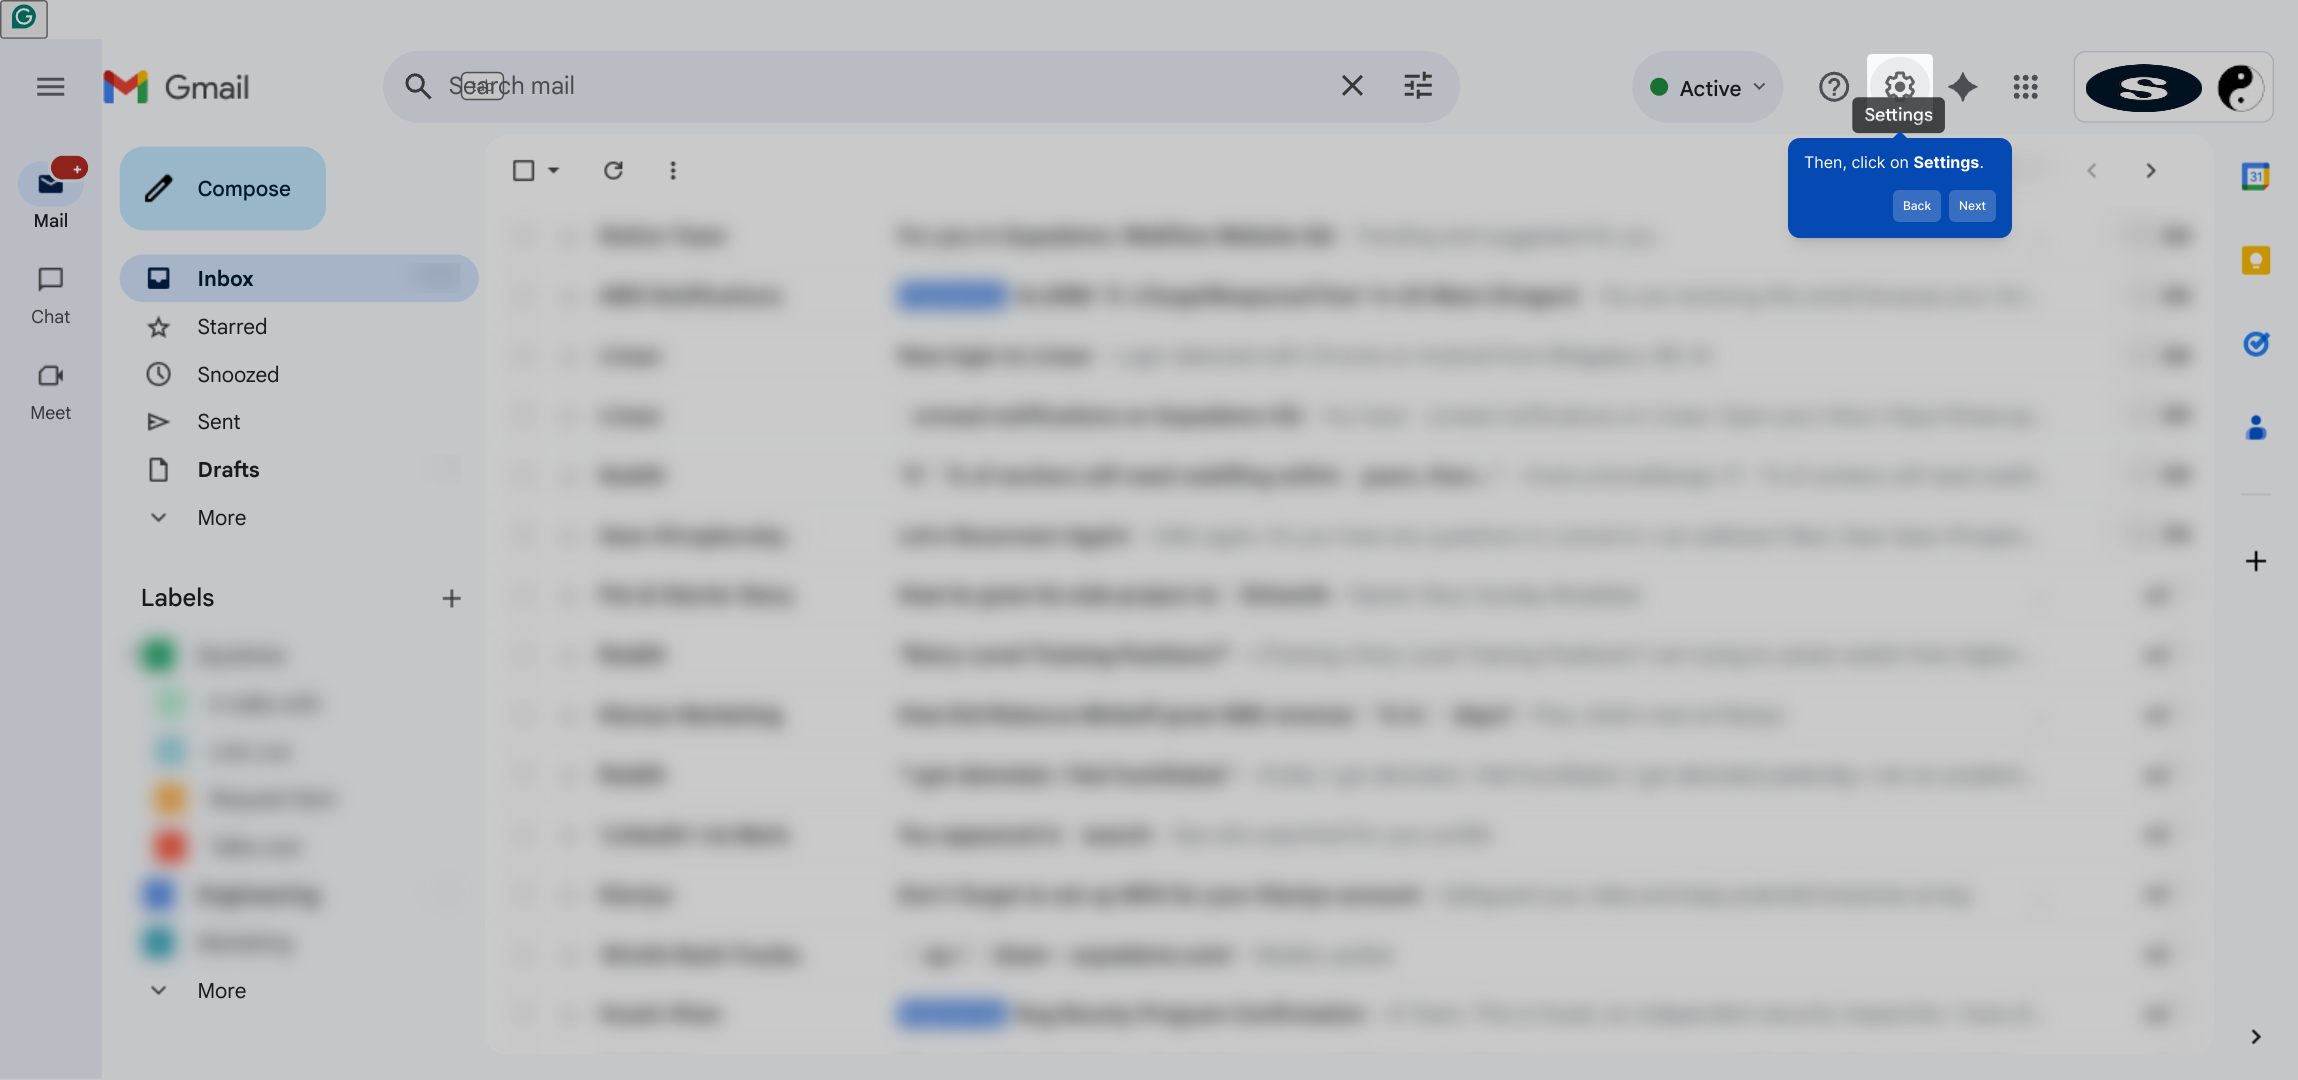
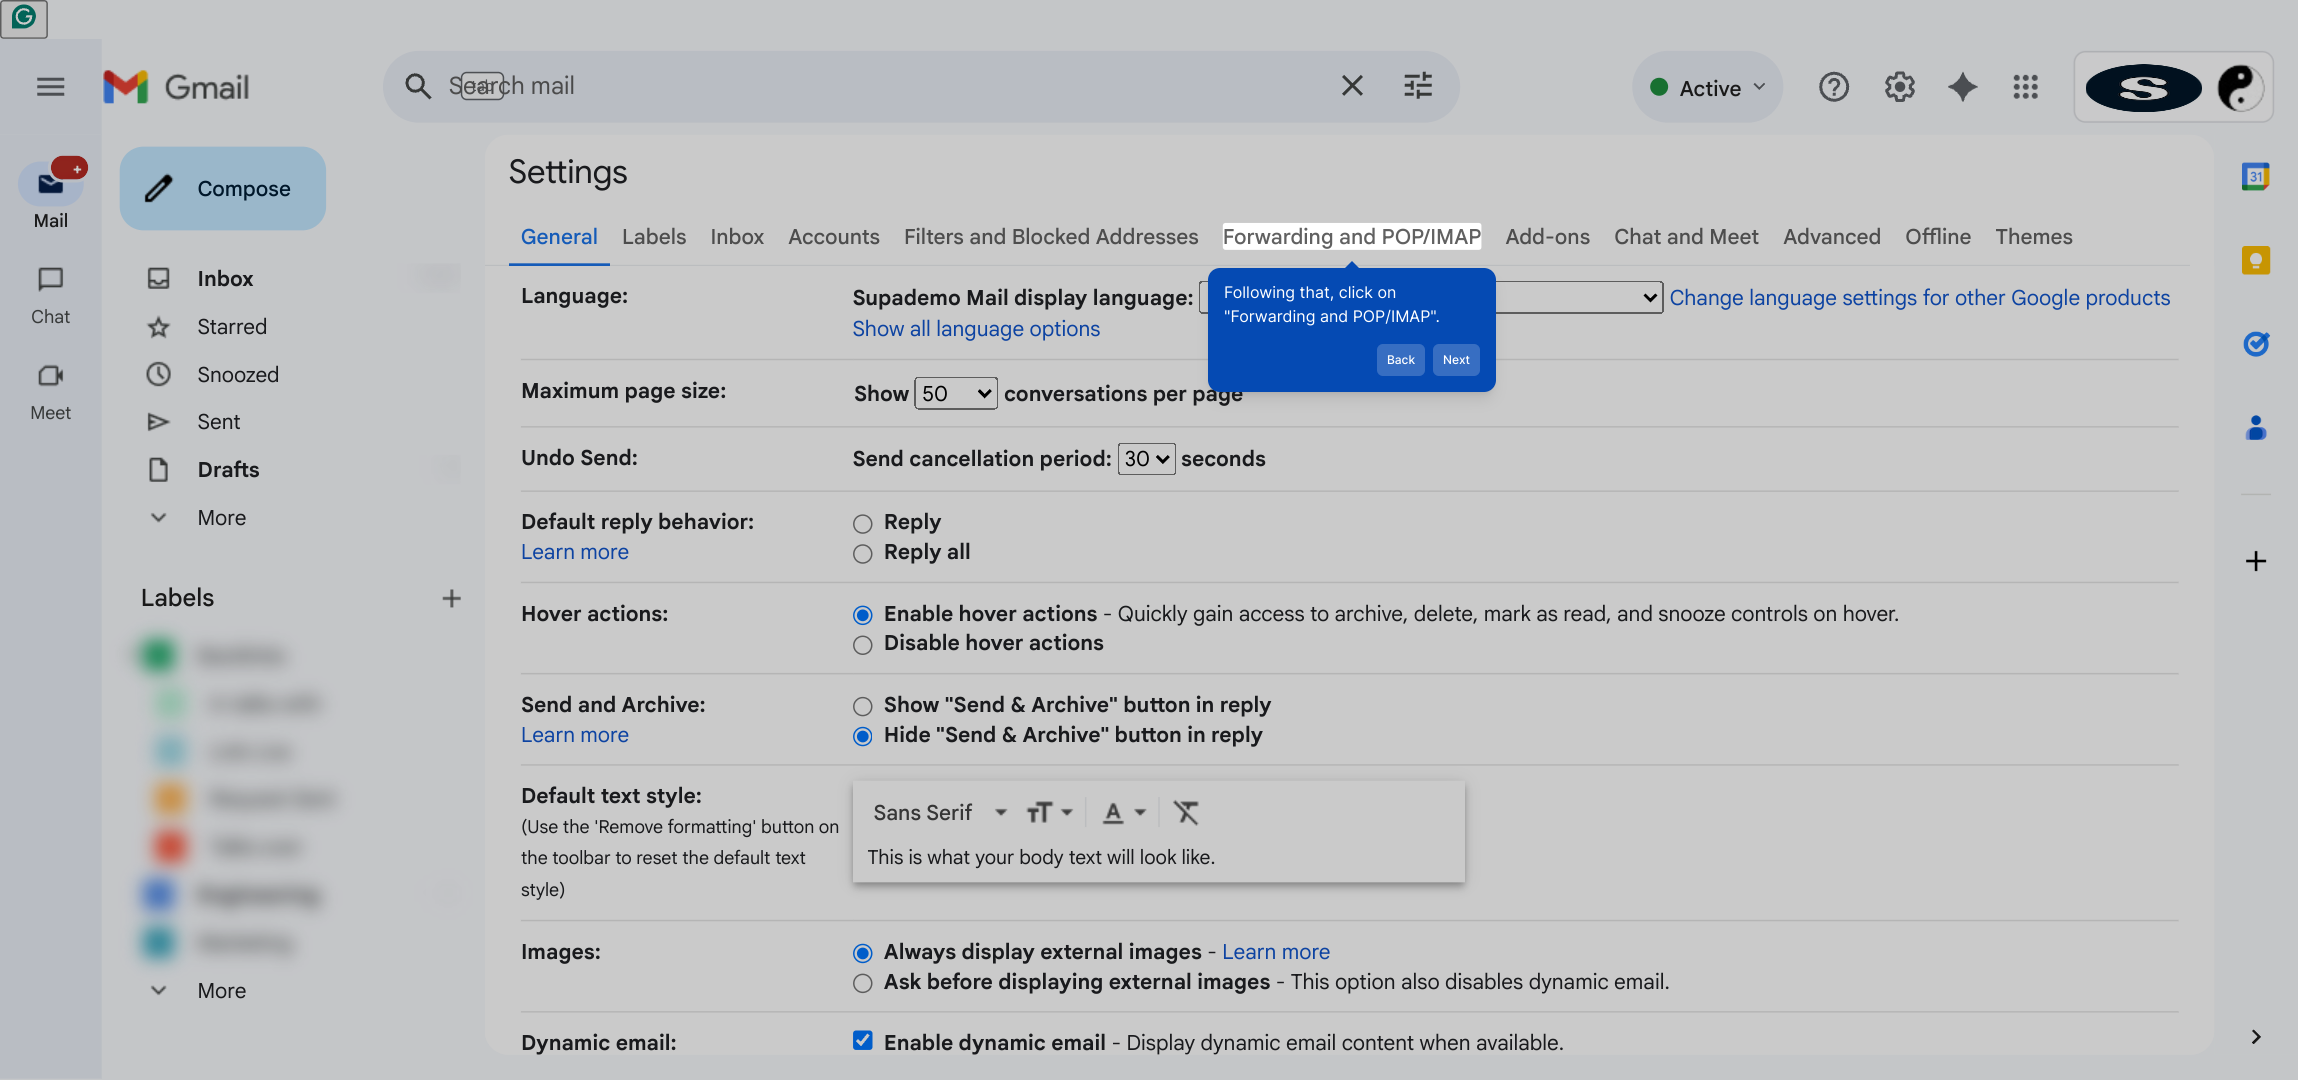
7. Then, click on Settings.
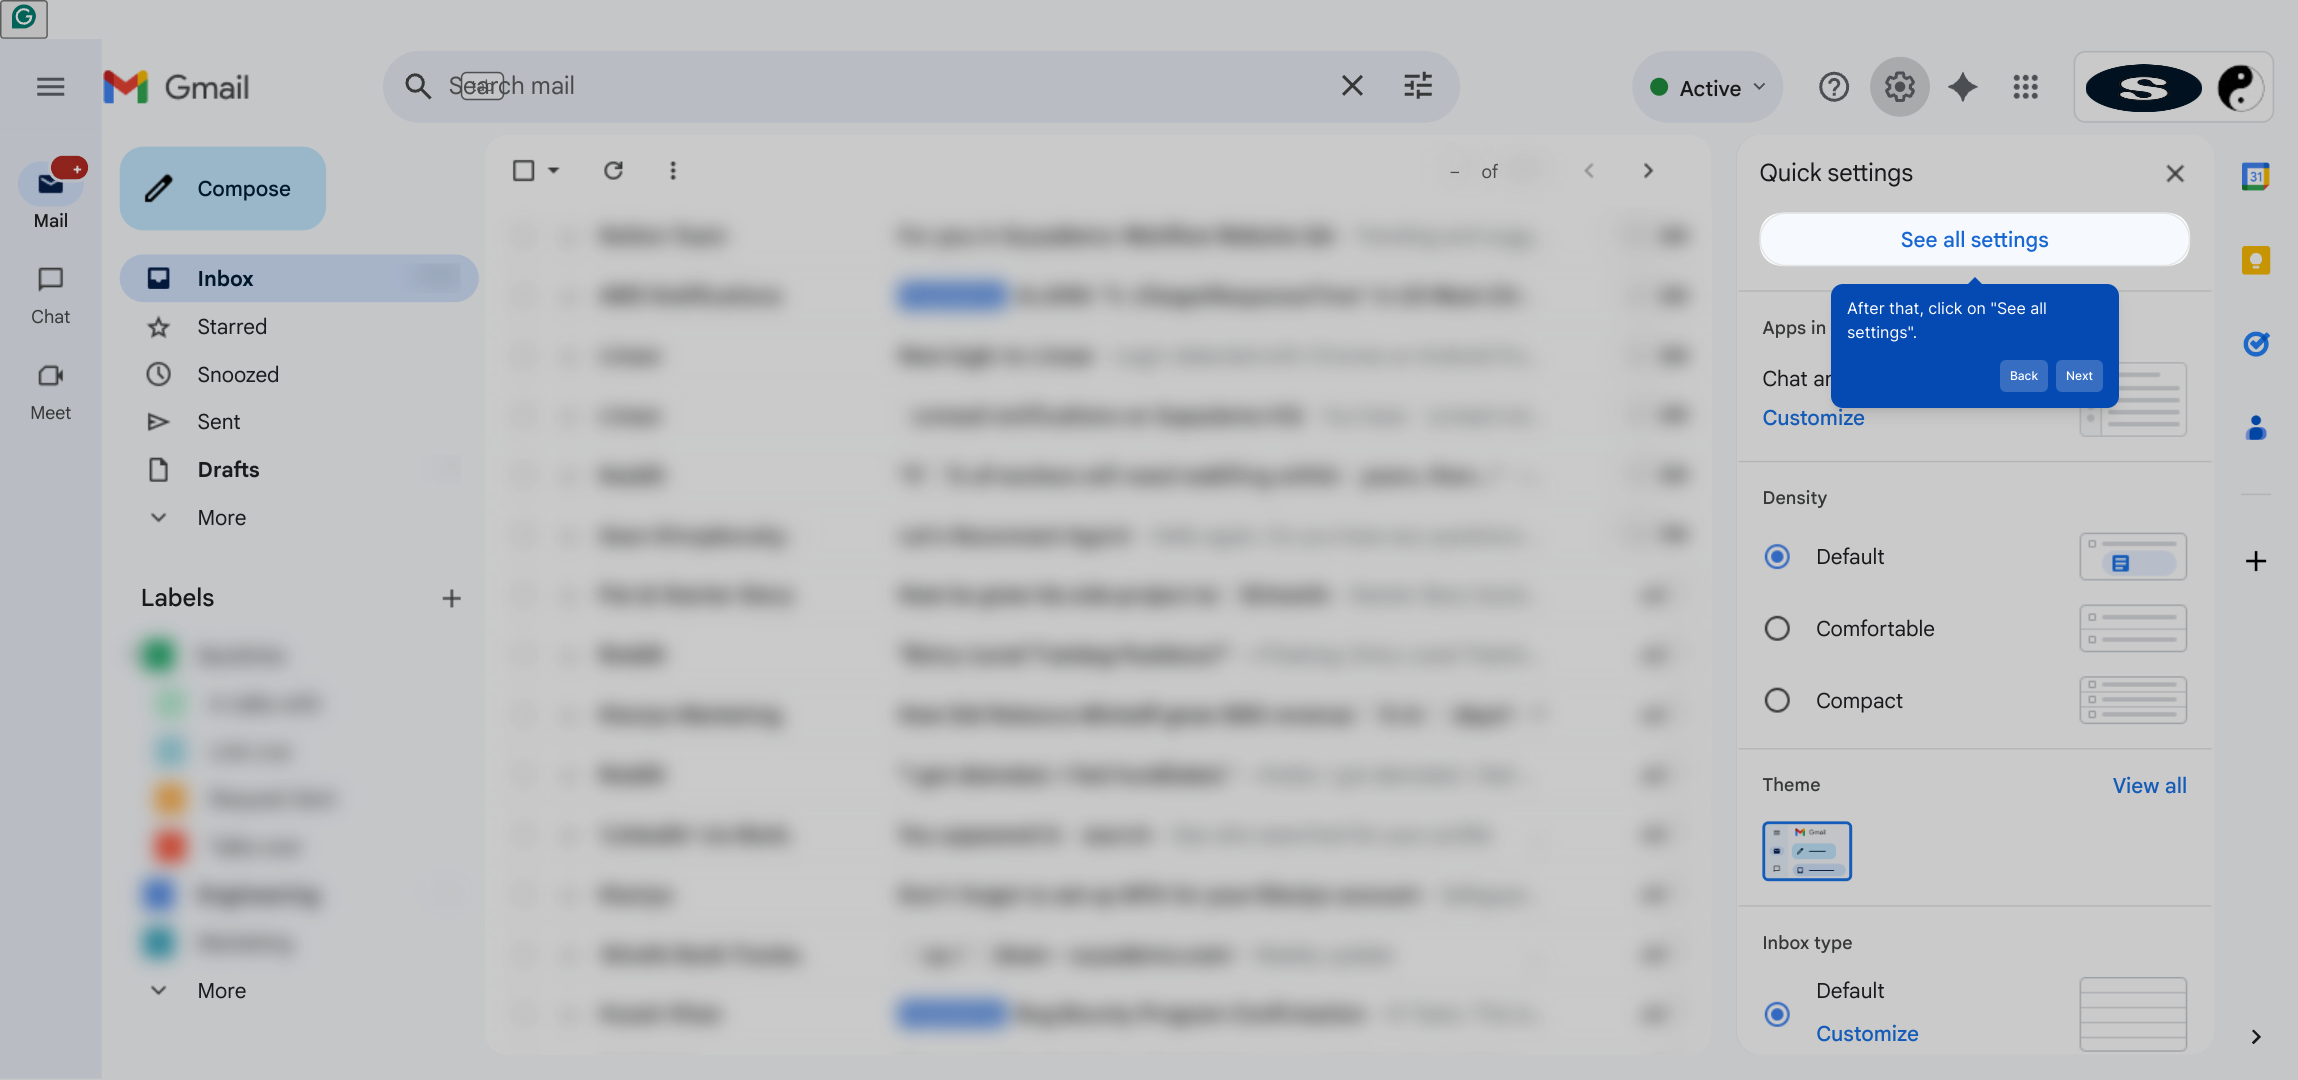
8. After that, click on "See all settings".
9. Following that, click on "Forwarding and POP/IMAP".
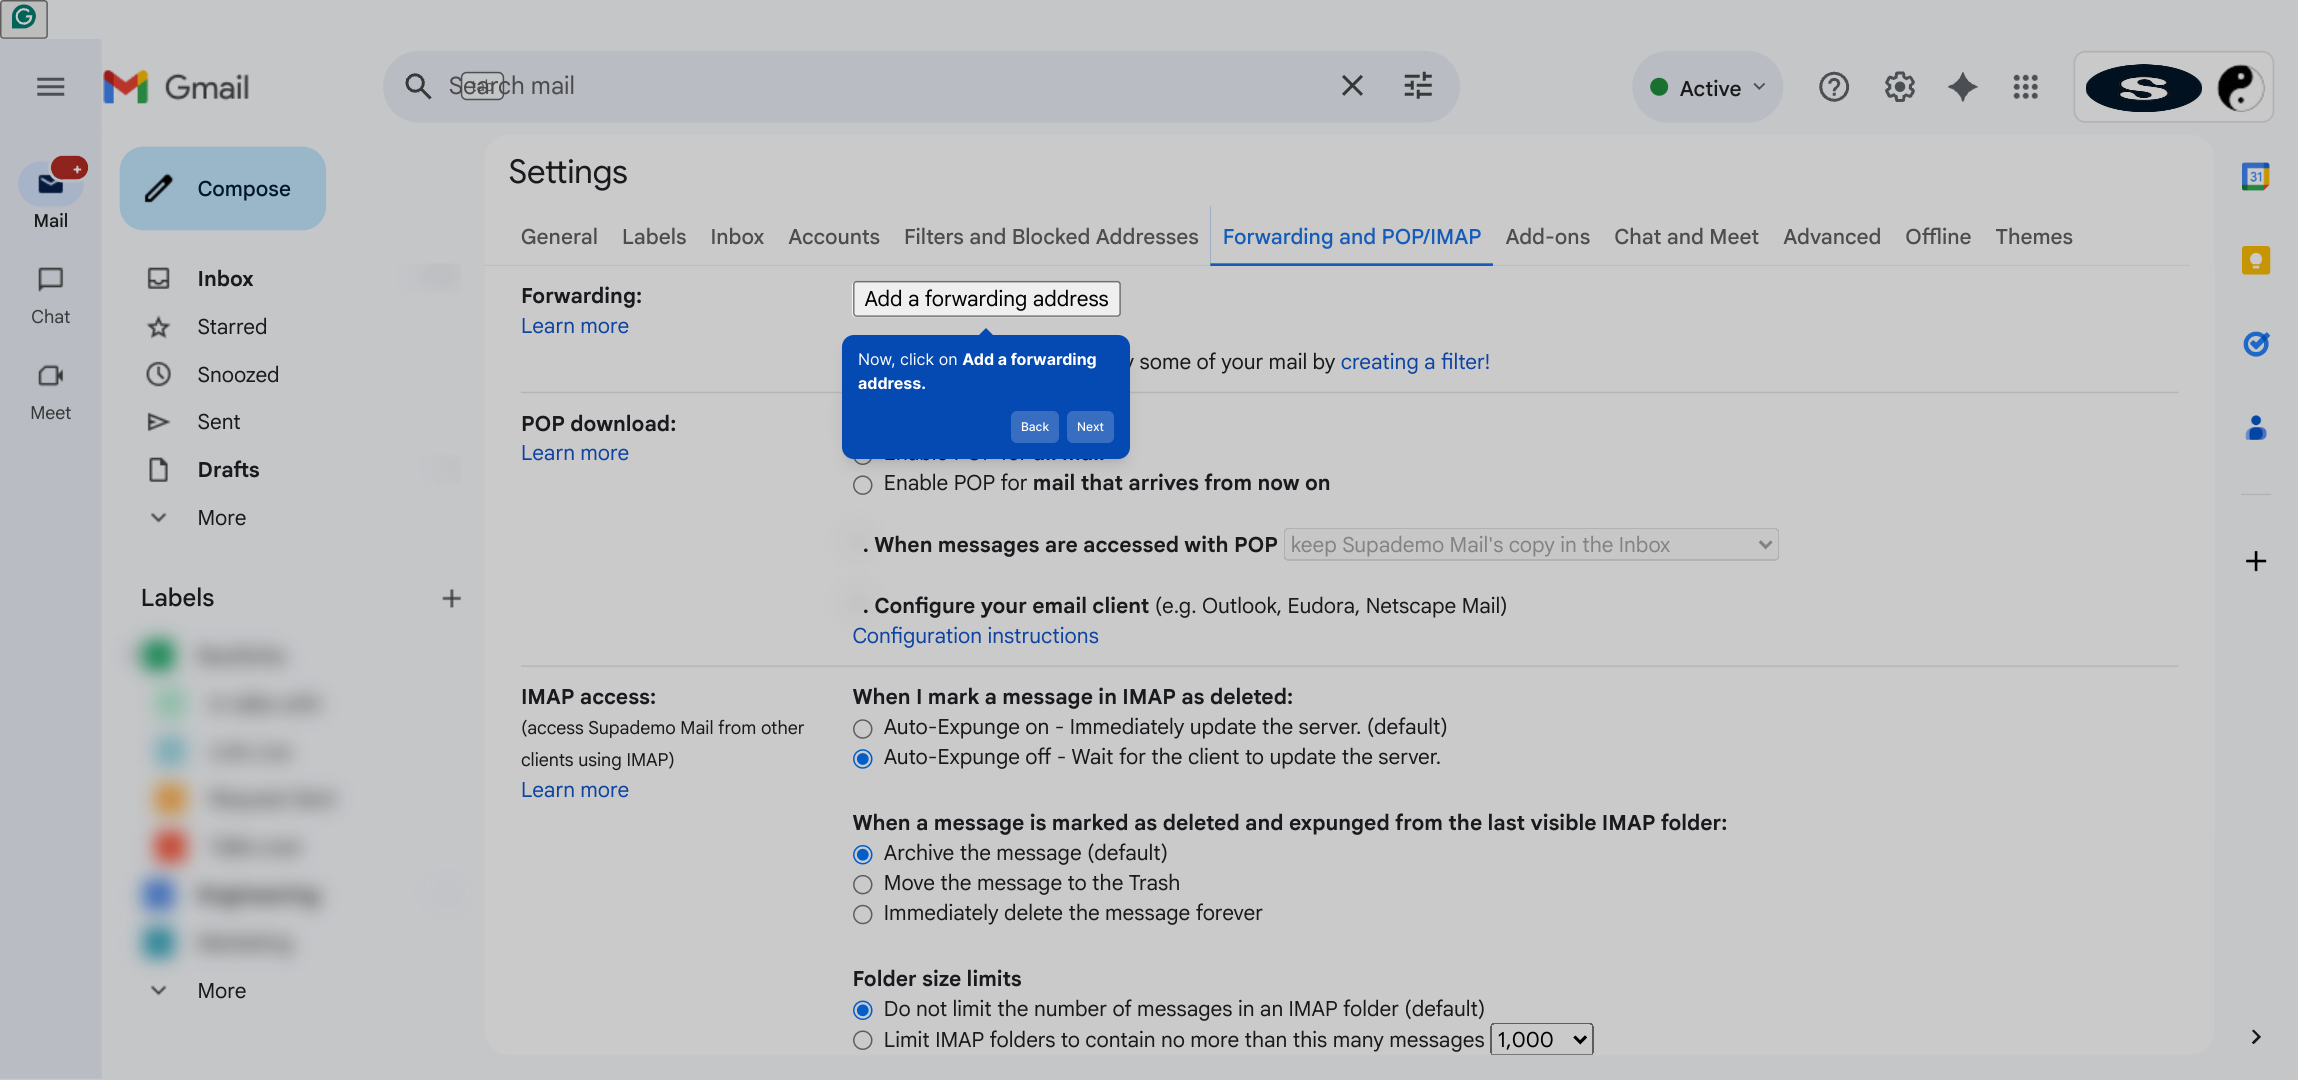
10. Now, click on Add a forwarding address.
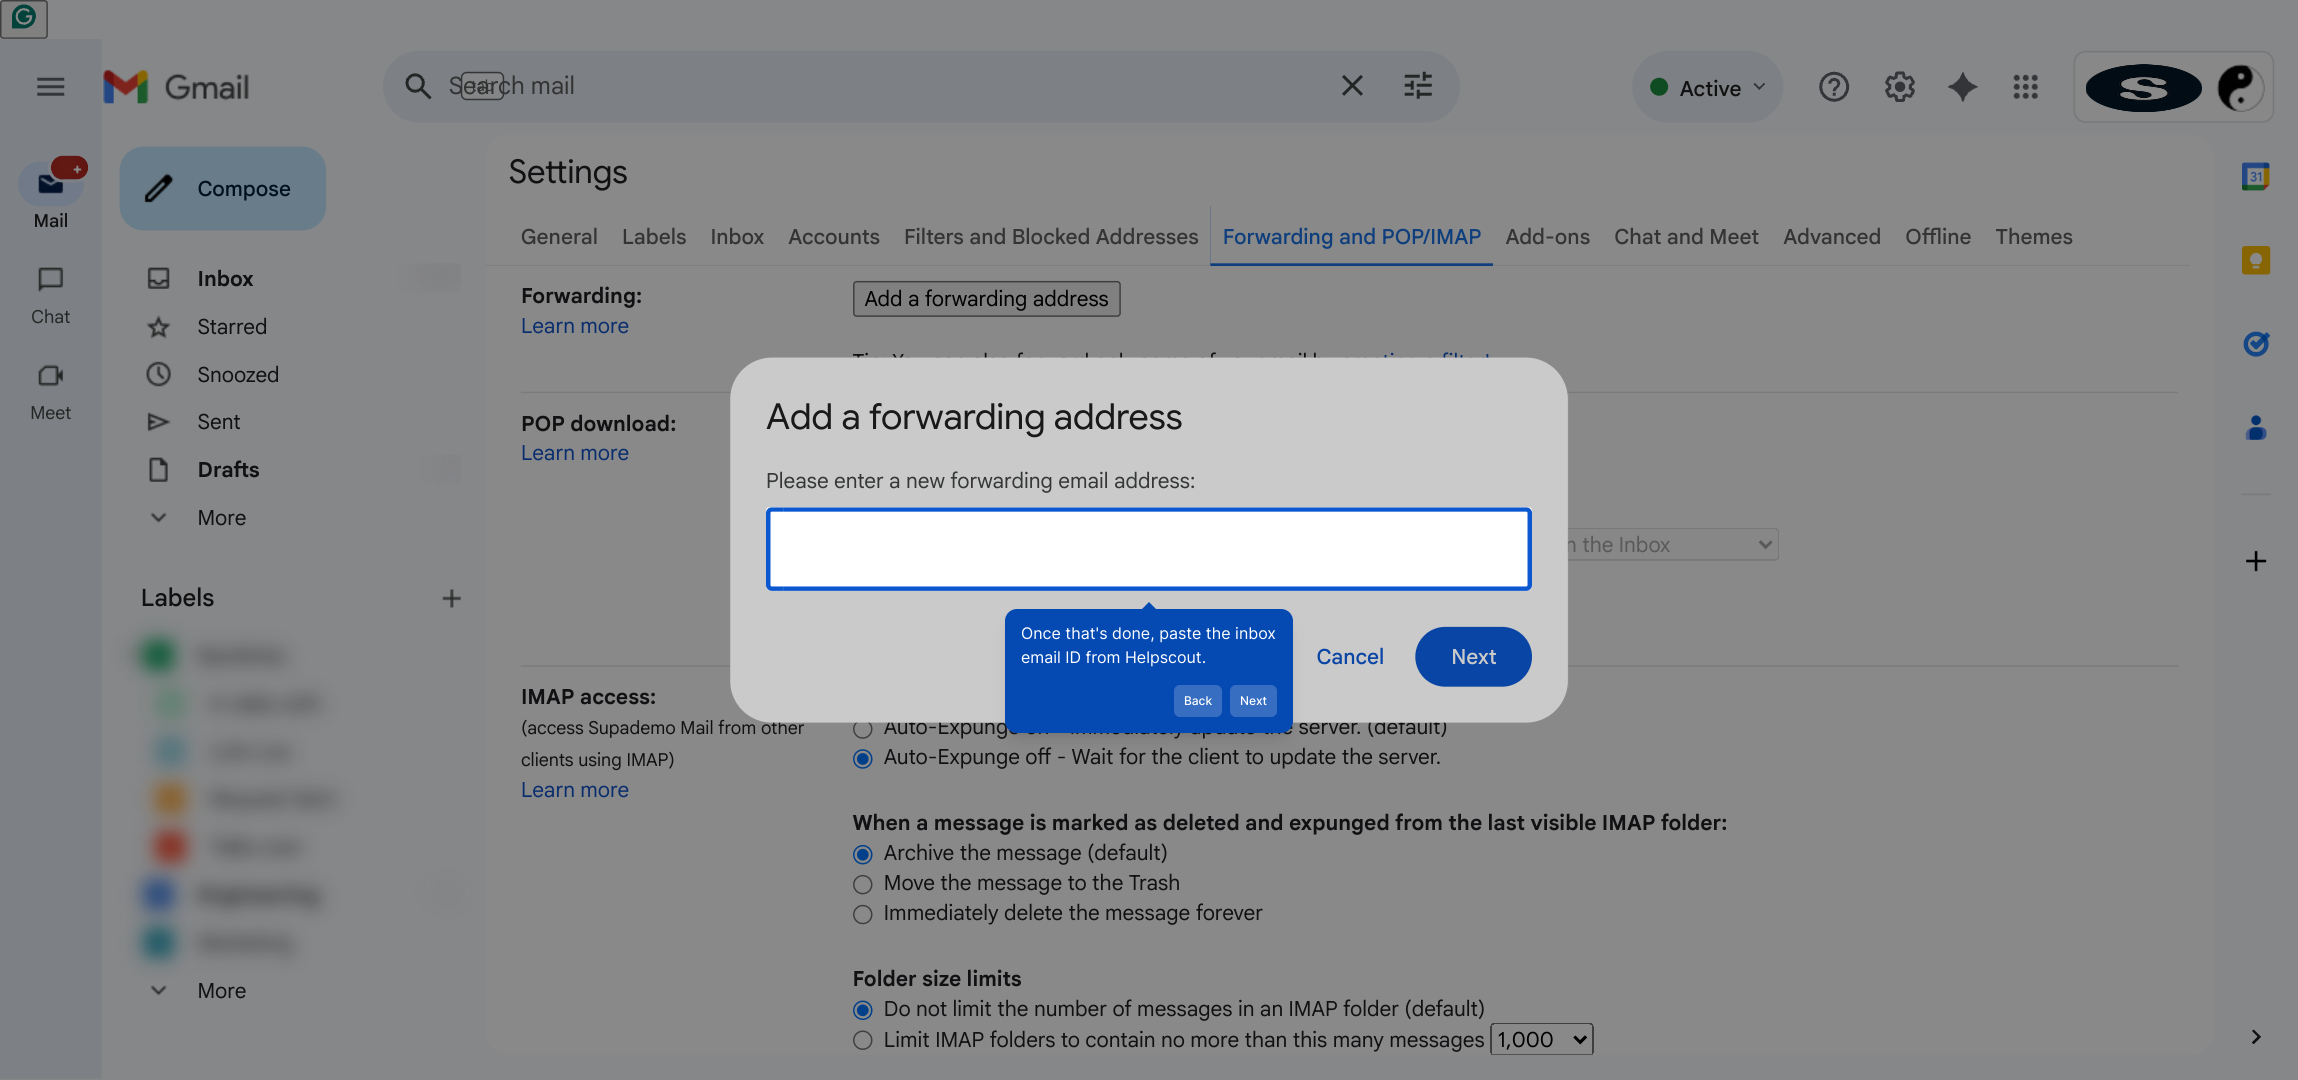
11. Once that's done, paste the inbox email ID from Helpscout.
12. Following that, click on Next.
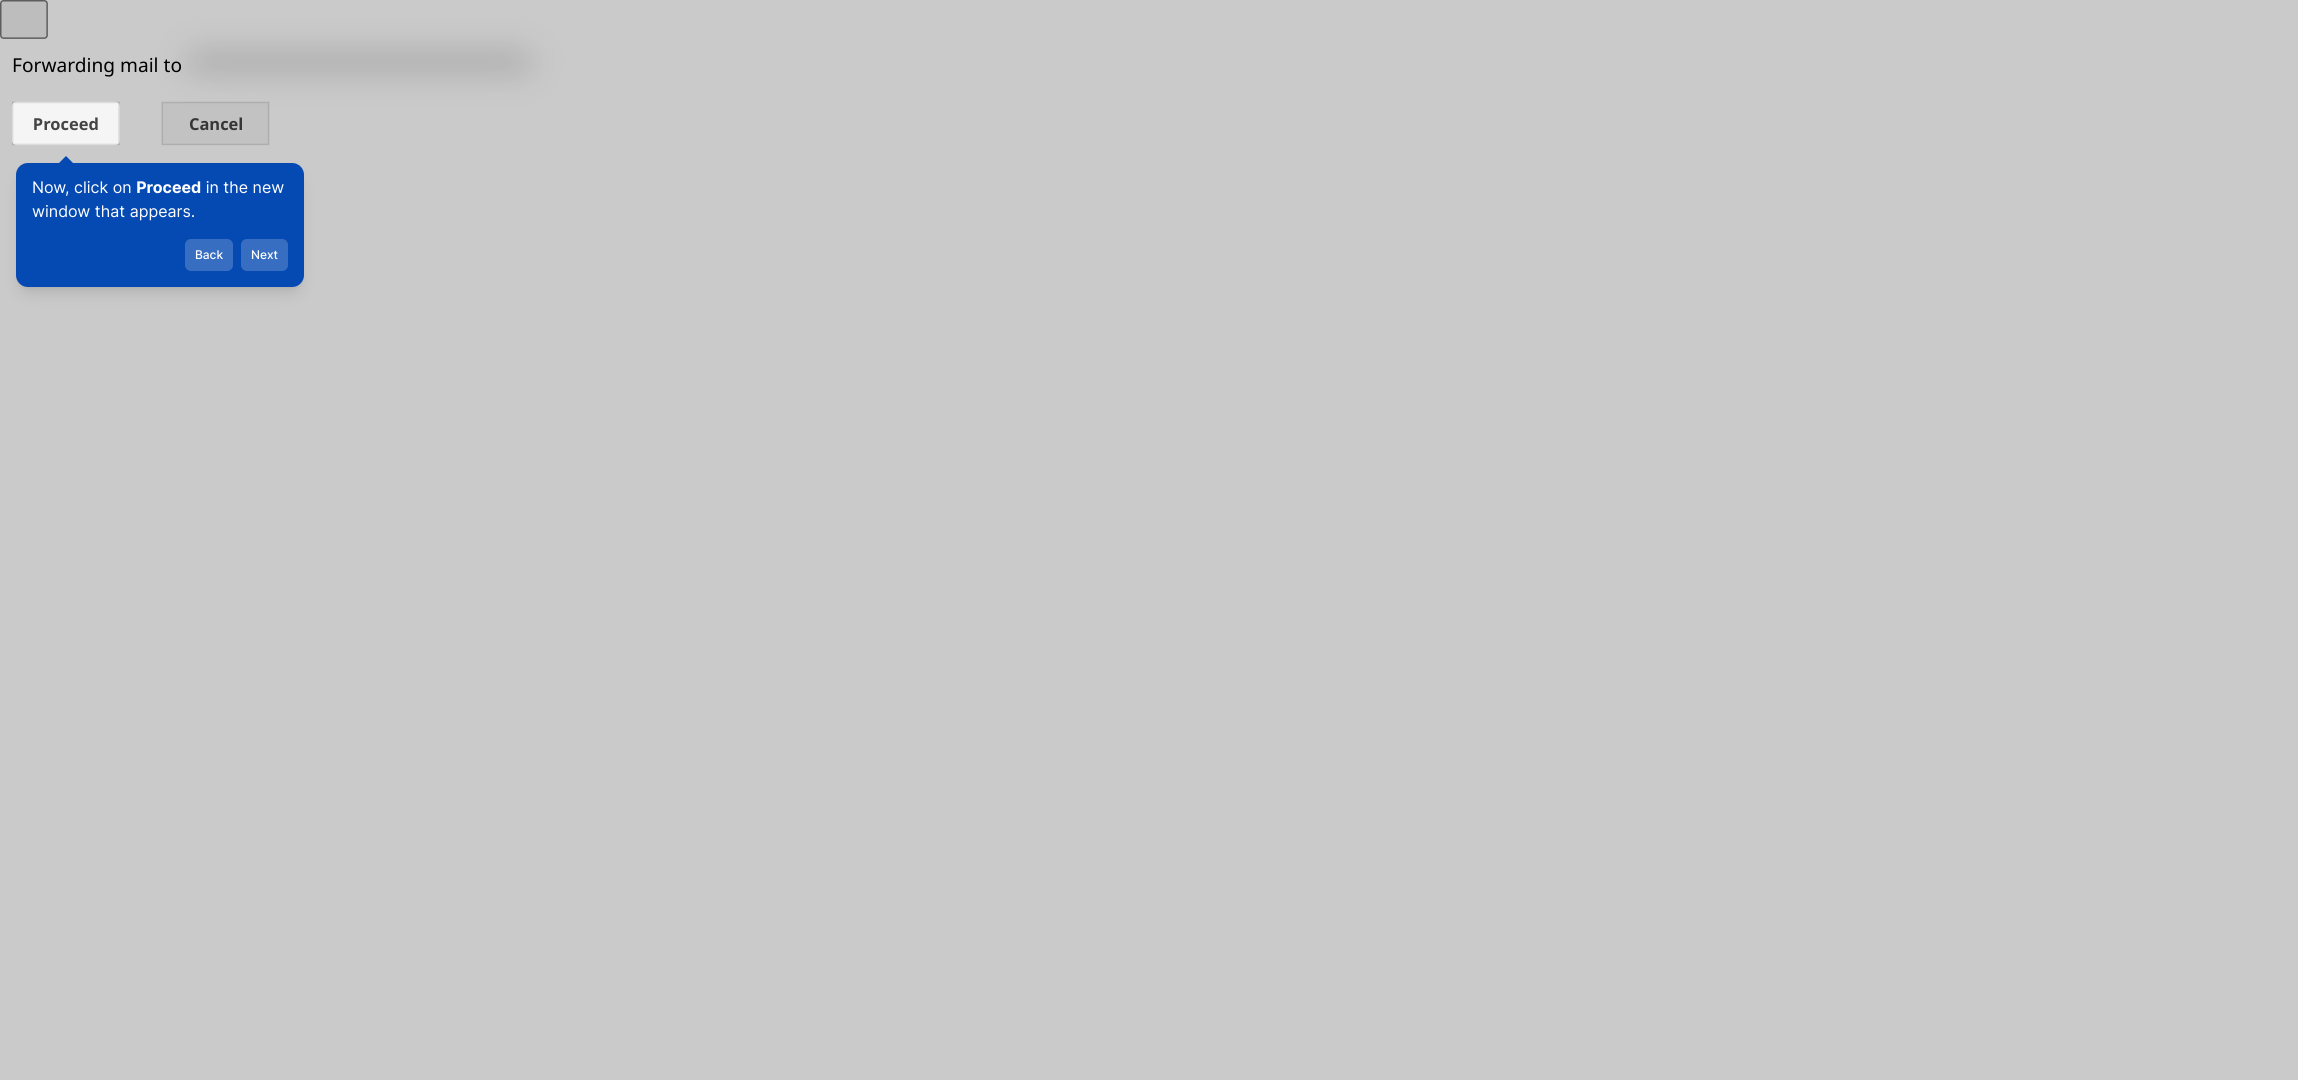
13. Now, click on Proceed in the new window that appears.
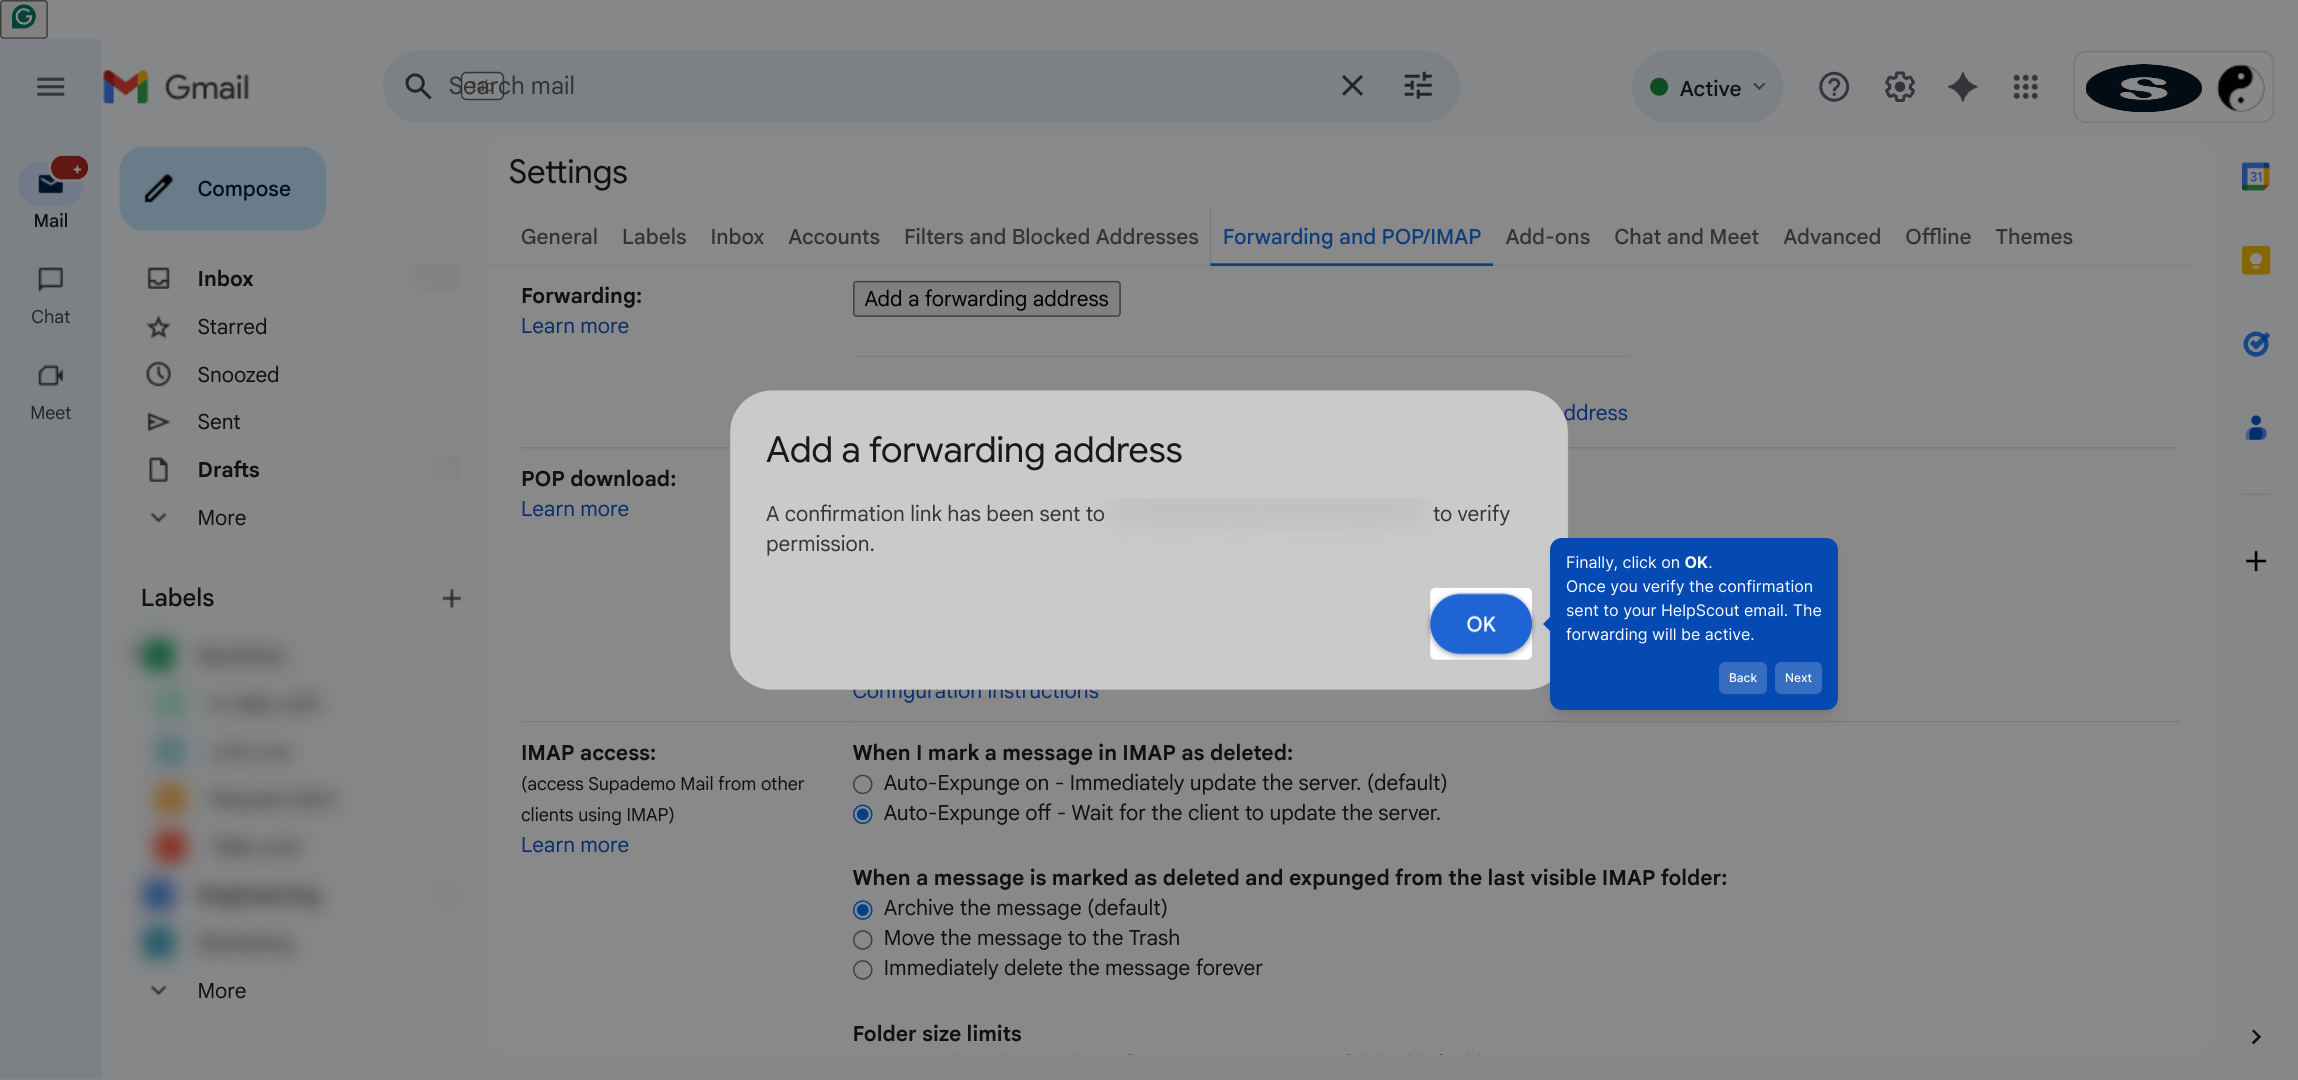
14. Finally, click on OK.
Once you verify the confirmation sent to your HelpScout email. The forwarding will be active.
15. Create a Supademo in seconds
This interactive demo/guided walkthrough on How to Set Up Email Forwarding in HelpScout was created using Supademo.
How to Set Up Email Forwarding in HelpScout : Step-by-Step Guide
Begin by signing into your Help Scout account to access the main dashboard where you manage all your mailboxes and settings.
Once you are on the dashboard, look for the "Manage" option in the main menu—this is where you can configure your mailboxes and other account settings.
Next, select the "Inbox" section from the management options to view the list of your inboxes and adjust their specific settings.
Here, find and click on the specific inbox you want to set up for forwarding. This will open the details where you can enable the email forwarding feature.
Within the inbox settings, you'll find the Inbox address. Copy this unique forwarding address as it will be needed in the next steps.
Now, open the email account from which you want to forward messages to Help Scout so you can set up the forwarding rules there.
In your email client, go to the Settings menu to access all configuration options.
From the settings menu, select "See all settings" to open the full range of customization options for your email account.
Look for the "Forwarding and POP/IMAP" tab, which controls your incoming email management and where forwarding addresses can be added.
Within this section, choose Add a forwarding address to begin configuring the forward to your Help Scout inbox.
Paste the inbox email address you copied from Help Scout into the forwarding address field to direct your emails to the correct destination.
After adding the forwarding address, click Next to proceed with the setup and confirm your entry.

A new window will pop up asking for confirmation. Click Proceed to complete the forwarding setup process.
Finally, confirm by clicking OK. You'll need to verify the forwarding request by clicking the confirmation link sent to your Help Scout email. Once verified, forwarding will be activated.
With forwarding set up, you can now create a Supademo quickly—and see how your emails seamlessly flow into Help Scout for efficient management.
Create your own interactive demos in < 5 mins with Supademo
You can create your own interactive product demo in minutes using Supademo. Drive growth, scale enablement, and supercharge product-led onboarding with Supademo.
Sign up for free here with no credit card required.
FAQs
What is email forwarding in HelpScout?
Email forwarding in HelpScout allows you to redirect emails from an external inbox to your HelpScout inbox automatically, ensuring all customer communications are centralized for easier tracking and response.
Why should I set up email forwarding in HelpScout?
Setting up email forwarding helps consolidate communications, making your support process more efficient by managing all incoming mails within HelpScout’s interface, improving response times and customer experience.
How do I find my HelpScout Inbox address?
You can find your HelpScout inbox address by navigating to Manage > Inbox in your HelpScout dashboard, selecting the inbox, and then copying the unique Inbox address provided in the settings.
Can I forward emails from any email provider to HelpScout?
Yes, most email providers support forwarding. You'll need to add the HelpScout inbox address as a forwarding address within your provider's settings, following their specific rules for adding forwarding addresses.
What if I don’t see the forwarding option in my email settings?
Some email clients may hide forwarding options under advanced or legacy settings. Check your provider’s help resources or contact their support if you cannot locate forwarding features.
Is there a confirmation process when adding a forwarding address in HelpScout?
Yes, after adding the forwarding address, you typically need to confirm the forwarding request by clicking a link sent to the HelpScout inbox email. This verification activates email forwarding.
Will forwarded emails retain the original sender’s information?
Yes, HelpScout preserves the original sender info when emails are forwarded, allowing you to respond directly and track conversations without losing context.
How long does it take for forwarded emails to appear in HelpScout?
Forwarded emails typically appear in HelpScout within a few minutes after being sent. However, delays can depend on your email provider’s forwarding speed.
Can I set up multiple inboxes with forwarding in HelpScout?
Yes, HelpScout supports multiple inboxes. You can set up forwarding from different email accounts to different HelpScout inboxes as needed to organize support channels.
Is it possible to disable email forwarding once set up in HelpScout?
Yes, you can disable forwarding at either your original email provider by removing the forwarding address or within HelpScout by adjusting the inbox settings related to forwarding.