
Overview:
Streamline your Mailchimp experience with our guide on exporting contacts effortlessly. Optimize workflow by organizing and categorizing your contacts with relevant tags for seamless navigation. This comprehensive guide provides step-by-step instructions on exporting contacts, ensuring efficiency and clarity in managing your email marketing campaigns within the Mailchimp platform.
Who is Mailchimp best suited for?
Mailchimp is best suited for a wide range of professionals, including Email Marketers, Small Business Owners, and E-commerce Managers. For example, Email Marketers can use Mailchimp for creating and automating email campaigns, Small Business Owners can leverage it for managing customer lists and running promotional emails, and E-commerce Managers can use it for crafting targeted marketing messages and analyzing campaign performance, all benefiting from Mailchimp’s user-friendly interface and robust marketing automation tools.
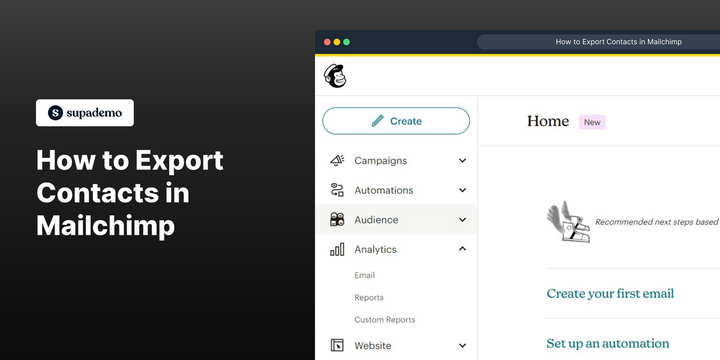
How to export contacts in Mailchimp
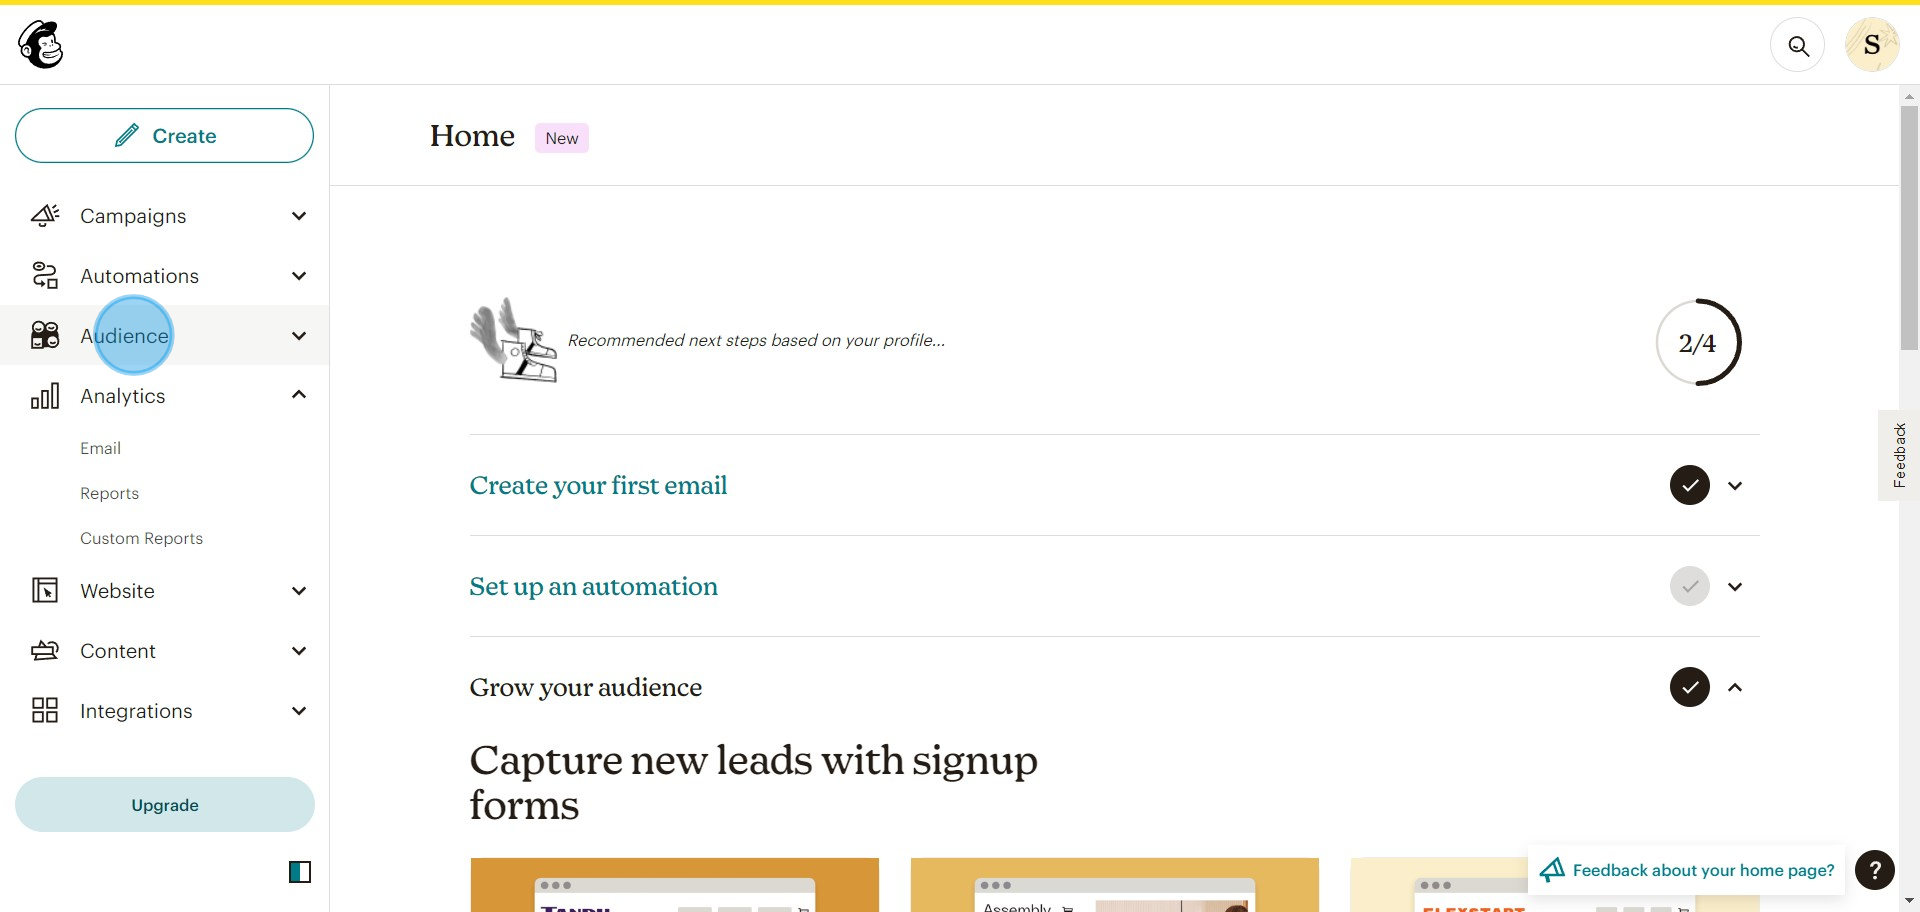
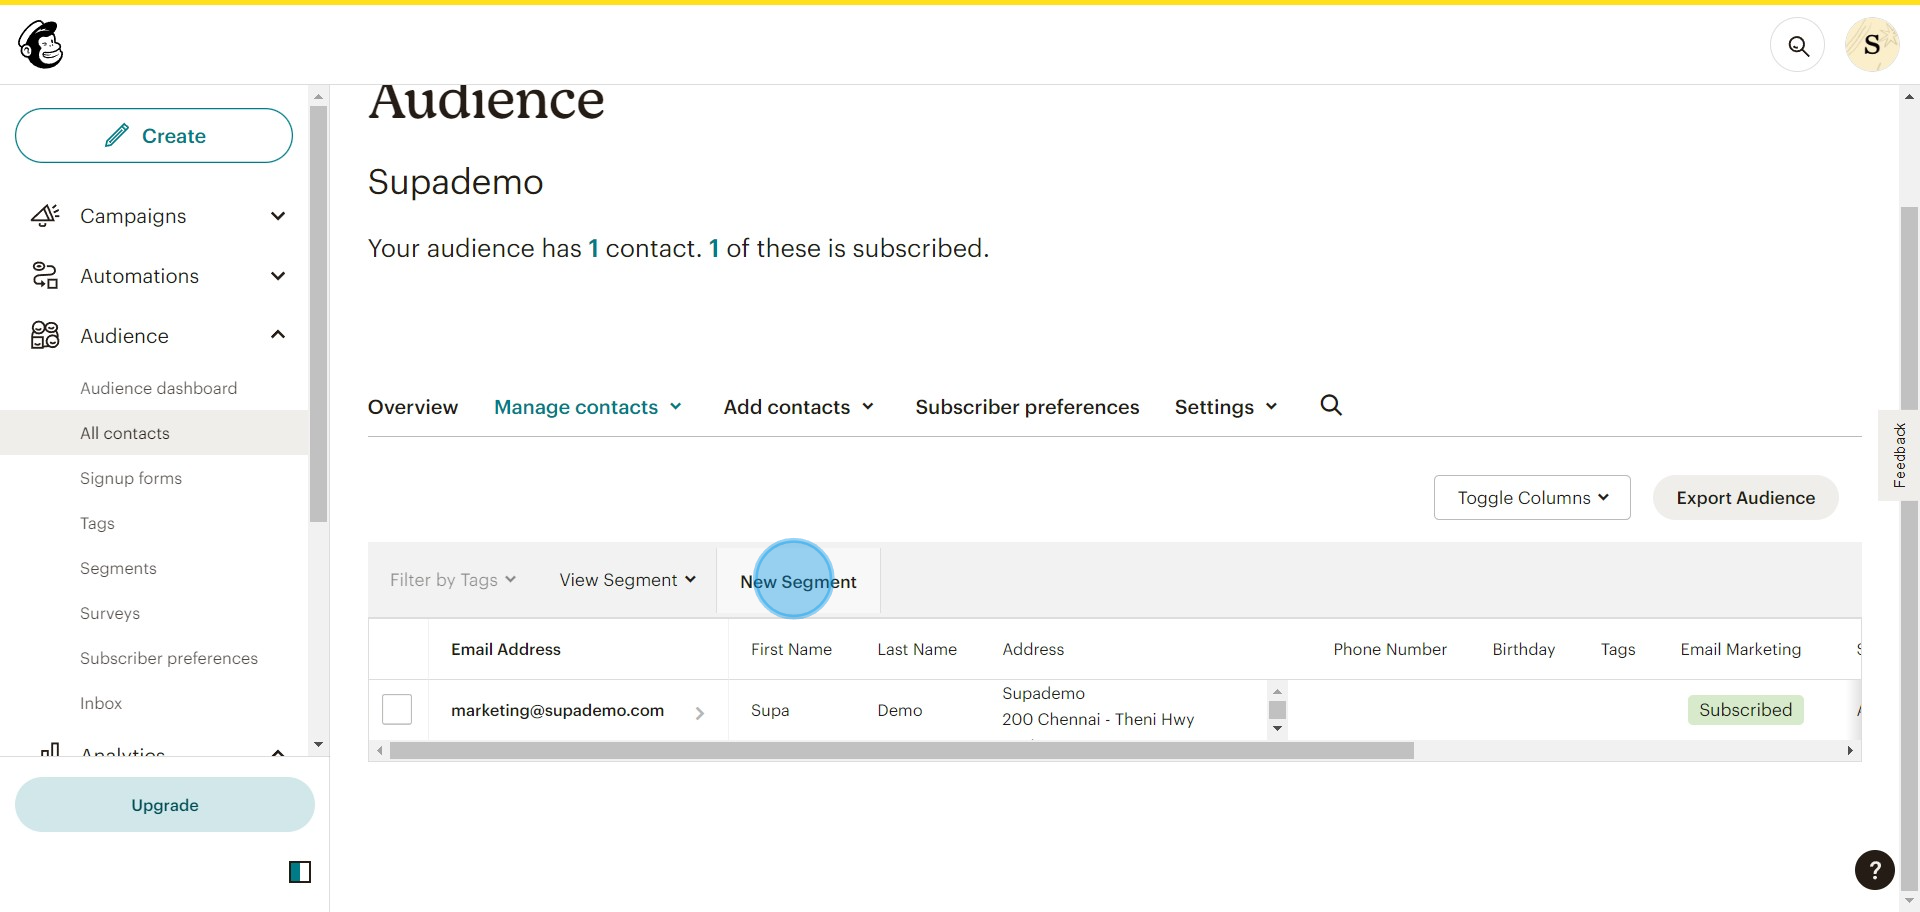
1. Start by selecting the Audience tab.
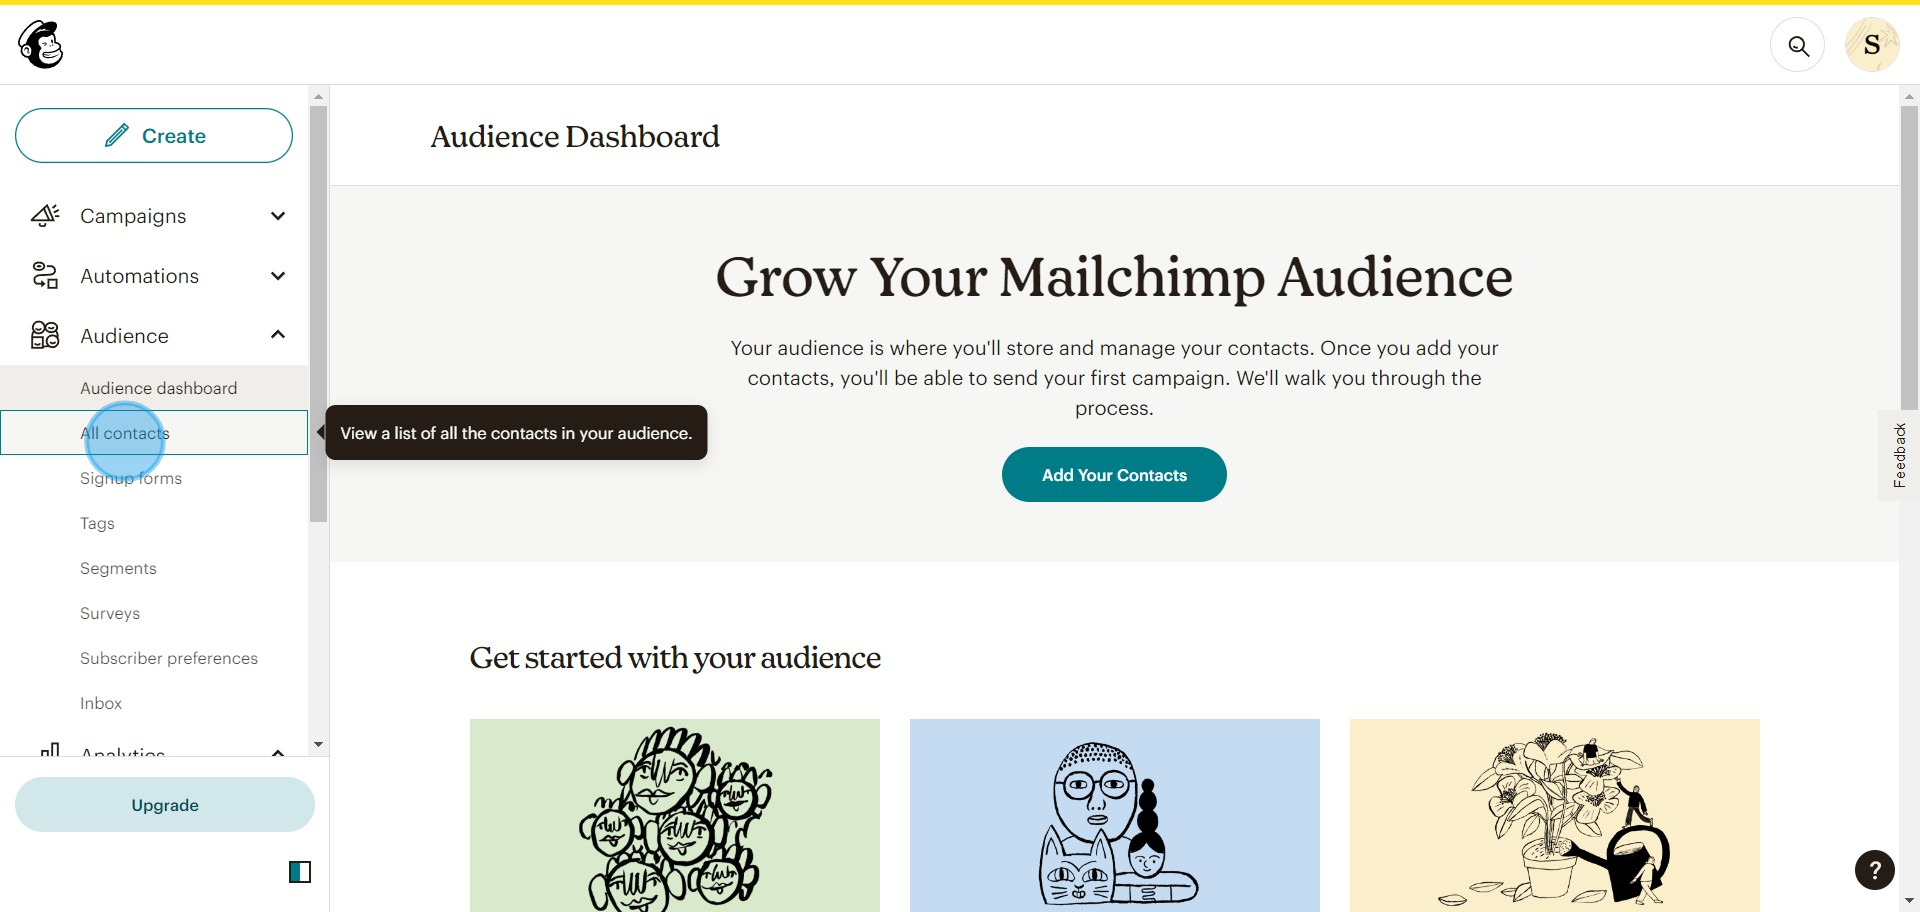
2. Proceed to choose All Contacts.
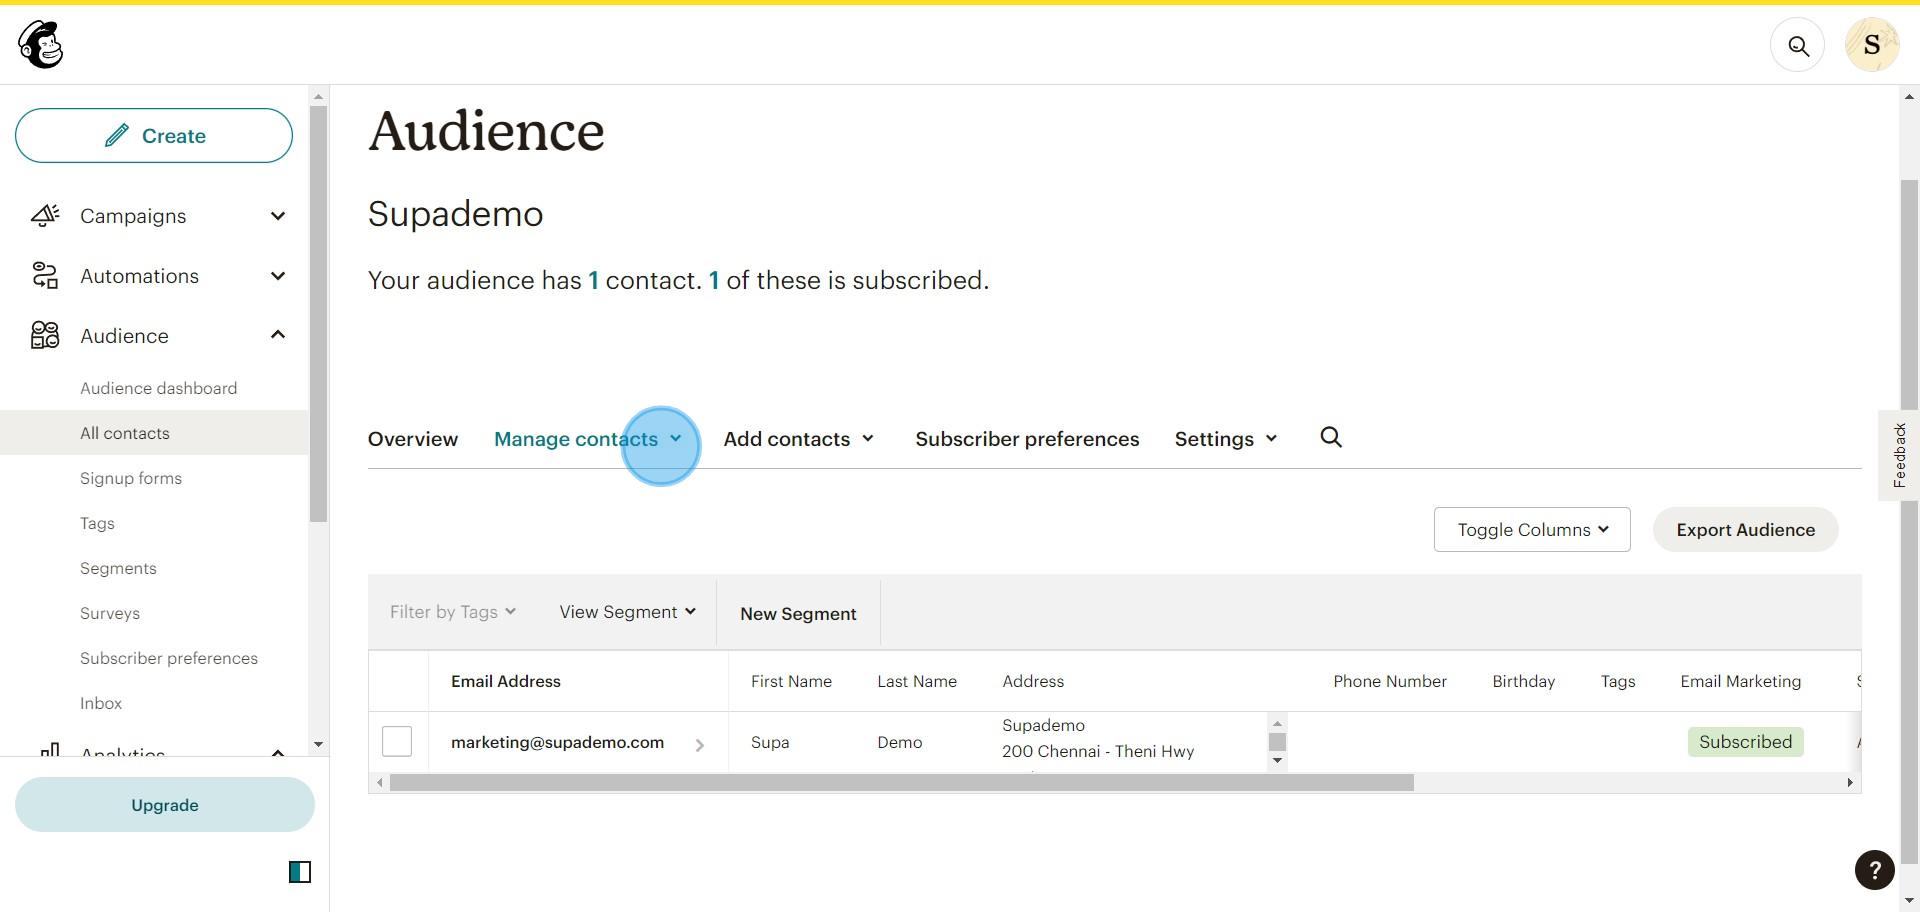
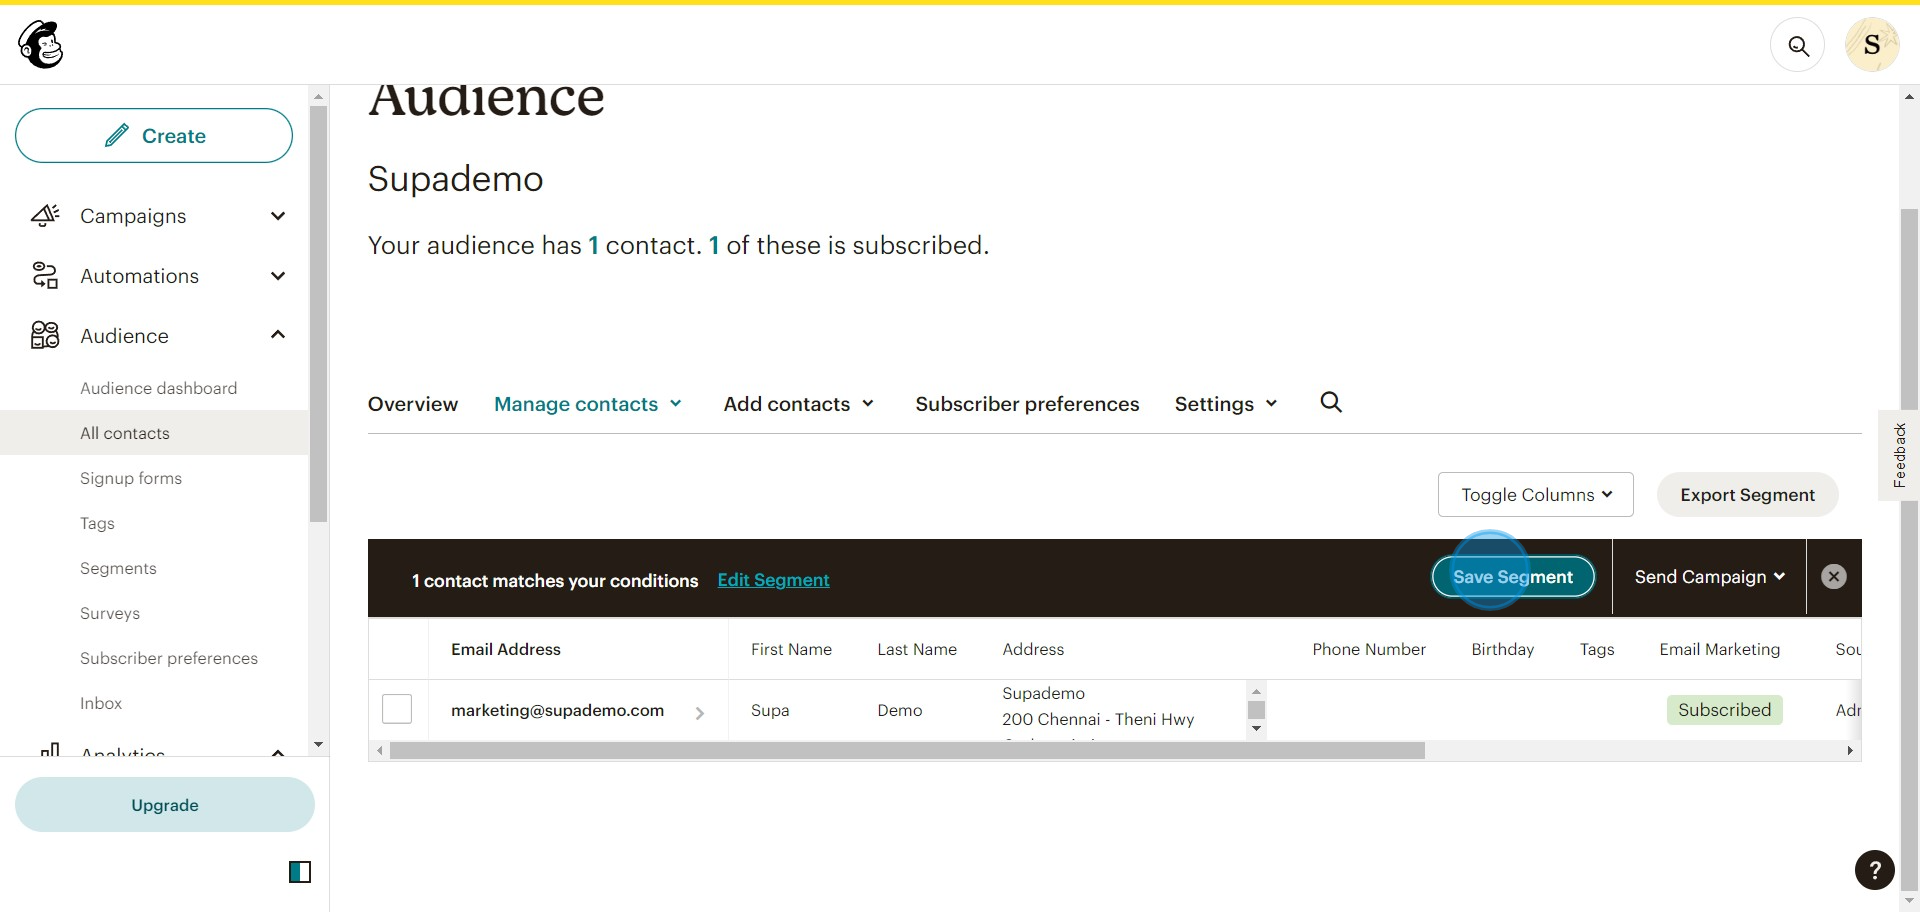
3. Next, Manage your Contacts.
4. Begin creating a New Segment.
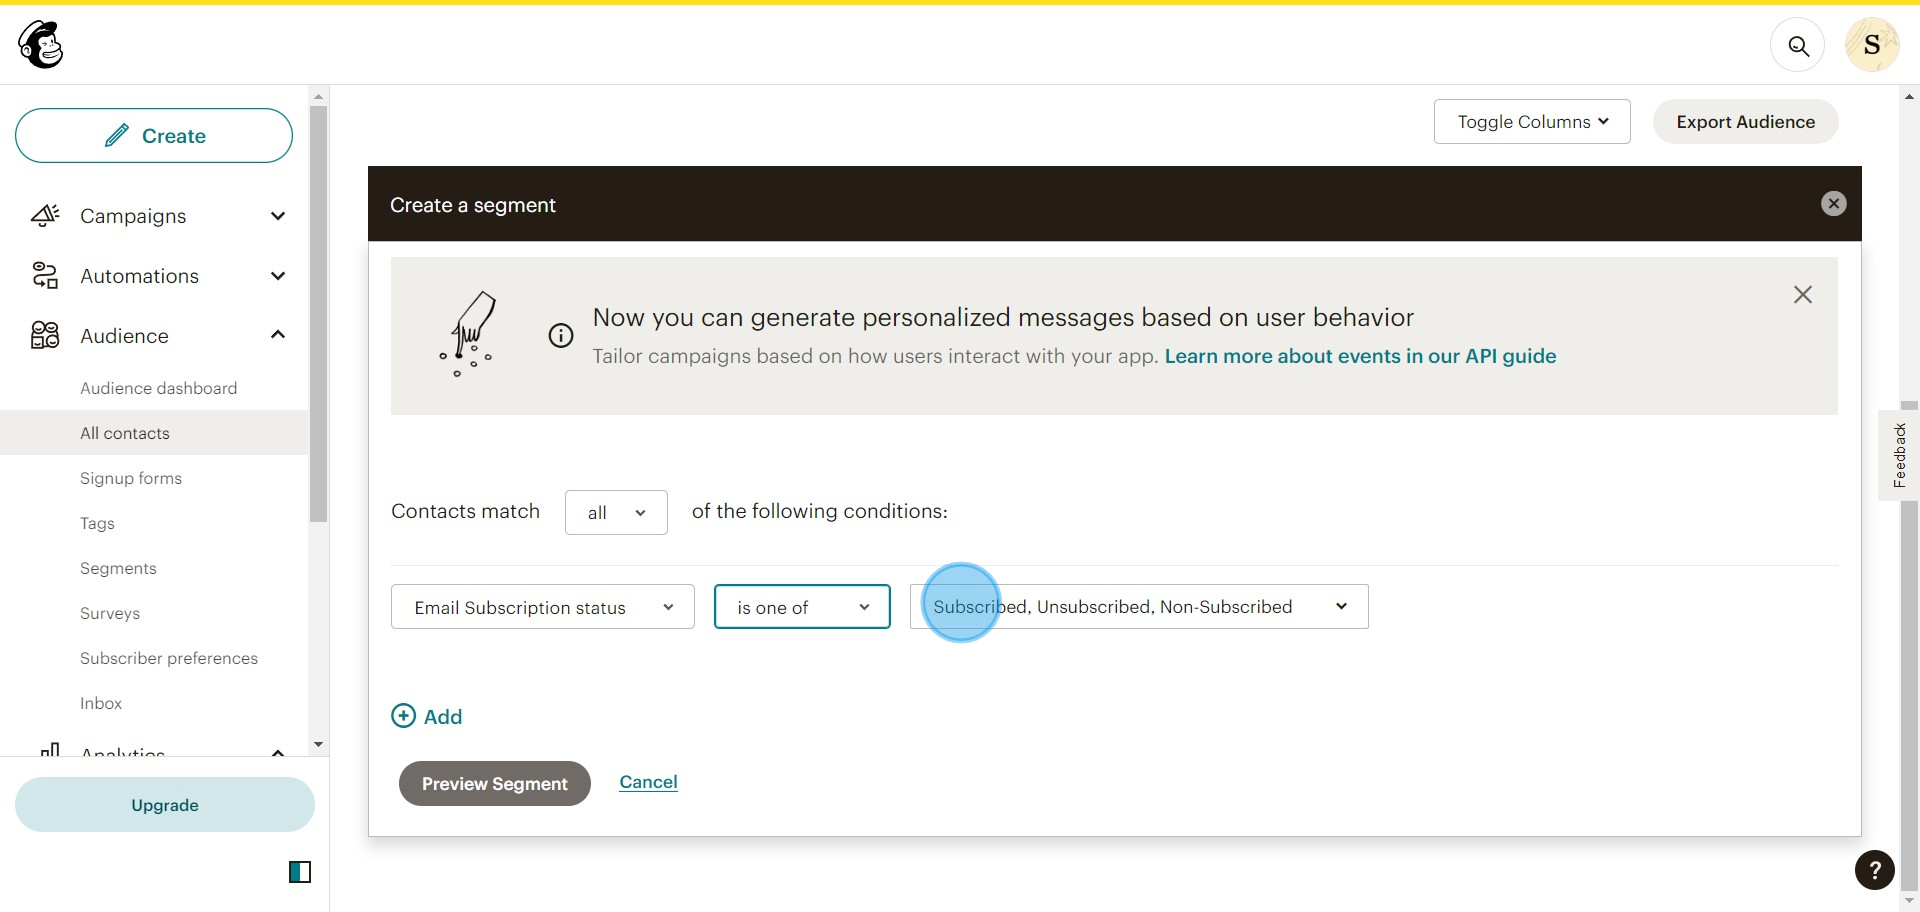
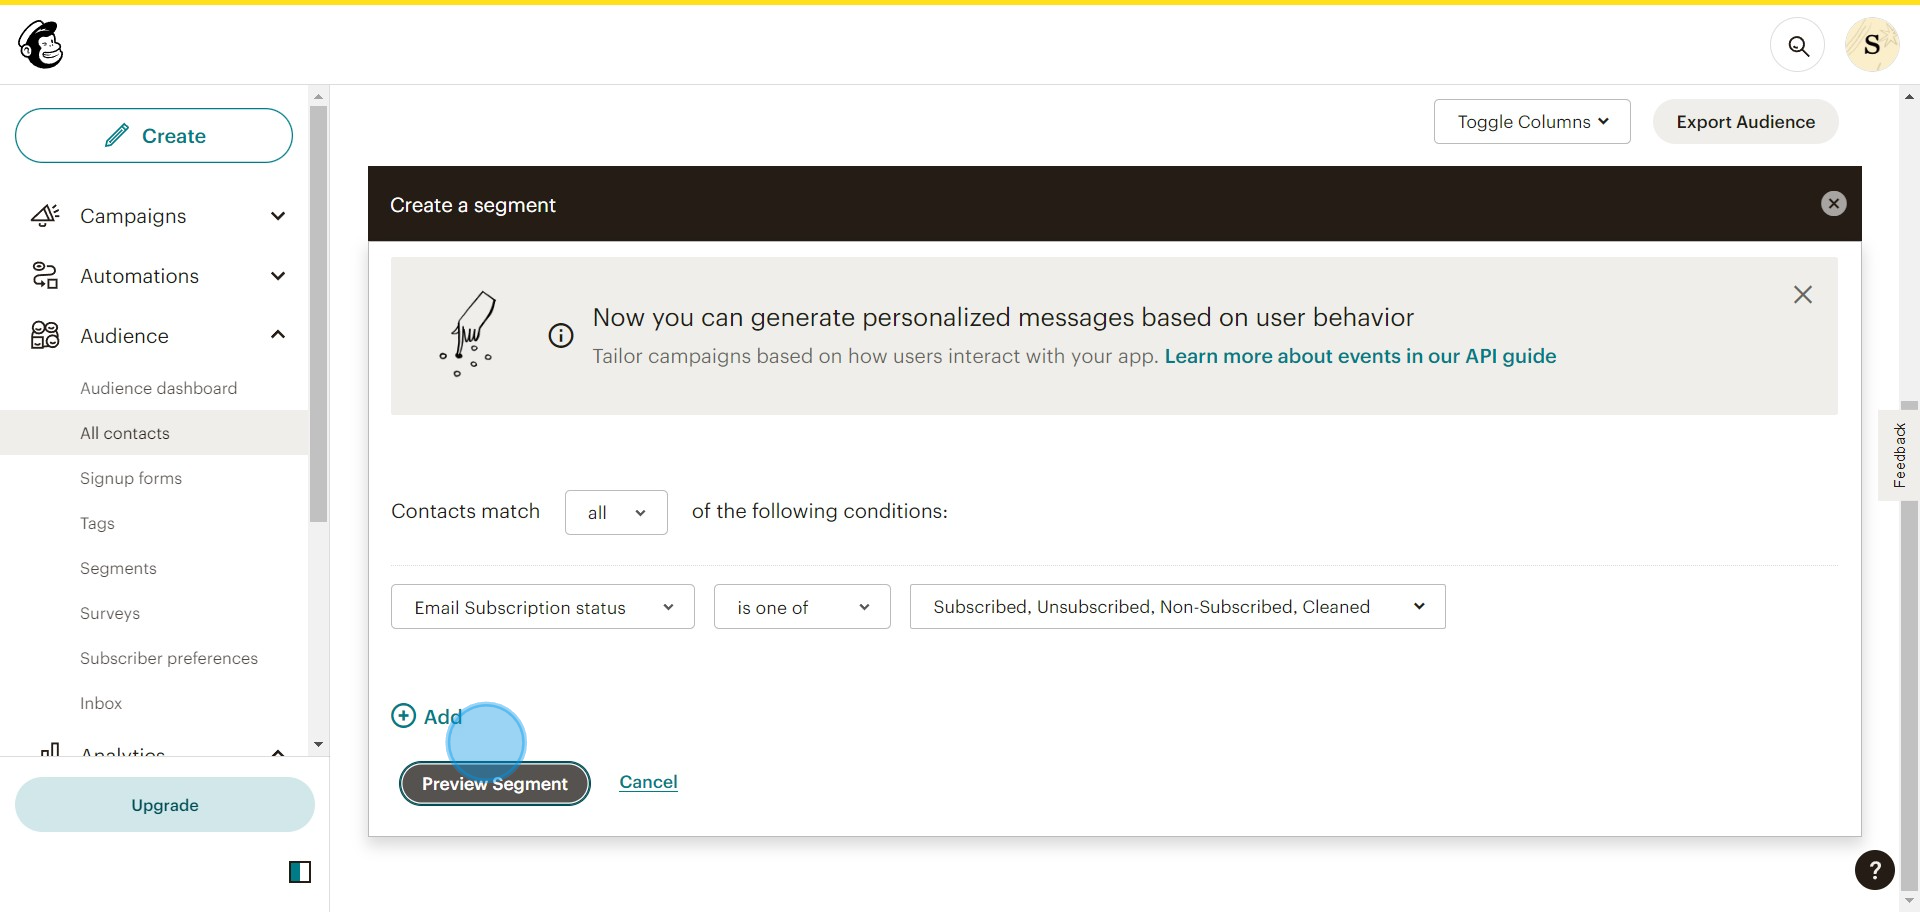
5. Choose the Contact Conditions for the export.
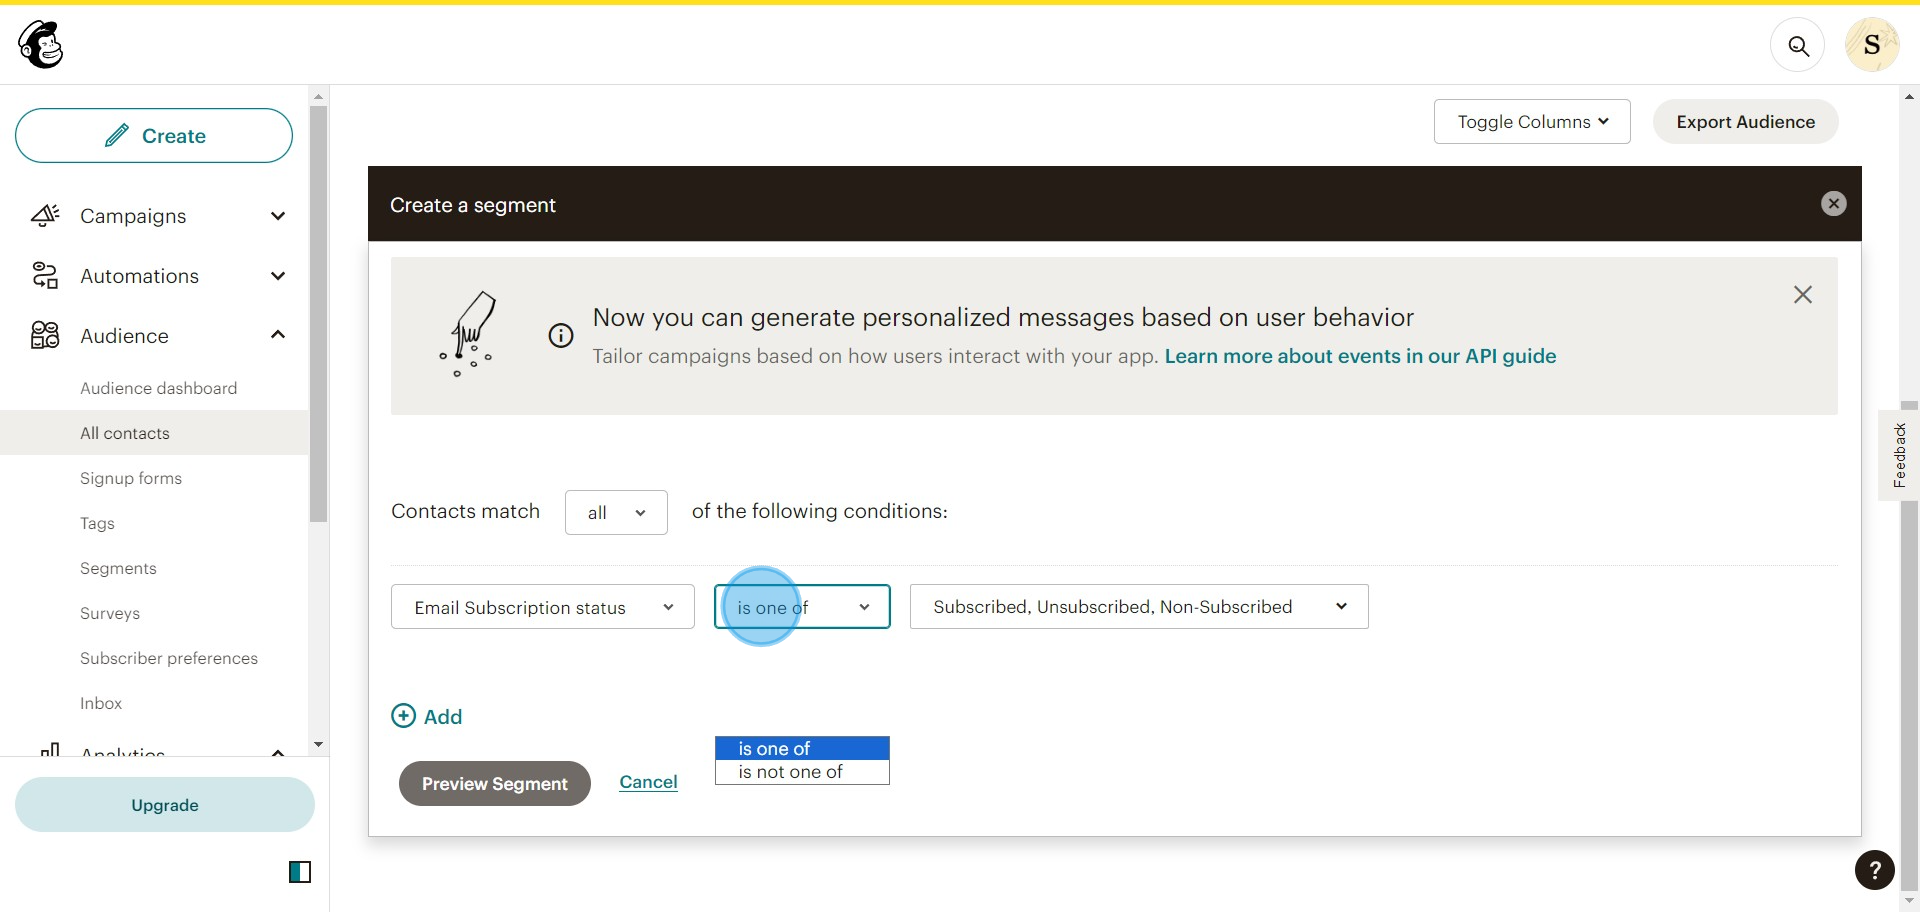
6. Select the desired Audience.
7. Get a Preview of your Segment.
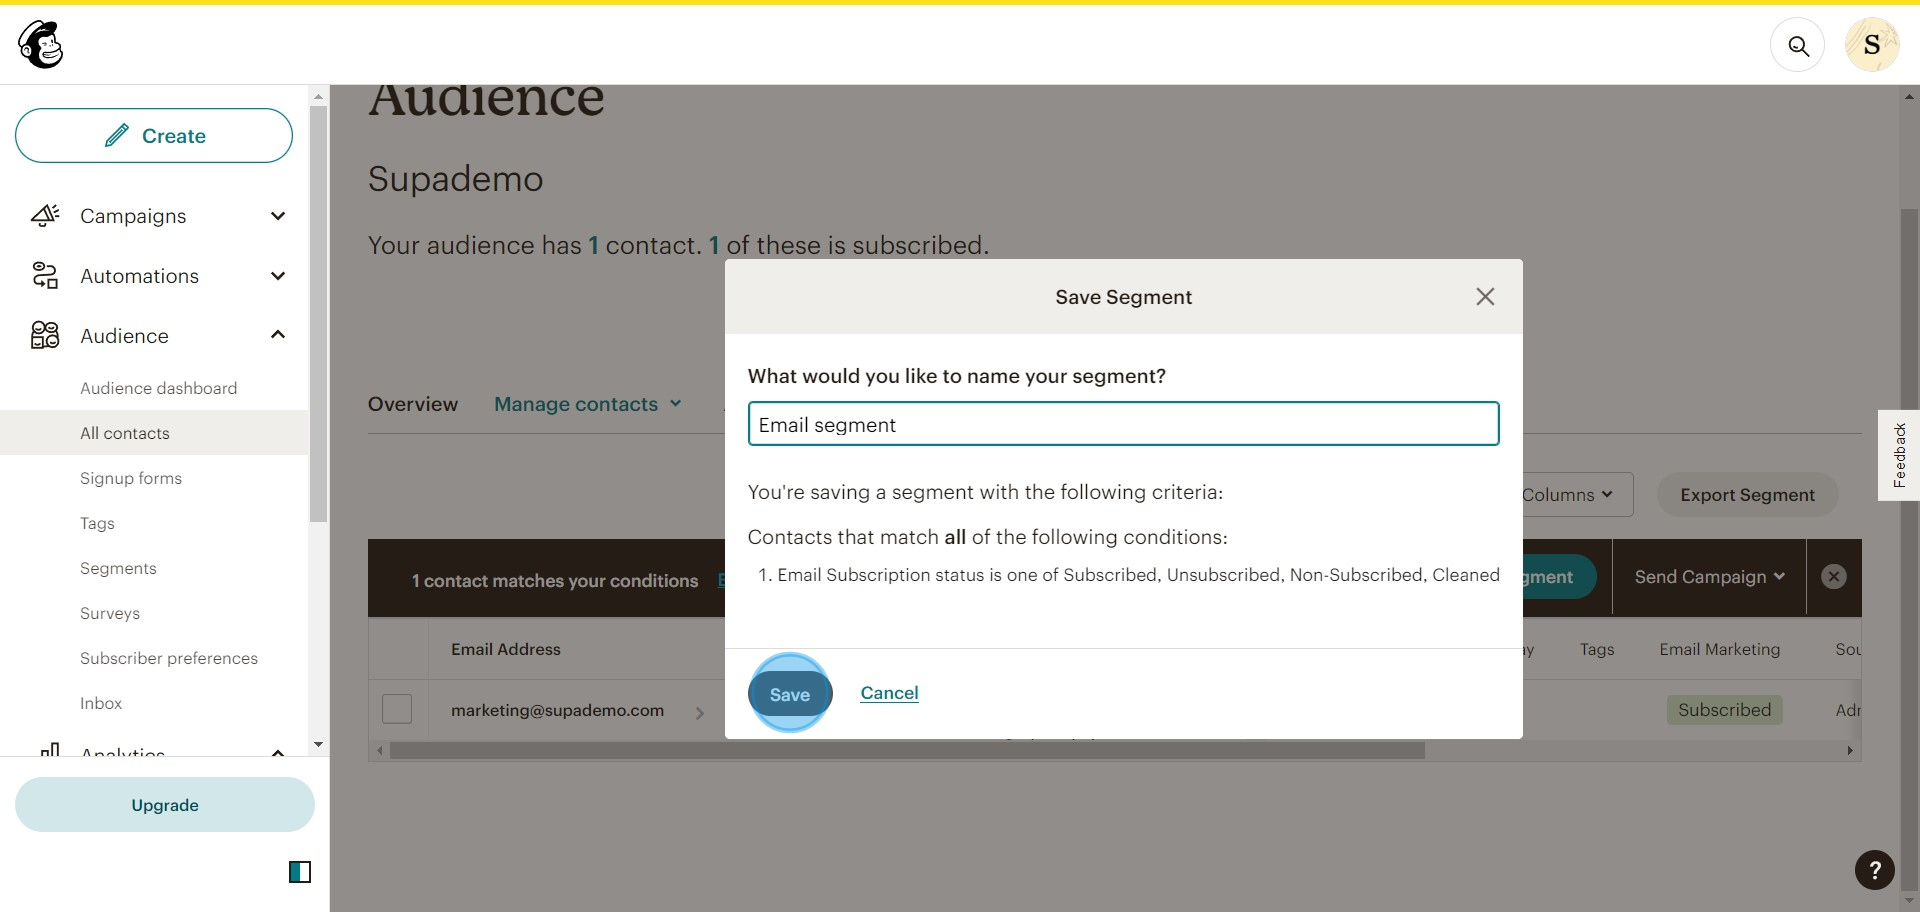
8. Save the created Segment.
9. Name your Segment then confirm by clicking Save.
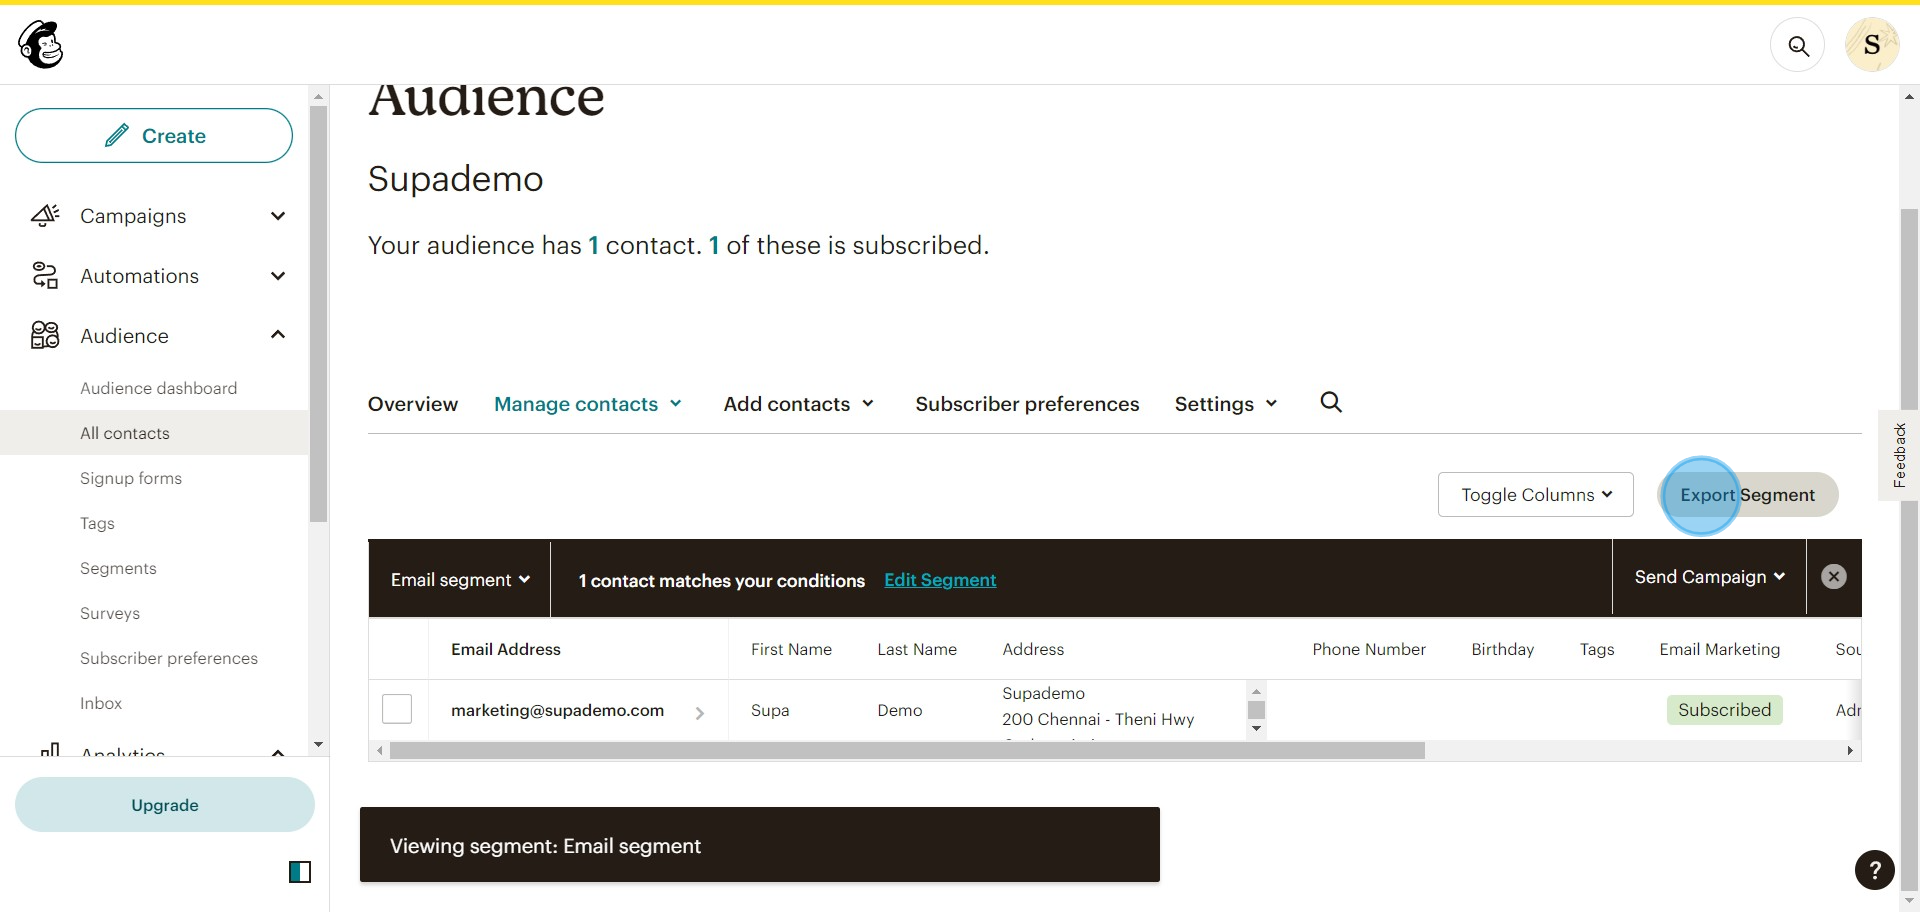
10. To finalize, choose Export Segment.
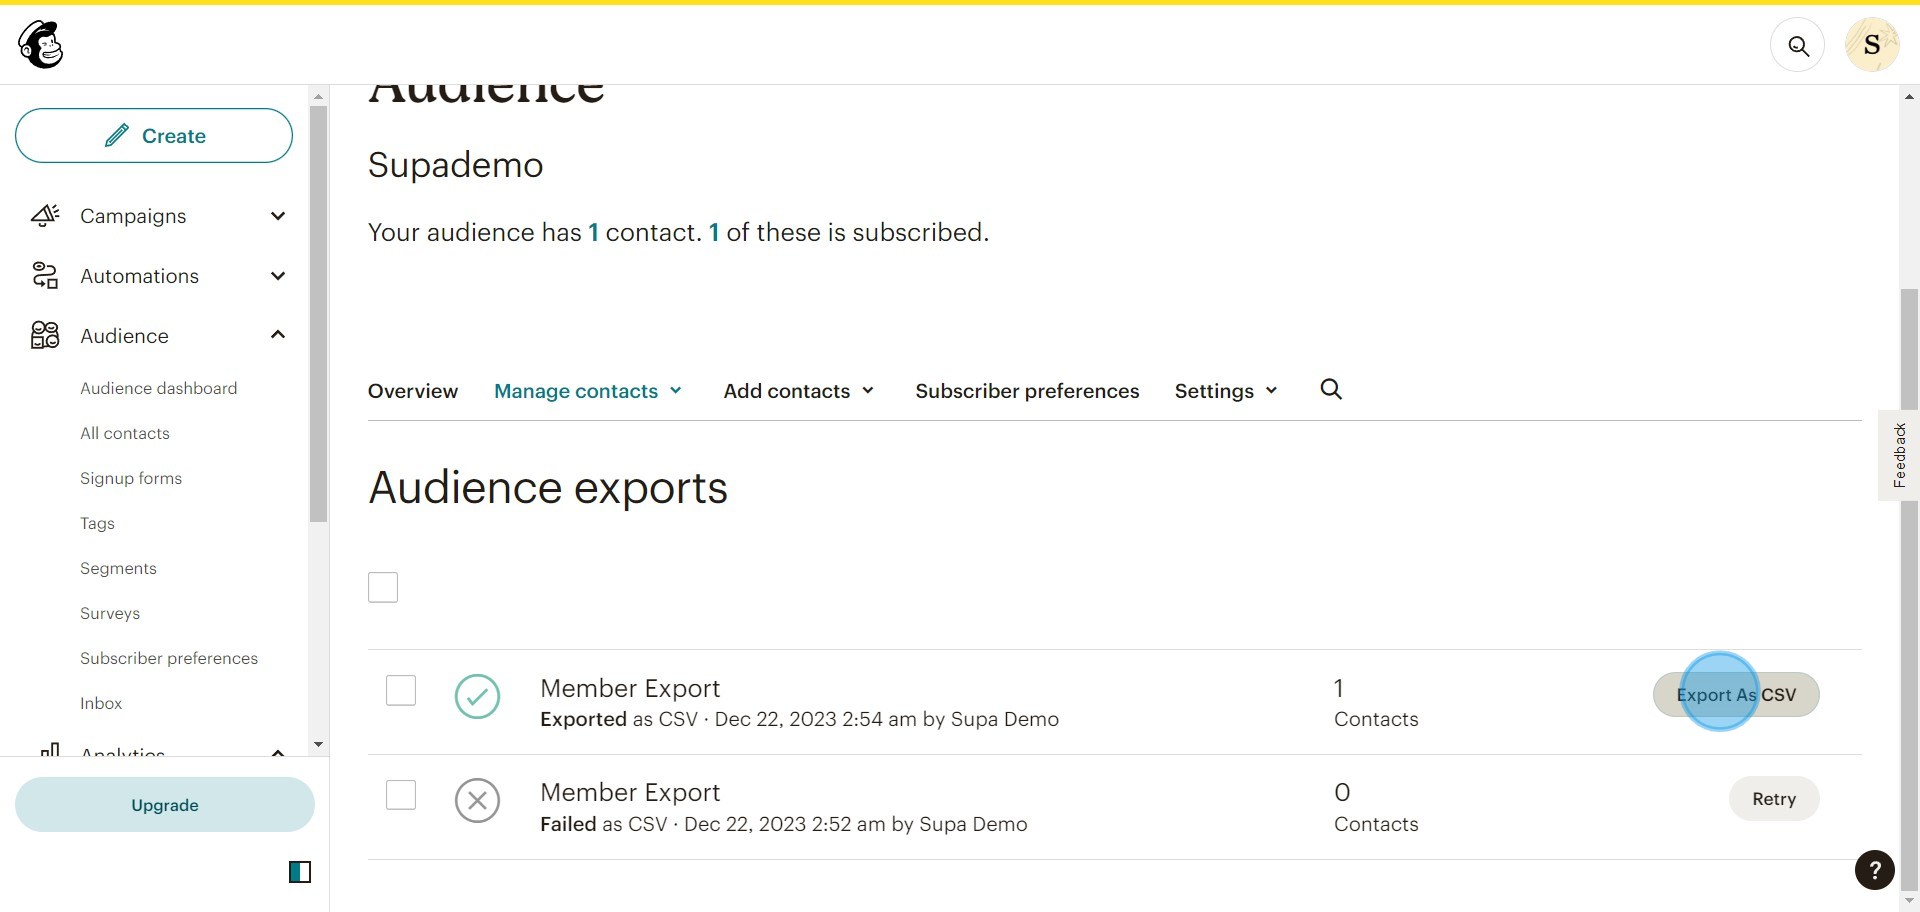
11. Export your Contact list As CSV for download.
Common FAQs on Mailchimp
How do I create an email campaign in Mailchimp?
To create an email campaign, log in to your Mailchimp account and go to the “Campaigns” tab. Click on “Create Campaign” and select “Email” from the options. Choose a campaign type (e.g., Regular, Automated, or Plain-text). Enter your campaign name and click “Begin.” Follow the steps to set up your campaign, including selecting your audience, designing the email content using Mailchimp’s drag-and-drop editor or templates, and configuring campaign settings. Once you’re ready, review and send your campaign, or schedule it for later.
Can I automate email workflows in Mailchimp?
Yes, Mailchimp offers automation features for creating email workflows. Go to the “Automations” tab and click “Create Automation.” Choose a workflow type, such as “Welcome Series,” “Abandoned Cart,” or “Post-Purchase Follow-Up.” Customize the workflow by setting triggers, such as user actions or specific dates, and design the automated emails. Mailchimp will automatically send these emails based on the triggers and conditions you’ve set, helping you engage with your audience effectively.
How can I analyze the performance of my email campaigns in Mailchimp?
To analyze your email campaign performance, go to the “Campaigns” tab and select the campaign you want to review. Click on “View Report” to access detailed analytics, including open rates, click rates, bounce rates, and unsubscribe rates. Mailchimp provides graphs and metrics to help you understand how your campaign performed and offers insights into engagement patterns. Use this data to optimize future campaigns and improve your email marketing strategy.
Create your own step-by-step demo
Scale up your training and product adoption with beautiful AI-powered interactive demos and guides. Create your first Supademo in seconds for free.
