Interactive product demos are self-paced, guided tours of your product’s features, benefits, or workflows. They offer potential customers an immersive, hands-on experience of the product during the entire buying and enablement journey – from discovery, consideration, purchase, adoption, and even retention.
When created correctly, these demos help you accelerate time-to-value, drive customer engagement, influence multiple stakeholders, build trust and close more deals.
In the coming sections, we will walk you through a detailed step-by-step of building damn good interactive demos with real-life examples and best practices. Let’s go!
Steps to Create Engaging Interactive Product Demos
While there's no one-size-fits all approach when it comes to creating high-converting interactive product demos, there are several proven tactics shared by the majority of the most success product demos.
Here are some of the key, overlapping steps that can help you create a compelling interactive demo:
• Step 2: Determine the demo flow
• Step 3: Create a demo mood board
• Step 4: Build your demo (writing + designing)
• Step 5: Ask for feedback
• Step 6: Share the demo
• Step 7: Track the demo's performance
• Step 8: Optimize the demo and repeat
Step 1: Goal setting
Be specific about the WHY and WHO behind building your demo. It’s not just about "Oh! We want to get X number of leads" or show our value proposition. Think beyond that. Try to derive concrete goals, be metrics-driven and get into granular details.
For example, a specific and measurable goal could be: "I want to upsell our new feature to 20 existing customers. I will demonstrate this new feature through a self-guided demo on the website and product blog, and also share the link during my customer touchbase and outreach. For this, I will target customers who have been using this software for the past three months".

When you have a clear goal, also think about the right persona to target to achieve that goal. When you think of selling in B2B, think of influencing a set of people (i.e. 5-6 power users or 1-2 decision makers), not just individuals. In B2B, decision-making flows through various stakeholders. So, the person you’re targeting might not be the final decision maker, which can cause delays in achieving your goal.
Here are some examples of how to tie your goals to a target persona:
- If you want to increase the number of upsells through interactive demos, the right persona to target would-be customers who have been using your product for at least three months or have shared positive feedback.
- If you want to increase the number of top-of-funnel leads, the right persona would be people in the awareness stage who might be coming to your website through search, socials, or paid channels.
- If you want to reduce time-to-value, your target audience could be new users still in the onboarding phase.
This step is a prerequisite, as your demos will yield unclear results if you're also unclear about what you want to achieve and who you want to target.
Step 2: Determine your demo flow
You can display the features and values of your product in different demo styles. From a single linear demo to offering users a self-directed journey, when done right, the proper demo flow shown to the right user increases your chances of conversions.
Here are three interactive demo flows our customer uses:
- Linear walkthrough (Guided, step-by-step demo)
- Demo showcases (Self-paced collection of multiple demos)
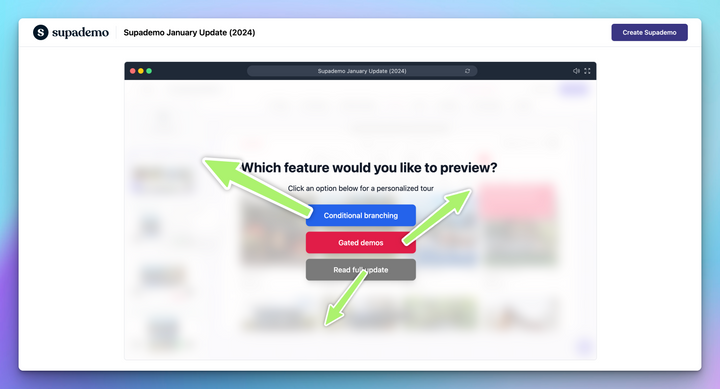
- Demo branching (Conditional, "choose your own journey" demo)
Choosing the appropriate demo flow should depend on your target persona and intended use case. For instance, an enablement demo or a walkthrough in a knowledge base is likely best served by a linear demo vs. a website product tour being better served by branching demos.
Since these demos are versatile and can be used by different departments, their use cases are also diversified. Some of the most commonly use cases of product demos are:
🖥️ Marketing & product teams
- Product comparisons
- New feature launches
- Self-paced product tours
💼 Sales & enablement teams
- Email outreach via demo link
- Post-demo sales follow-up
🫱🏽🫲🏼 Customer Success
- Contextual help guides
- Customer onboarding
- FAQs
Step 3: Create a demo mood board
Once you have the basics down, it’s time to start curating all the material you need to build compelling demos. It’s like creating a mood board or vision board for interactive demos.

Treat this step as creating an outline and include all the assets you need to add to your demos:
Enlist features to show
Based on who you want to persuade with a particular demo, enlist possible features you can highlight. When deciding on features, consider users' problems and how these features can help them. Instead of picking features because ‘you want them to try it,’ pick ones to help them solve their problems.
Aha! Moments
It’s easy for buyers to shift to your competitor if your product doesn’t reveal its value proposition as early as possible. That’s why you need to spark those Aha! Moments. Reactions like, “Wow, this feature is exactly what I've been looking for! It would solve our [specific problem] completely!"
For example, our team created an interactive demo for our newest product launch, Supa Screenshot, a tool to help you capture stunning screenshots. A user who sees this interactive demo will realize how this feature solves their problem of a cluttered screenshot folder.
Instead of juggling to find the exemplary screenshot, they can create one using this feature, share it directly, or embed it in one of their Supademos. This is their Aha moment!
To build those moments of realization, keep your ICP’s pain point in mind and answer questions like:
- How does this feature help them solve a particular challenge?
- How can I best highlight that benefit through this demo?
- Do I have social proof to show this implemented by others?
Customer reviews/feedback/success stories
Talk to your CS team, review feedback calls, read customer success stories and pick relevant and helpful statistics your product helped them achieve.
It can be a particular data point (25% increase in website engagement), the most used features (Zoom and Pan), or a quote (“These demos have saved us a huge amount of time”). The magic is buried in those calls and reviews.
Here’s an example of how to embed social proof in a demo:

Call to action
Come up with at least 4-5 different calls to action. By having options, you can test different CTAs and determine which resonates most with your audience.
Here are some tips to come up with compelling CTA ideas:
Use actionable text:
- Join the newsletter to stay tuned
- Sign up now to build 5 free demos
- Start Your Interactive Tour Now
Incentivize the viewer:
- Get 10% off on our scale plan
- {Feature} now included in our free plan. Try now!
Add social proof:
- {Feature} Used by 100+ users! Try it now
Set expectations for the viewer:
- Explore {product} in 2 min
- Learn about {feature} in 6 clicks

Target their problem and offer a solution:
- Short on time? Create a demo in 5 minutes
- Lagging retention rate? {Feature} makes it easy!
Step 4: Build your demo
Now that you have all the ingredients (thanks to your mood board), it’s time to prepare an engaging demo. This step involved designing and working on the demo automation software’s demo-building tool.
The first step is to record your demo, which you can typically do in three ways:
- Screen recording via a Chrome extension
- Take screenshots and upload them in the demo builder tool or
- Code your demo using HTML
We recommend using a Chrome extension to record your screen to speed up the process. The extension captures all the interactions (clicking, typing, hovering, scrolling, etc.). Once you have the recording, review it before making any edits. Check if you got all the interactions you wanted.
Once that is confirmed, start working on writing/editing each slide. Supademo generates hotspot text by understanding the intent behind each interaction. You can rewrite these hotspots and get help from our built-in AI assistant to speed up the process.
Not only this, but we should also try adding a voiceover to dictate the step using our synthetic voiceover feature or localizing each demo in 15+ languages.
Here are some other helpful tips to build a demo that captures the viewer’s attention:
- Use Zoom and pan to add a transition or to emphasize certain features
- Use a brand colour theme and fonts to build consistent demos
- Reposition your hotspot for the best user experience
- Write compelling clickable intro chapters (the first slide of your demo)
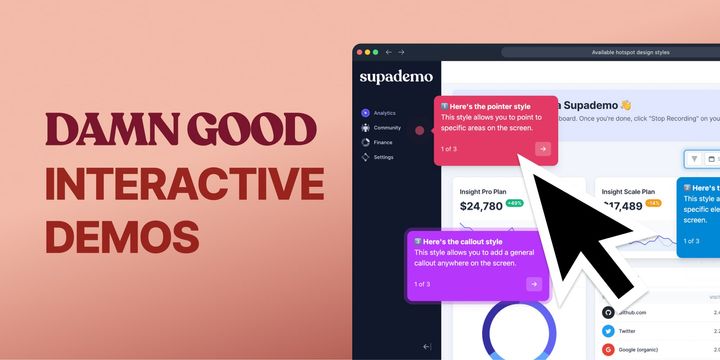
Try our different hotspot styles
- Use a blinking Pointer Style to call out to a specific element that should be clicked.
- Use a Callout Style to provide general context on a feature or page without highlighting a specific element.
- Use a Custom Area Style to highlight and bring focus to a section or large element.

Step 5: Ask for feedback
Getting a second-eye review is never a wrong decision. Ask your peers, managers, or even customers for feedback. We advise you to do this before you publish the demo to avoid those “Oops” moments with your customers.
It’s even better to ask the teams for feedback on who would also use that demo. For example, if you built a new product launch demo, instead of striving for feedback only from the marketing team, ask your sales team for feedback, too. As these teams might use those demos during their outreach, getting their point of view is helpful as they interact with the customer directly and might have much specific information to share.
After you have built the demo
Once your demo is ready, you can spread the word about the interactive demo and monitor its performance.
Step 6: Share it
It’s time to revisit your goals and ICP to determine the right channel to reach them. Don’t expect users to magically find your demo because you added it to your home page. Some will, but not all. That’s why you need to put your demos among your target audience.
Try to add a layer of personalization whenever possible – whether you're doing this for a specific prospect, company, or use case.
With features like dynamic variables, you can easily personalize your demos at scale with little effort while receiving notifications each time viewers engage — helping you focus on the highest potential leads.
Lastly, focus on distributing it across all the related assets about that feature or product – such as product blogs/changelogs, marketing pages, knowledge bases, or onboarding guides.
Step 7: Track the performance
Along with the user's basic info, an interactive demo offers insights into how the user interacted with it. It’s one of the most beneficial propositions of interactive demos, as they provide some really deep data points about your users.
- Engagement rate: Number of users who clicked on at least one hotspot
- Completion rate: Number of users who viewed the demo to the end slide.
- CTA engagement: Number of users who clicked on the CTA
- Steps viewed: Number of steps watched by a particular user

This data is super easy for website visitors to collect. To see which channel is bringing traffic to your website, add UTM parameters when you share demo links on social media posts, email outreach, newsletter, or any blog post.
Step 8: Optimize
It's time to improve your demo by understanding major drop-off points and lack of user engagement. These are the directional pointers that will guide your iteration process and make your demos better.
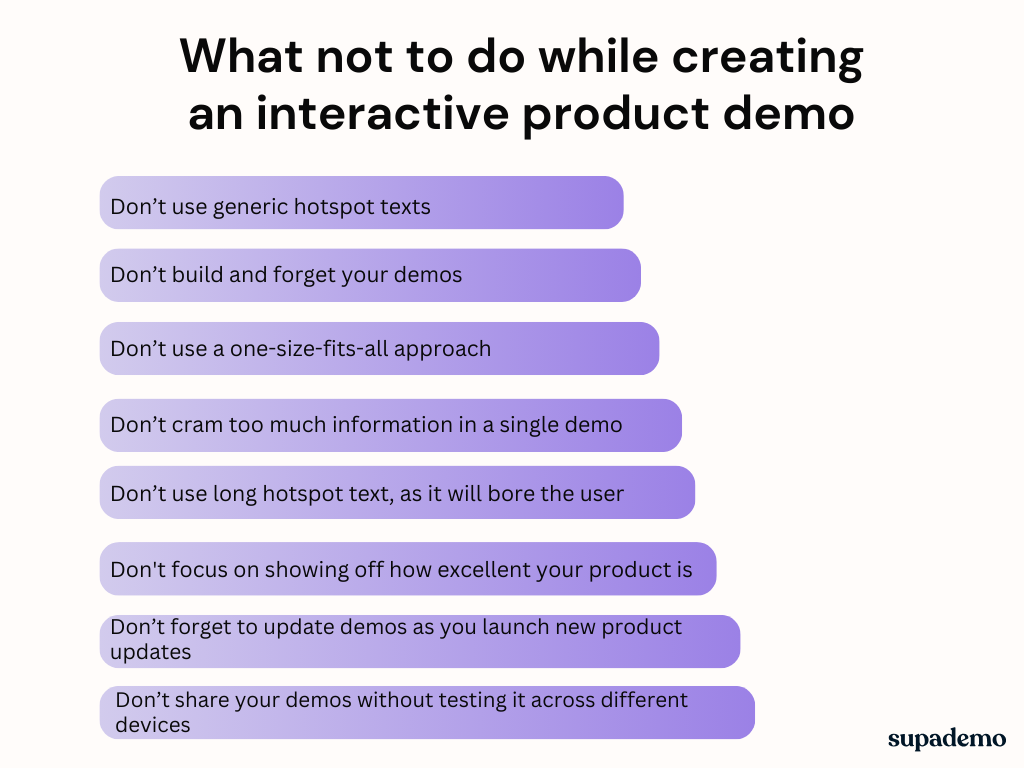
What not to do while creating a self-guided interactive product demo
Some practices you must avoid while building interactive demos:

- Don’t try to cram too much information in a single demo. The last thing you want is for users to feel too overwhelmed and leave without meaningful engagement on the demo.
- Don’t use a one-size-fits-all approach. You won’t see the expected results with this approach.
- Don't focus on showing off how excellent your product is. Spoiler Alert: Your buyers don’t care. Show them how it benefits them.
- Don’t use long hotspot texts, as it will bore the user. They are not here to read a long help guide – they want to quickly and efficiently learn, by doing.
- Don’t build and forget your demos. Find what’s working through user interaction metrics.
- Don’t forget to update your demos as you launch new product updates. Save yourself from lost sales opportunity. With Supademo, you can update content in a modular way and have it update everywhere it's embedded or linked,
- Don’t use generic hotspot texts (Click here, then click here!). Stay away from those, especially for marketing demos.
- Don’t share your demos without testing them across different devices. Don’t make users squint their eyes to read the hotspot text on mobile.
Let’s see some good examples of interactive demos built by different SaaS brands across various use cases.
Interactive Product Demo Examples
1. Supademo: Asynchronous customer onboarding
What did we like about this interactive demo?
- This demo uses conditional branching demo flow, best in offering a personalized experience by letting viewers choose their journey.
- Each step builds upon the next, keeping users engaged and immersed in different use cases.
- The demo uses AI voiceovers, which is helpful as it eliminates the need for users to read text in each step. Users can also mute the voiceovers if they want.
- The use of colour is uniform across each branch and is linked to the colour used in CTAs at the beginning.
2. ProcessMaker: Self-paced education for customers
What did we like about this interactive demo?
- ProcessMaker’s demo is directly embedded in their knowledge base for easy access. Additionally, viewers can choose between autoplay and self-actioned tours. By using a self-directed demo or engaging in a video-like overview, users can select the demo that suits them.
- The demo uses a simple, conversational tone and offers examples of different steps, making it easy for viewers to understand.
- Despite being somewhat longer than preferred, the demo directly addresses a common problem. And ensures that each step helps users resolve the problem they’re facing.
3. Senja: Give a complete product tour
What did we like about this interactive product demo?
- Senja’s interactive demo gives a complete product overview in just six steps. The demo covers the core features and focuses on the benefits of each feature.
- The demo is consistent with Senja’s branding, using matching colours and copy language for uniformity across design and copy.
- With AI voiceover, the viewer is guided through each step without friction.
- Throughout Step 5, they discussed their product's widget, which was tied to a customer case study. A good example of embedding social proof in interactive demos.
Formula Bot: Pre-sales demo
What did we like about this interactive demo?
- Formula Bot's new feature demo highlights their Data Analyzer feature by giving a short yet impactful tour of what's possible.
- The demo has interactive elements such as zoom-in and zoom-out, as well as AI voice features. The zoom-in and zoom-out feature pulls viewers' attention towards specific options, thus making them more engaged in the demo. The voiceover feature has been executed with finesse to give users multiple ways to absorb information.
- The demo's conciseness (6 steps is excellent) makes it a good fit for discovery or cold outreach. It gives a glimpse into the new feature while piquing the viewer's interest in exploring more use cases.
- The demo ends with a clear call to action, encouraging users to try the new feature.
A Checklist to Building High-Converting Interactive Demos
We didn’t plan to create a lengthy guide, but here we are—sharing everything we have learned, building impressive interactive demos, and helping our customers drive their key metrics.
If we had to compile this information in a digestible format, the result would be this interactive demo-building checklist. Here's what the checklist contains:

How Supademo helps you build engaging product demos quickly
Building good and high-converting demos demands user first thinking and input from multiple teams to hit the mark. Not only do you need to invest your time, but you also work on iterating the demos to stay relevant in the long run. And, if you're thinking of playing the long-term game with interactive demos, demo software like Supademo is here to help.
Our demo automation platform is one of the top-ranked in terms of usability, and our customers vouch for that.
Before Supademo, we spent countless hours creating demos and videos across discovery, qualification, training, or simply answering common questions. Creating these could take 8-10 hours, which is both painful for us and less engaging for prospects." ~ Andreas Moekesch, Solutions Consultant, ProcessMaker
Record your first demo, edit it in our effortless demo editor, and analyze user interaction through our analytics dashboard. Whenever you are ready, sign up for a free account, get access to some cool features and create up to 5 interactive demos.


