
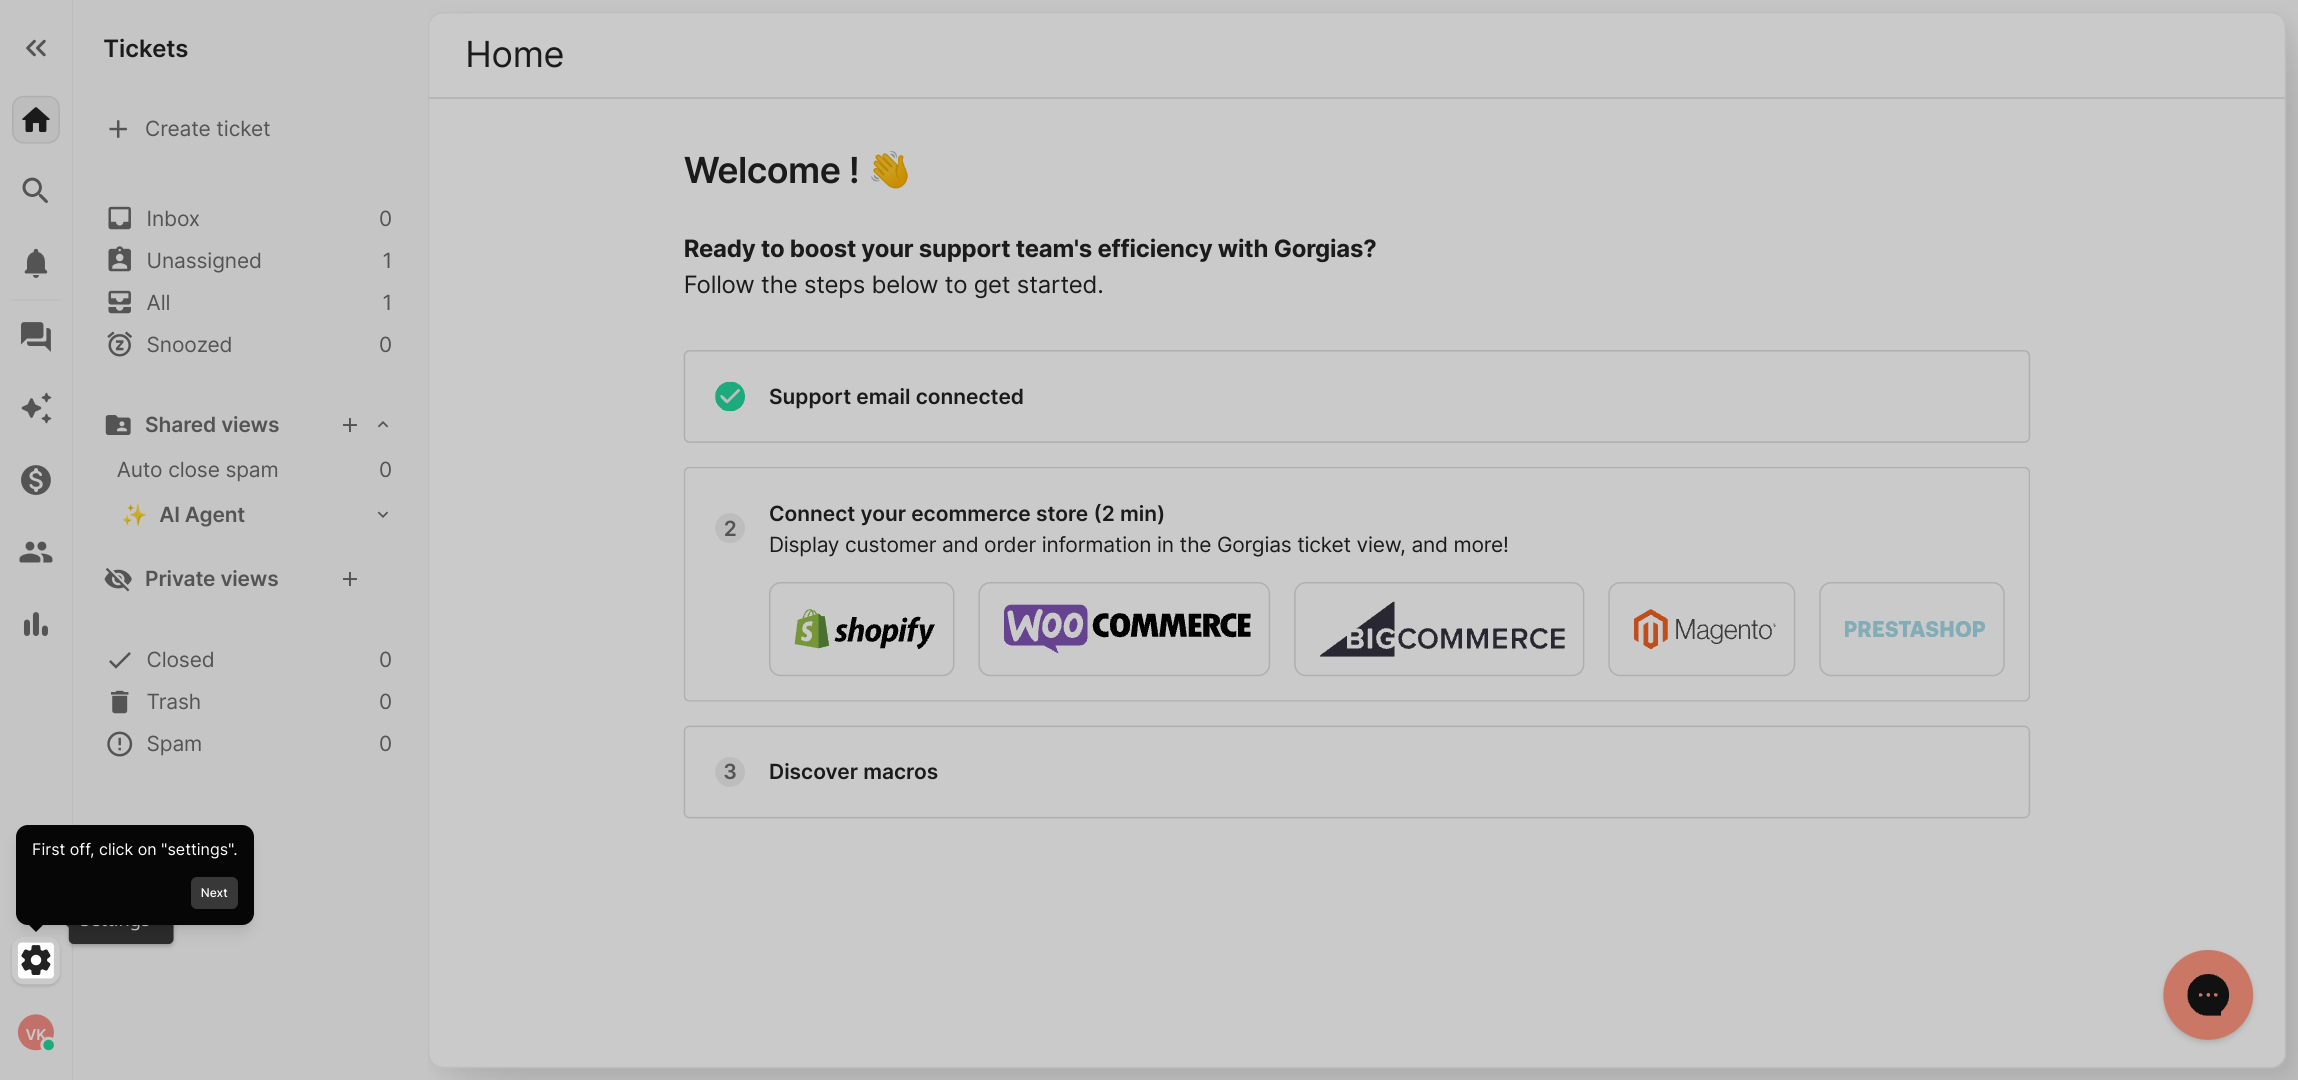
1. First off, click on "settings".
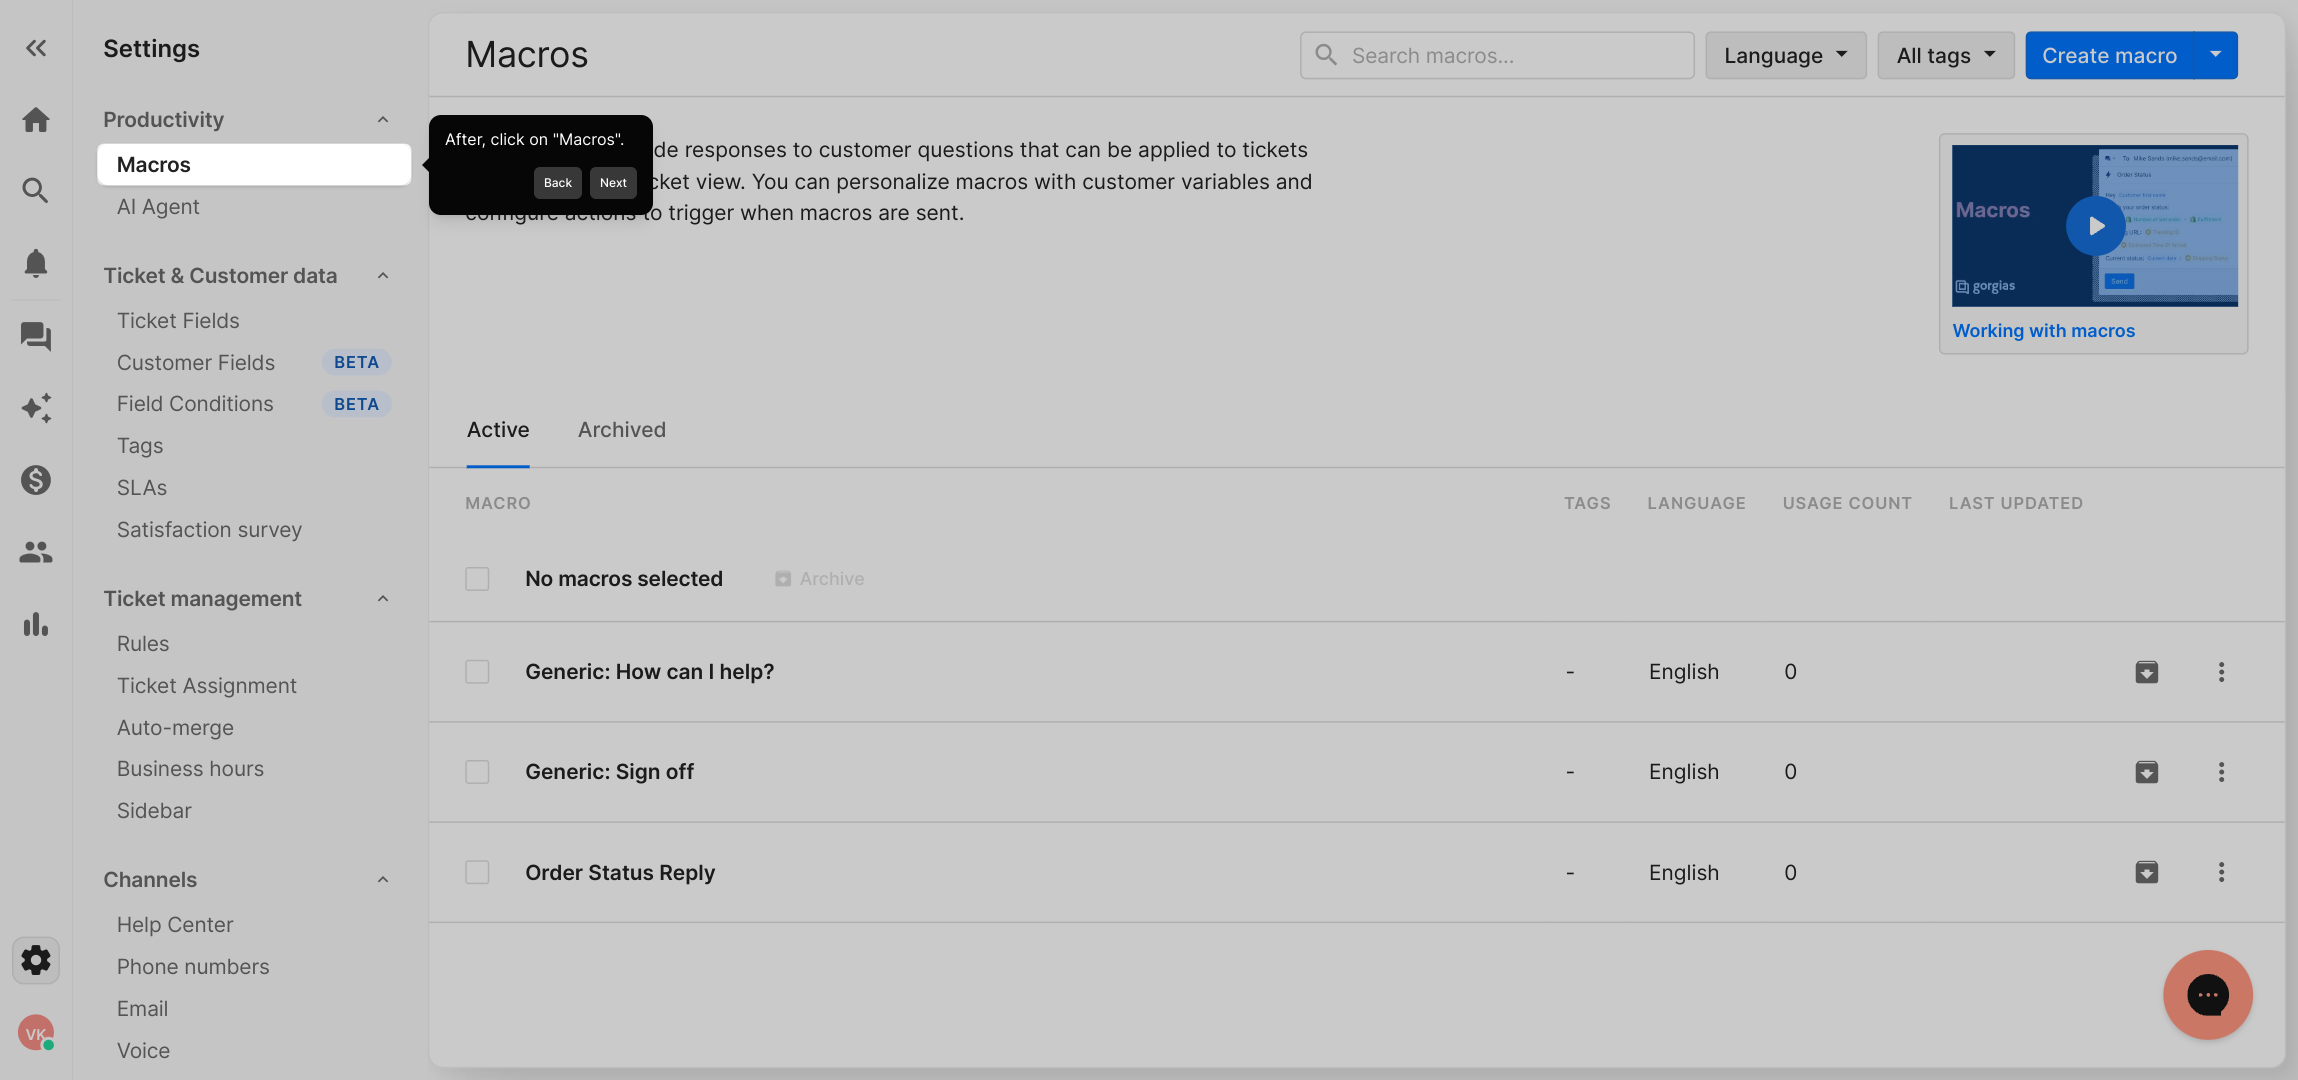
2. After, click on "Macros".
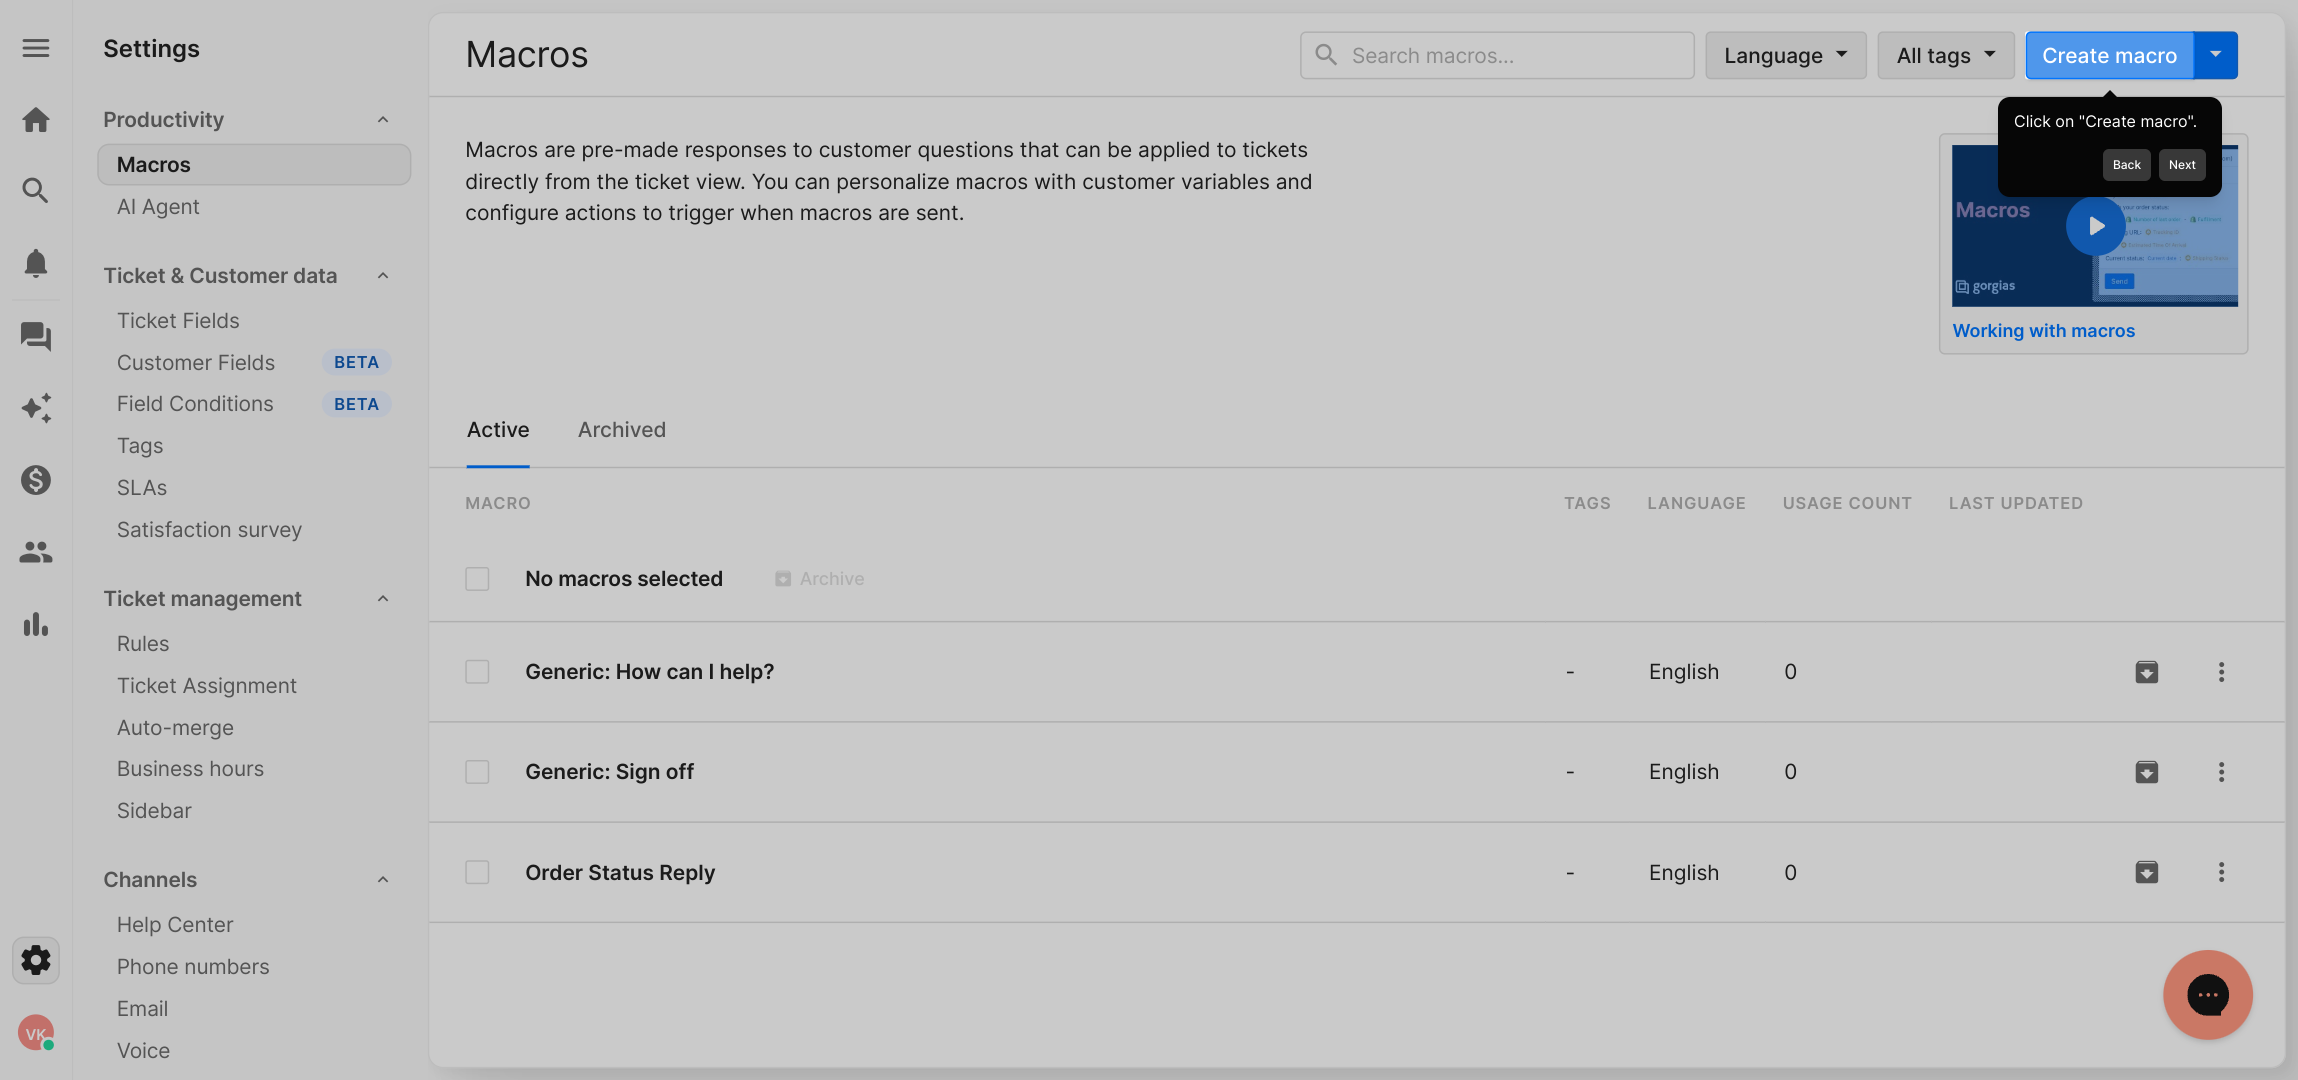
3. Click on "Create macro".
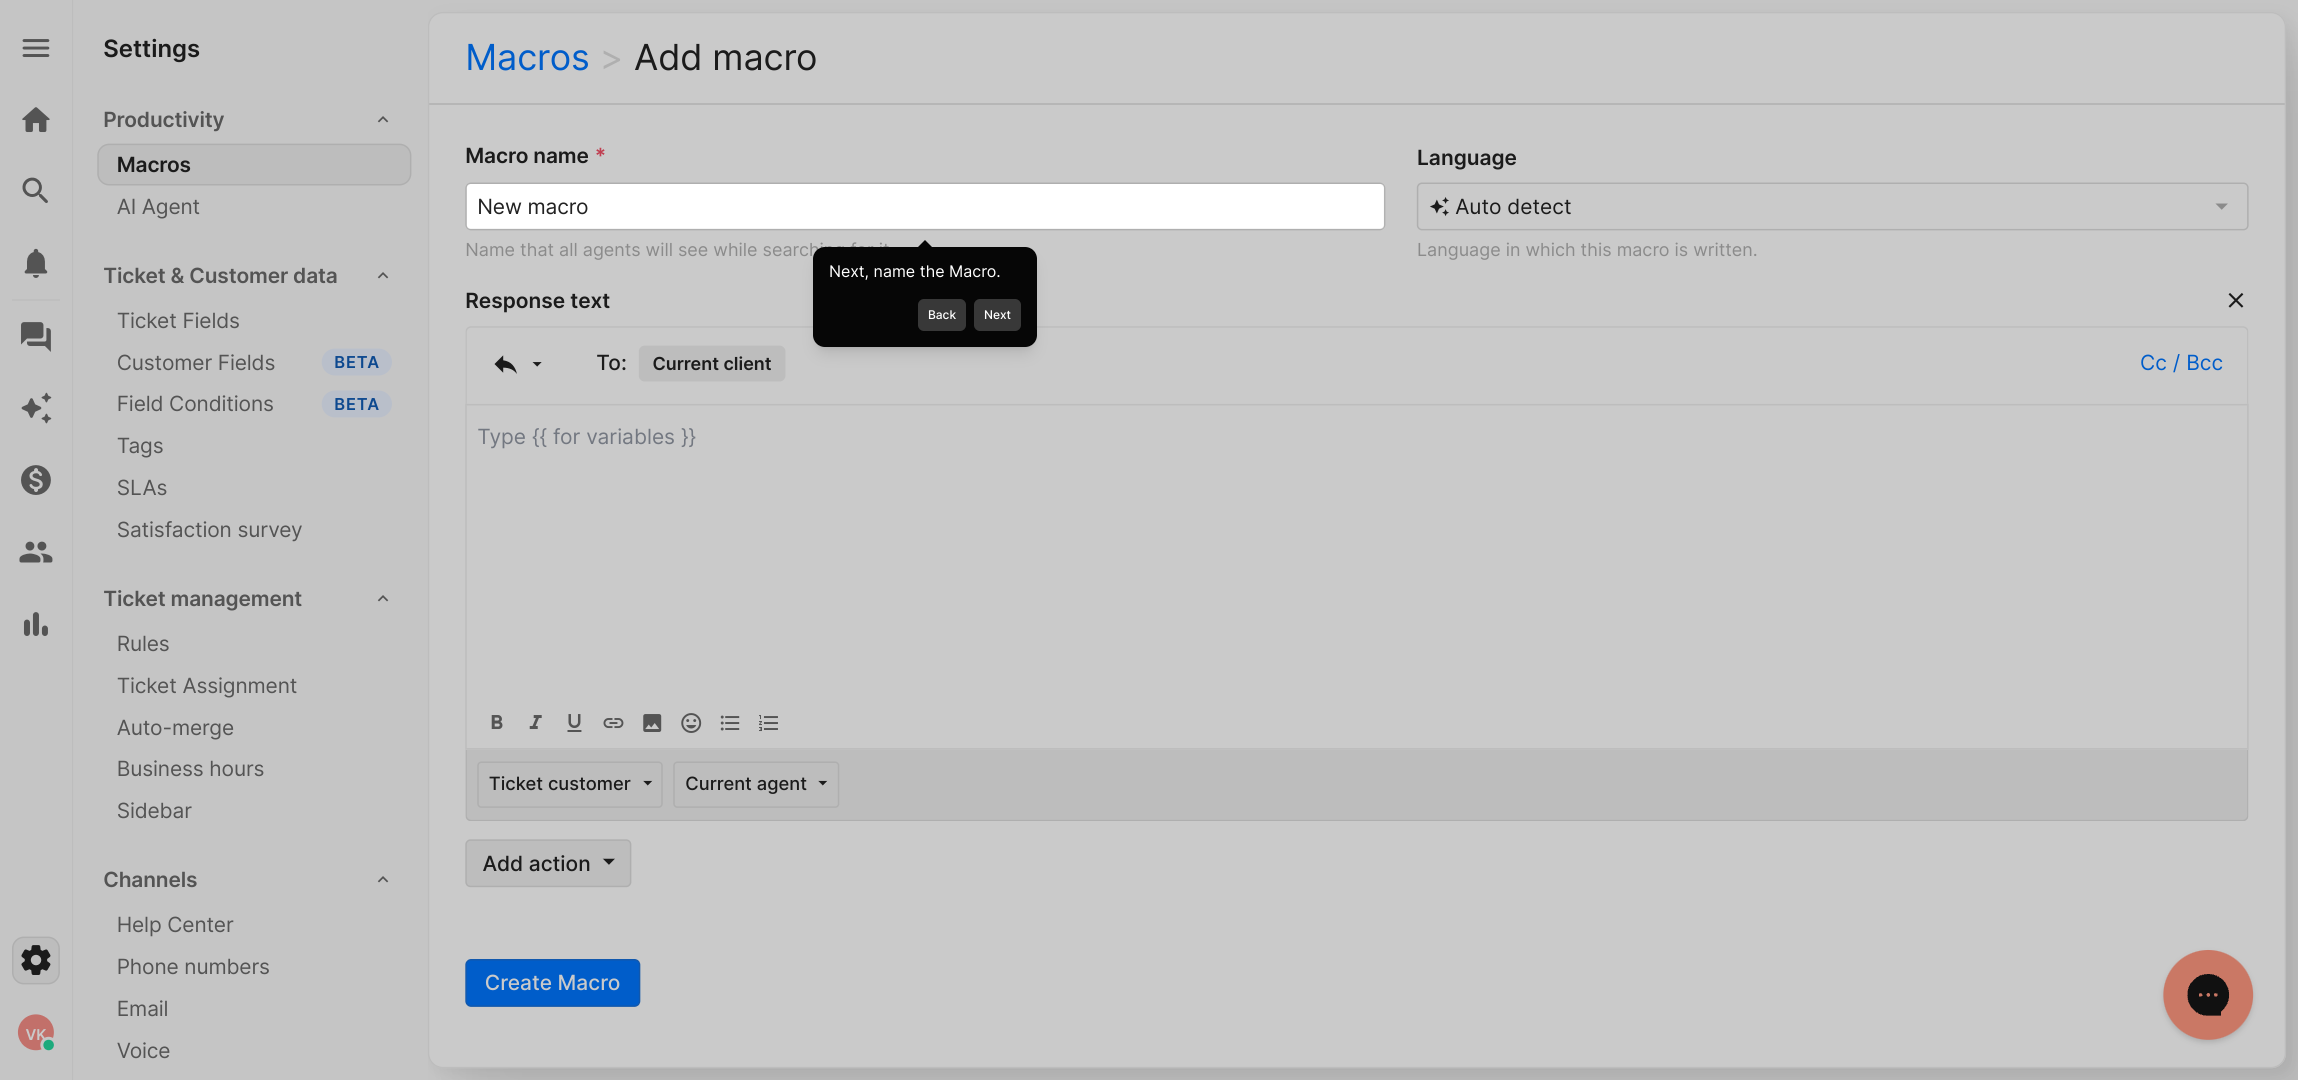
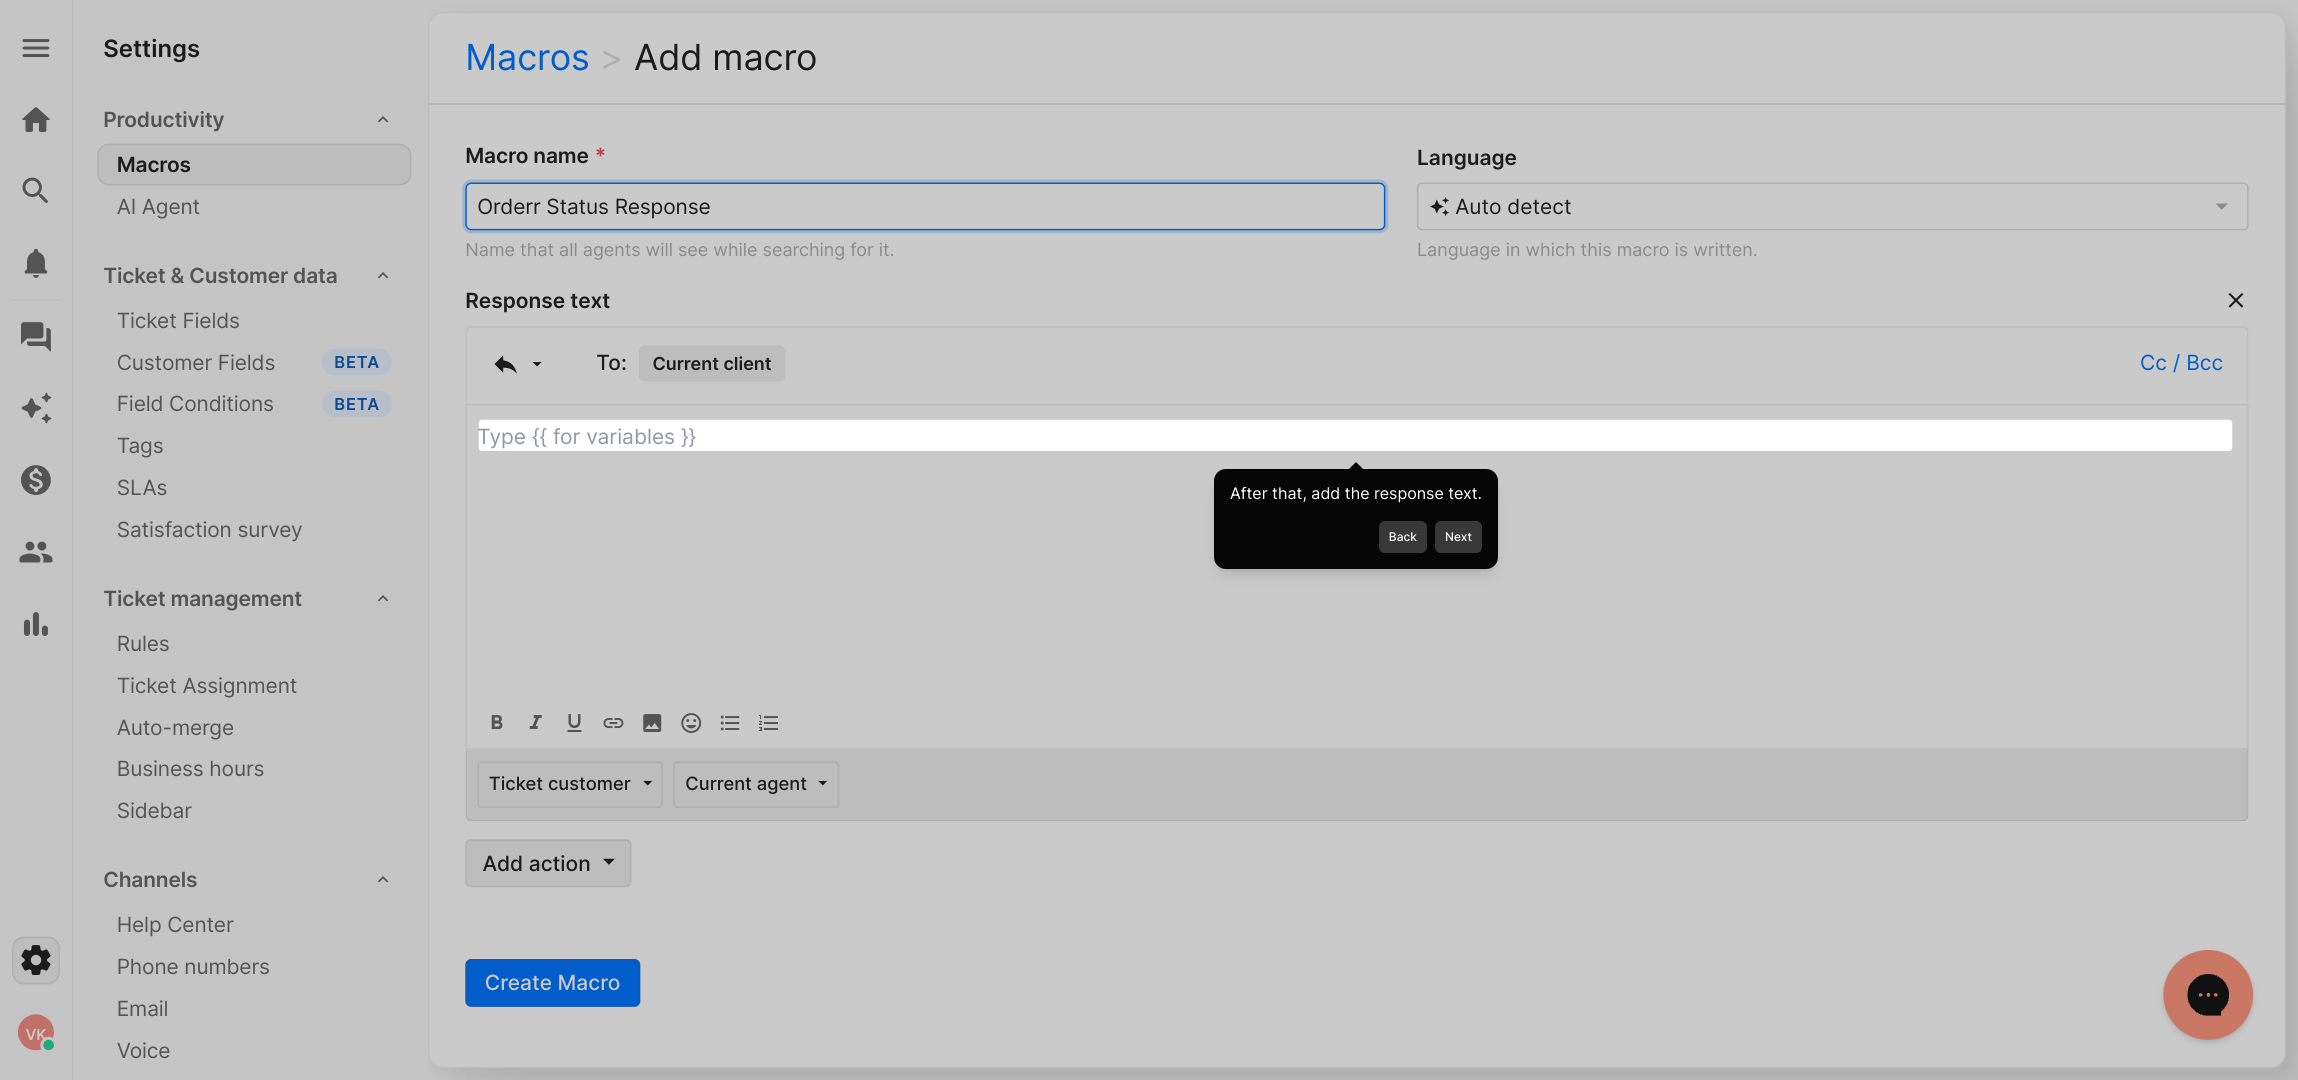
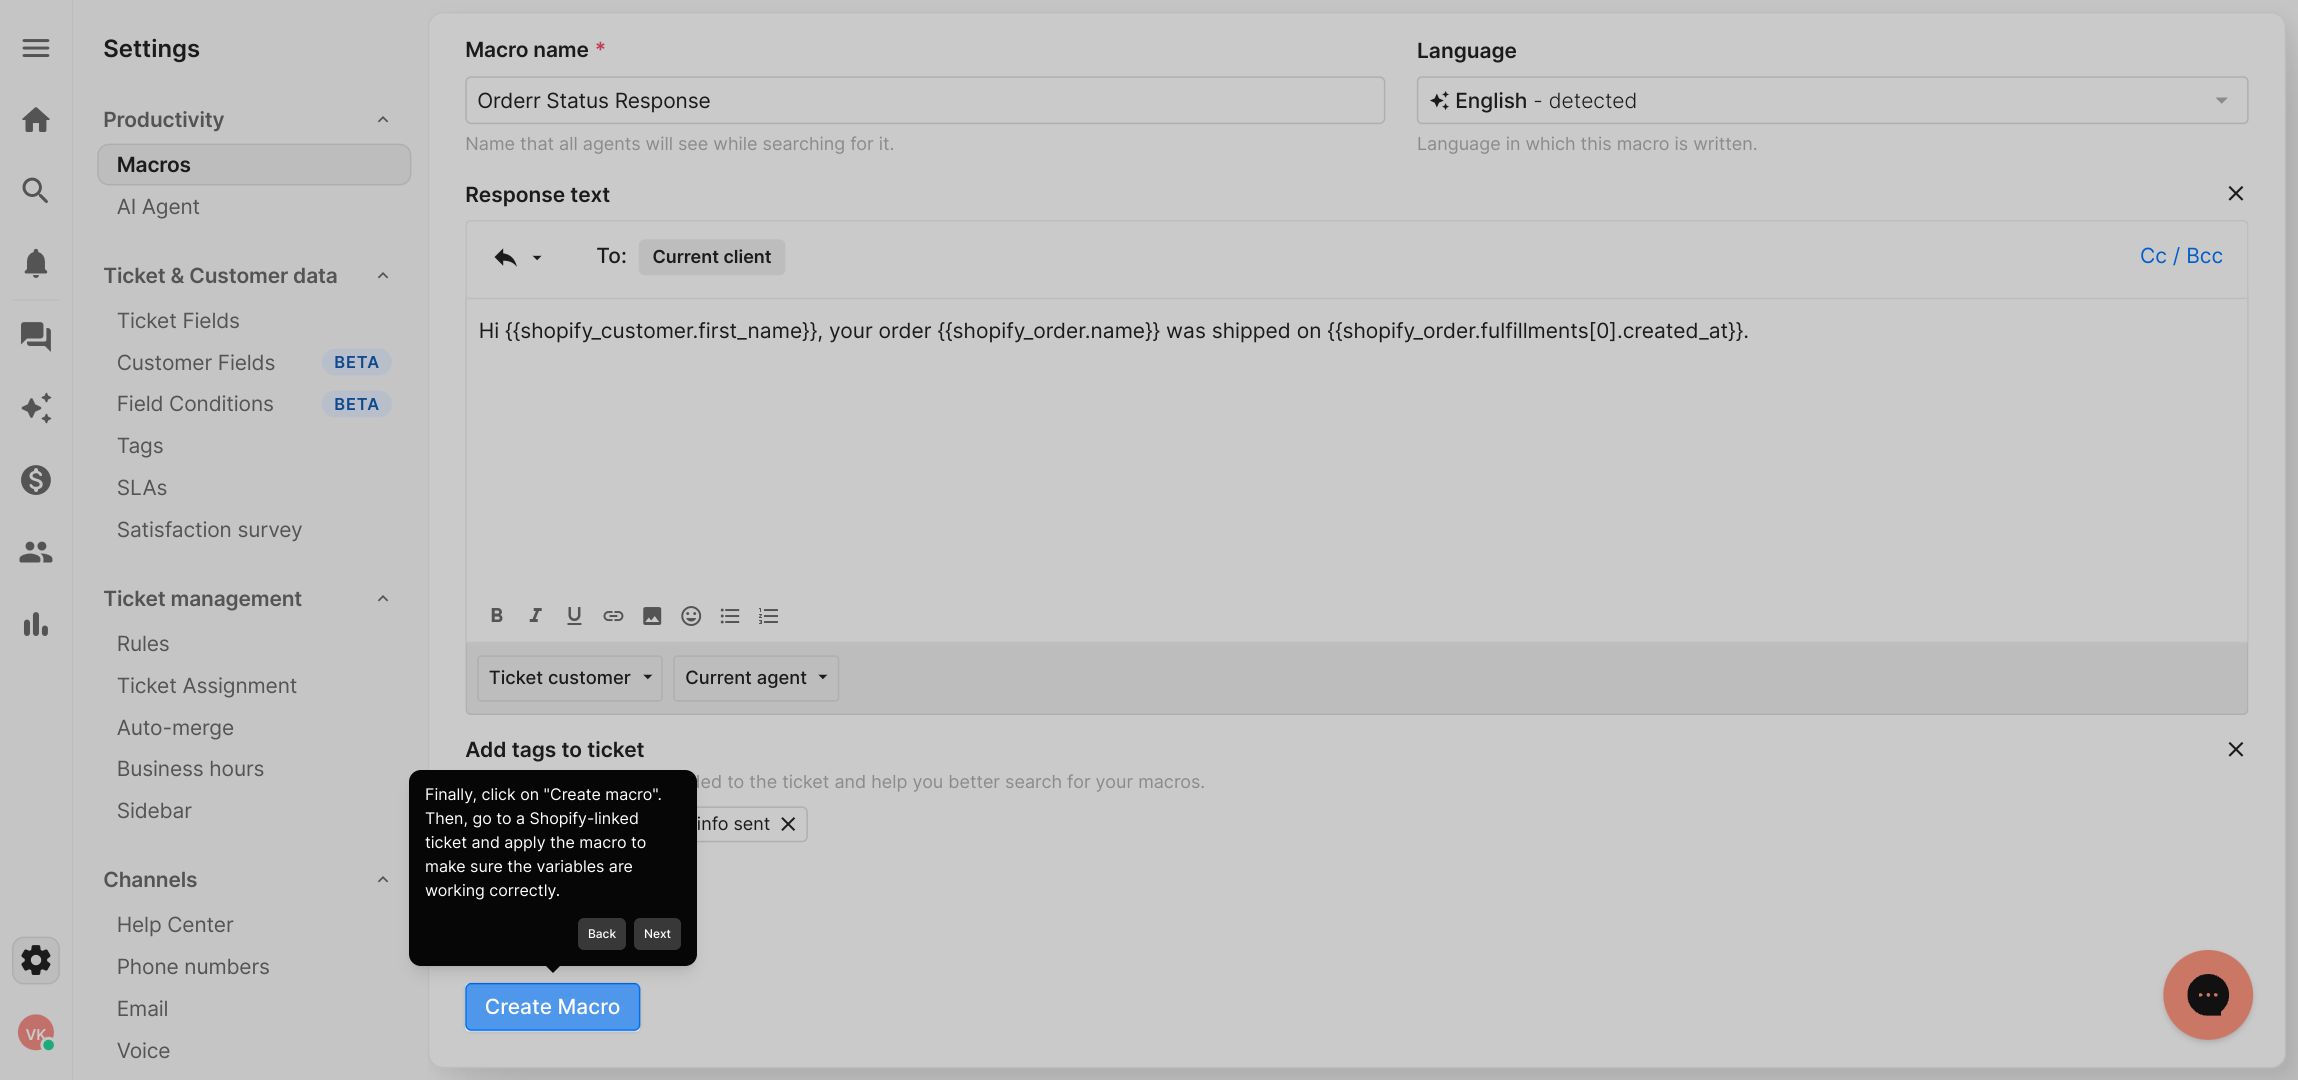
4. Next, name the Macro.
5. After that, add the response text.
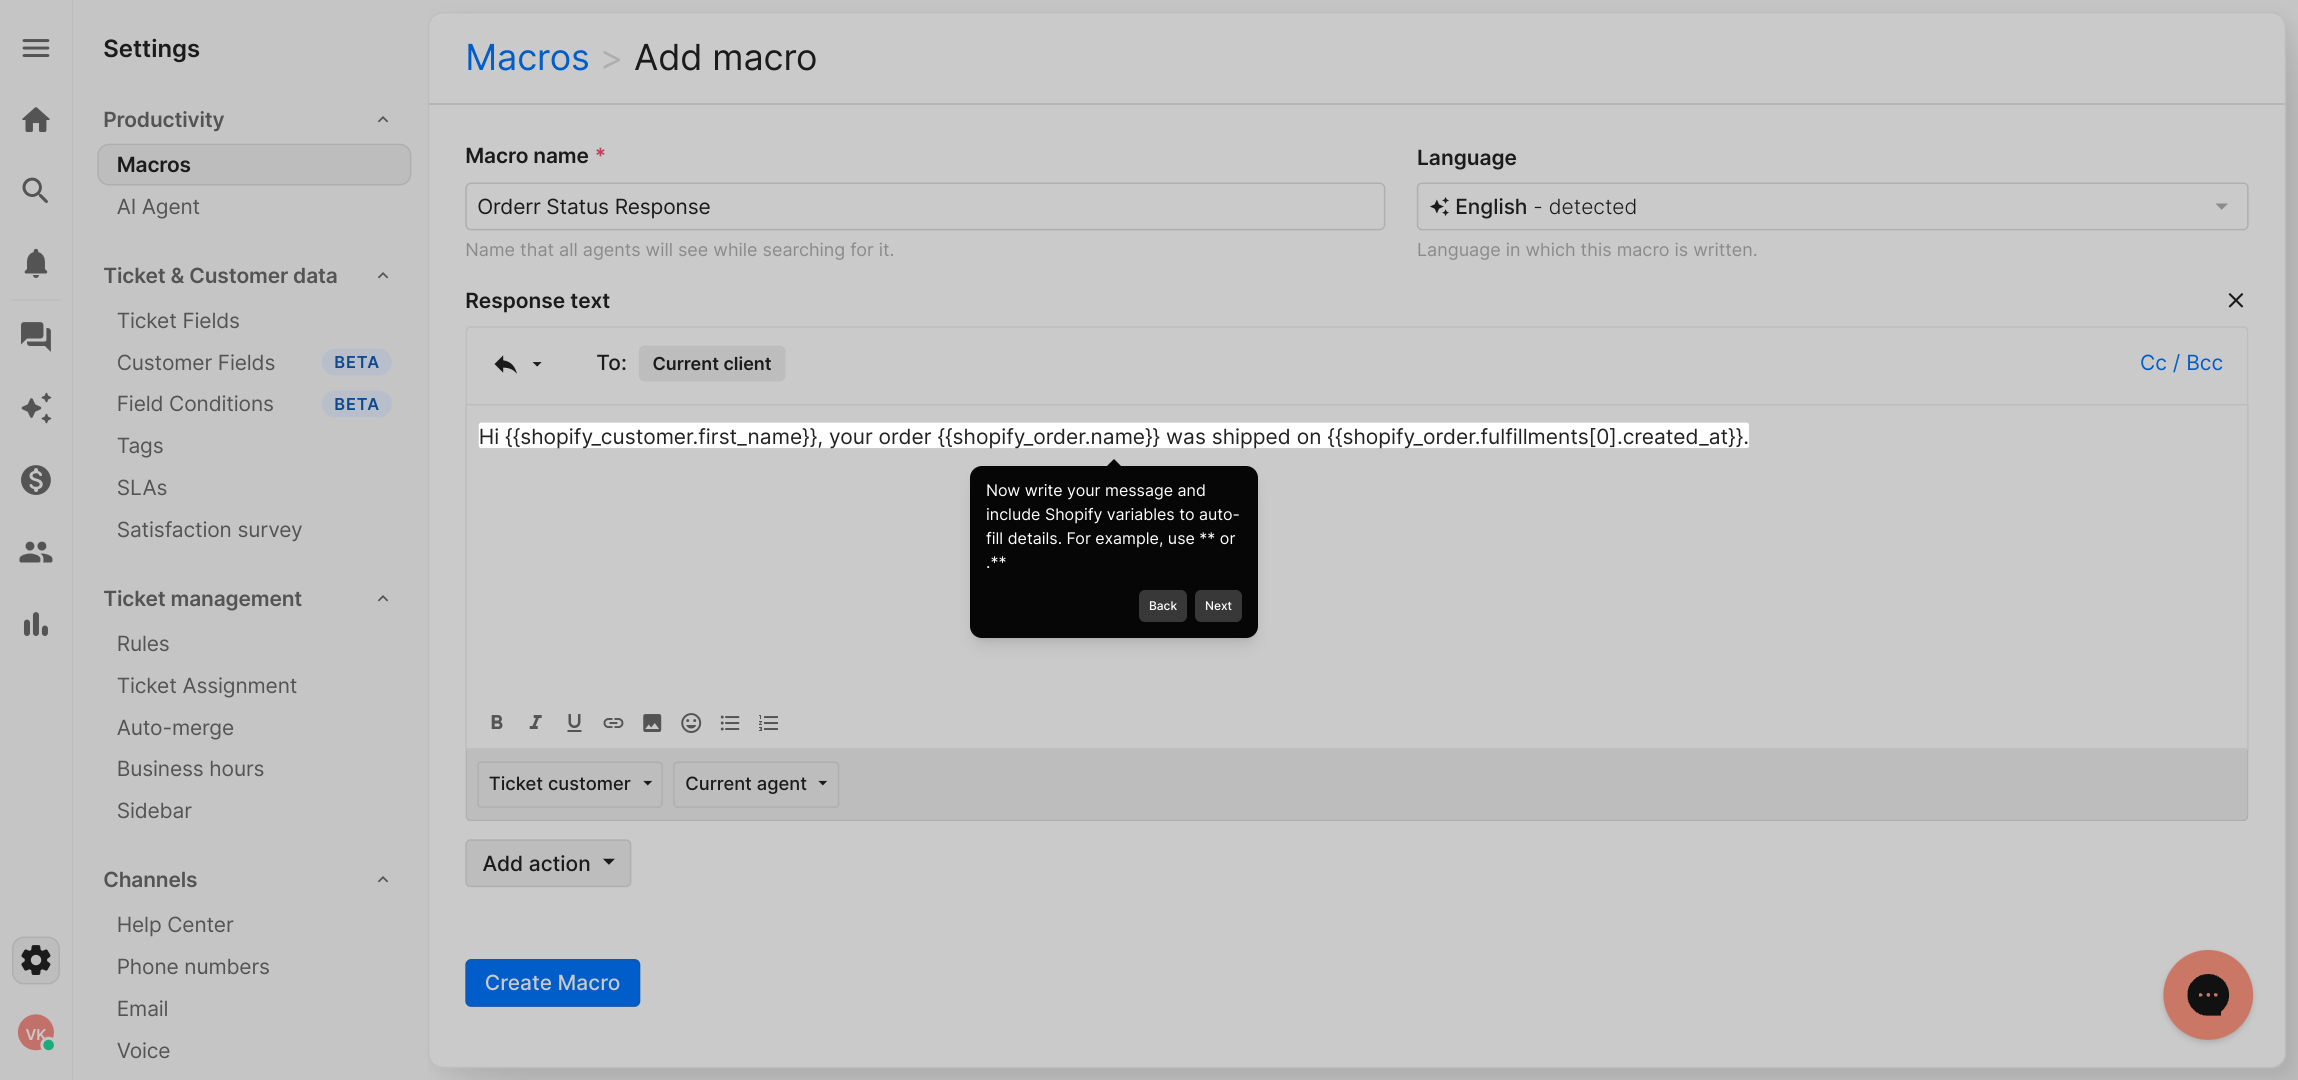
6. Now write your message and include Shopify variables to auto-fill details. For example, use ** or .**
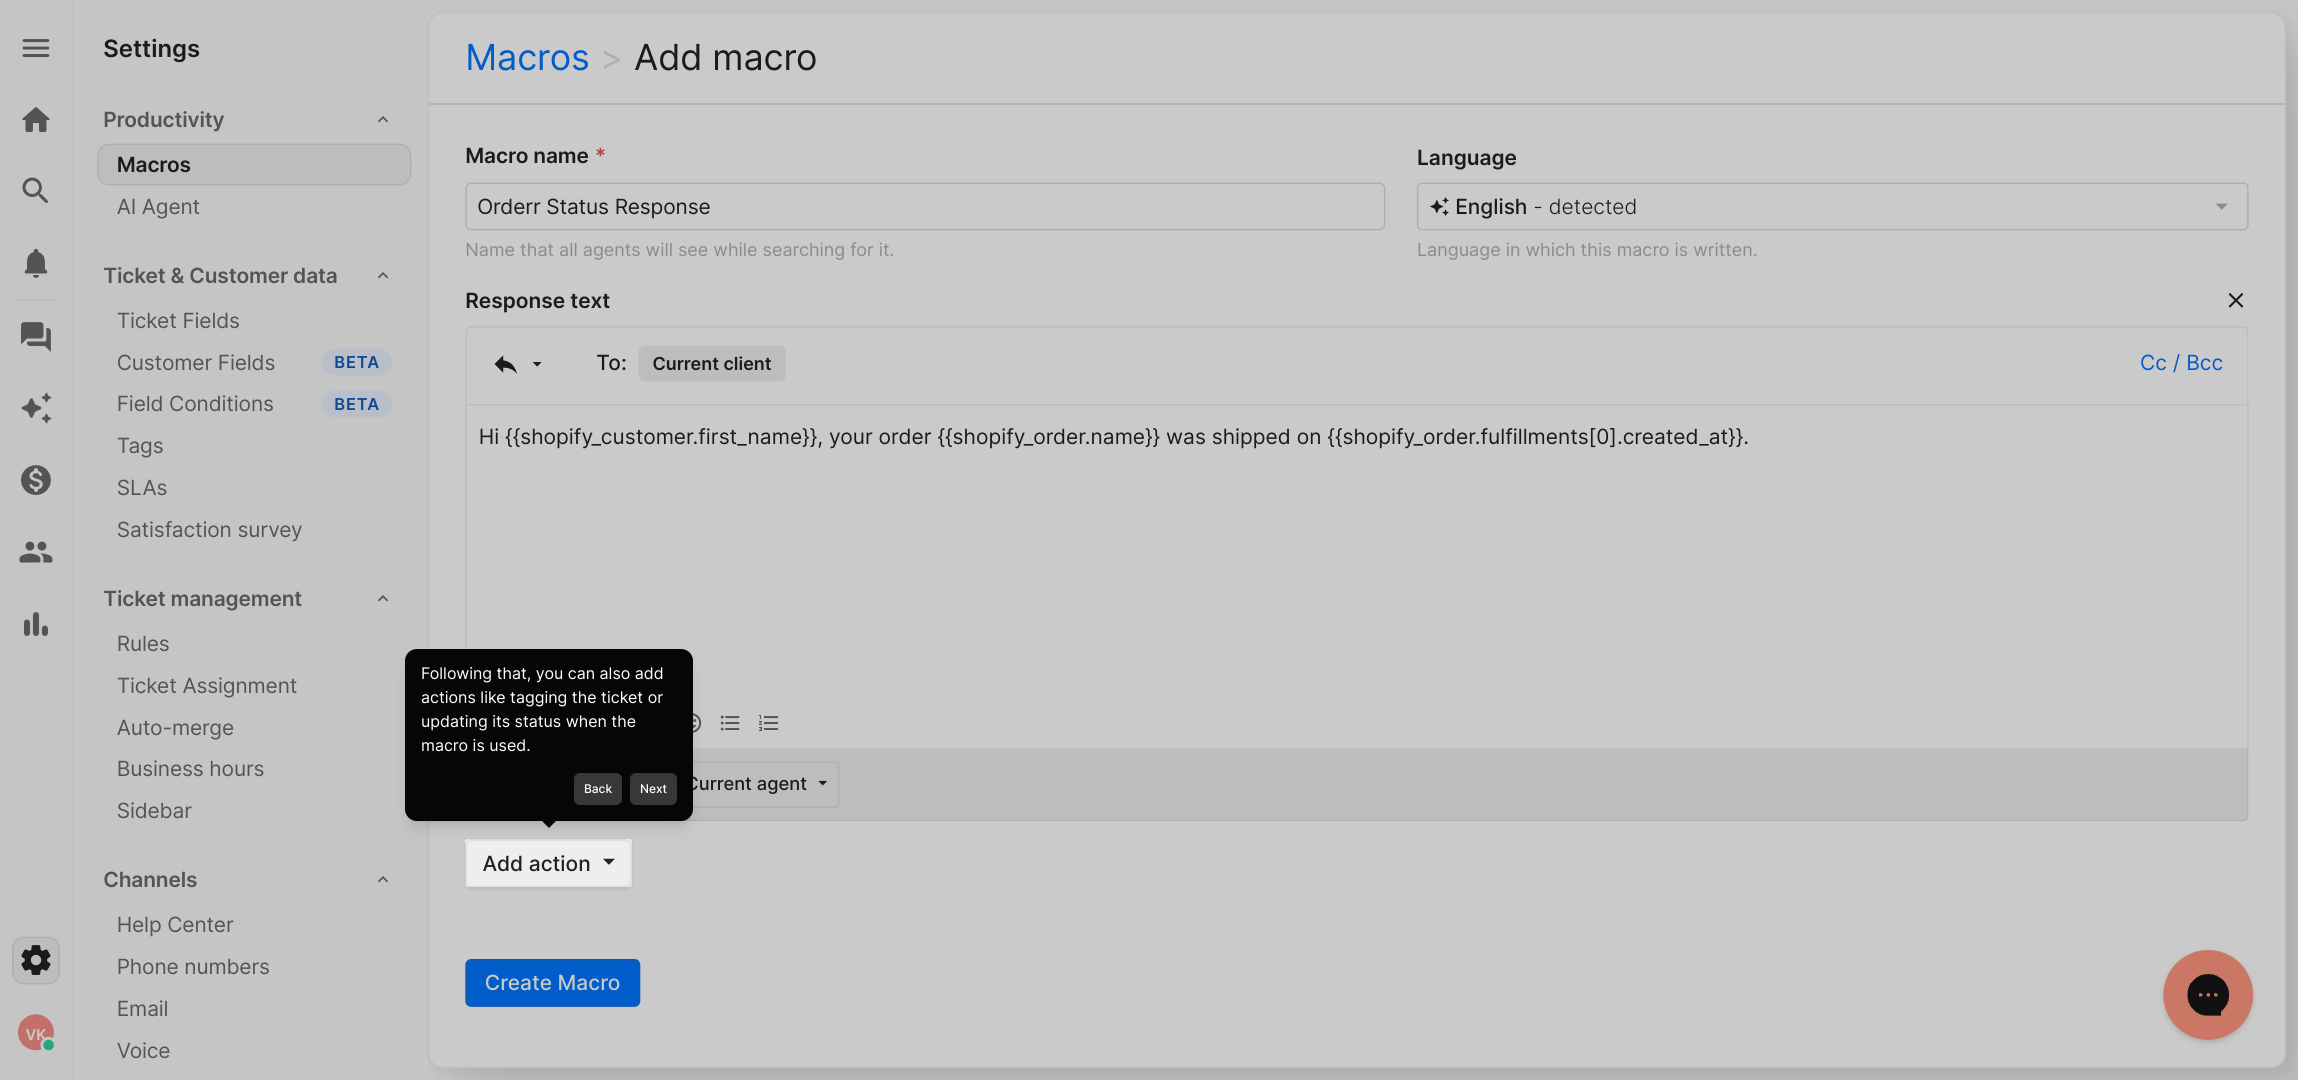
7. Following that, you can also add actions like tagging the ticket or updating its status when the macro is used.
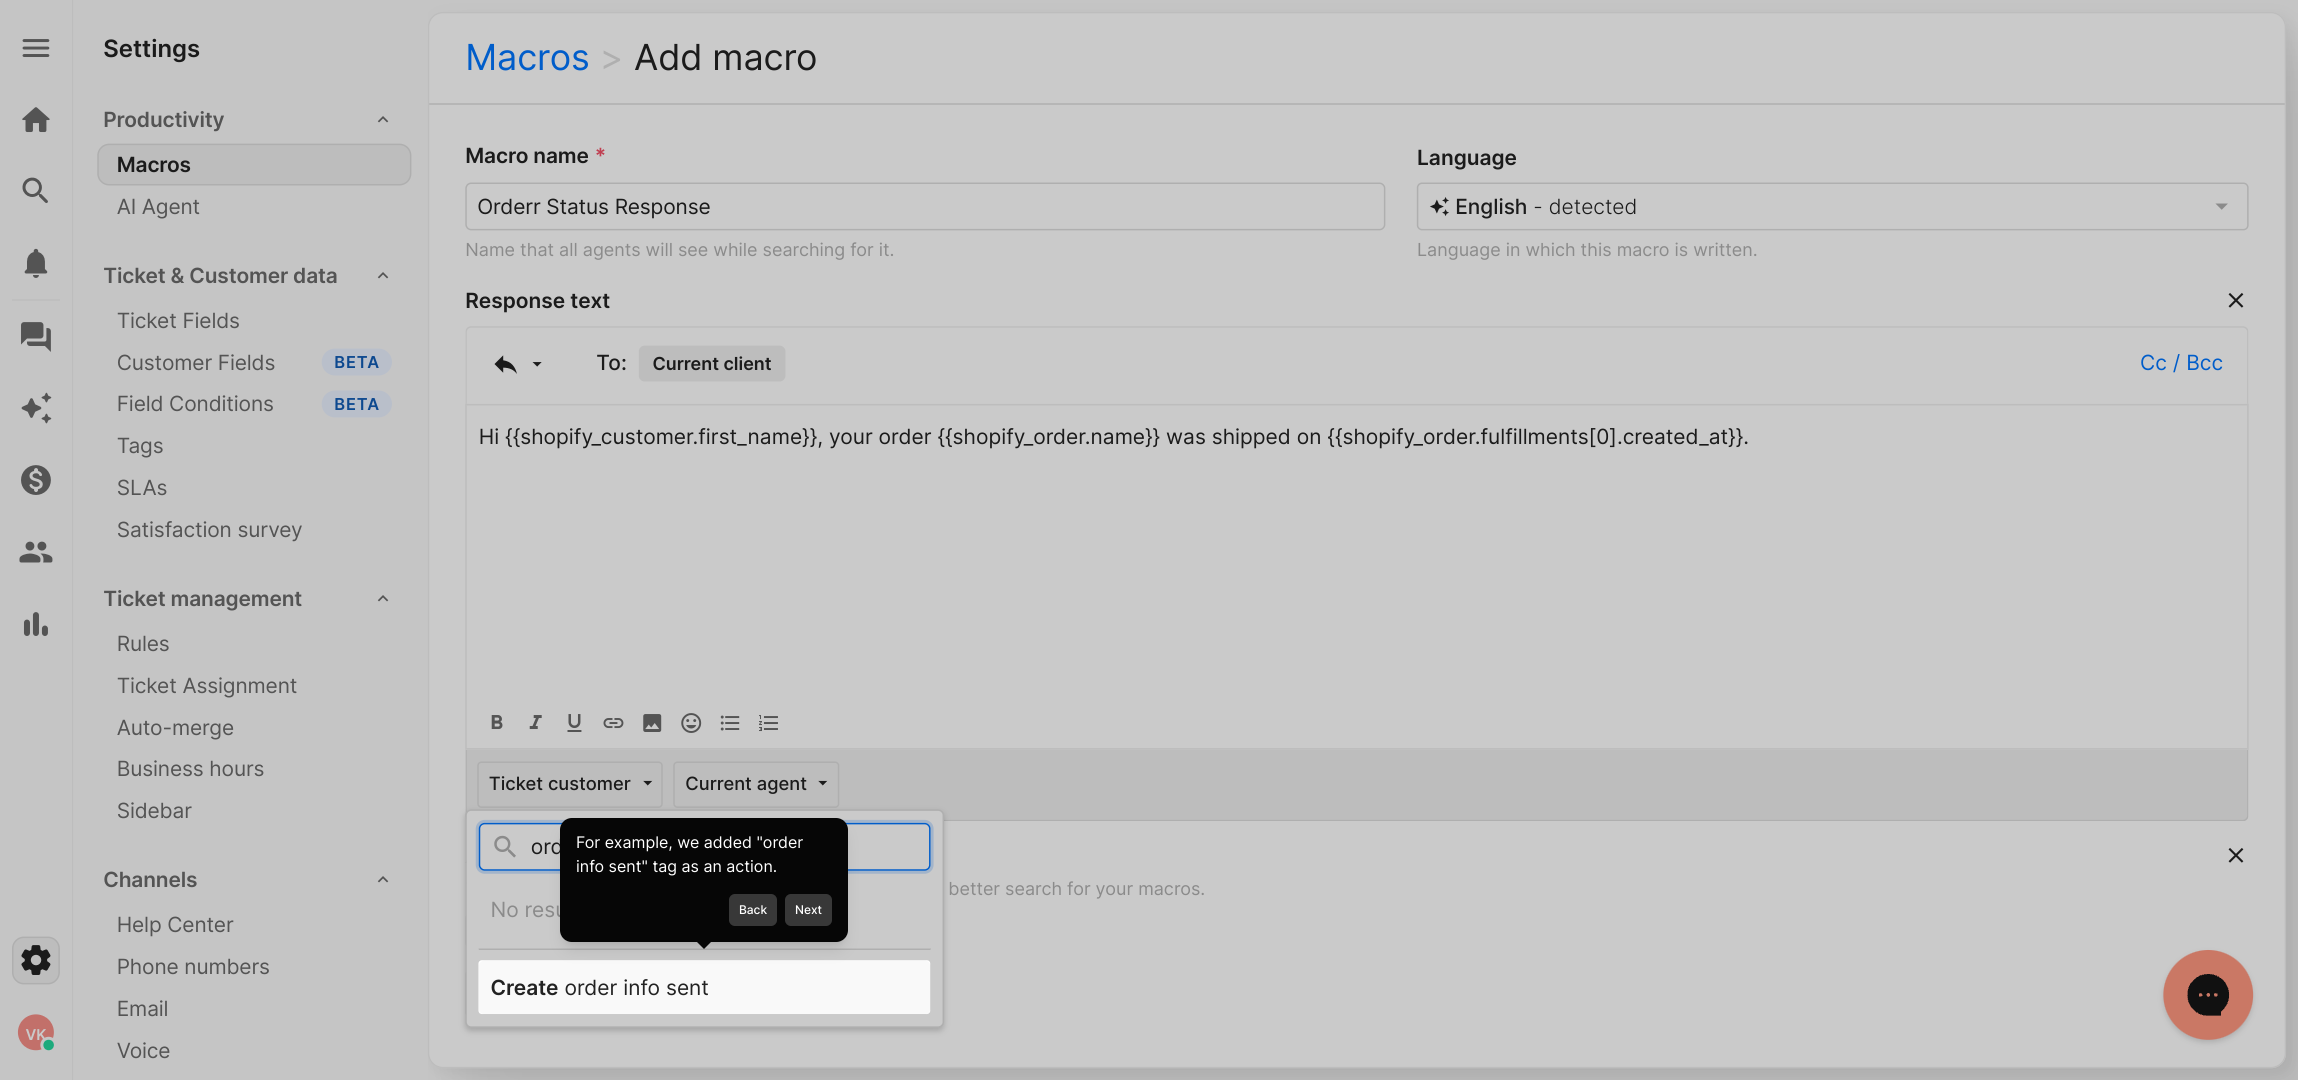
8. For example, we added "order info sent" tag as an action.
9. Finally, click on "Create macro". Then, go to a Shopify-linked ticket and apply the macro to make sure the variables are working correctly.
10. Create a Supademo in seconds
This interactive demo/guided walkthrough on How to Use Shopify Variables in Gorgias Macros was created using Supademo.
How to Use Shopify Variables in Gorgias Macros : Step-by-Step Guide
To get started, head over to the main dashboard and locate the "Settings" option. Clicking here will open up the area where you can customize various parts of your workspace.
Once you're inside Settings, find and select the "Macros" section. This is where you’ll create automated responses to help streamline your workflow.
In the Macros area, click on the button labeled "Create macro" to start building a new template that you can reuse across your tickets.
Now, give your new macro a clear and descriptive name. This helps you easily identify it later when you need to apply it.
Next, enter the response message that you want this macro to send. This text will be used whenever you apply the macro to a ticket.
Take a moment to personalize your message by including Shopify variables. These placeholders automatically fill in details like customer names or order numbers to make your replies more tailored and efficient.
Beyond just text, you can configure additional actions for the macro. For example, automatically tagging a ticket or updating its status helps keep your workflow organized without extra steps.
As an example, we’ve added an action to tag tickets with "order info sent." This makes it easy to track which tickets have been handled with this specific macro.
When everything looks good, finalize your setup by clicking "Create macro." Then, test it out by applying the macro to a ticket linked to Shopify to ensure all variables populate correctly.
And that’s it! You’ve successfully created a macro that saves you time and keeps your customer communications consistent. Try out Supademo’s features to create powerful automations in just moments.
Create your own interactive demos in < 5 mins with Supademo
You can create your own interactive product demo in minutes using Supademo. Drive growth, scale enablement, and supercharge product-led onboarding with Supademo.
Sign up for free here with no credit card required.
FAQs
Commonly asked questions about this topic.
What are Shopify variables in Gorgias macros?
How do I insert Shopify variables into a Gorgias macro?
Can I add actions to my macros besides messages?
What are some common Shopify variables used in macros?
How do I test if the Shopify variables work in my macro?
Do Shopify variables update automatically in tickets?
Can I customize Shopify variables in Gorgias macros?
Are there any limits on the number of Shopify variables per macro?
What should I do if variables aren't populating correctly?
Is using Shopify variables in macros suitable for all support scenarios?

Product Operations Associate
Vimal Kumar helps build and grow Supademo’s team and GTM efforts, with a focus on figuring out growth levers and improving product traction.


