How to Delete or Remove a Source in NotebookLM

Vimal Kumar
Vimal Kumar·
How to Delete or Remove a Source in NotebookLM
Interactive demo powered by Supademo

1. First, open the Notebook where you want to remove a source.

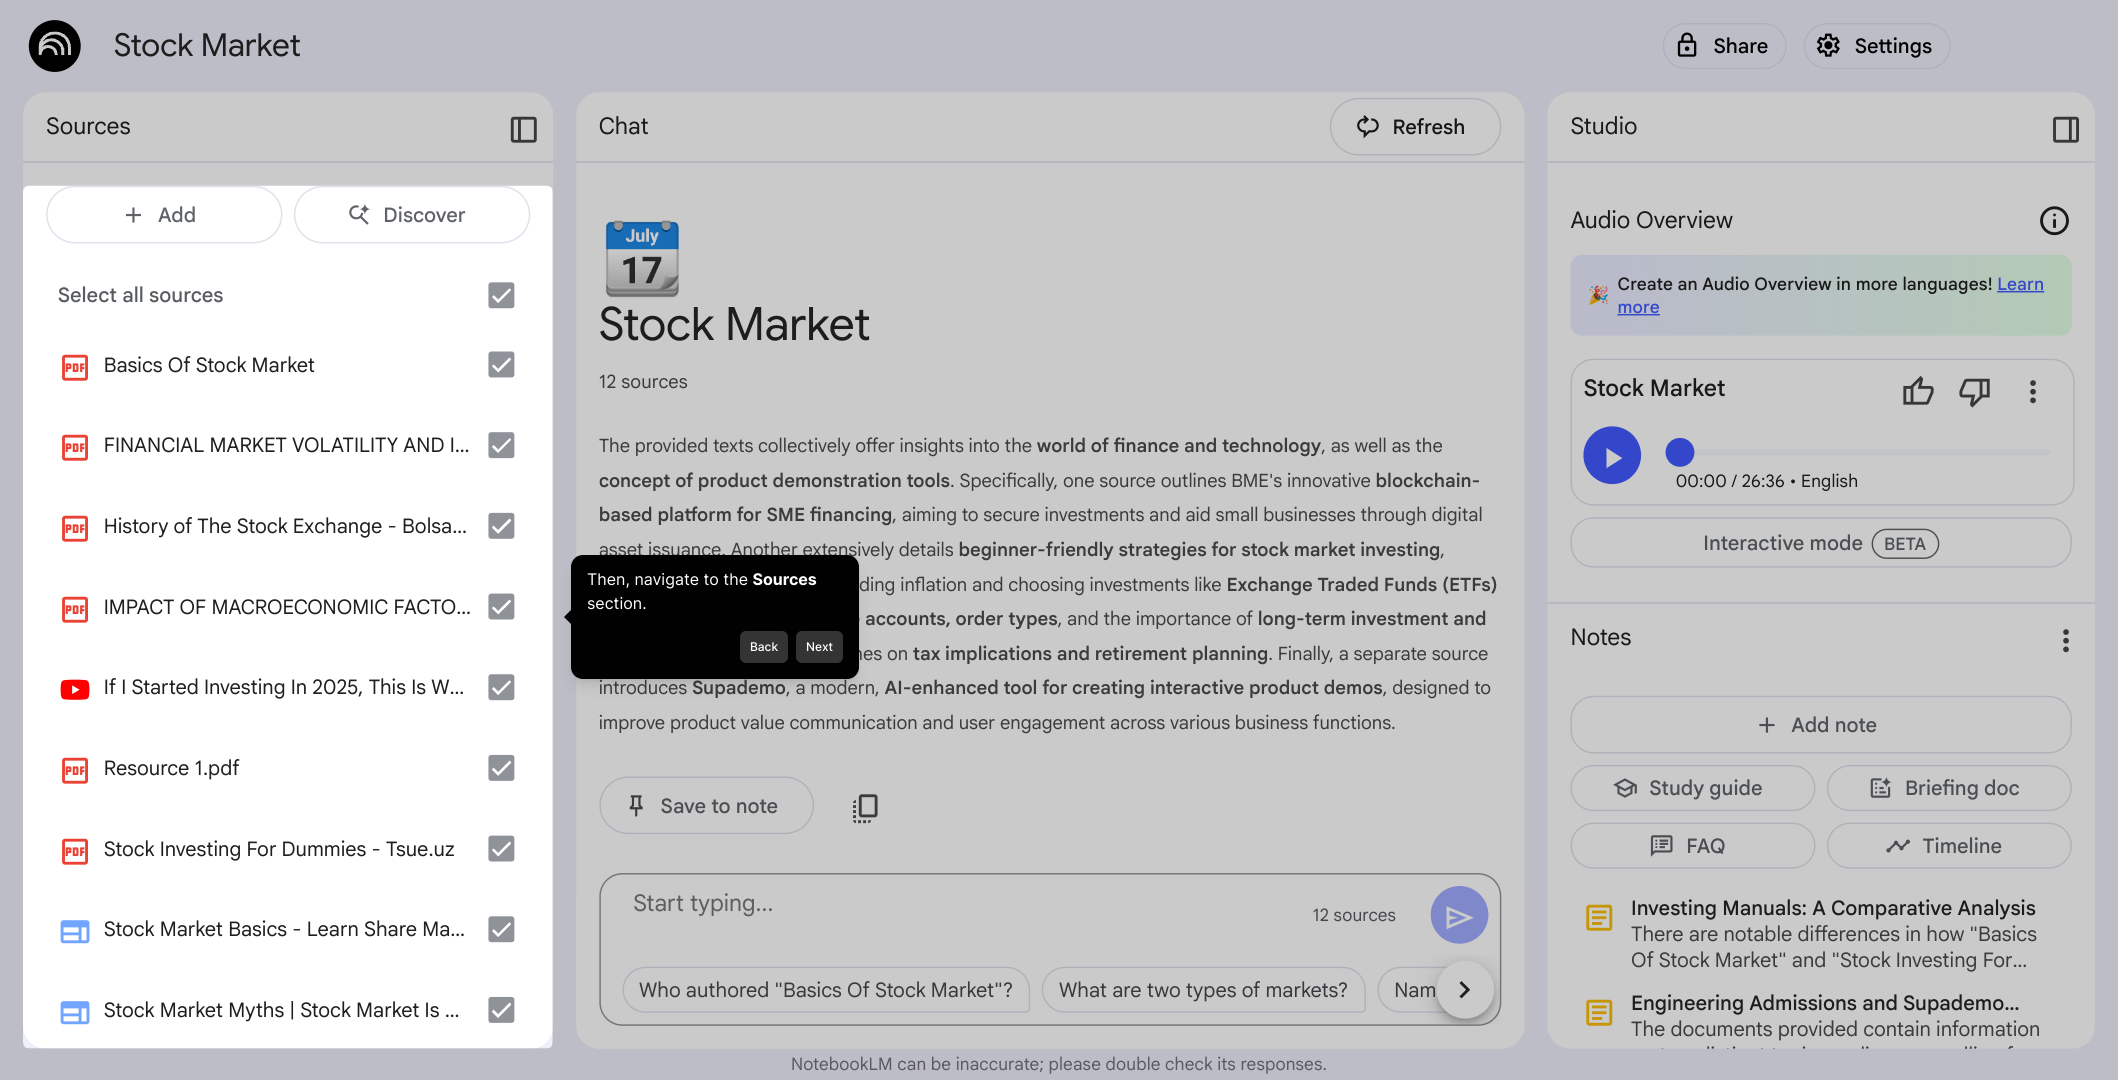
2. Then, navigate to the Sources section.

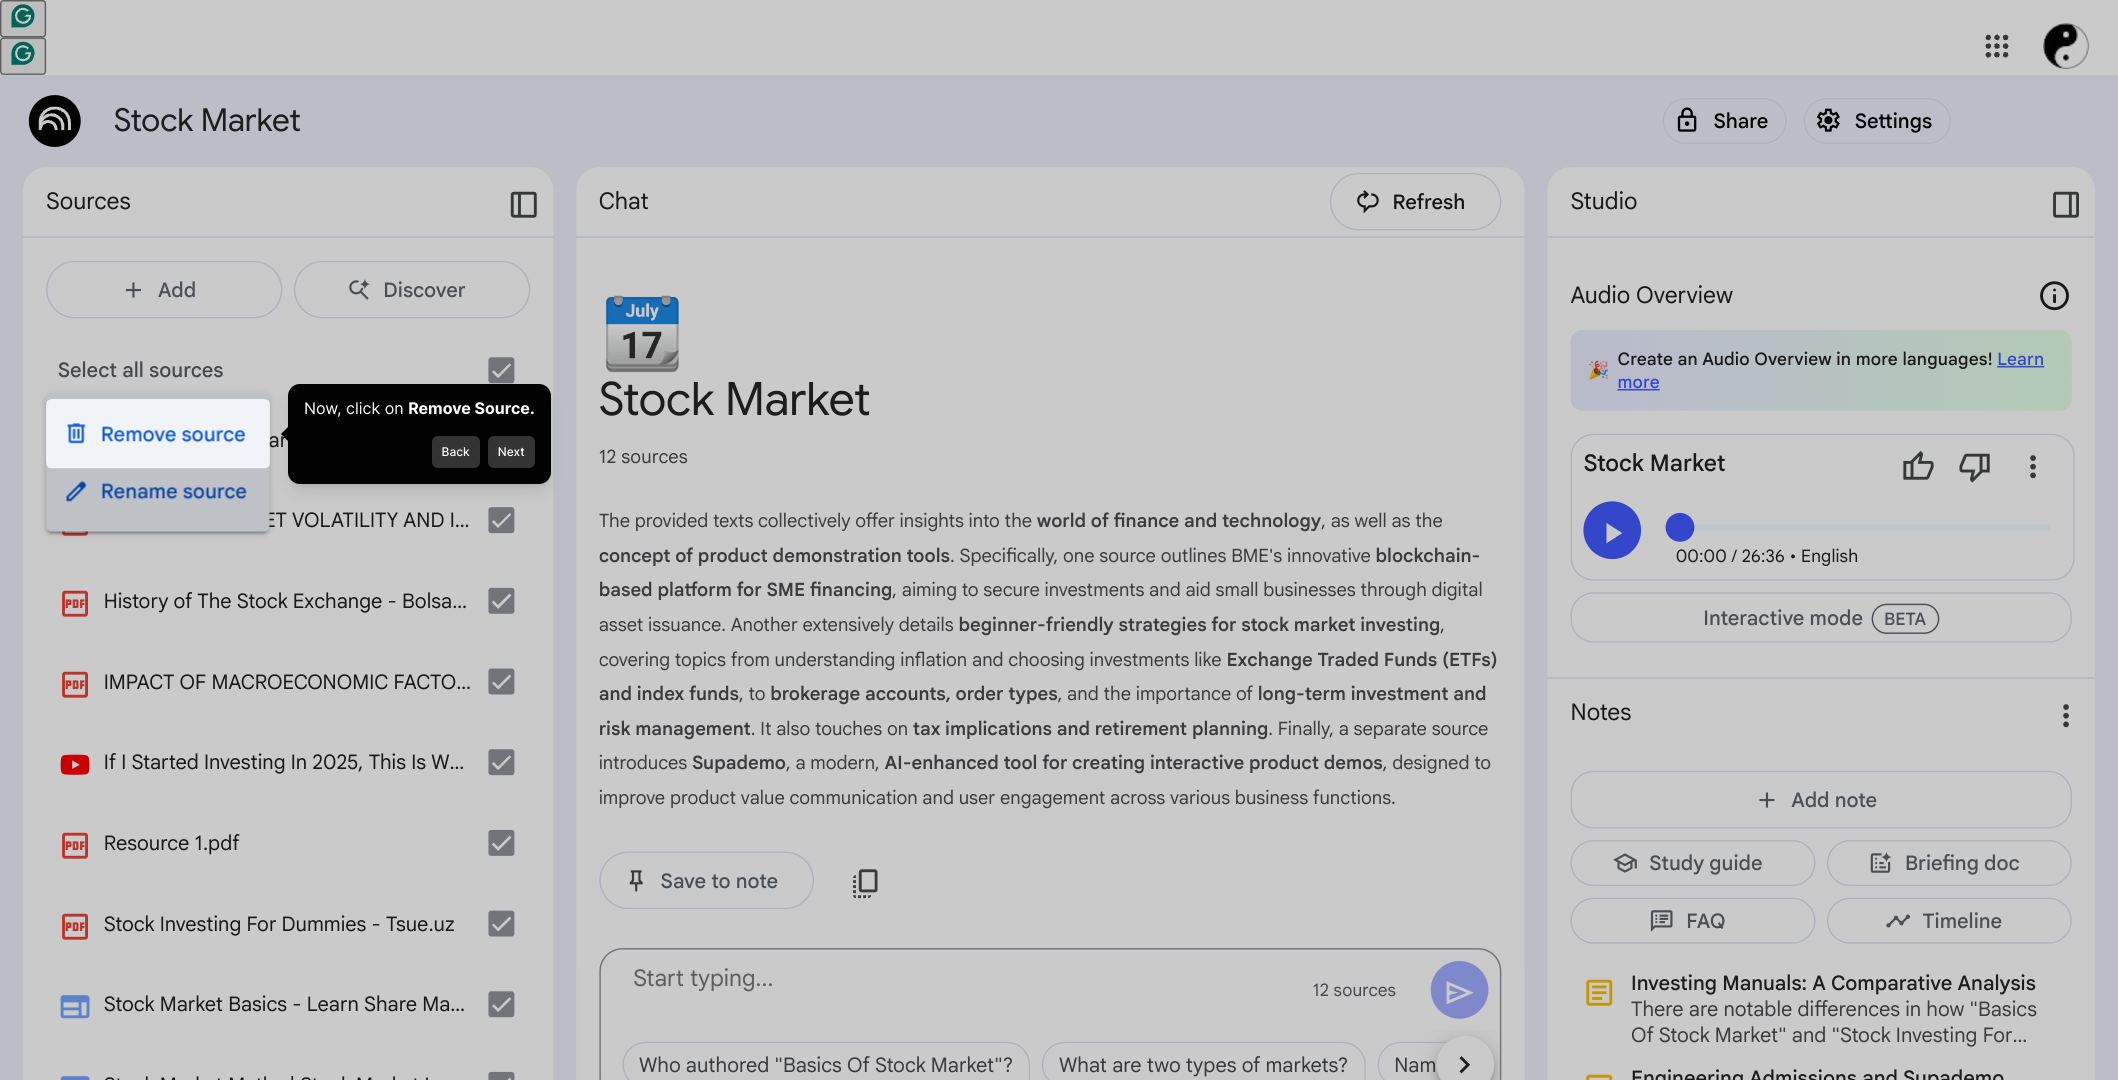
3. After that, hover over the source that you want to remove and click on the "More" icon.

4. Now, click on Remove Source.

5. Finally, to confirm, click on Delete.

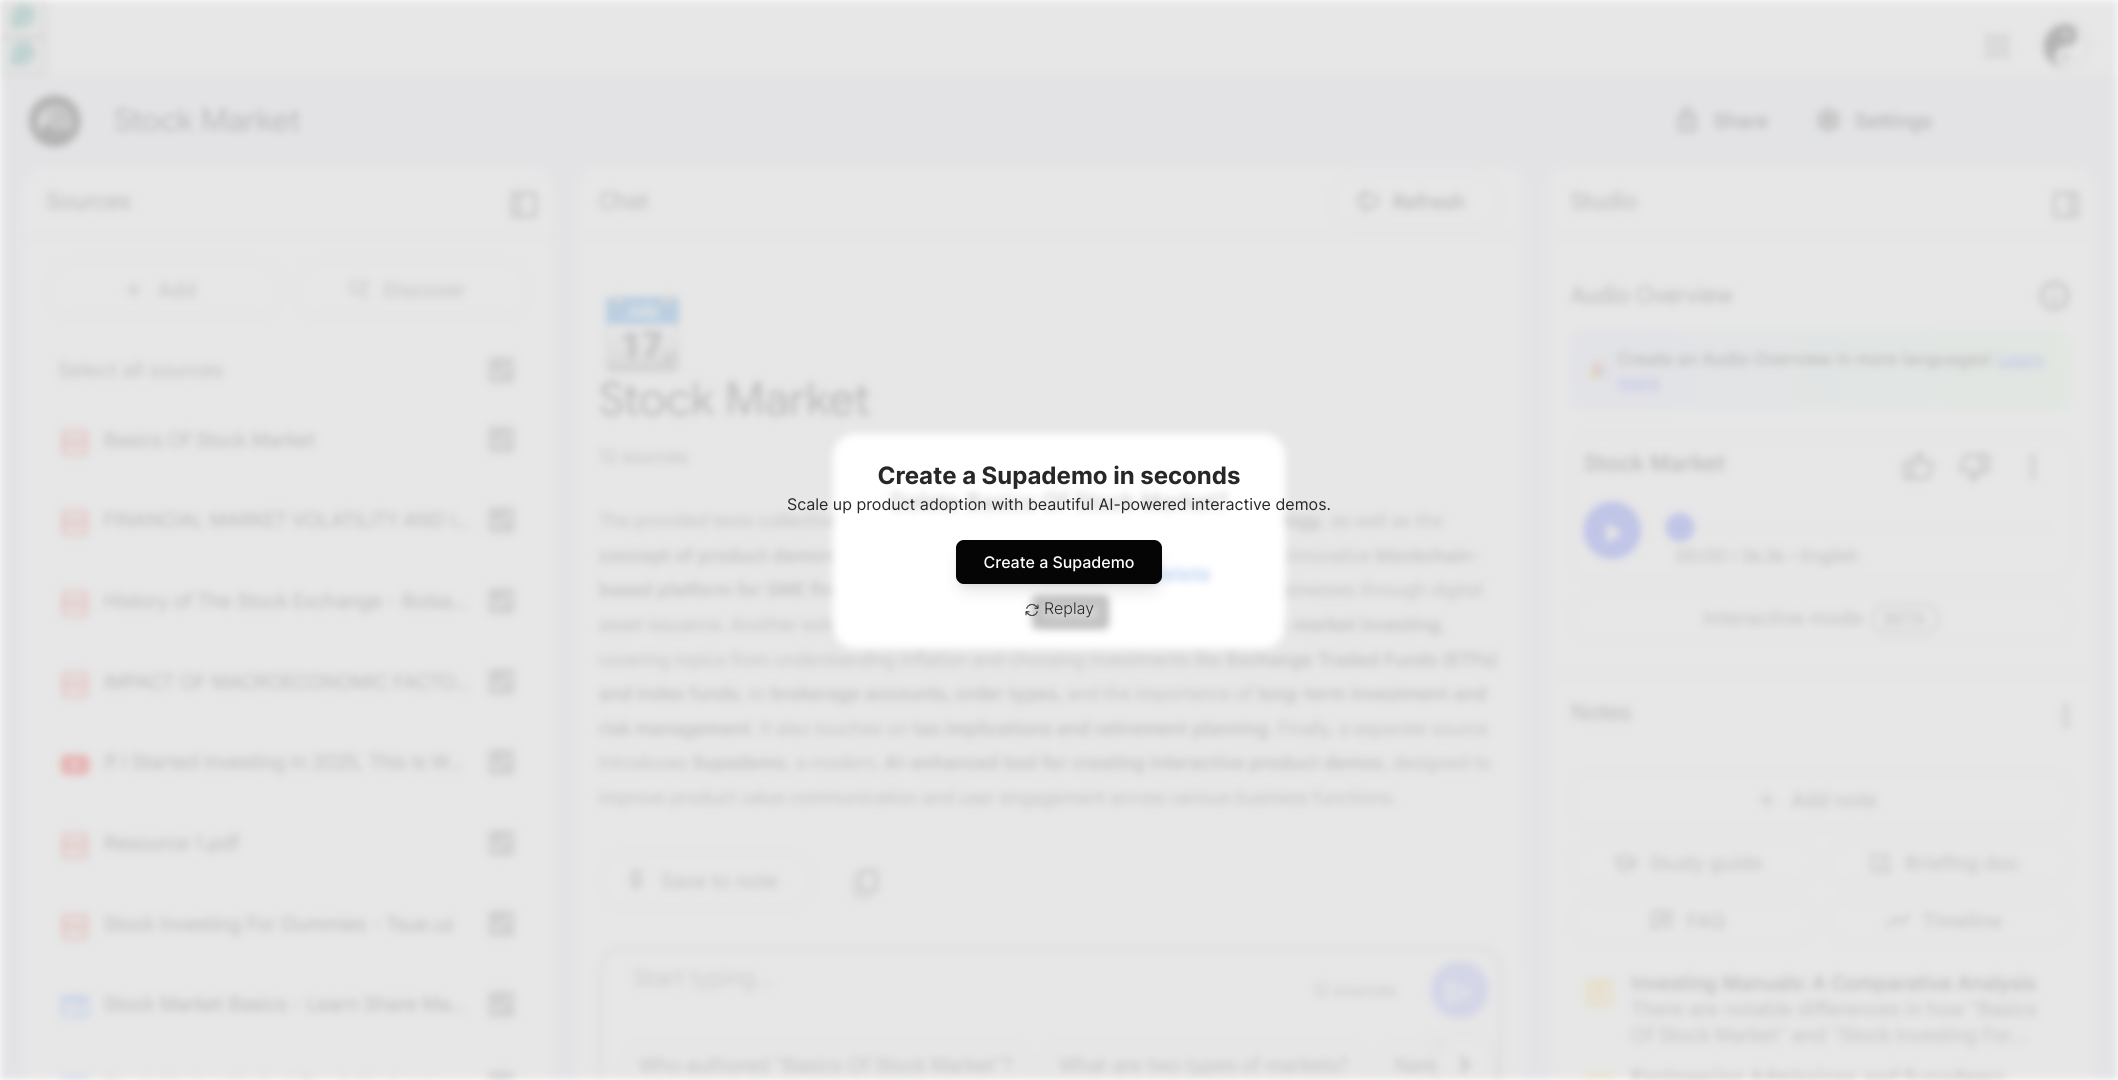
6. Create a Supademo in seconds

This interactive demo/guided walkthrough on How to Delete or Remove a Source in NotebookLM was created using Supademo.


How to Delete or Remove a Source in NotebookLM : Step-by-Step Guide

Begin by opening the Notebook that contains the source you wish to remove. This is where all your sources are managed, so starting here ensures you’re in the right place to make changes.

1

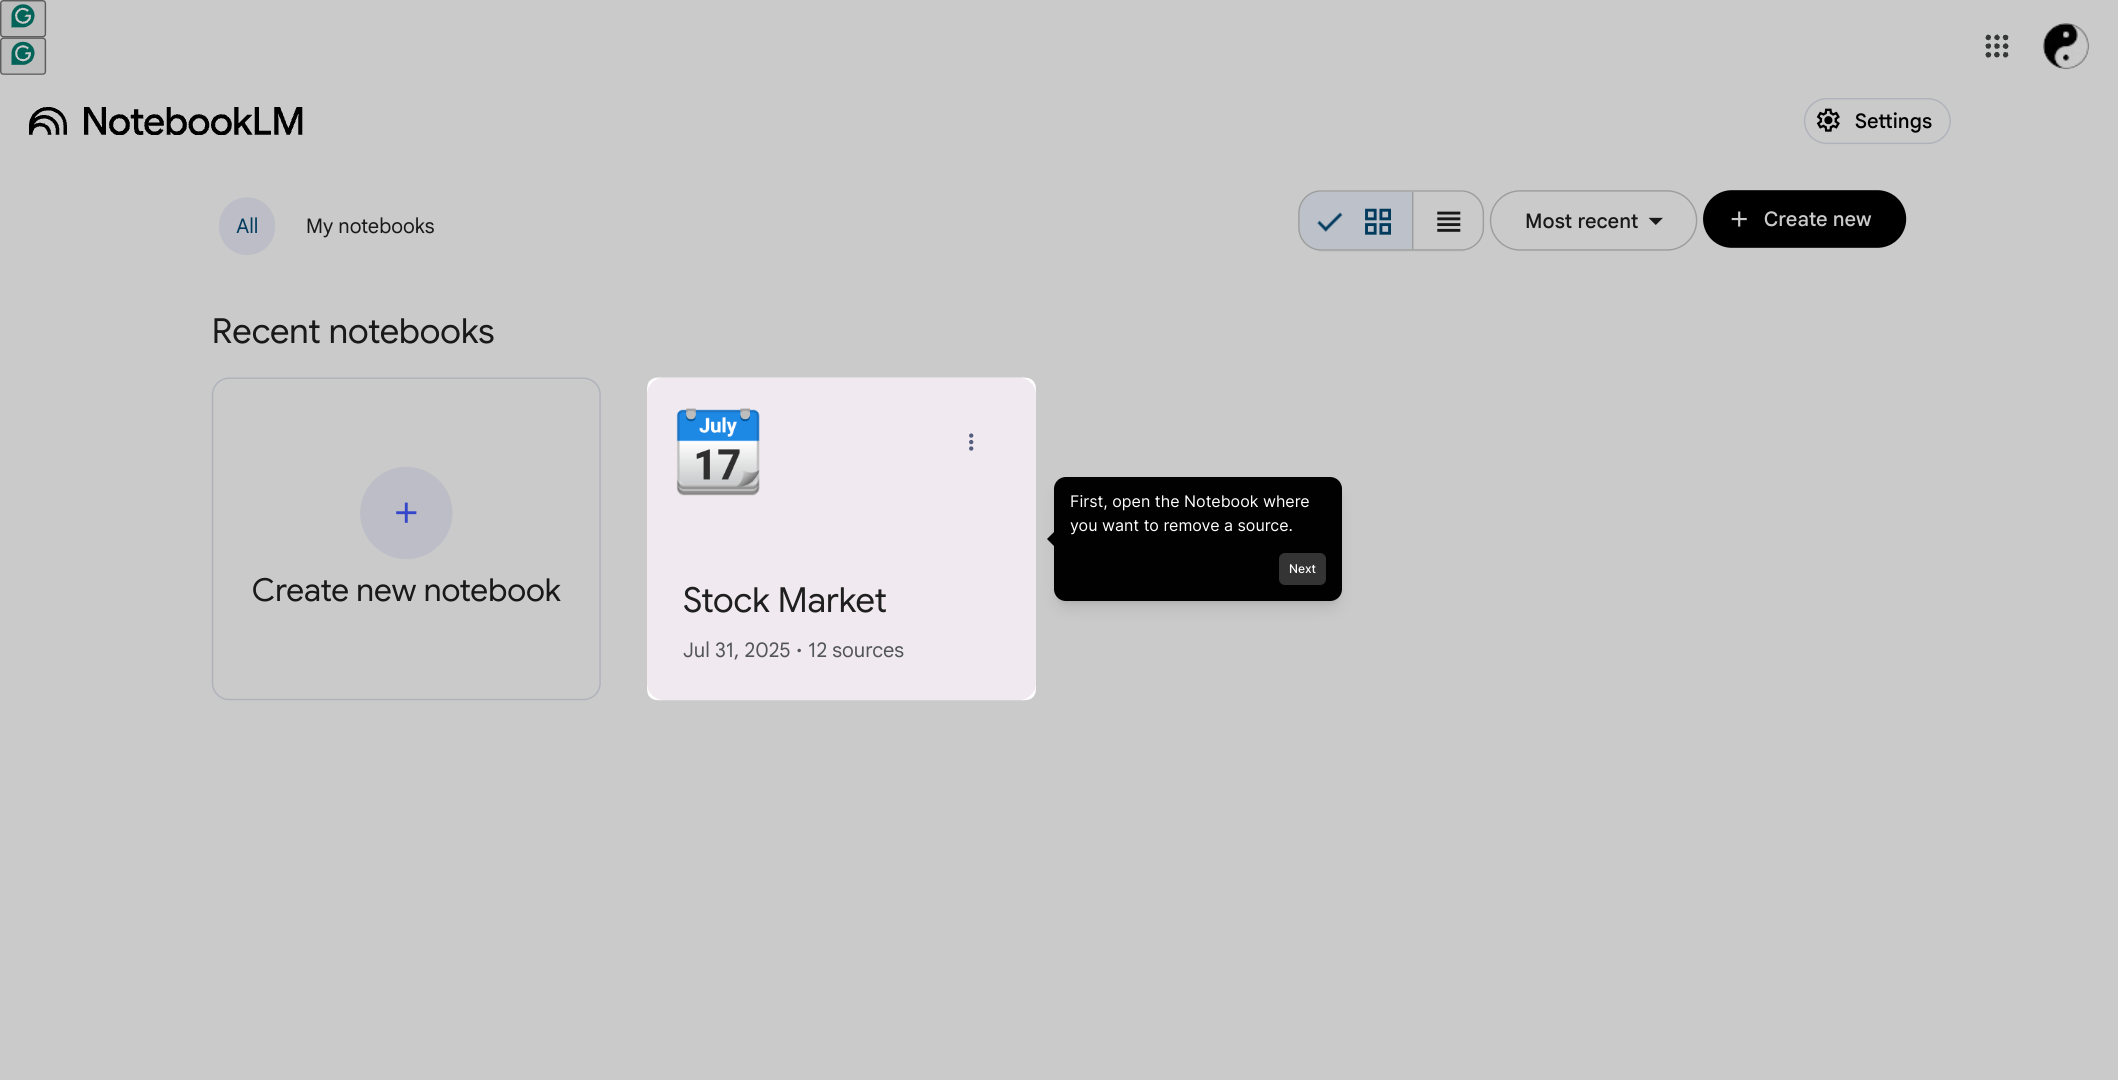
Once inside the Notebook, look for the Sources section in the menu or sidebar. This area lists all data sources connected to your Notebook and is your gateway for managing them.

2

Next, find the specific source you want to remove. Hover your mouse over it to reveal additional options, then click on the "More" icon to access the menu where removal options are located.

3

In the menu that appears, select Remove Source to initiate the deletion process. This step helps you start the removal while keeping control over what’s happening in your Notebook.

4

To finalize the removal, confirm your choice by clicking on Delete. This confirmation step is designed to prevent accidental deletions and ensures you are certain before the source is removed.

5

With the source removed, you’re ready to proceed or create a new Supademo quickly. This final screen lets you move forward with a clean setup, tailored exactly to your current needs.

6

Create your own interactive demos in < 5 mins with Supademo

You can create your own interactive product demo in minutes using Supademo. Drive growth, scale enablement, and supercharge product-led onboarding with Supademo. Sign up for free here with no credit card required.


FAQs

Commonly asked questions about this topic.

What is a source in NotebookLM?

A source in NotebookLM refers to an external document or data set that you connect to your notebook to enrich your notes or research. It allows you to reference and interact with various types of information directly within your notebook.

Can I recover a source after deleting it in NotebookLM?

Once you delete a source in NotebookLM, it is removed from your notebook and cannot be recovered unless you re-add it manually. Make sure to double-check before confirming the deletion to avoid accidental loss of important data.

Why would I want to remove a source from my Notebook?

Removing sources can help clean up and organize your notebook, especially if a source is outdated, irrelevant, or no longer needed. It improves focus and ensures your notebook contains only the information important to your current work.

Is deleting a source in NotebookLM permanent?

Yes, deleting a source from NotebookLM is permanent for that particular notebook. It will no longer be accessible within that notebook unless re-imported. Always confirm you no longer need the source before deletion to prevent accidental data loss.

How do I access the "More" icon to remove a source?

The "More" icon usually appears as three dots when you hover over a source in the Sources section. Clicking it opens a menu with options including "Remove Source" to manage your connected data efficiently.

Will removing a source affect my notes in NotebookLM?

Removing a source disconnects its data from your notebook, which may affect any notes or references tied directly to that source. Make sure to review your notes to adjust or remove any related content after deletion.

Can I remove multiple sources at once in NotebookLM?

Currently, NotebookLM requires removing sources one at a time. You’ll need to repeat the removal steps for each source individually. Keep an eye on updates as batch removal could be added in future versions.

Do I need special permissions to remove a source?

You must have editing access to the Notebook to remove sources. If you’re a viewer or collaborator without edit rights, you won’t see removal options. Ensure you have appropriate permissions before attempting to delete a source.

What happens if I click "Remove Source" by mistake?

After clicking "Remove Source," a confirmation prompt appears asking you to confirm deletion. If you clicked it accidentally, you can cancel at this step. This safeguard helps avoid accidental removal of valuable data.

Is it possible to delete a source from the mobile version of NotebookLM?

The ability to remove sources on mobile depends on the current app or web interface features. Typically, full source management, including deletion, is best done through the desktop version for better control and usability.
Vimal Kumar

Vimal Kumar

Product Operations Associate

Vimal Kumar helps build and grow Supademo’s team and GTM efforts, with a focus on figuring out growth levers and improving product traction.

More from the blog

How to Remove 'Powered by Shopify'

How to Remove 'Powered by Shopify'

Learn how to easily remove the 'Powered by Shopify' text from your online store with step-by-step instructions and tips to customize your Shopify storefront.

Vimal Kumar
Vimal KumarJan 3, 2026
How to Add Products to Shopify

How to Add Products to Shopify

Learn step-by-step how to add products to your Shopify store effortlessly, including tips on product details, images, pricing, and inventory management to boost your online sales.

Vimal Kumar
Vimal KumarDec 17, 2025
How to Deactivate Your Shopify Store

How to Deactivate Your Shopify Store

Learn step-by-step how to deactivate your Shopify store easily, including important considerations and tips to pause or close your shop without losing data.

Vimal Kumar
Vimal KumarDec 17, 2025
How to Remove 'Powered by Shopify'

How to Remove 'Powered by Shopify'

Learn how to easily remove the 'Powered by Shopify' text from your online store with step-by-step instructions and tips to customize your Shopify storefront.

Vimal Kumar
Vimal KumarDec 17, 2025
How to Create a Shopify Account

How to Create a Shopify Account

Learn step-by-step how to create a Shopify account quickly and easily, set up your online store, and start selling your products in no time.

Vimal Kumar
Vimal KumarDec 17, 2025
How to Create a Stripe Account

How to Create a Stripe Account

Learn how to create a Stripe account quickly and easily with our step-by-step guide, perfect for beginners looking to start accepting online payments.

Vimal Kumar
Vimal KumarDec 17, 2025