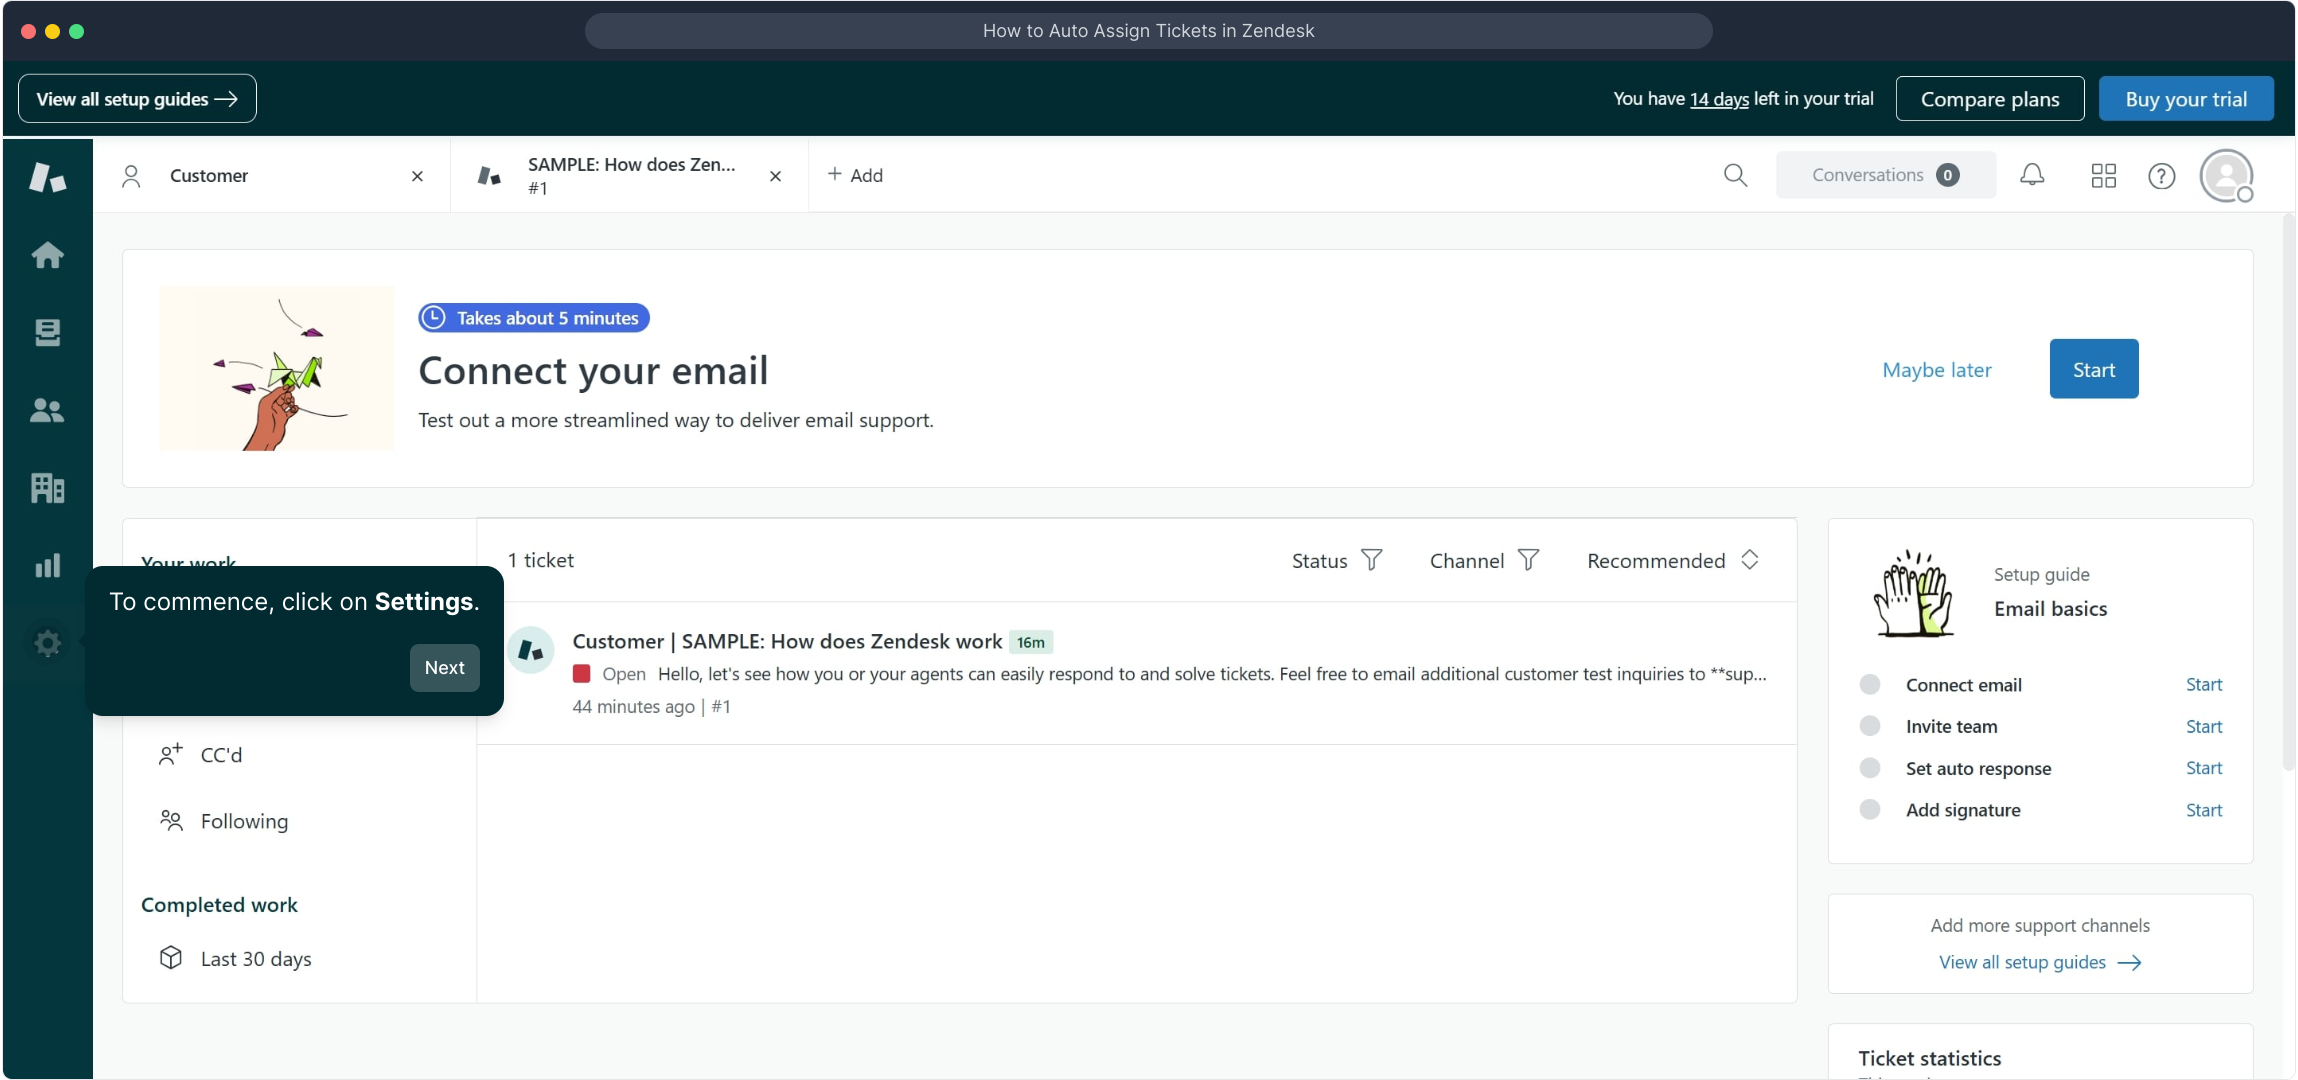
1. To commence, click on Settings.
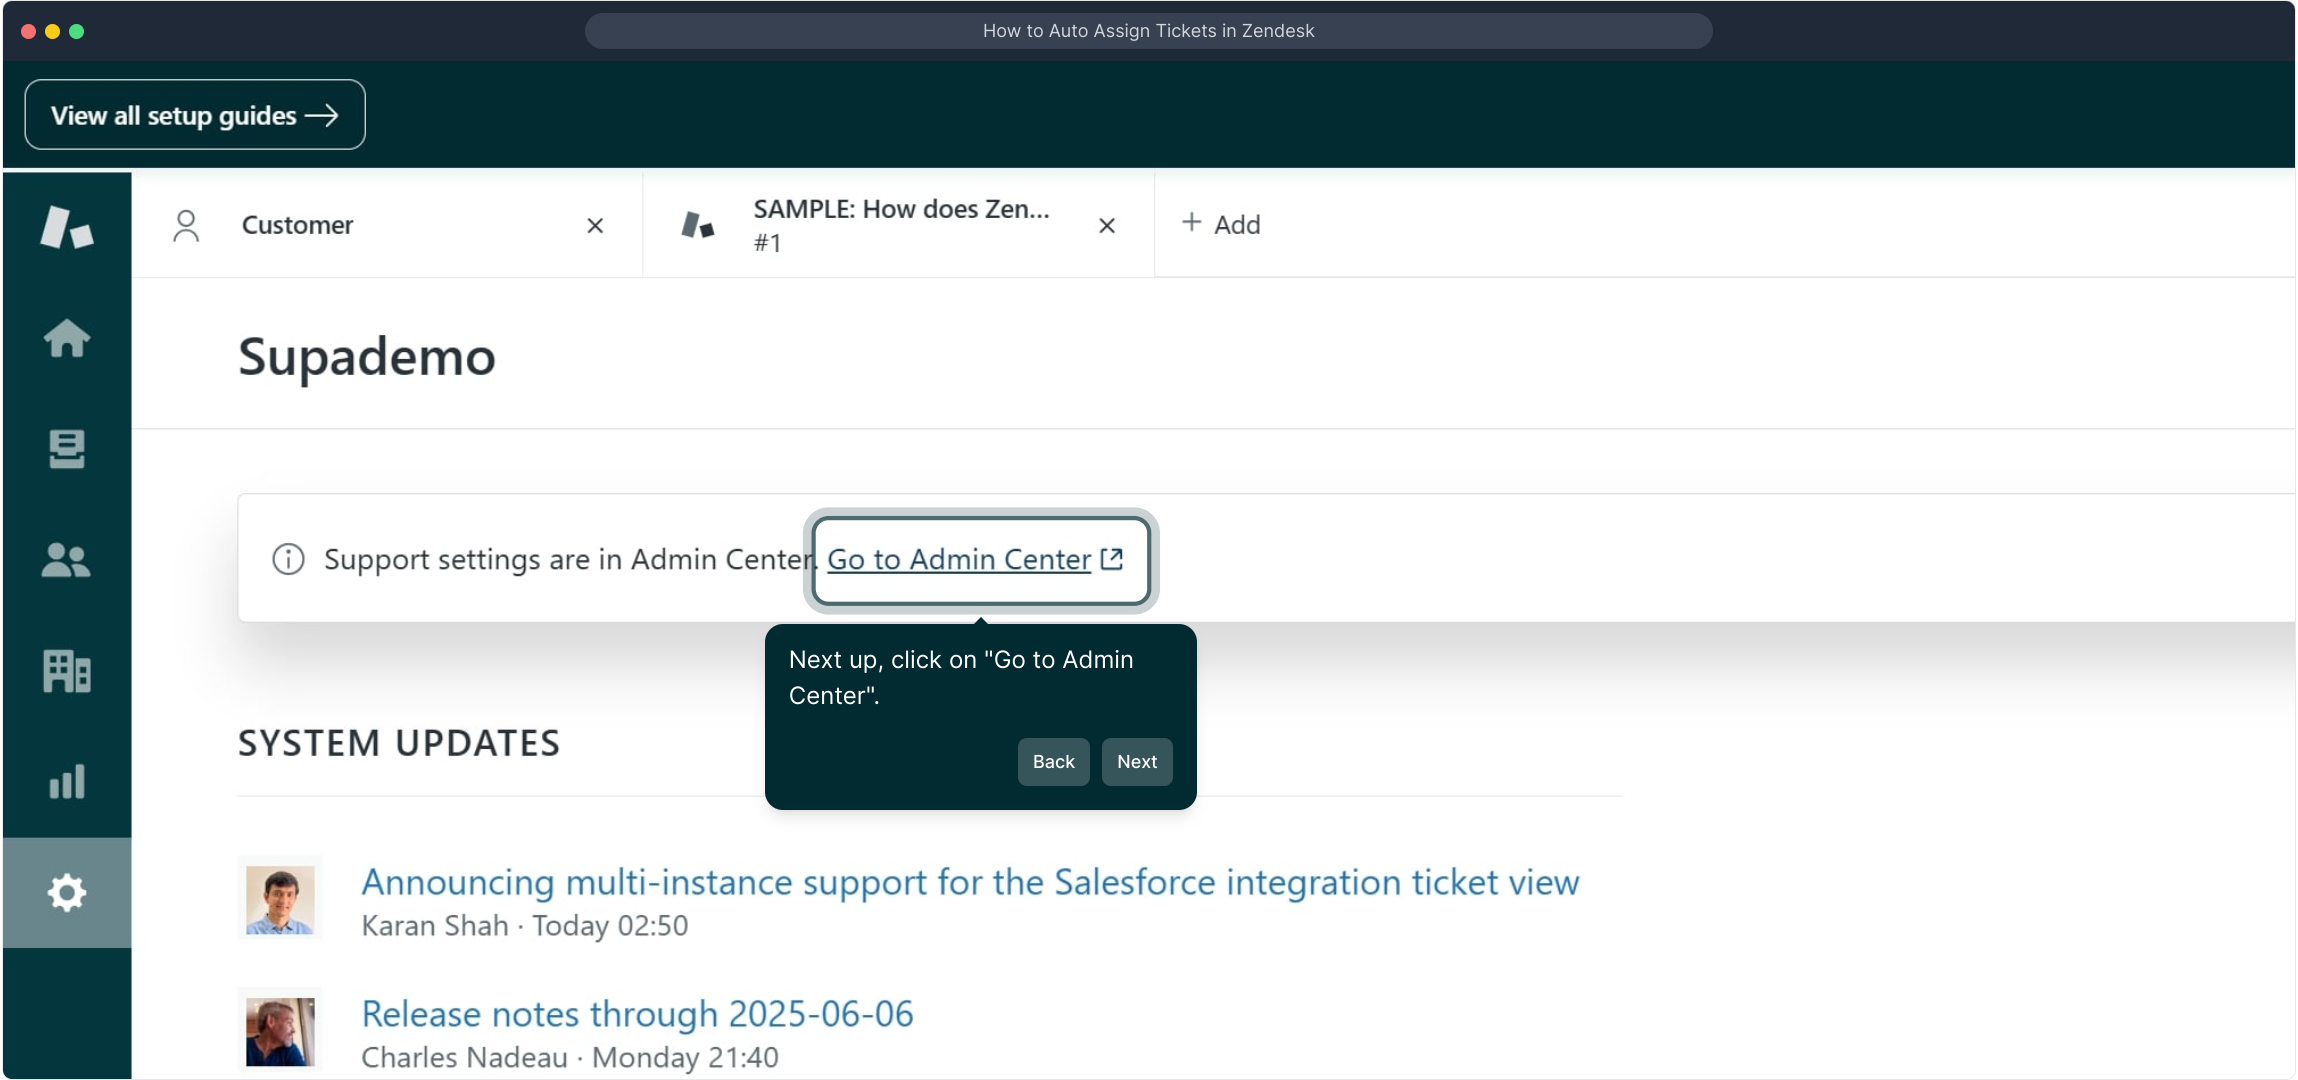
2. Next up, click on "Go to Admin Center".
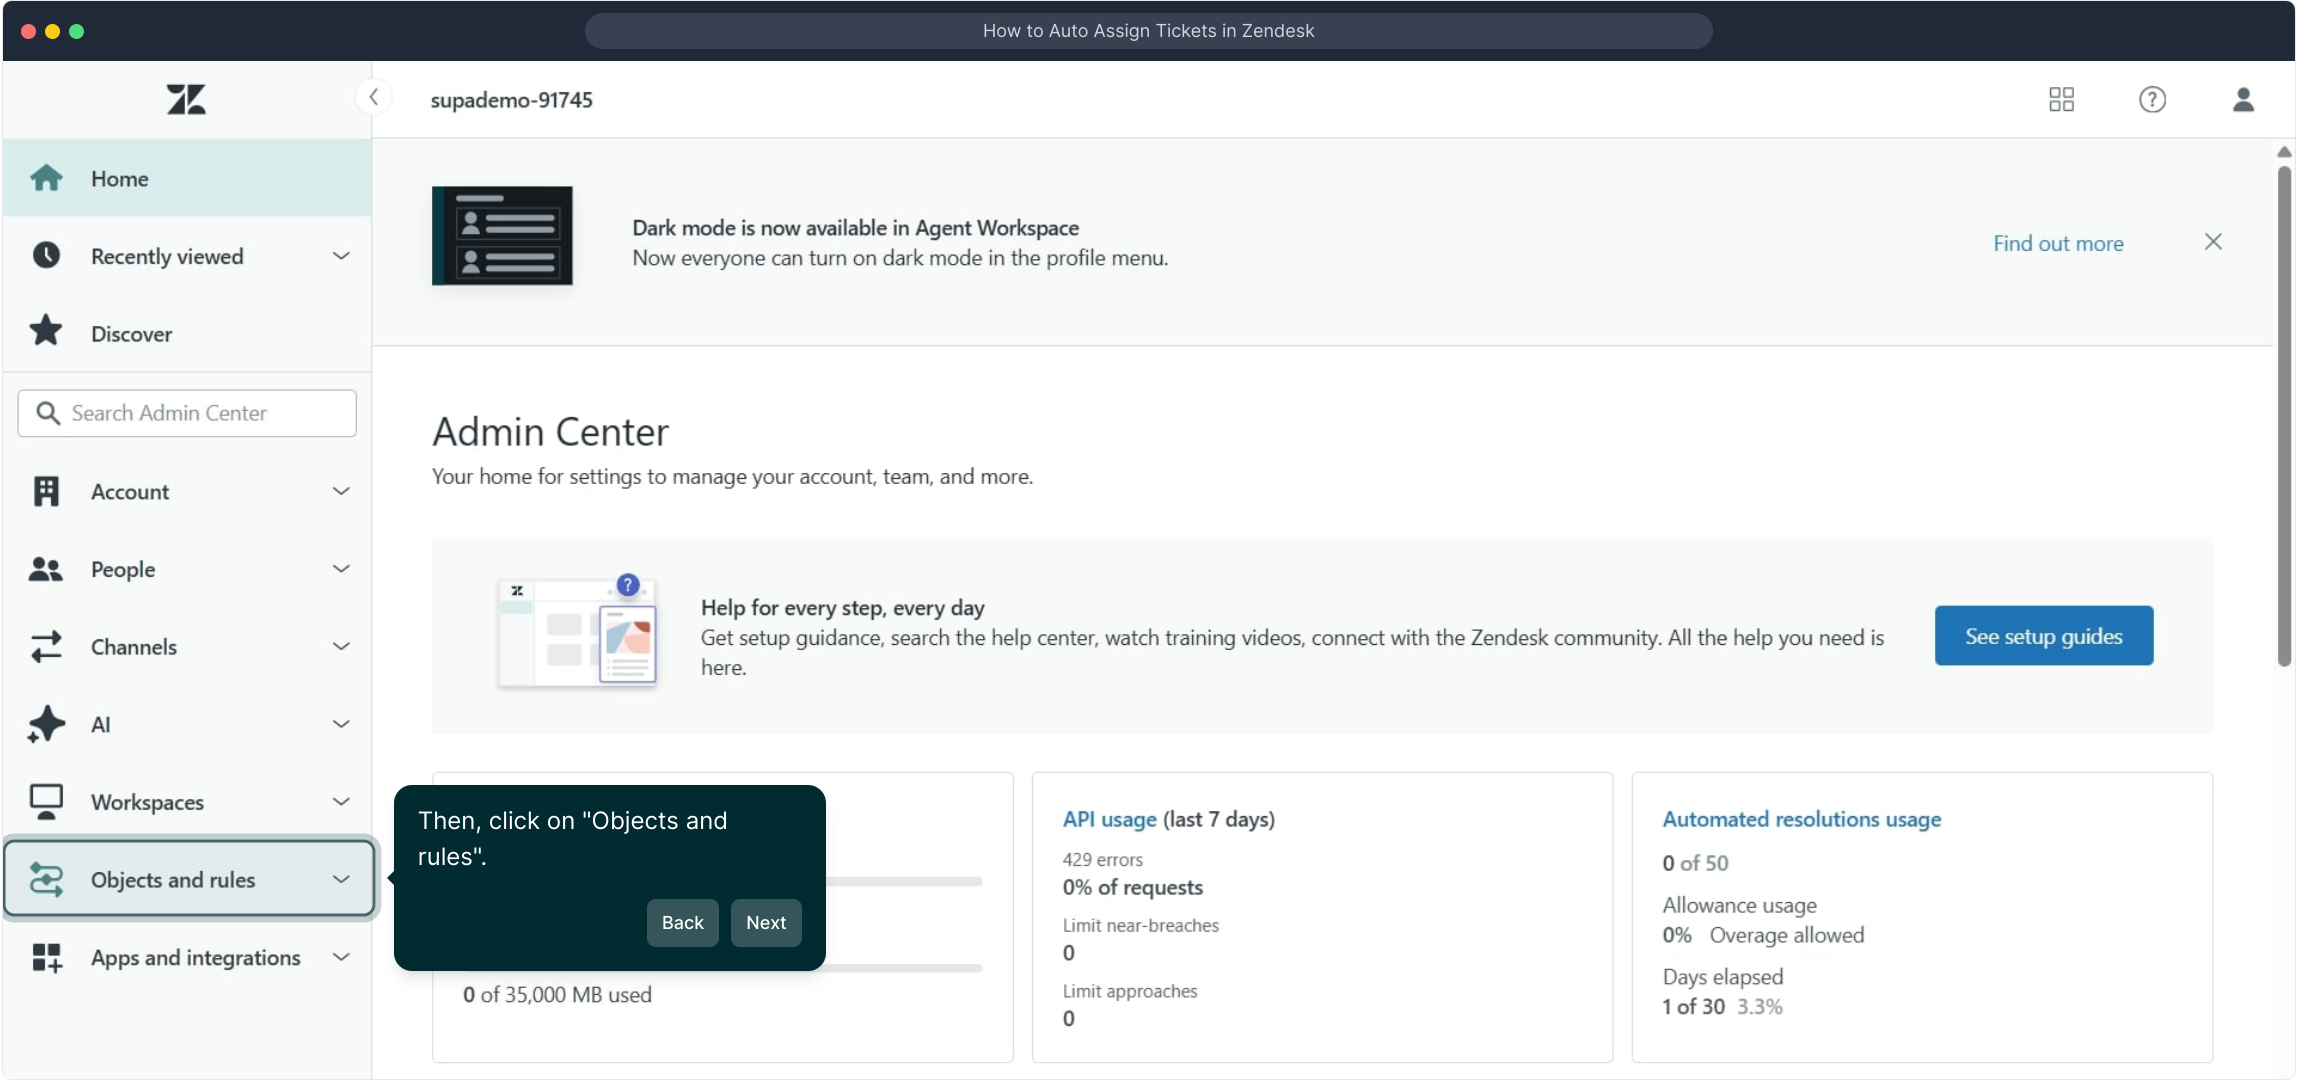
3. Then, click on "Objects and rules".
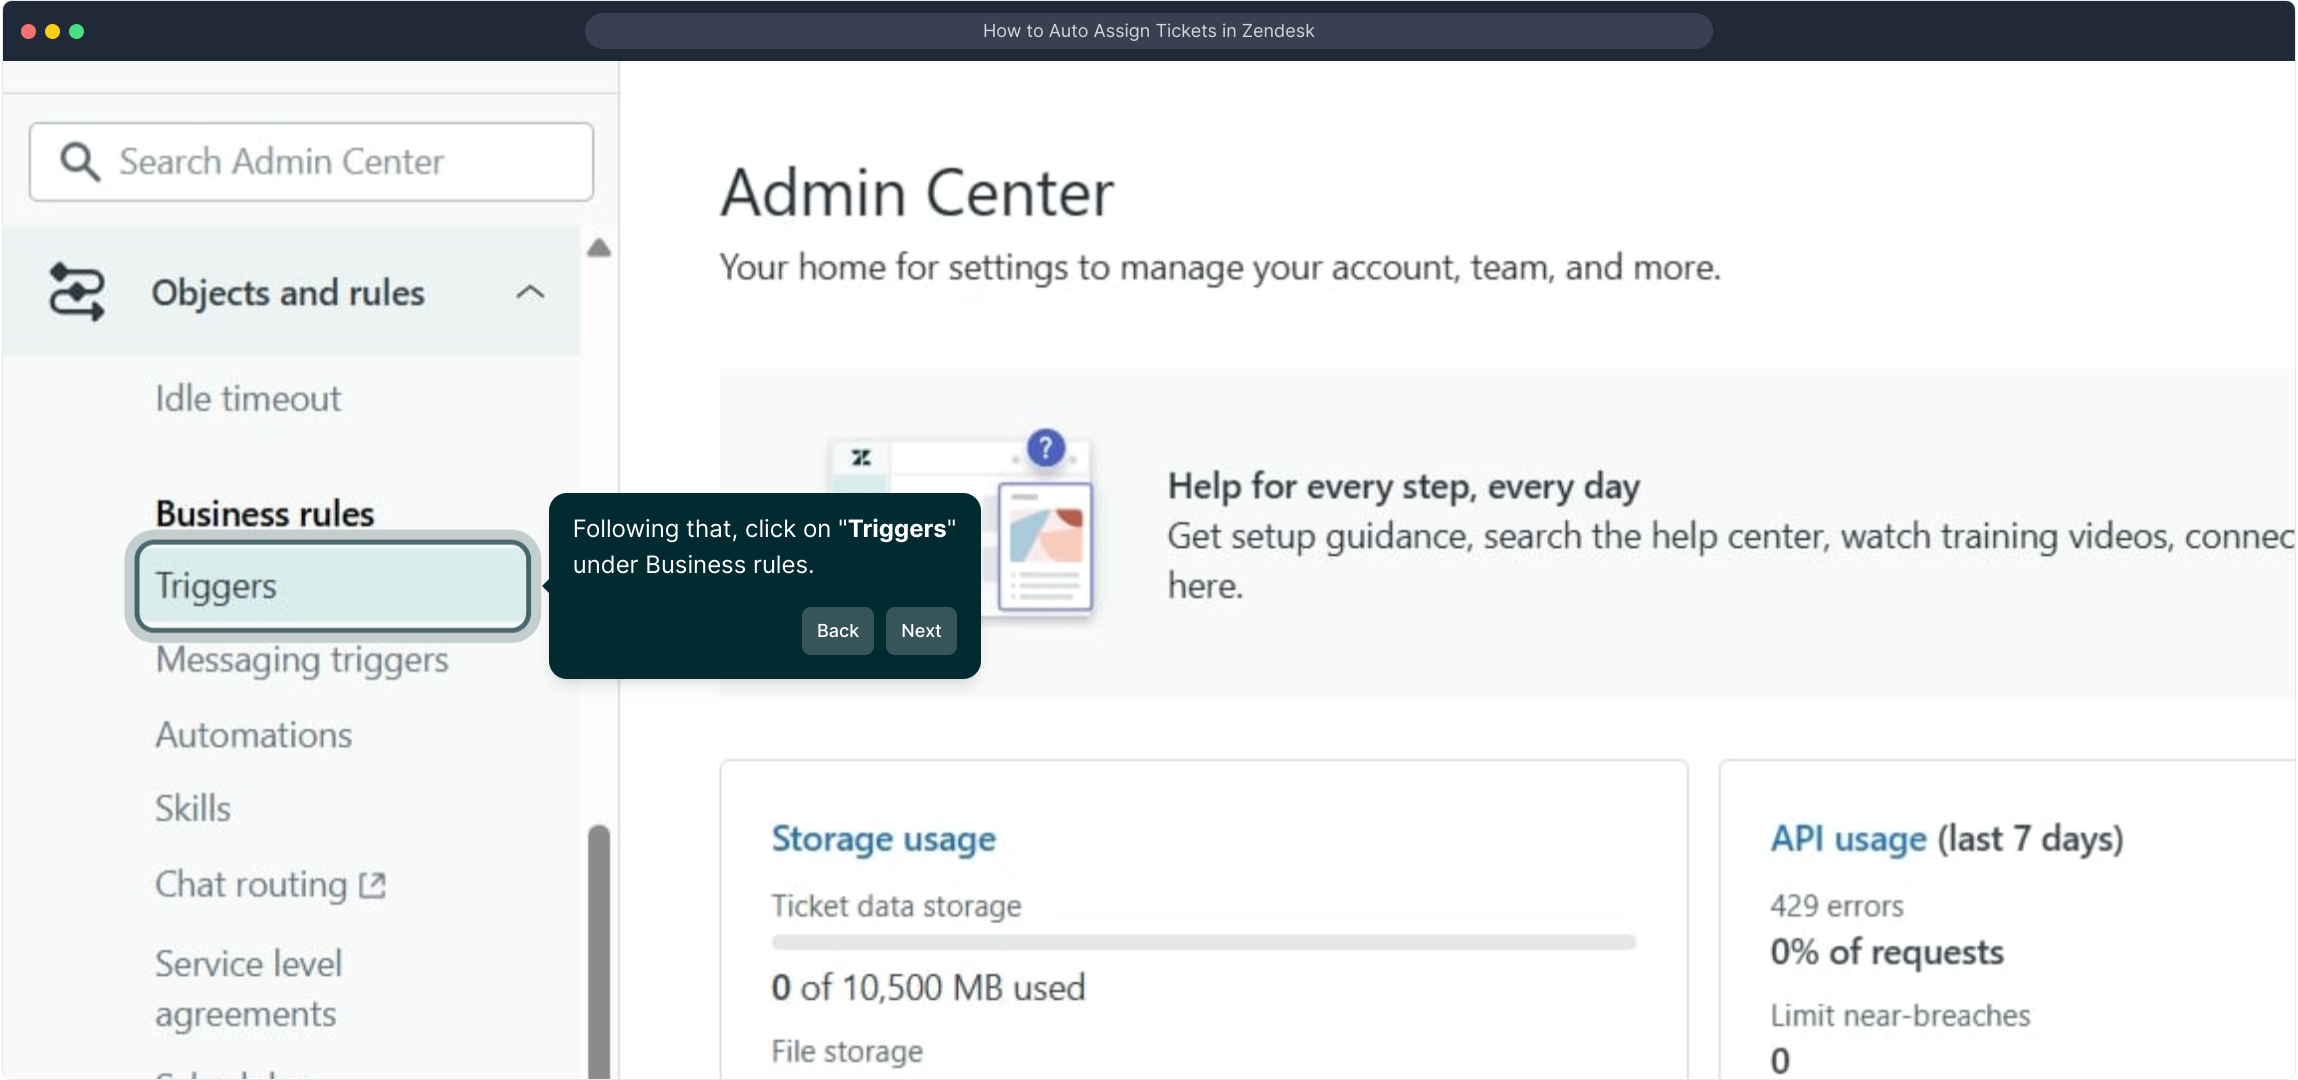
4. Following that, click on "Triggers" under Business rules.
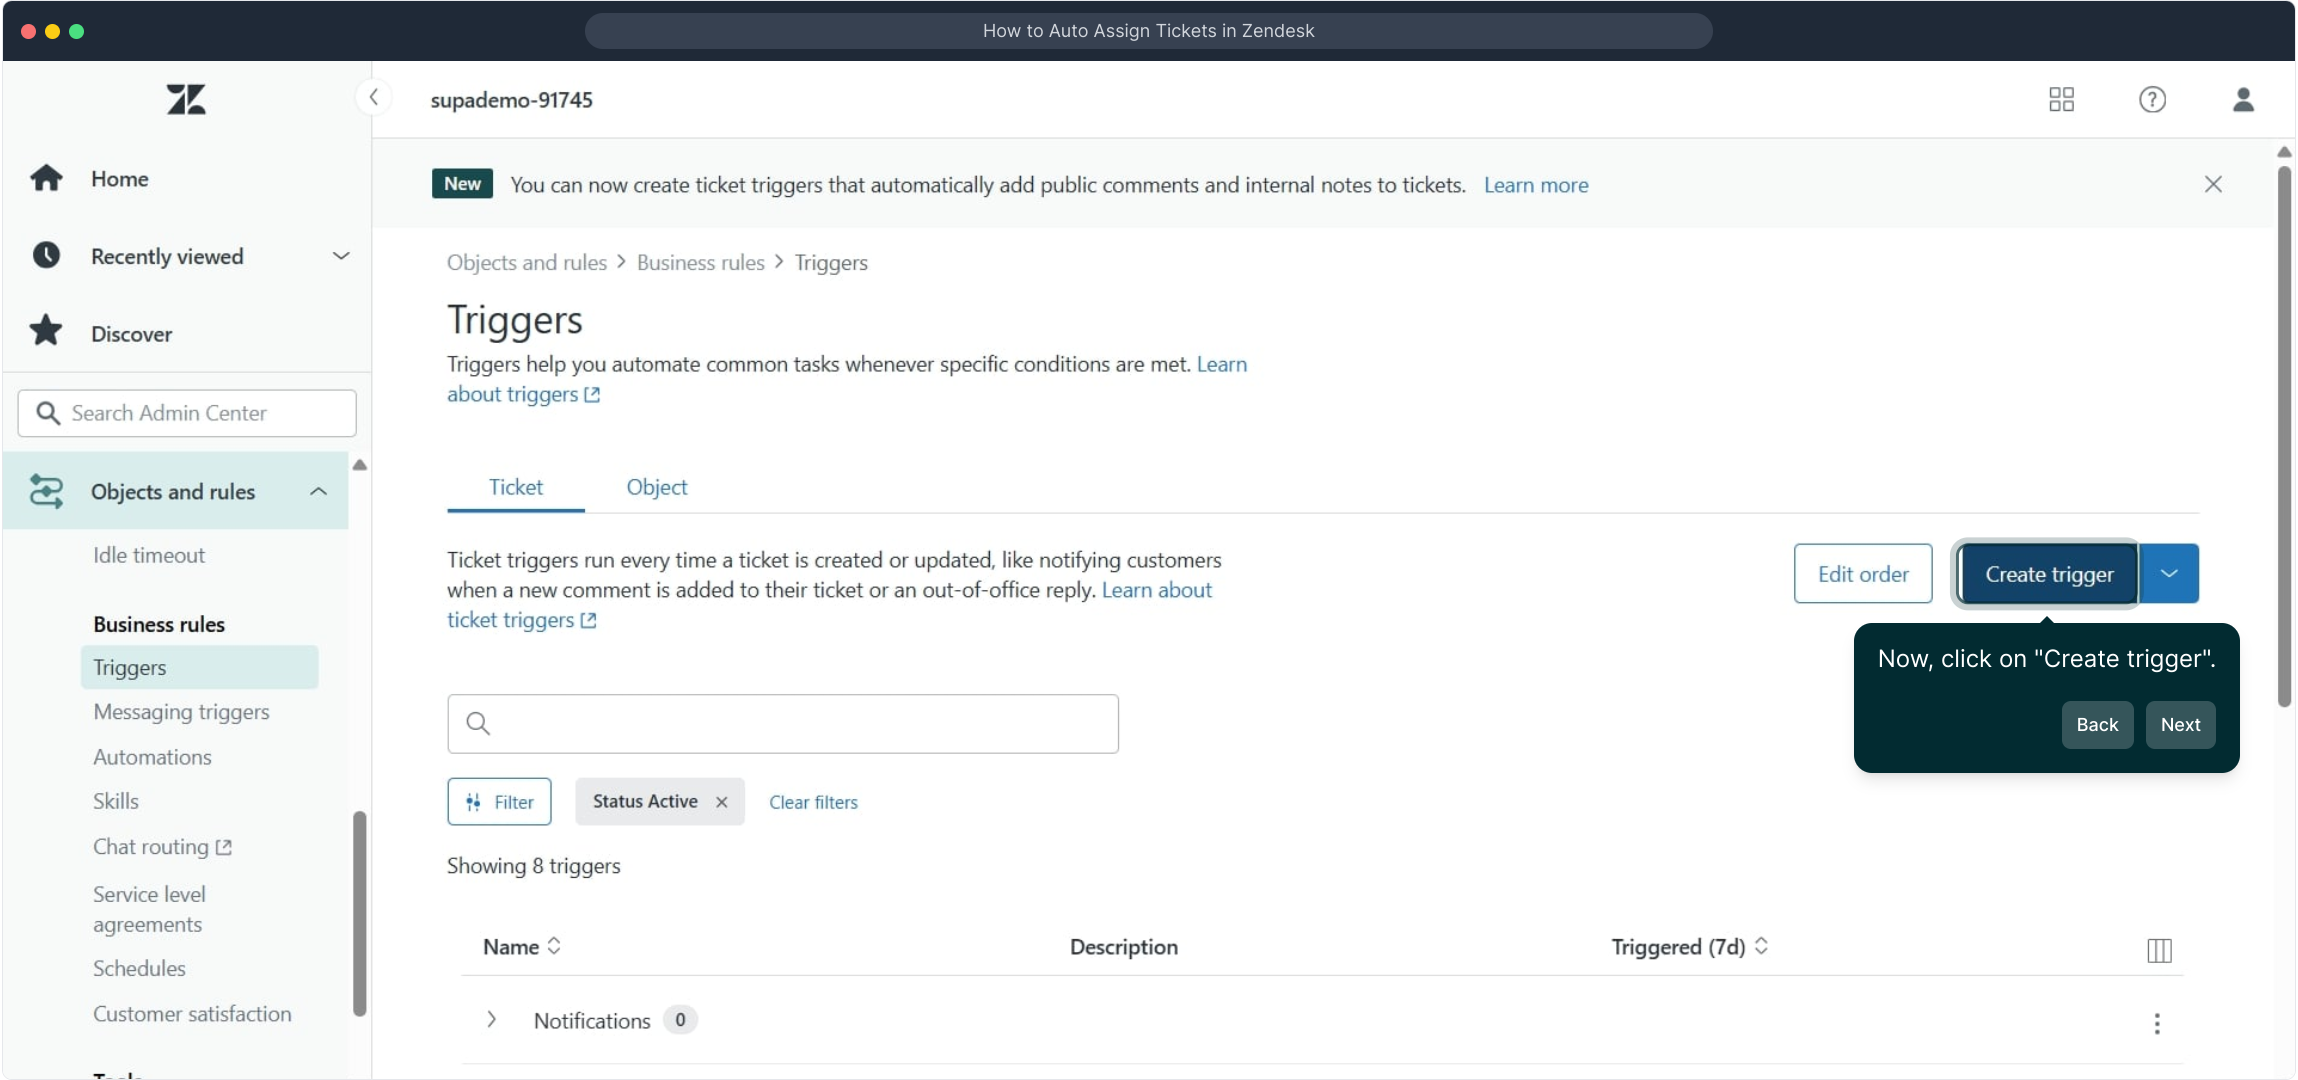
5. Now, click on "Create trigger".
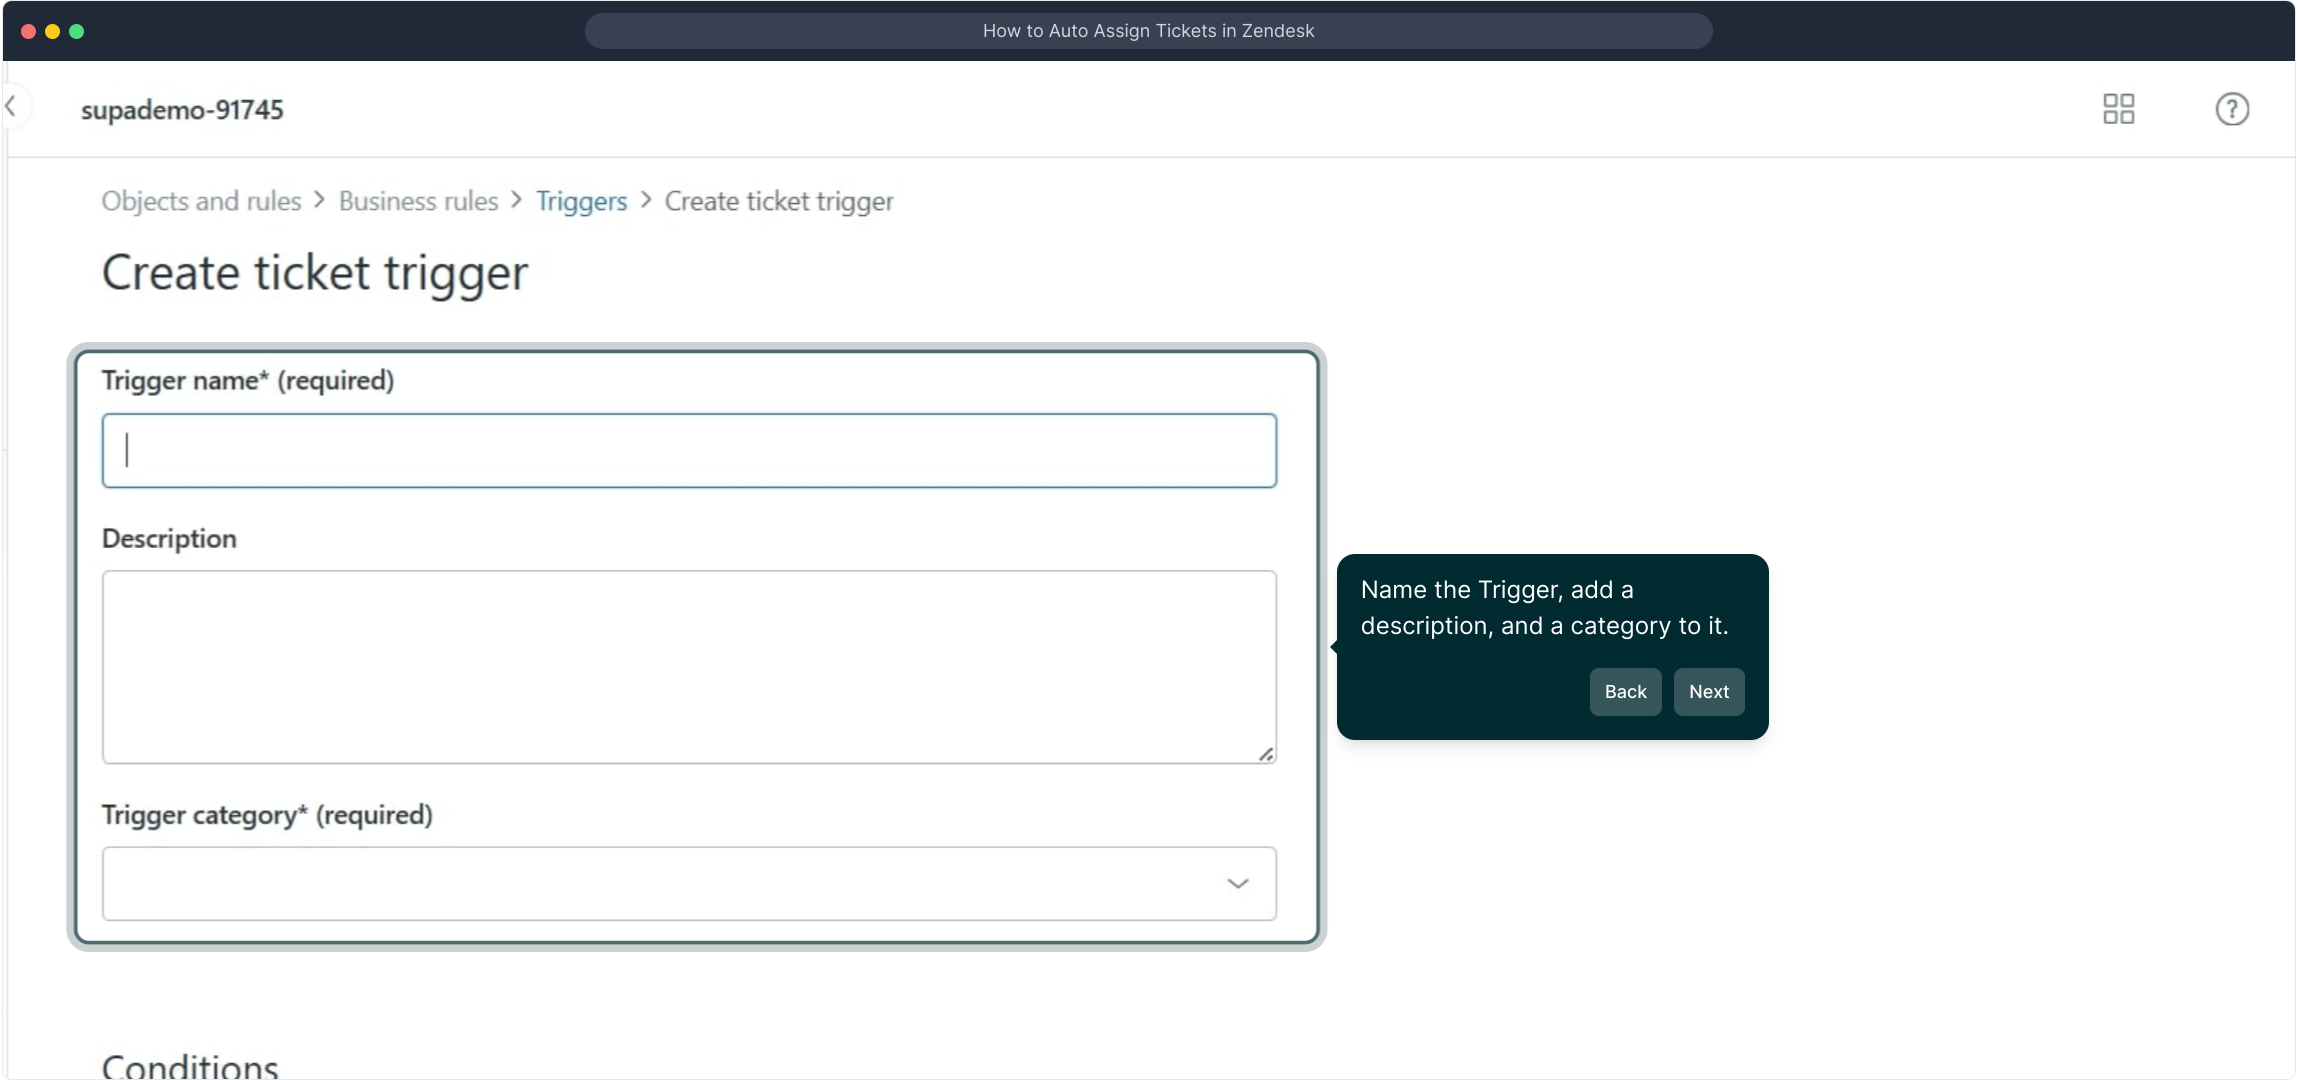
6. Name the Trigger, add a description, and a category to it.
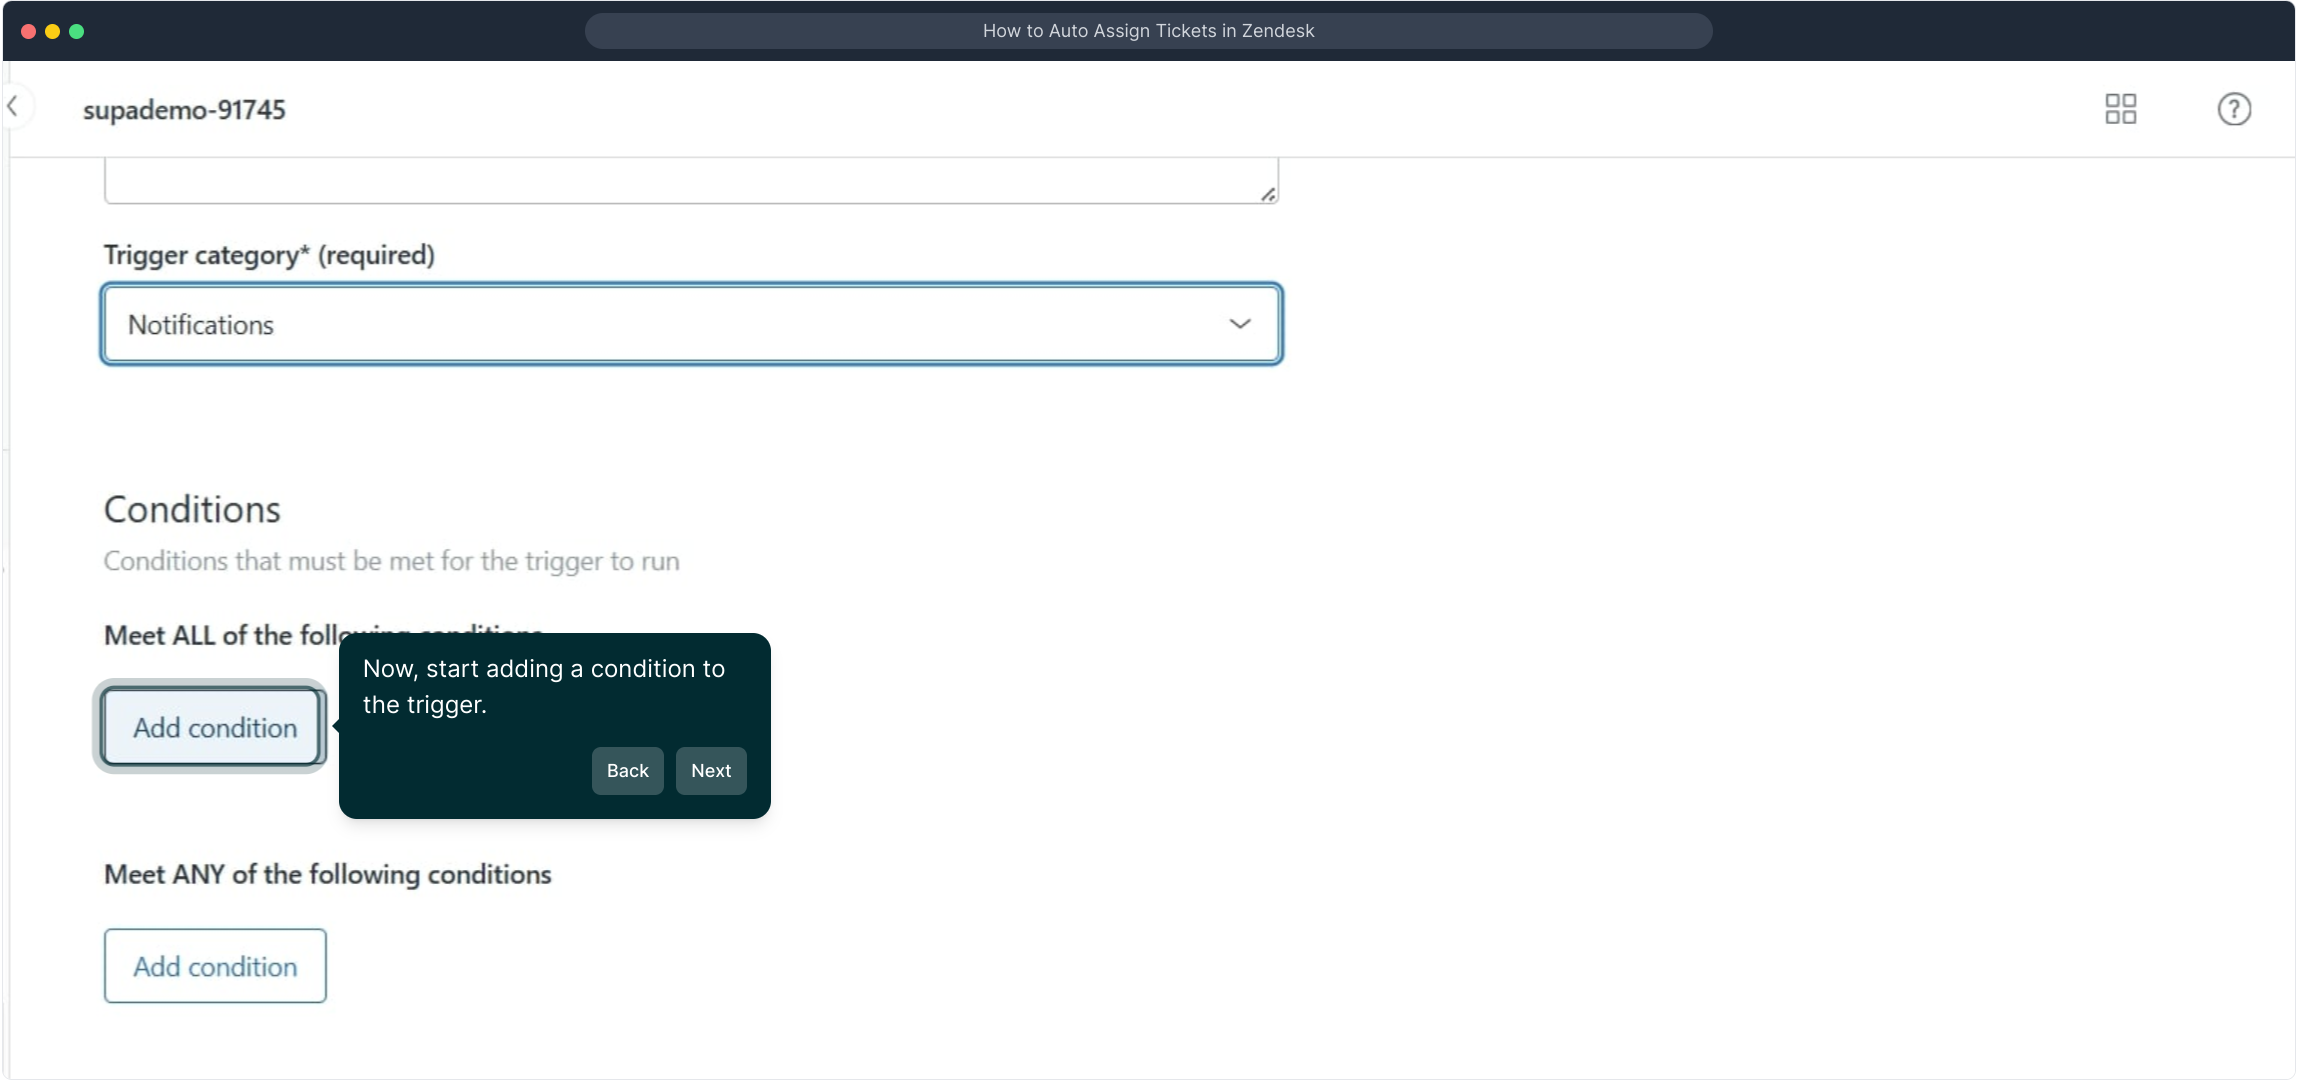
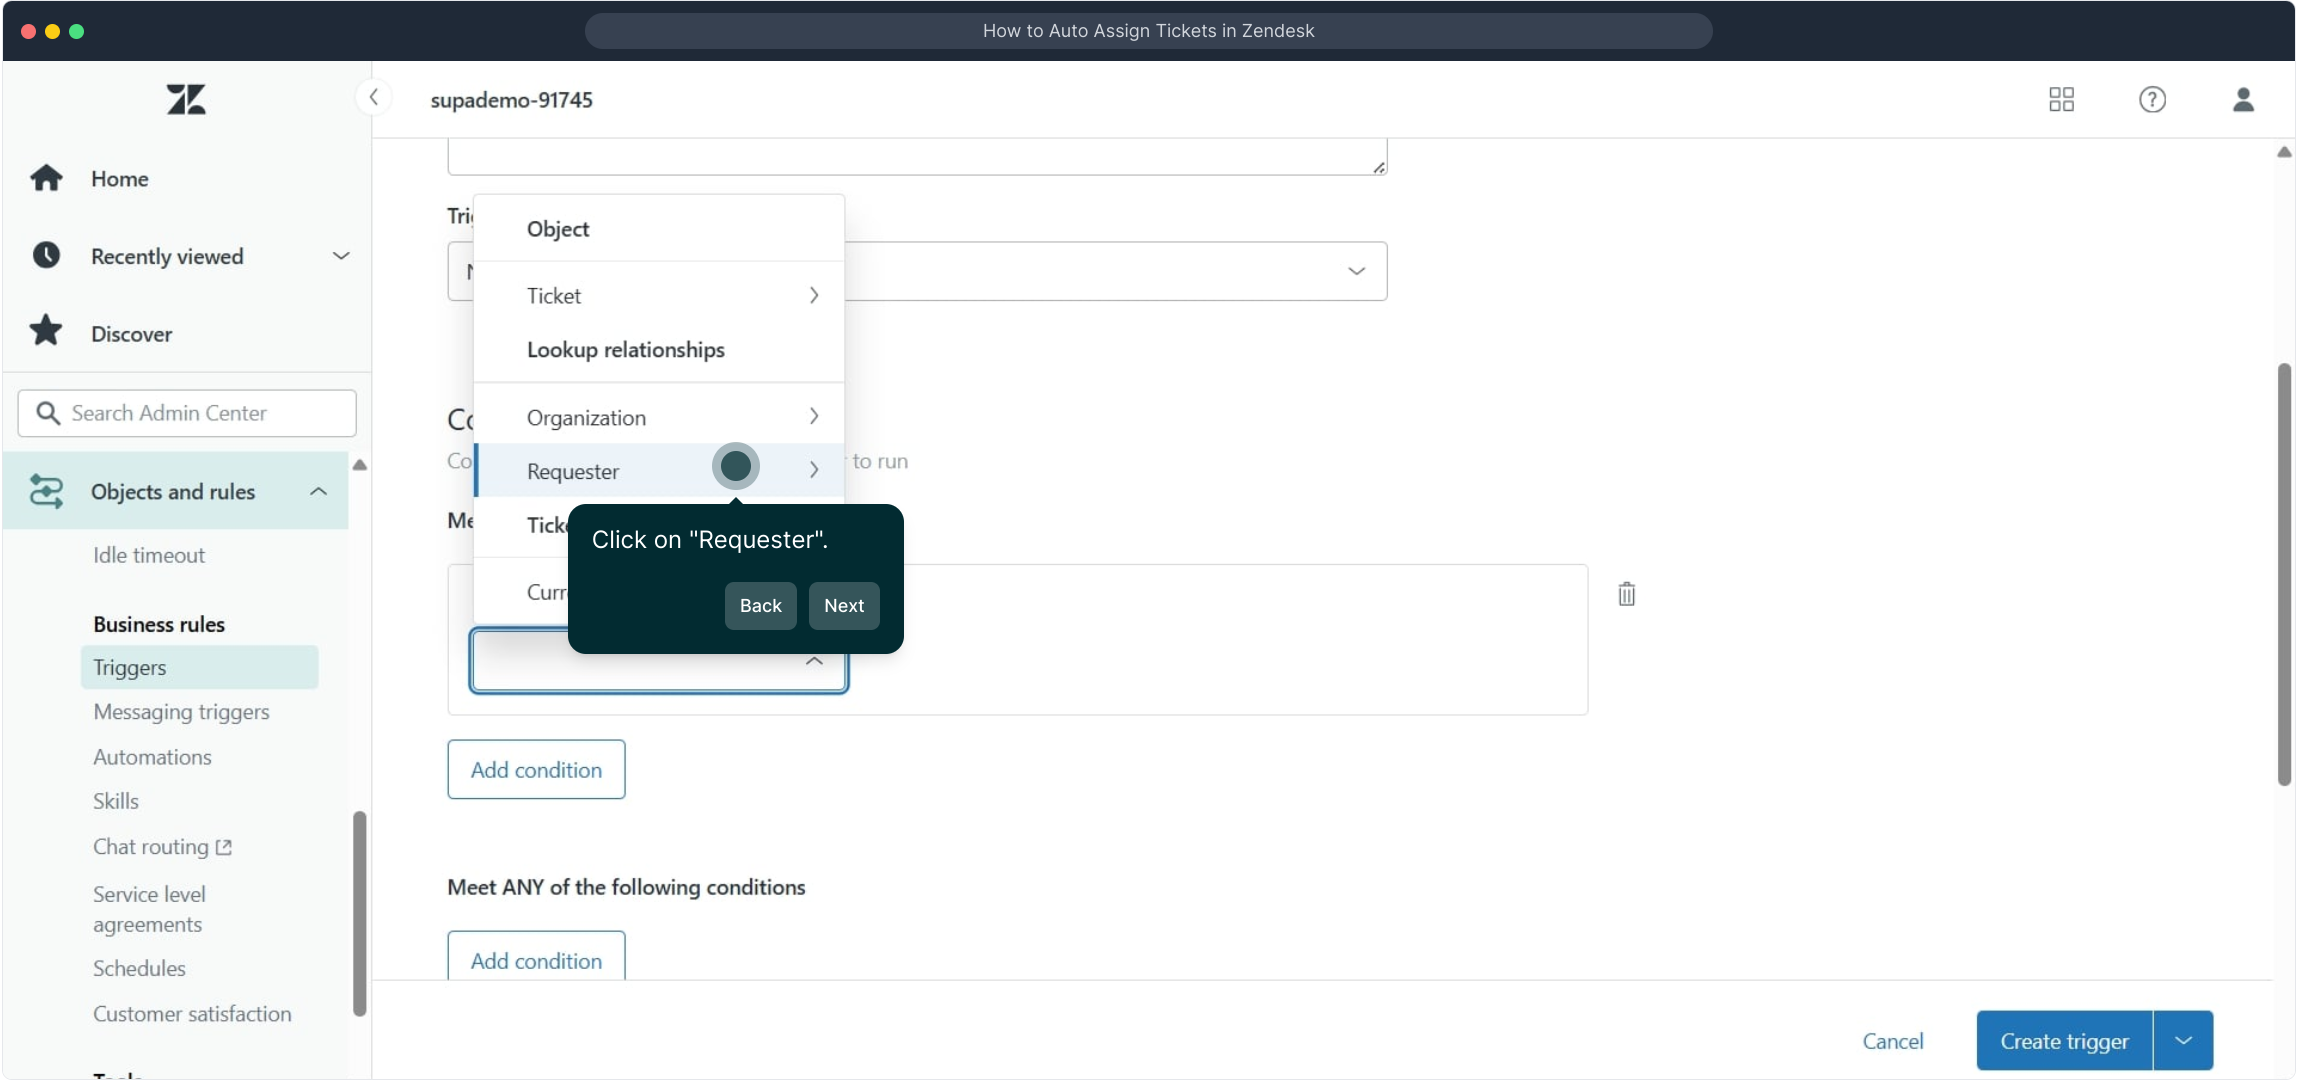
7. Now, start adding a condition to the trigger.
8. Click on "Requester".
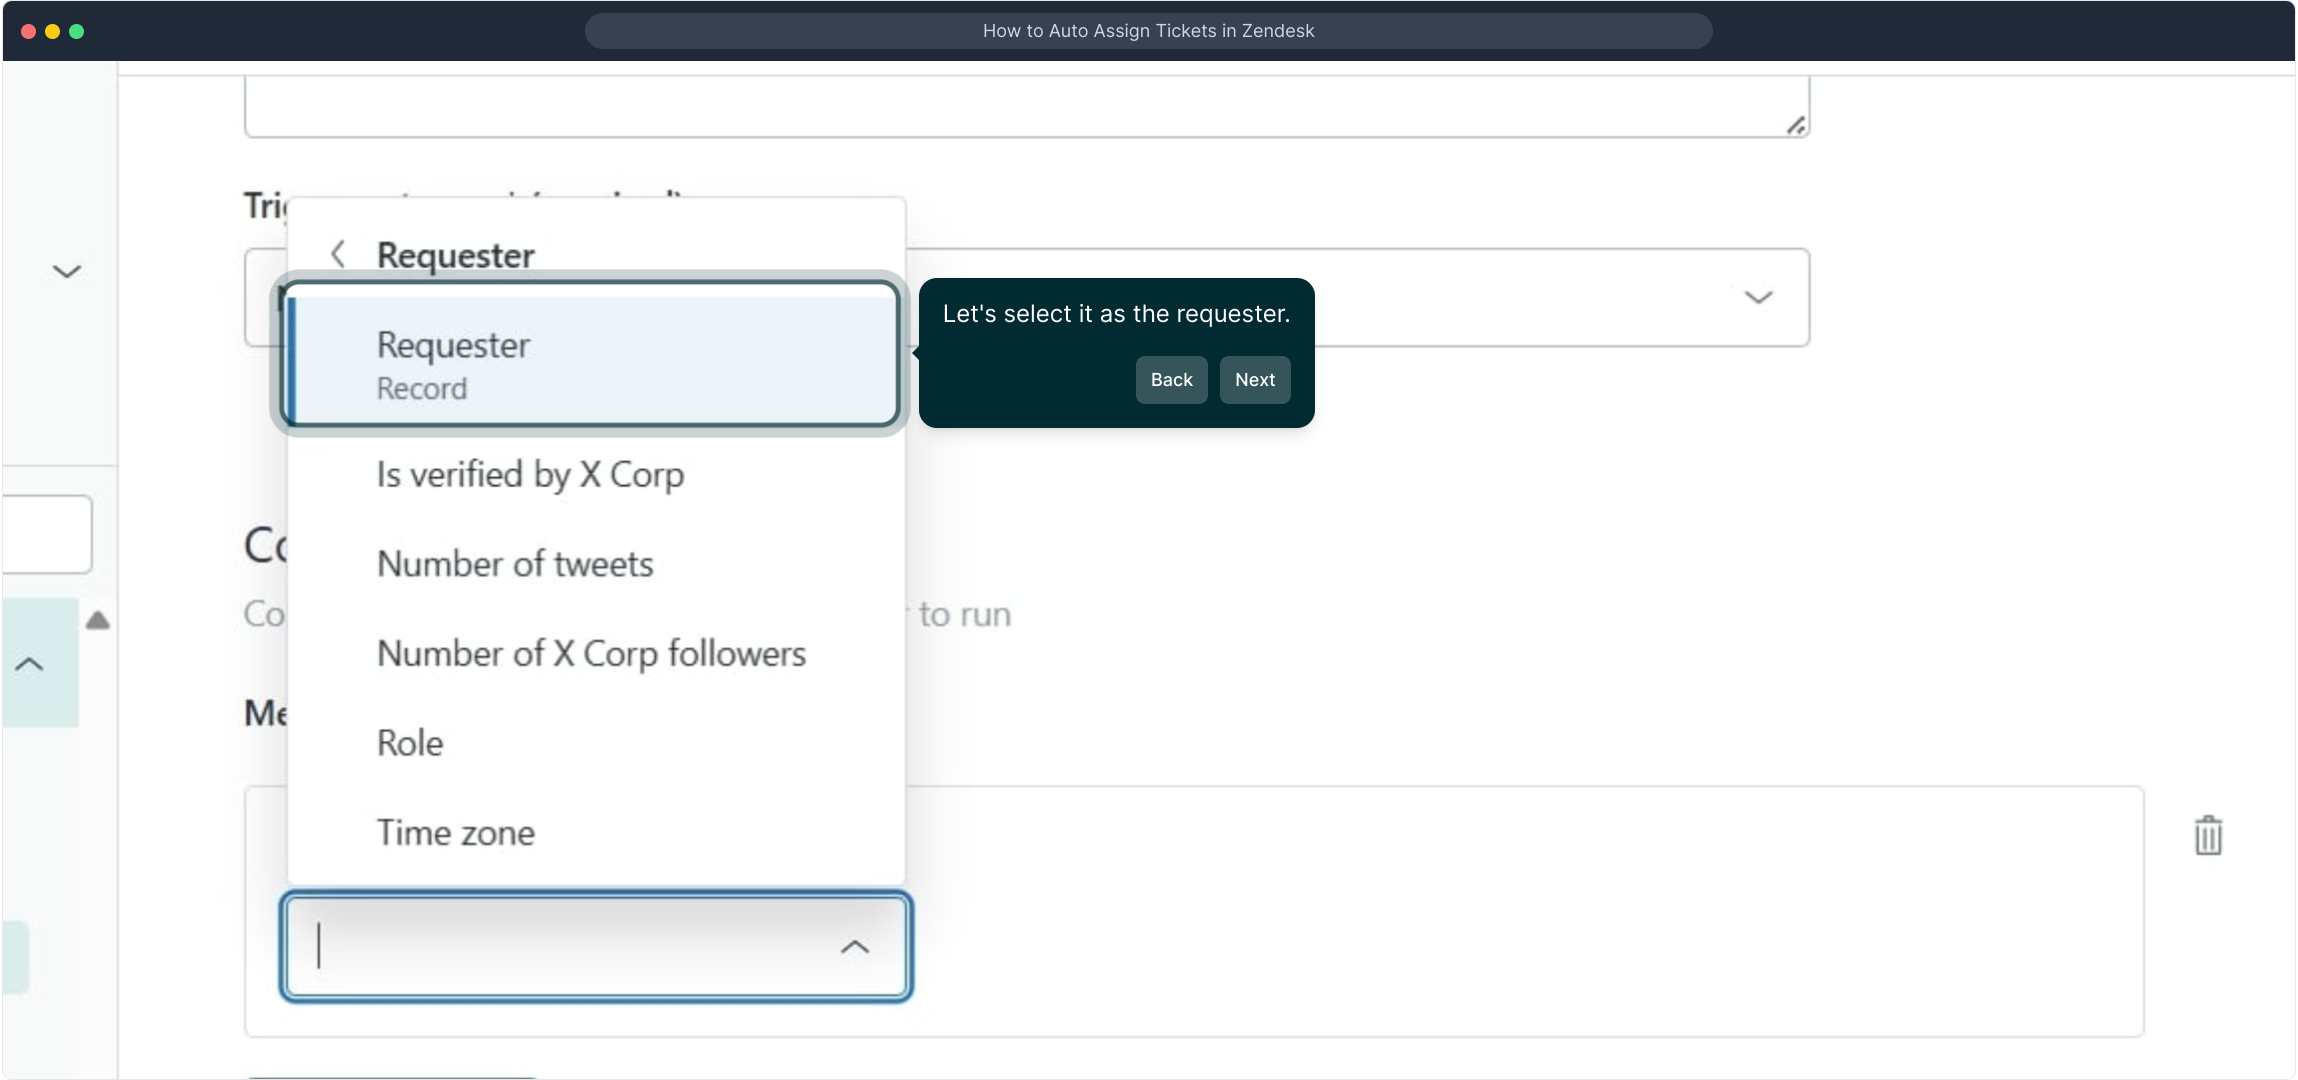
9. Let's select it as the requester.
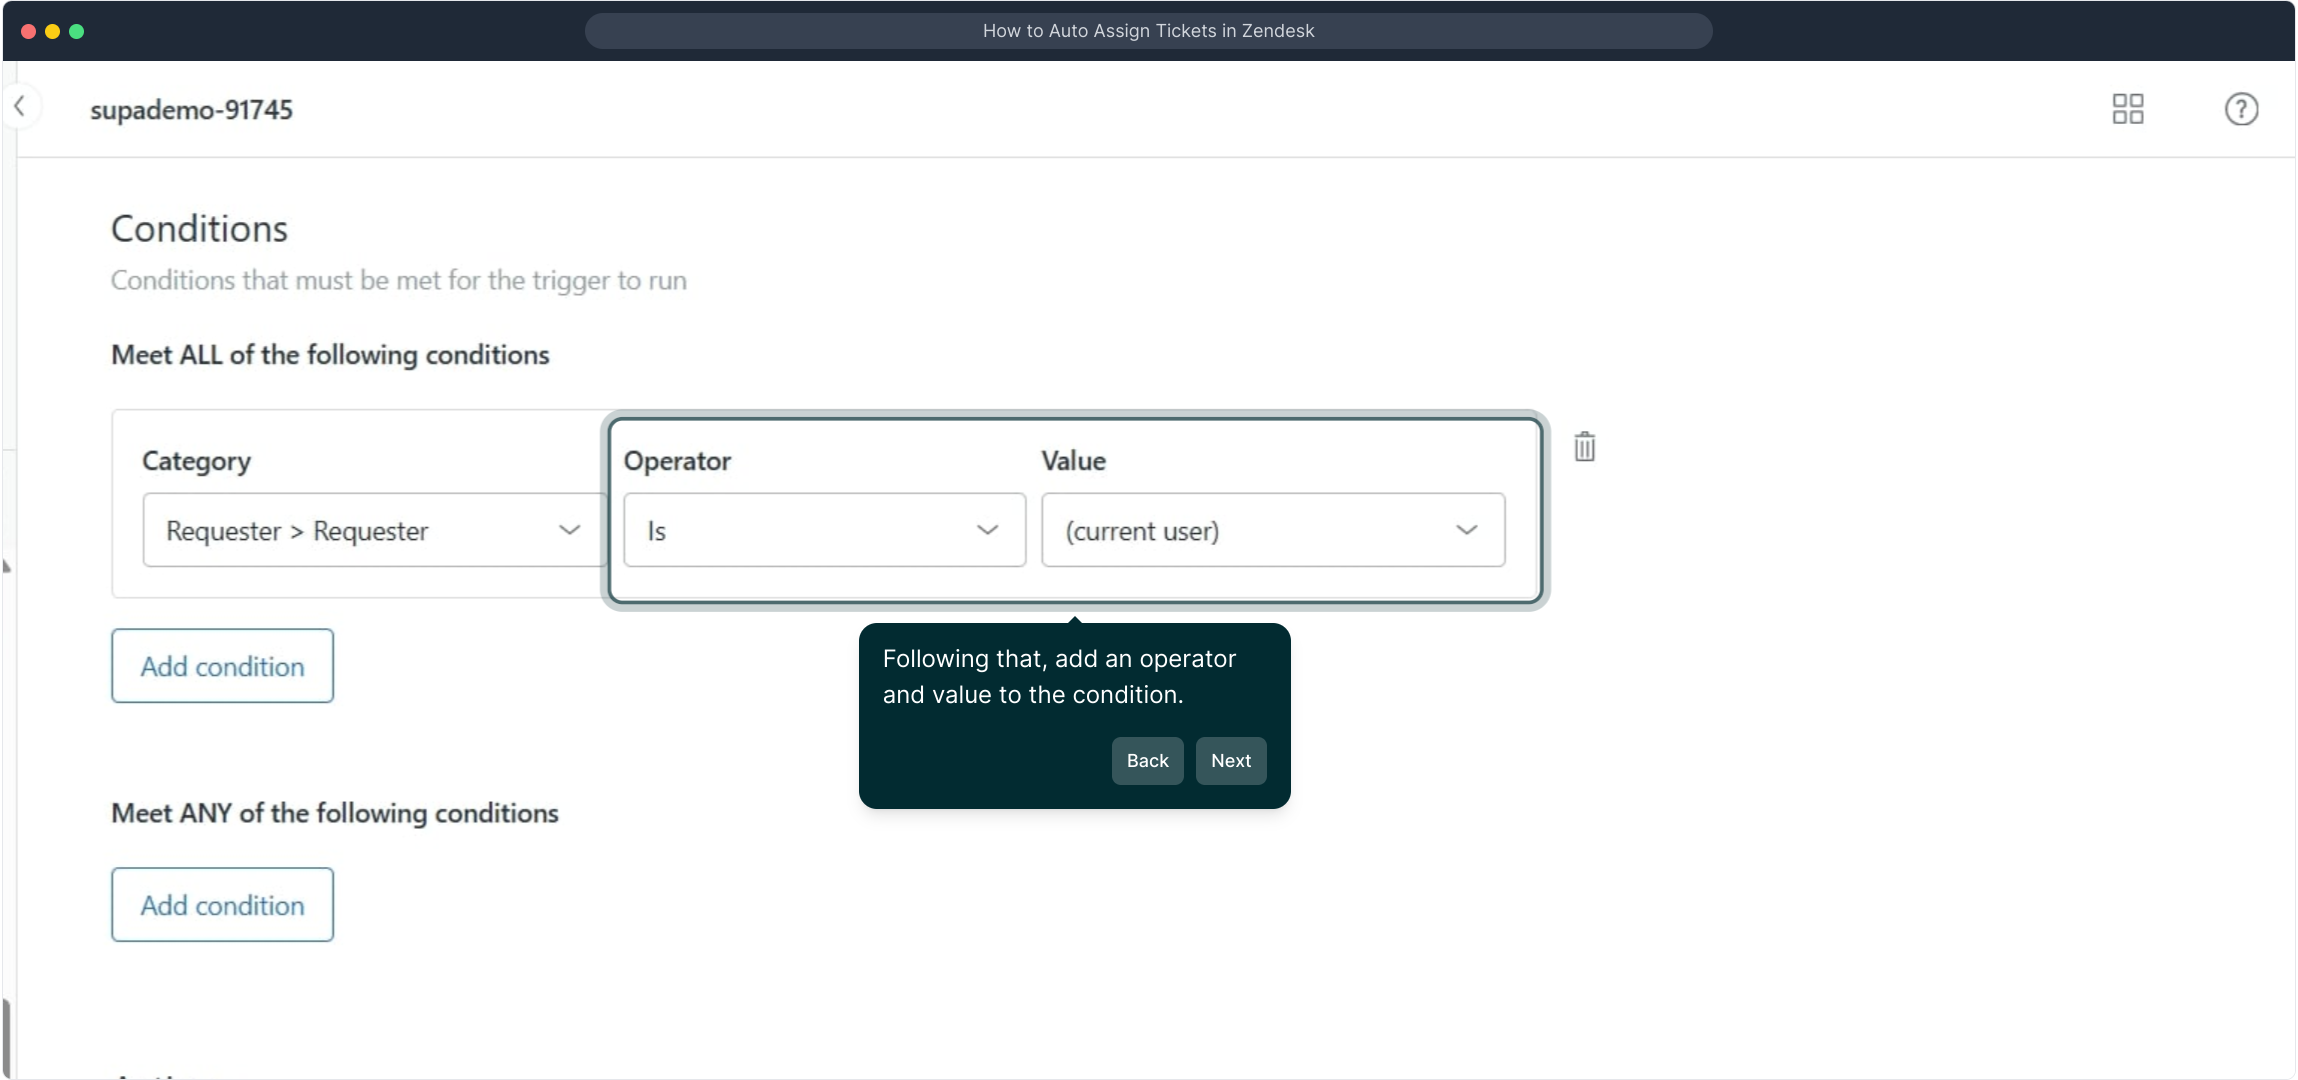
10. Following that, add an operator and value to the condition.
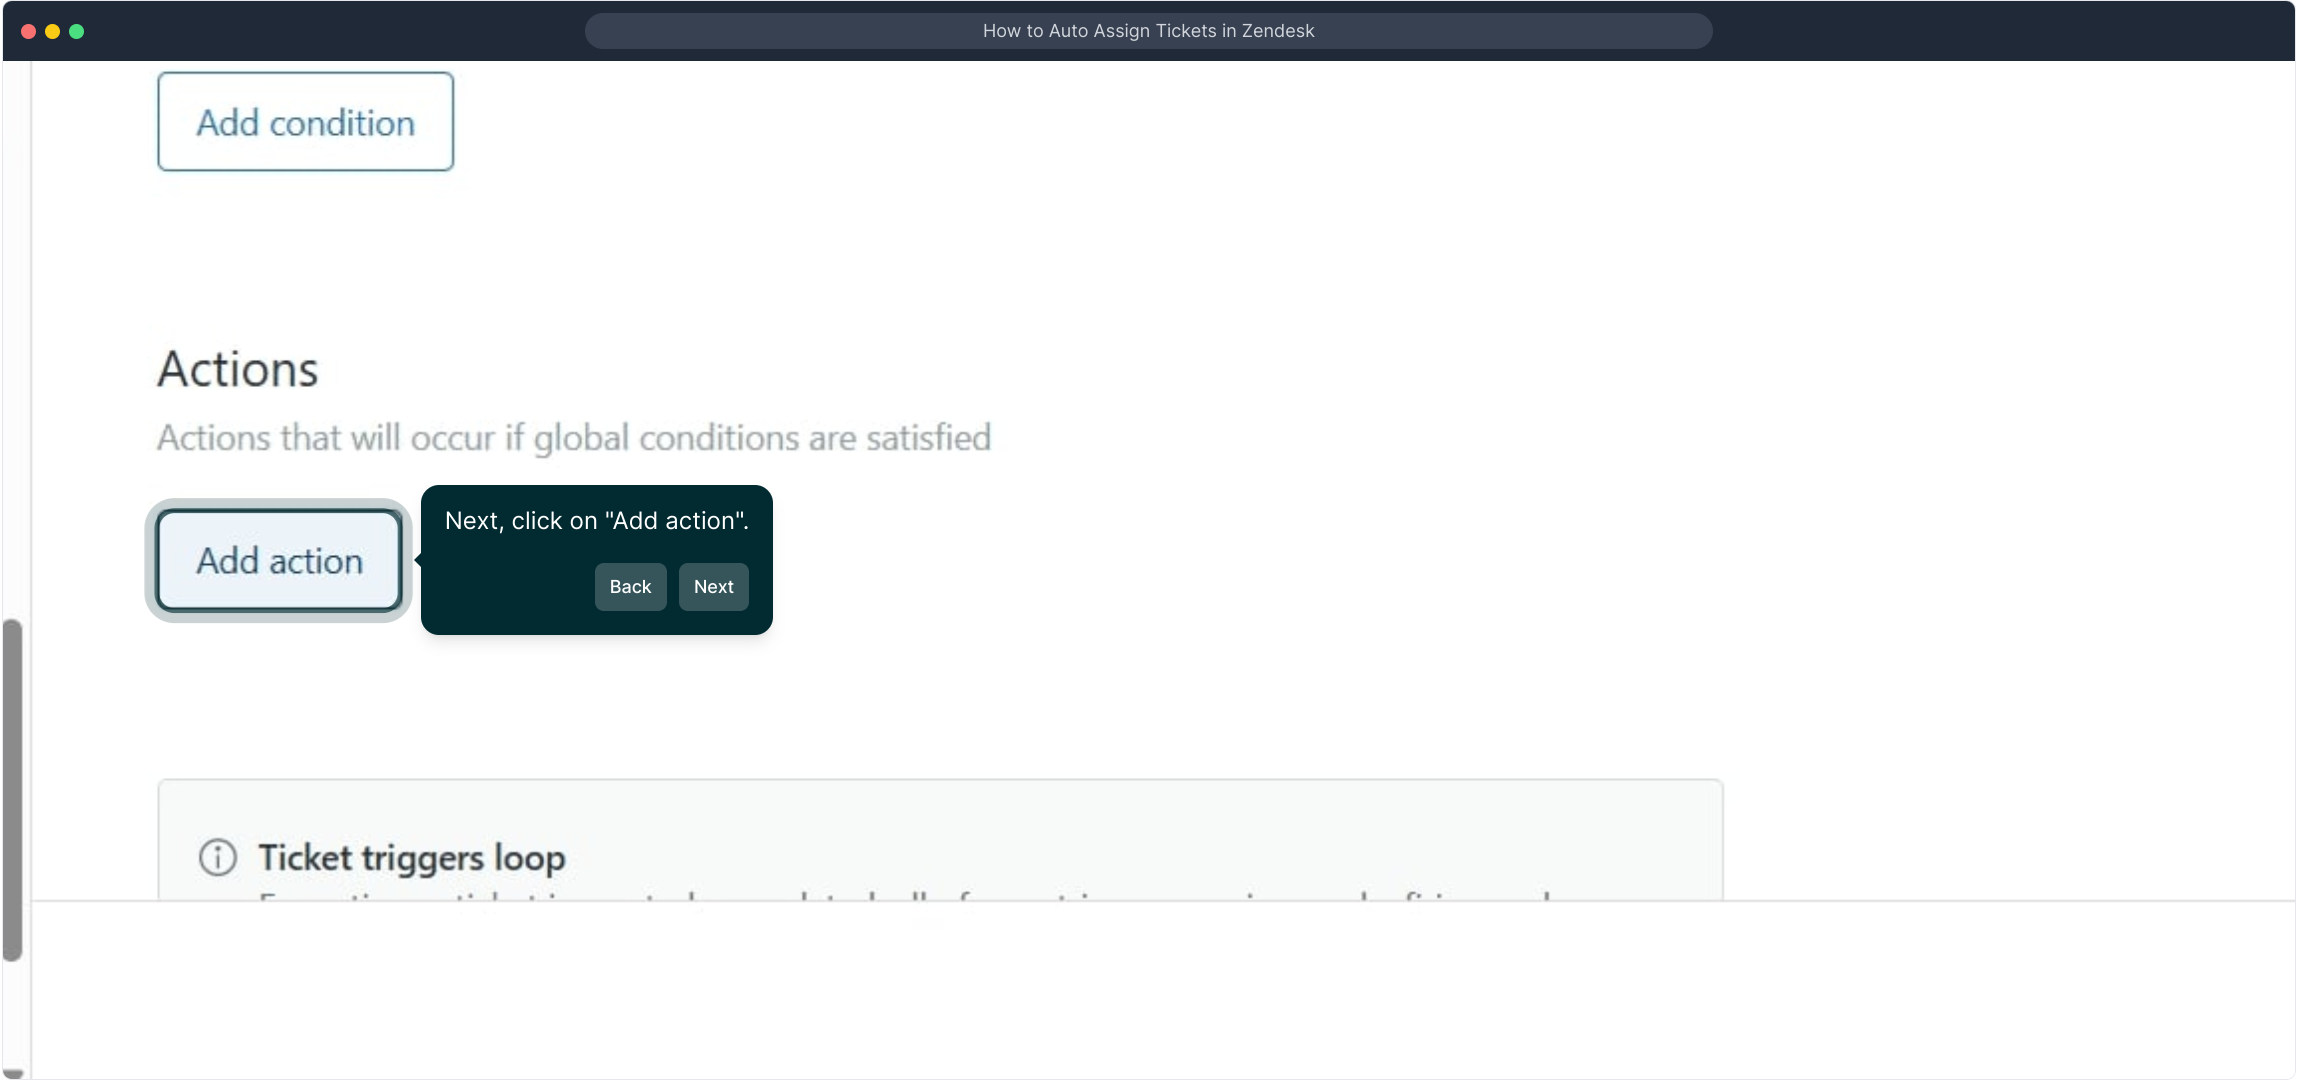
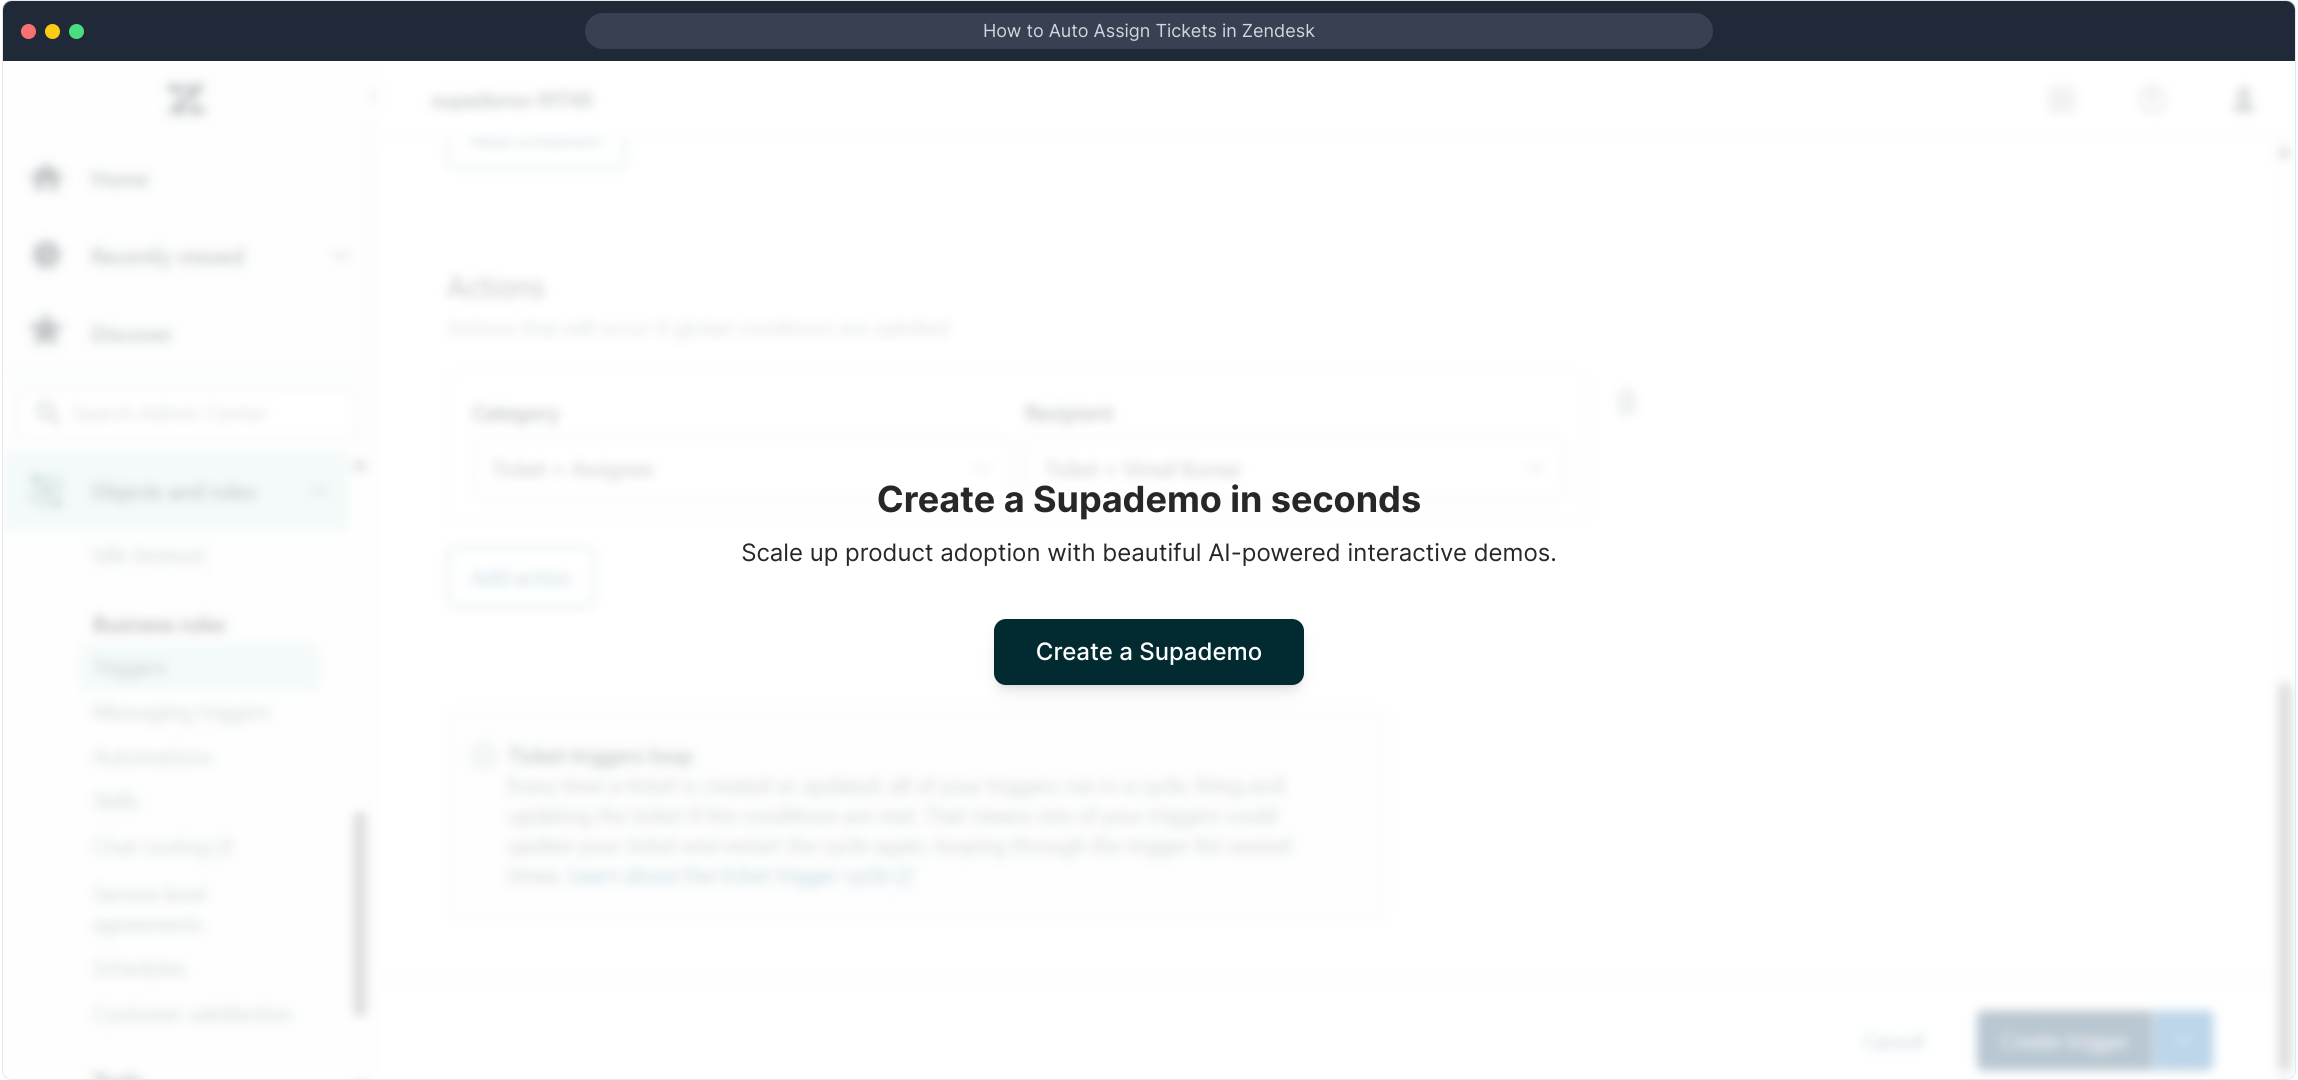
11. Next, click on "Add action".
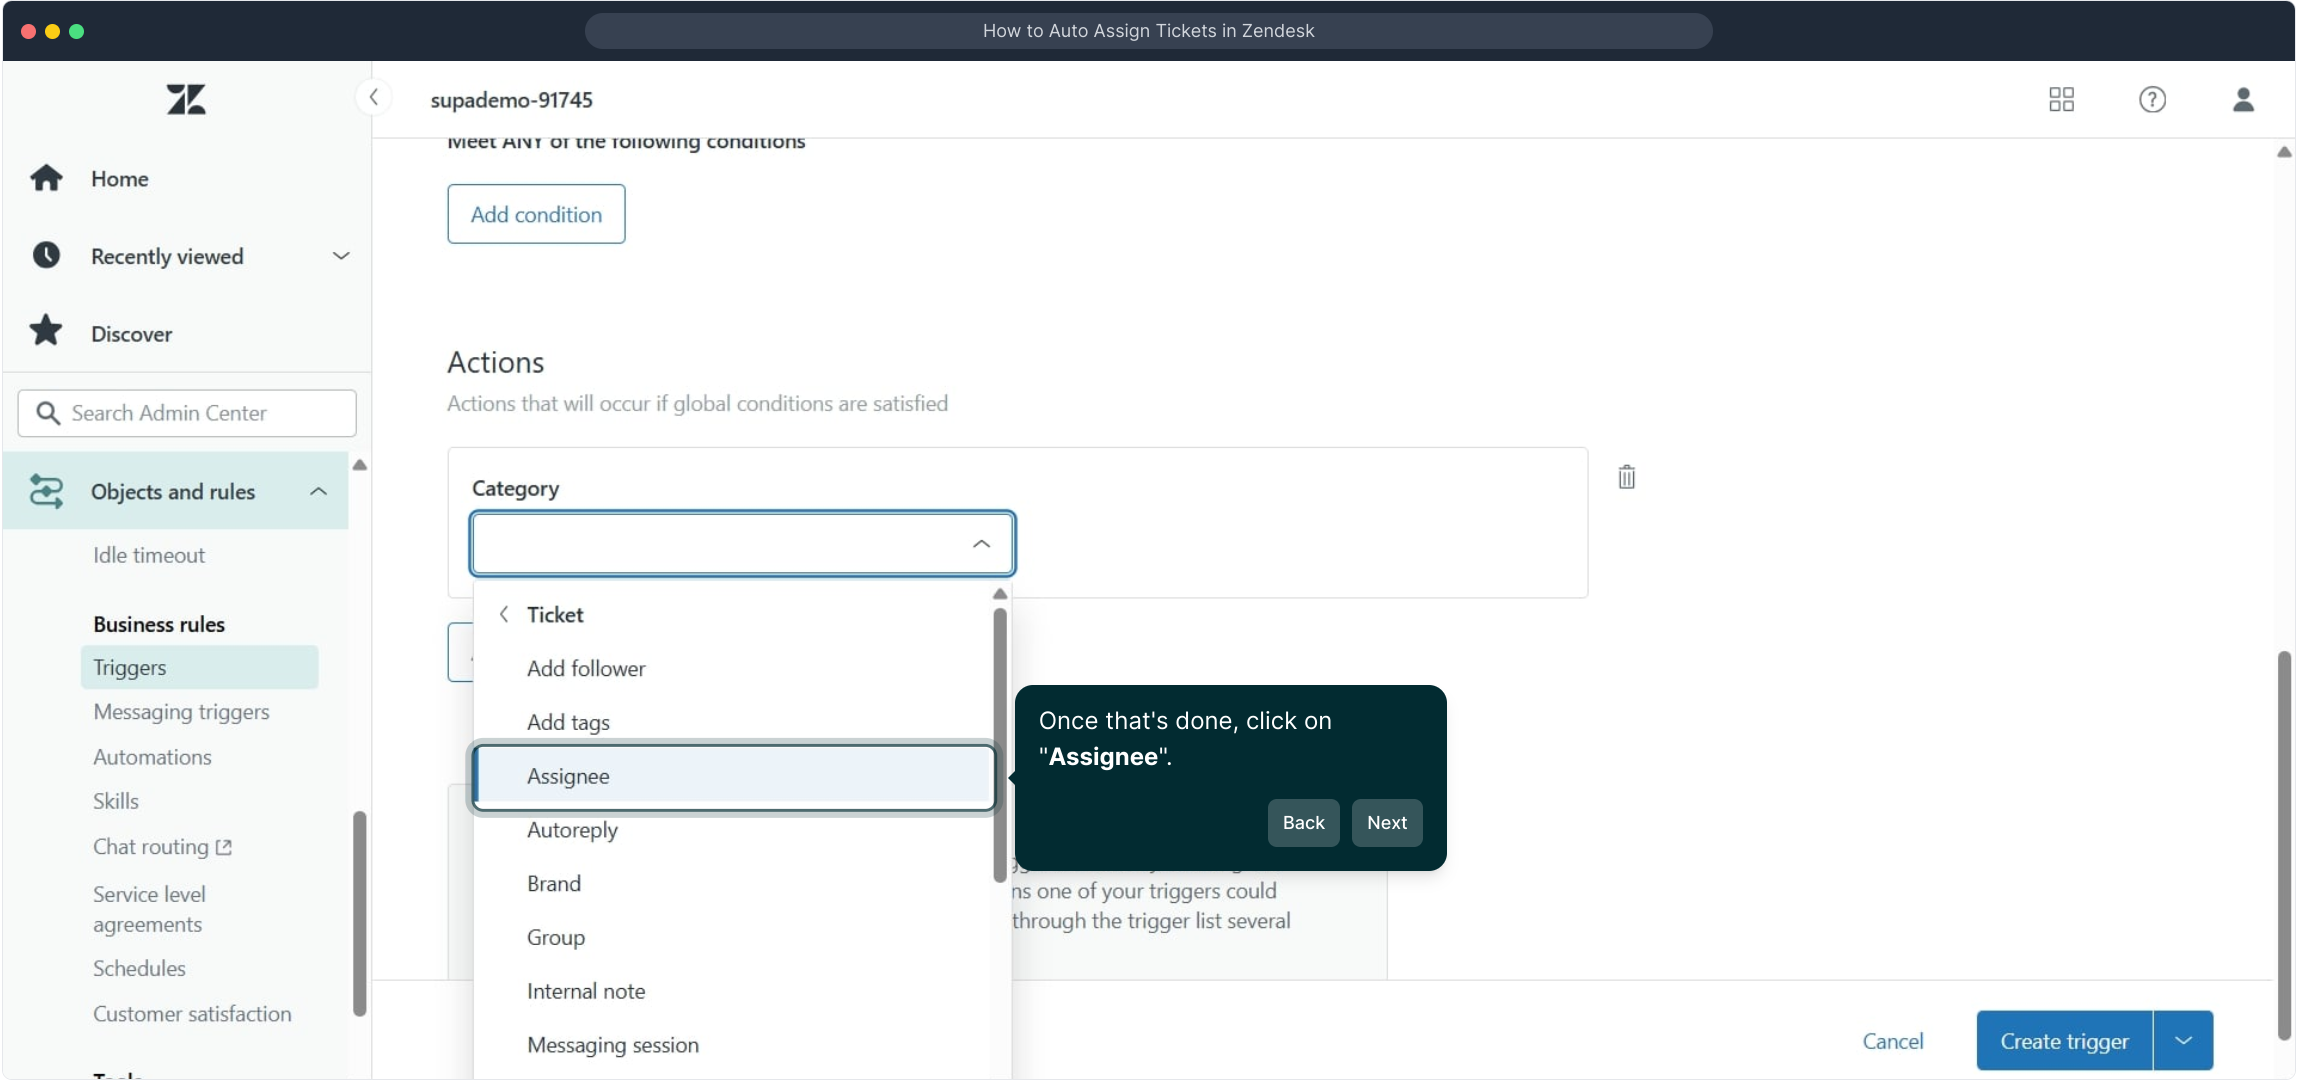
12. Here, select the category as "Ticket".
13. Once that's done, click on "Assignee".
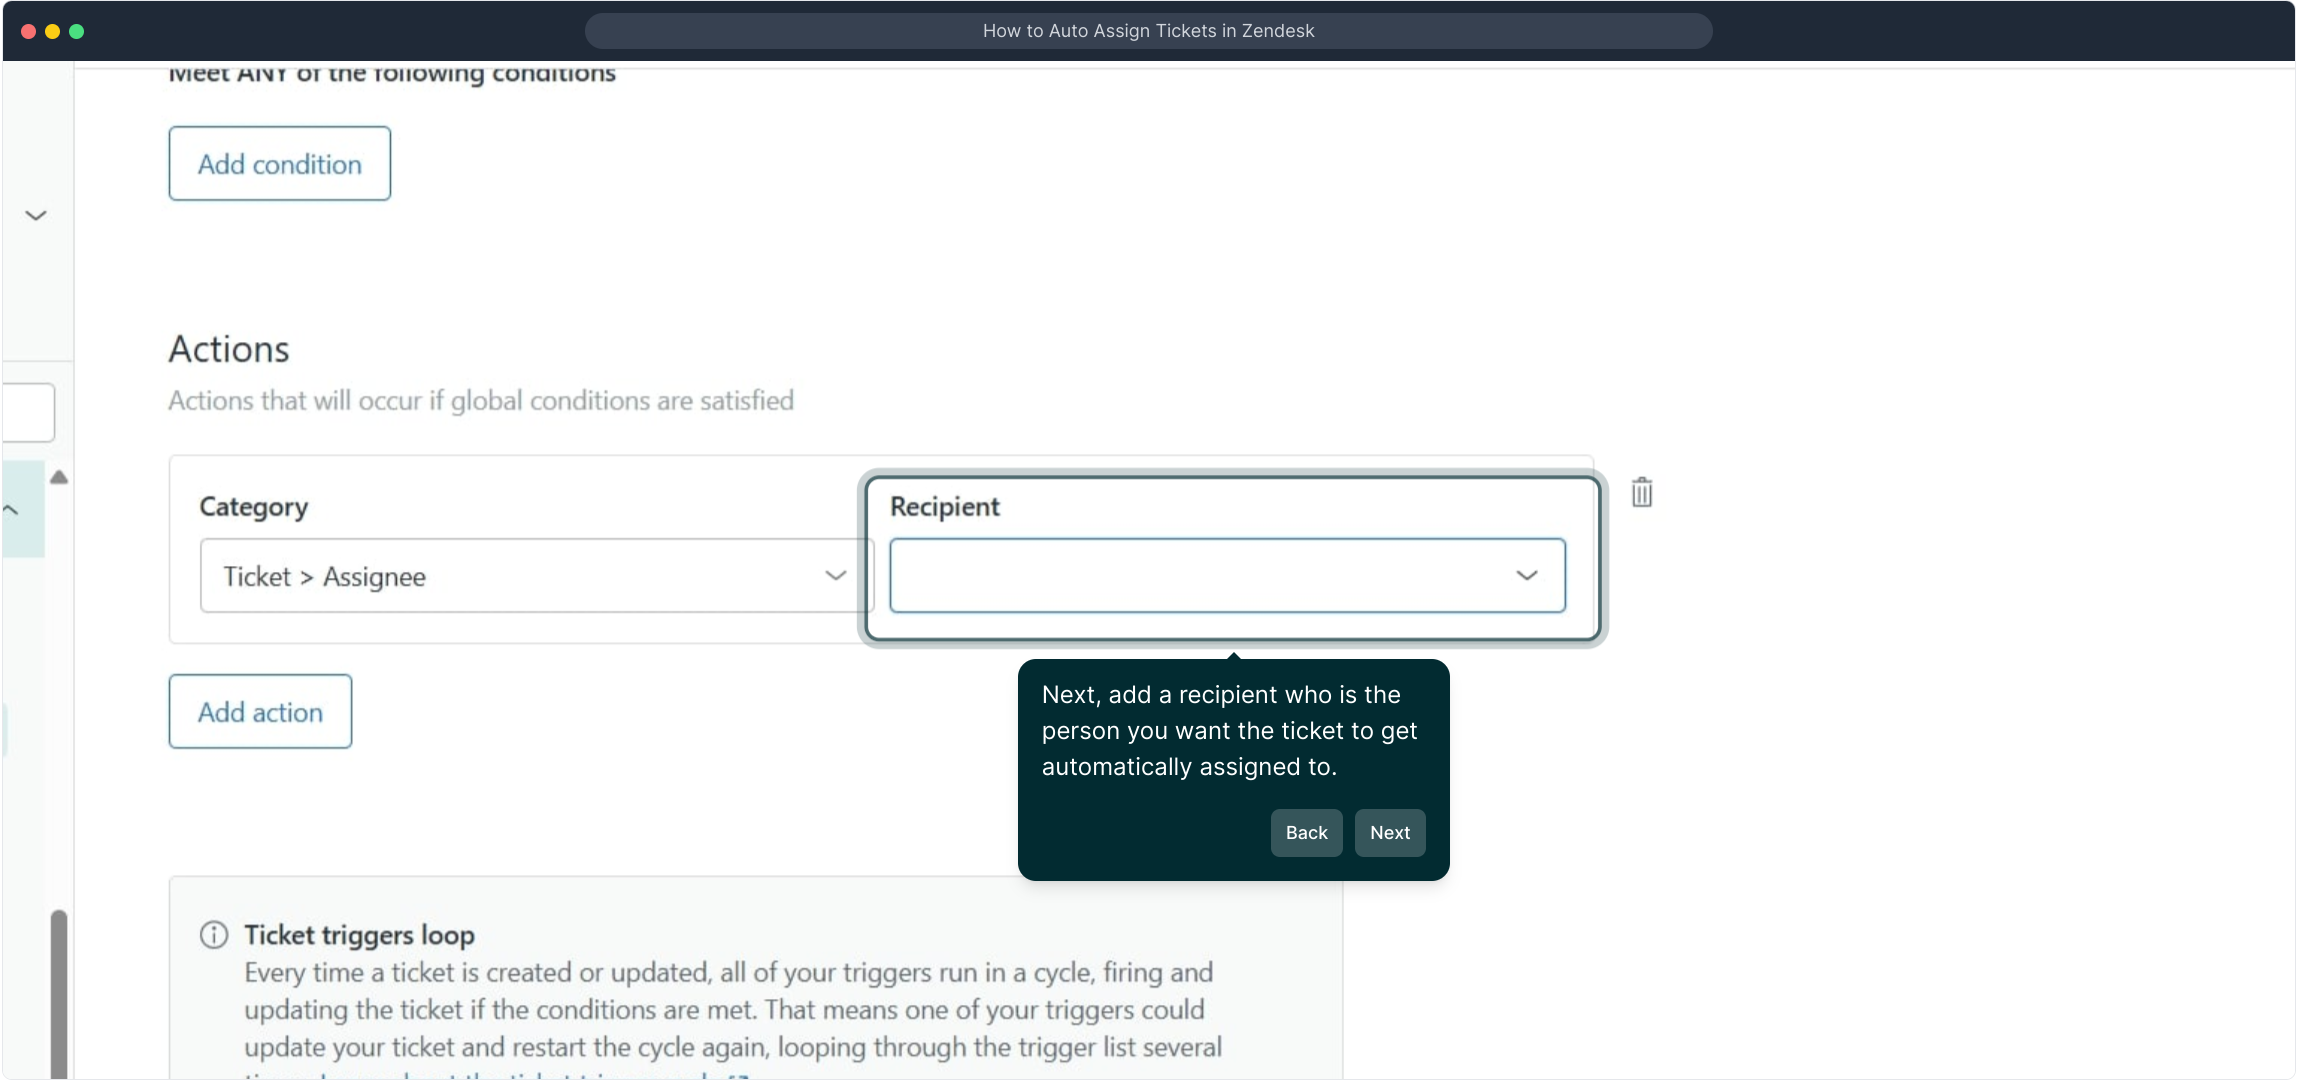
14. Next, add a recipient who is the person you want the ticket to get automatically assigned to.
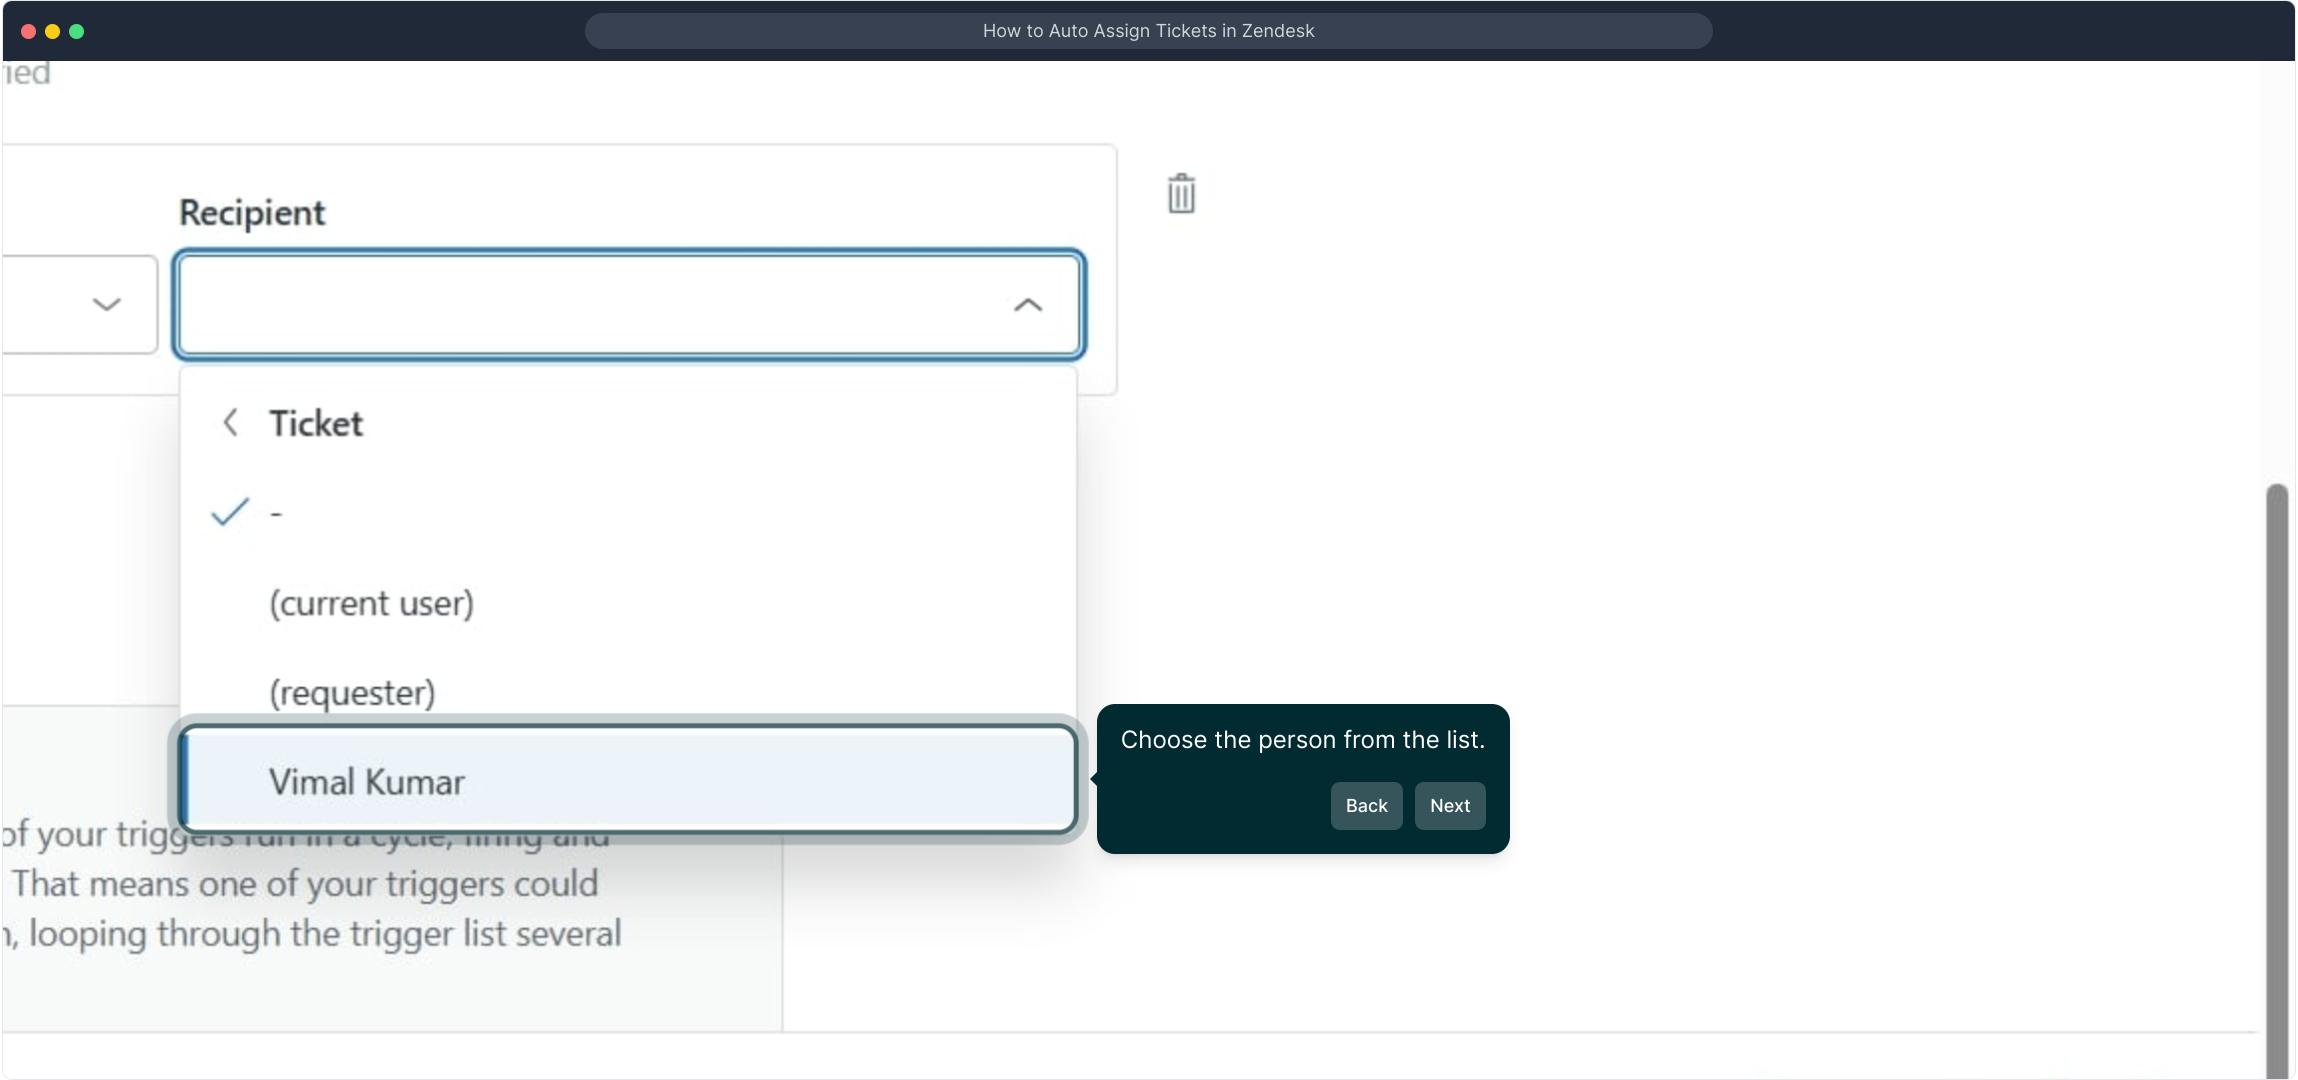
15. Choose the person from the list.
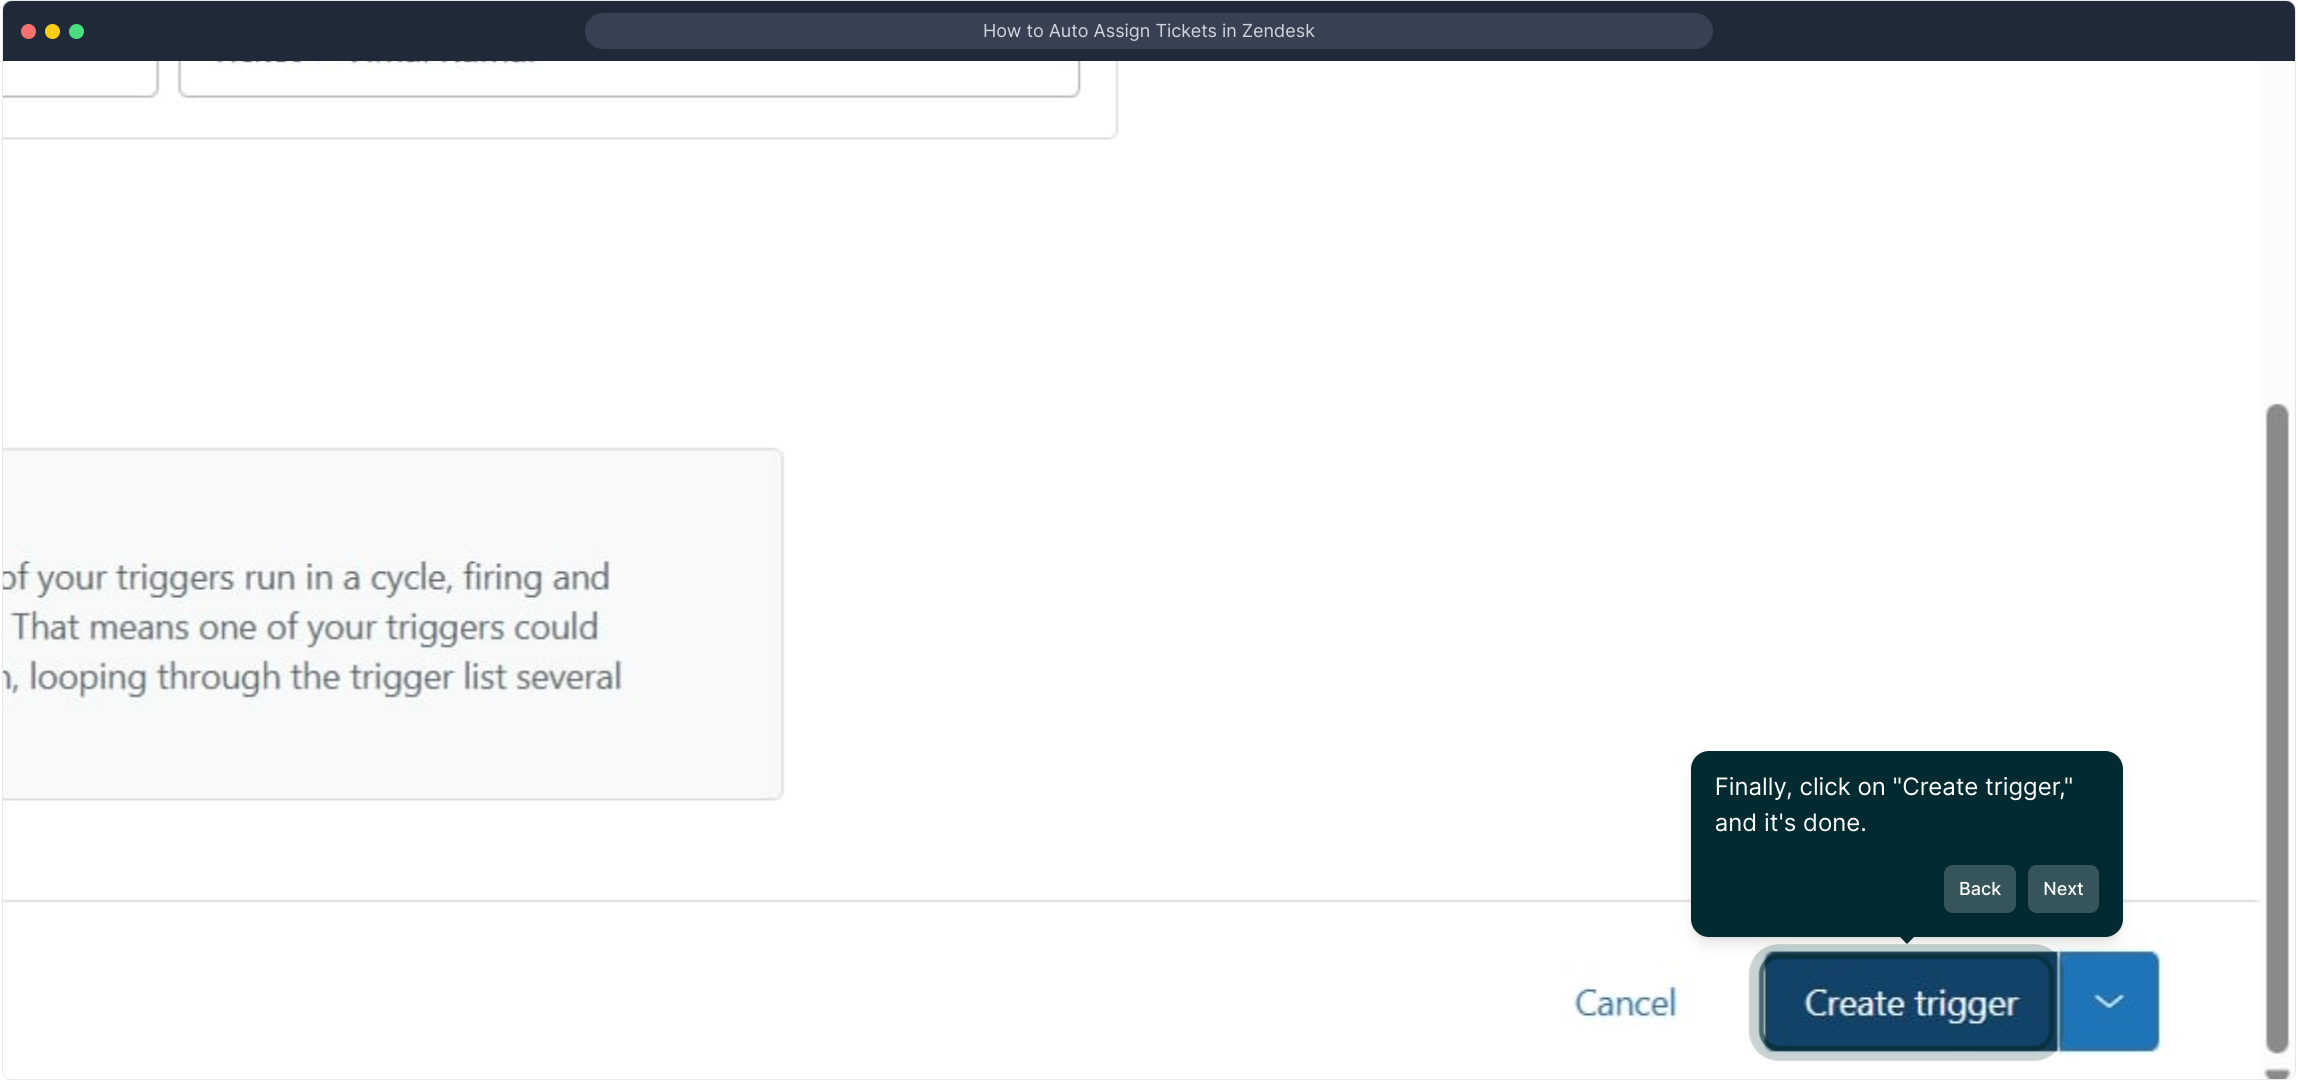
16. Finally, click on "Create trigger," and it's done.
17. Create a Supademo in seconds
This interactive demo/guided walkthrough on How to Auto Assign Tickets in Zendesk was created using Supademo.
How to Auto Assign Tickets in Zendesk: Step-by-Step Guide
To get started, navigate to the main menu and select Settings. This is where you'll find all the configuration options to customize your experience.
From the Settings page, look for the option labeled "Go to Admin Center" and click on it. This will take you to the control hub where you can manage advanced settings for your account.
Once inside the Admin Center, locate the section titled "Objects and rules" and click there. This area allows you to manage the core elements and automate processes within your system.
Next, find the "Triggers" option under the Business rules category and select it. Triggers are essential for automating actions based on specific conditions.
Inside the Triggers area, click on the button labeled "Create trigger" to start setting up a new automated rule.
Give your trigger a clear and meaningful name. Add a brief description that explains its purpose, and assign it to the appropriate category to keep everything organized.
Now, it’s time to define the conditions that will activate your trigger. This allows you to specify exactly when the automation should take effect.
Within the conditions section, select "Requester." This defines which user or group will be involved in the trigger’s evaluation.
Choose the requester option so the system knows to evaluate the action based on who made the request.
Next, specify the operator and value for your condition. This determines the criteria that must be met for the trigger to run.
After setting your conditions, click on "Add action" to define what happens when those conditions are fulfilled.
In the actions section, select "Ticket" as the category. This will allow you to configure actions specifically related to tickets.

Once the category is set, click on "Assignee" to specify who should be assigned the ticket automatically when the trigger fires.
Here, input the person who will receive the ticket automatically. This step is key to ensuring tickets land in the right hands without delay.
From the list of users, select the individual you want to designate as the assignee for these tickets.
When everything is set up to your satisfaction, click the "Create trigger" button to finalize and activate your new automated rule.
And just like that, you’ve created a Supademo! You can now automate your workflow to save time and increase efficiency.
Create your own interactive demos in < 5 mins with Supademo
You can create your own interactive product demo in minutes using Supademo. Drive growth, scale enablement, and supercharge product-led onboarding with Supademo. Sign up for free here with no credit card required.
FAQs
Commonly asked questions about this topic.
What is the purpose of auto assigning tickets in Zendesk?
How do triggers work for auto assigning tickets in Zendesk?
Can I assign tickets based on the requester’s identity?
Is it possible to auto assign tickets to groups instead of individuals?
How do I specify the conditions for auto assignment in a trigger?
Can I create multiple triggers for different auto assignment rules?
What if the assigned agent is unavailable? Will the ticket be reassigned automatically?
Can I auto assign tickets based on ticket priority or type?
Does Zendesk support round-robin auto assignment for tickets?
How can I test my auto assignment triggers before going live?

Vimal Kumar
Product Operations Associate
Vimal Kumar helps build and grow Supademo’s team and GTM efforts, with a focus on figuring out growth levers and improving product traction.


