Overview:
Enhance your editing process in Figma by utilizing the power of duplication. Streamline your workflow with this guide on how to edit files seamlessly. Learn to efficiently duplicate files in Figma, allowing you to make edits without compromising the original, ensuring a smooth and organized design process within the Figma platform.
Who is Figma best suited for?
Figma is best suited for a wide range of professionals, including UX/UI Designers, Product Managers, and Design Teams. For example, UX/UI Designers can use Figma for creating and iterating on interface designs, Product Managers can leverage it for collaborating on product prototypes and gathering feedback, and Design Teams can use it for working together in real-time on visual projects, all benefiting from Figma’s powerful design tools and collaborative capabilities.
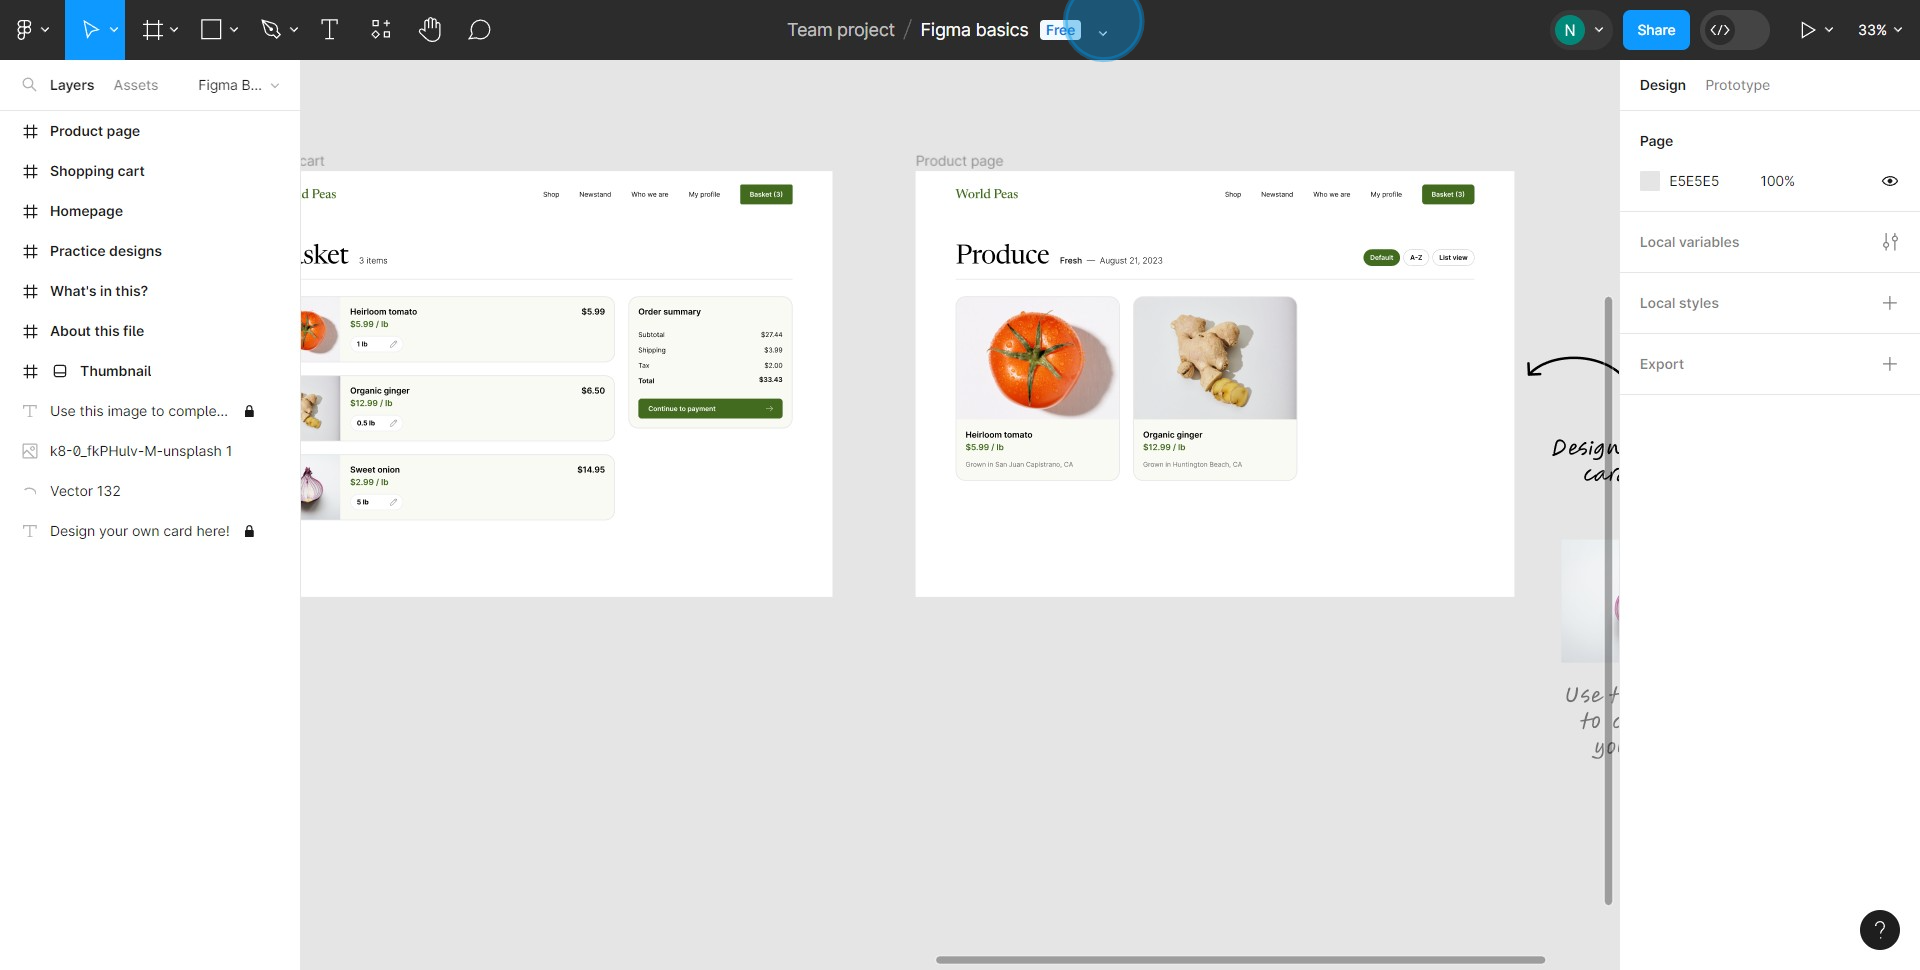
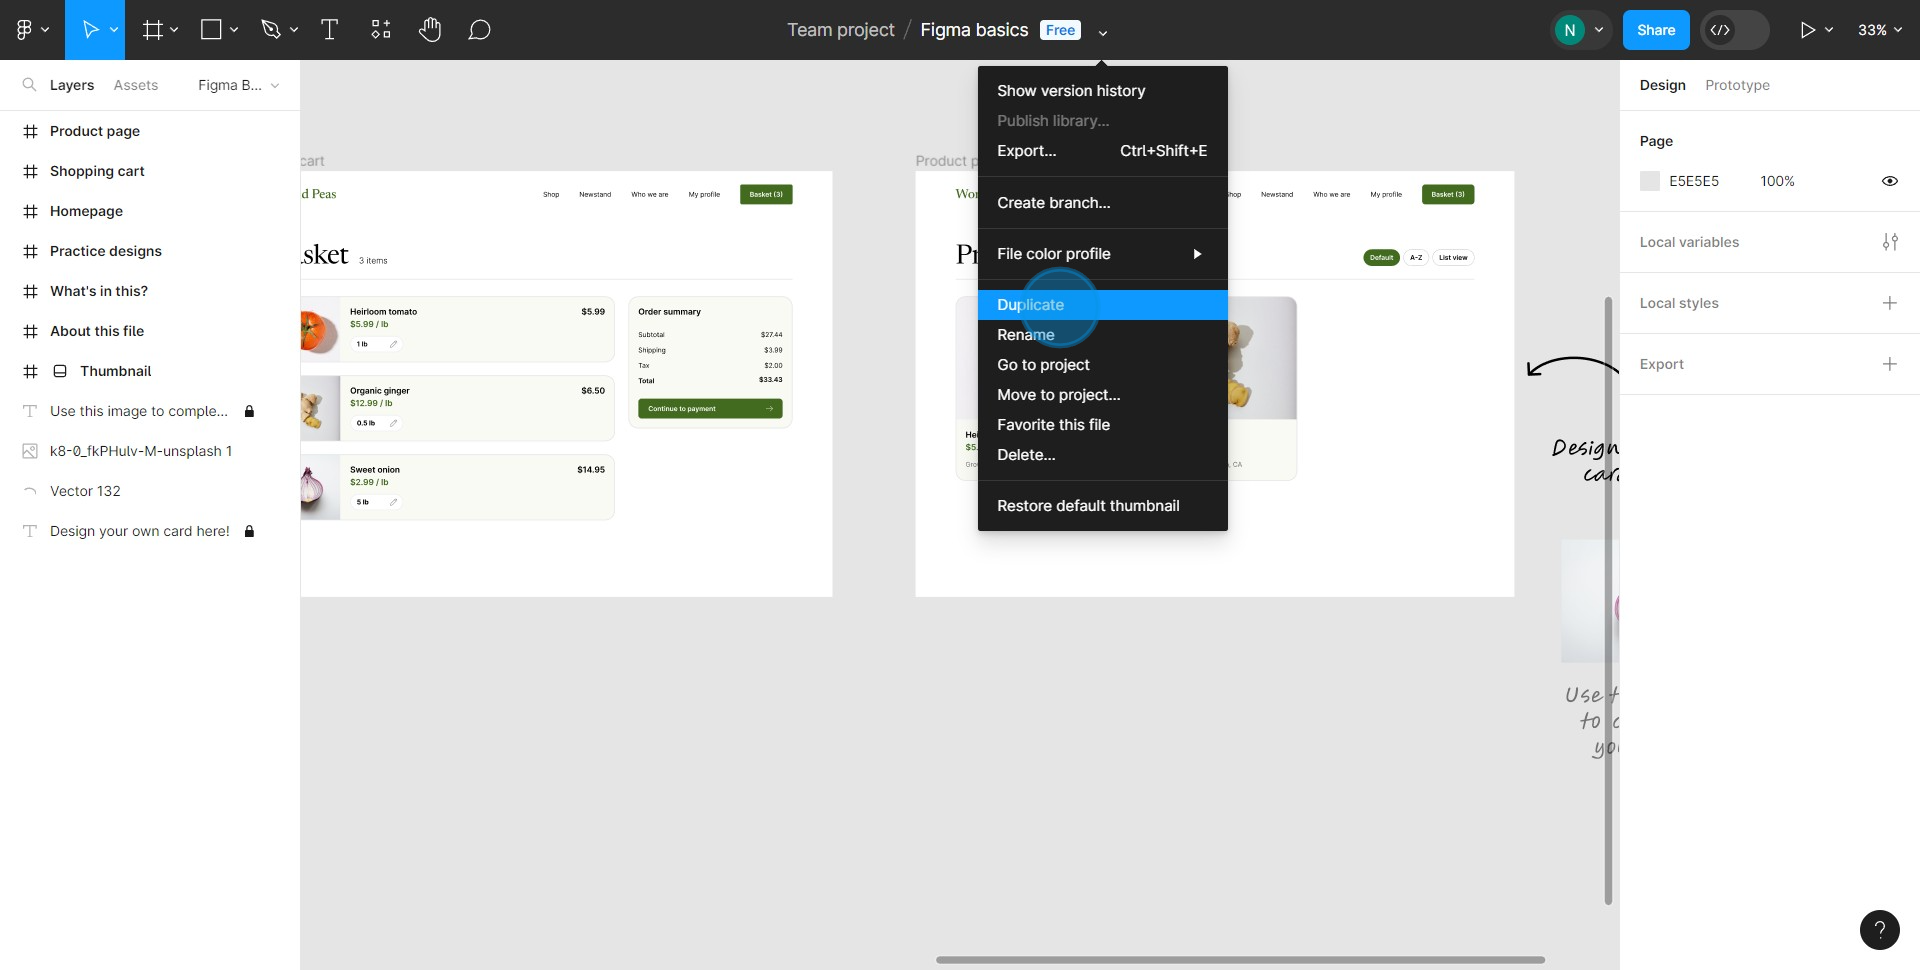
How to duplicate and edit a file in Figma
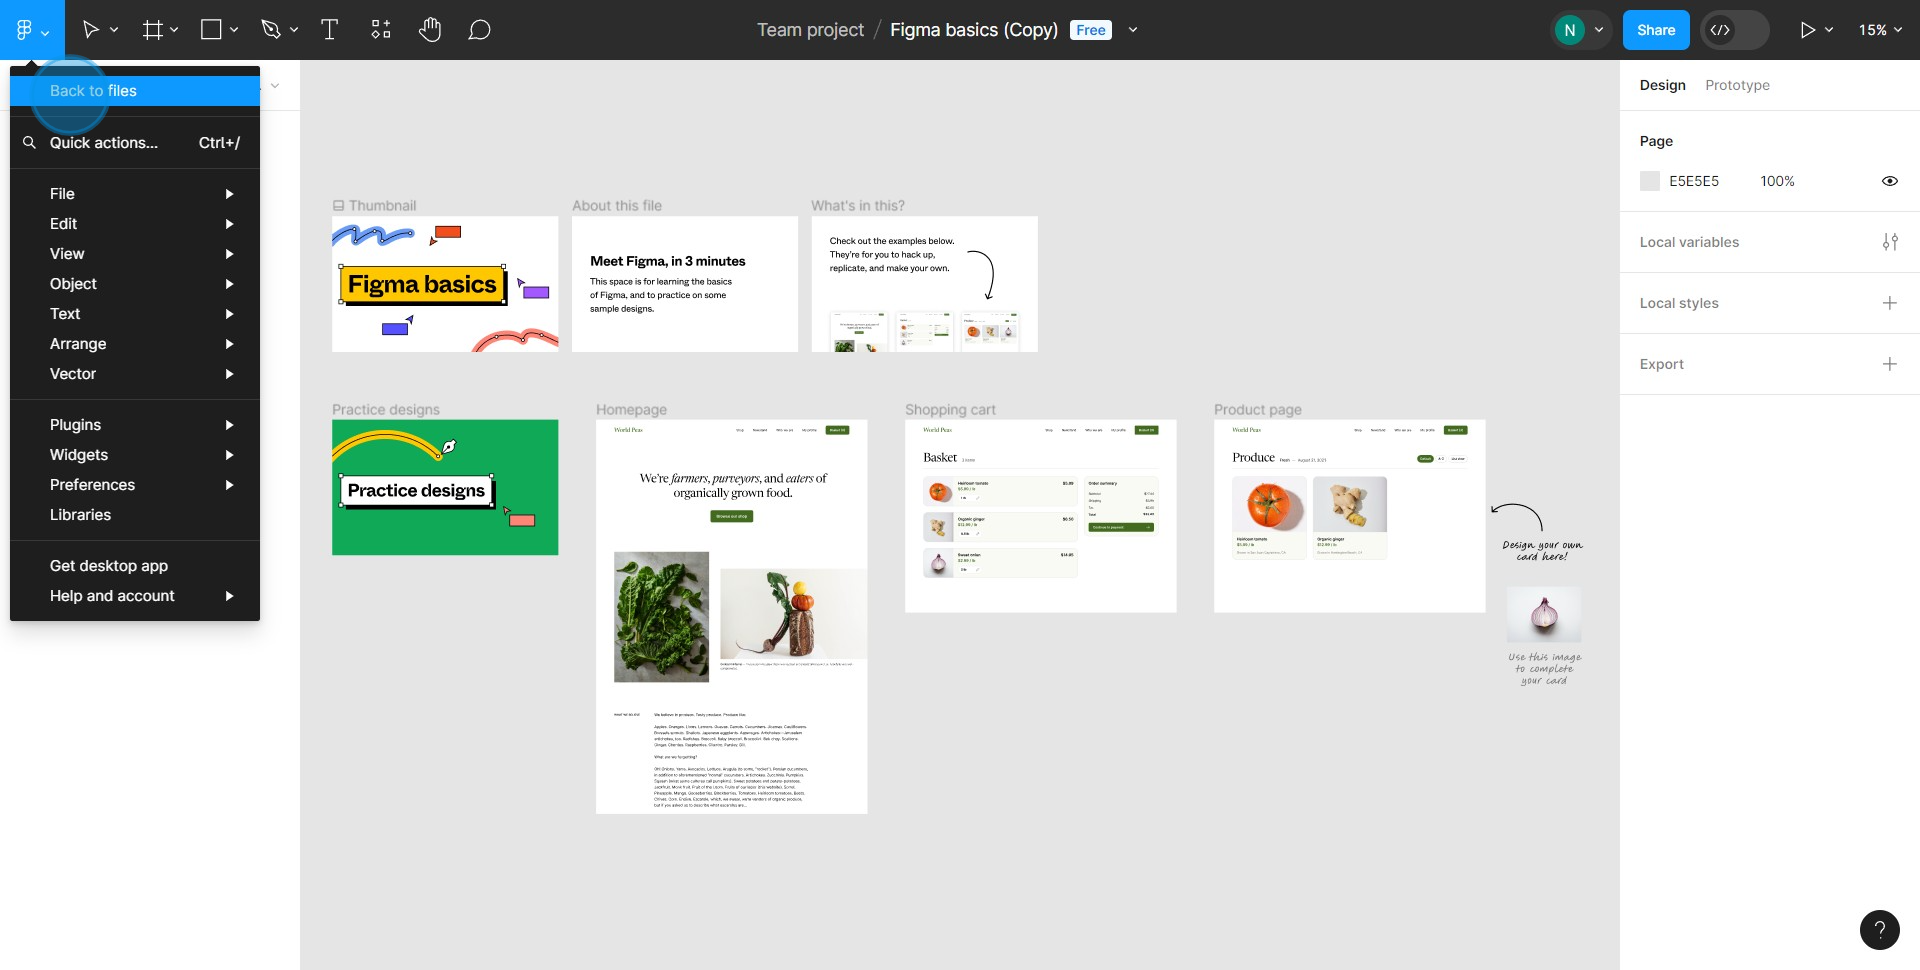
1. Click the small arrow to reveal more options.
2. Select 'Duplicate' to copy the file.
3. Navigate back to the menu.
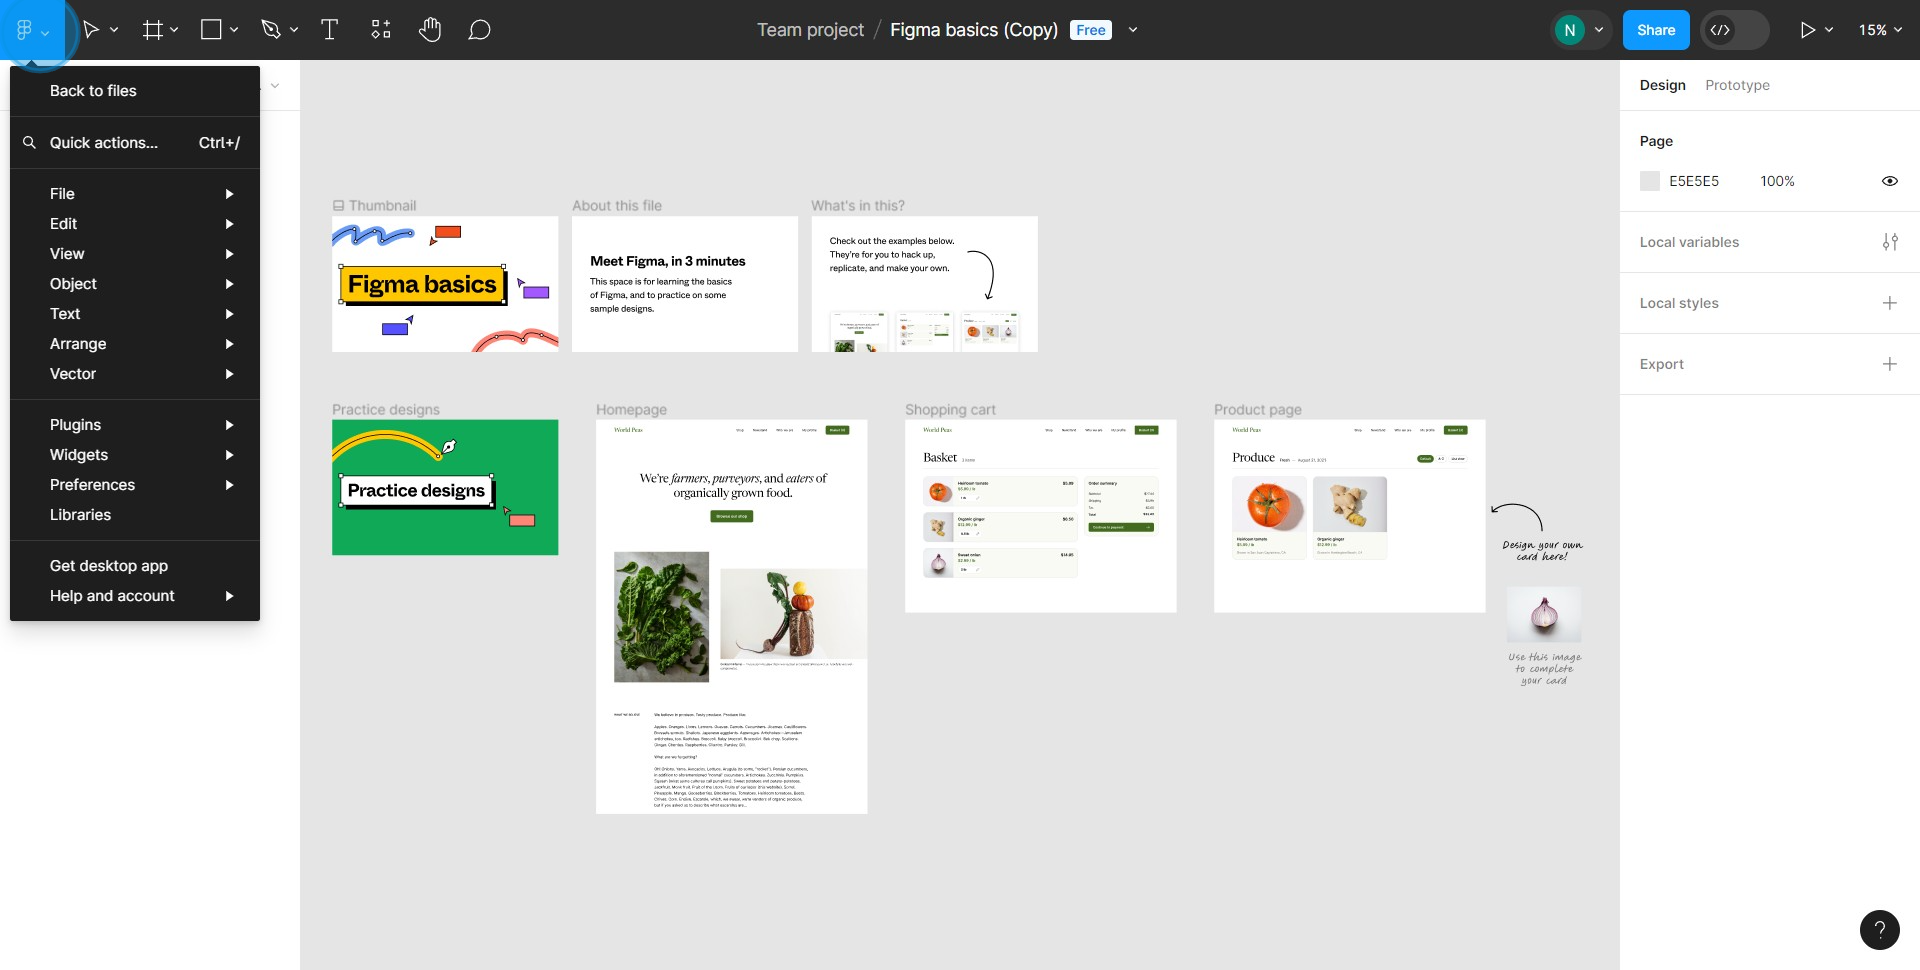
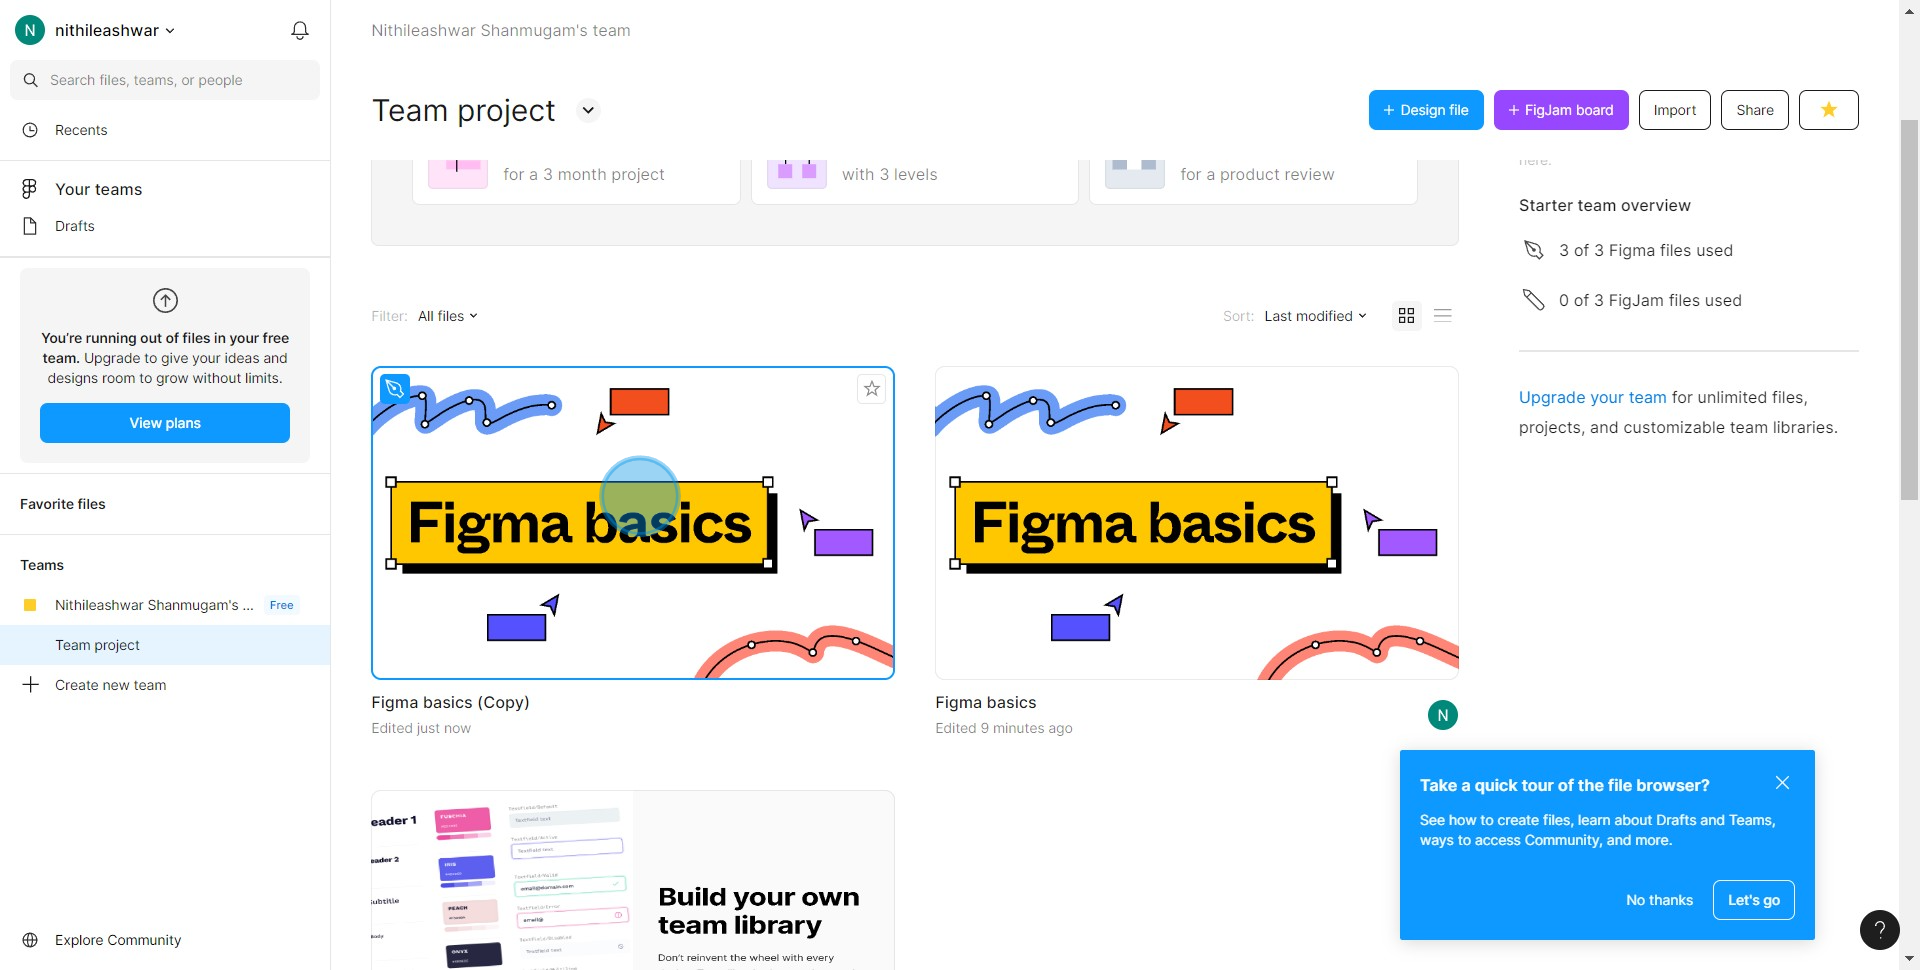
4. Choose 'Back to files' to view all your files.
5. Double click your desired file to start editing.
Common FAQs on Figma
Commonly asked questions about this topic.
How do I create and organize design projects in Figma?
How can I collaborate with others on a Figma design?
How do I use Figma’s prototyping features?
Create your own step-by-step demo
Checkout Supademo Figma Plugin: Create interactive prototypes from frames (beta)
Welcome to the easiest way to create and share interactive prototypes from Figma — for free. With the Supademo Figma Plugin, you can transform your existing Figma frames into elegant, interactive prototypes.
Learn more about the Figma plugin through our feature page.
Here's how it works
Frequently Asked Questions about how to duplicate and edit a file in figma
Commonly asked questions about this topic.
How can duplicate work?
How do I teach my team to duplicate files in Figma?
What's the best way to organize duplicated files for easy navigation?
How can I track file versions after duplicating in Figma?
Does Figma offer plugins to speed up the duplication process?
What are best practices for duplicating and edit a file effectively?
Is Figma suitable for enterprise-scale duplicating and edit a file?
Content Marketer
Nithil is a startup-obsessed operator focused on growth, sales and marketing. He's passionate about wearing different hats across startups to deliver real value.


